
Interior: How-To: Install TWM short shifter in your SS T/C


Thread Starter
Senior Member
Joined: 11-15-05
Posts: 993
Likes: 0
From: Egg Harbor Township, NJ
How-To: Install TWM short shifter in your SS T/C
Yup, that's right...TWM's short shifter for the SS S/C fits the SS T/C, and here's how you do it....
You will need:
(2) flat head screw drivers
(1) T-20 and (1) T-25 torx bits
(1) 15mm wrenches (they recommend (1) 15mm and (1) 9/16", but I used one 15mm)
(1) 5/32 Allen Key
(1) Wire cutters (or side cutters...or even just scissors)
Some white lithium grease. (I "found" some...but I'll explain that later)
An online version of the directions can be found here: http://www.twmperformance.com/manual...all-manual.pdf
I'm not going to have pics of everything since the online manual has a lot of good ones already...but I'll go through the basics and my experience with it.
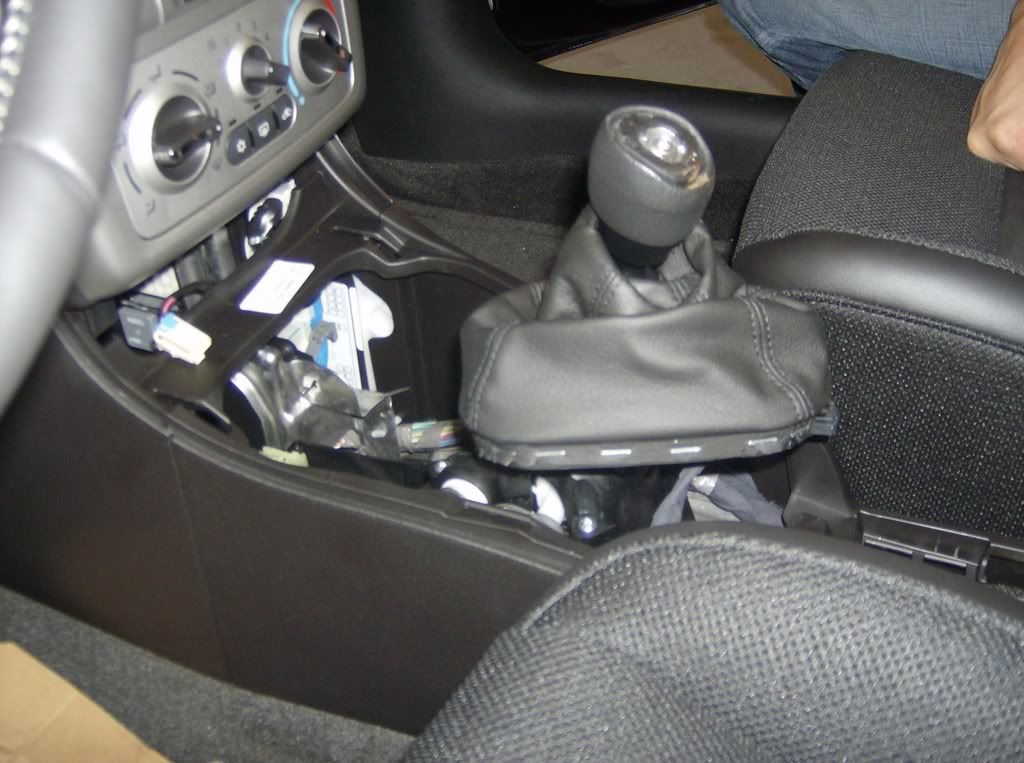
First thing you have to do is get to the shifter by removing the center console. The first part to go is the middle piece around the e-brake. Simply lift it up (carefully) and it just pops out because it's held on by clips.
Then remove the cupholder by lifting that out. You can do it with your hands by pushing out/up from the inside..but if you're stuck a flathead can help you out. Just be careful not to mess up your plastic console pieces.
Next go under the console (with the cup holders out) and push up around the shifter boot to remove it from the center console. It will still be attached to the shifter knob, but the bottom will not be attached to the console
Next lift up on the front part of the center console. BE CAREFUL not to lift too hard as there are two cigarette lighter adapter wires here that need to be unclipped before you can completely remove this piece. Once you unclip the wires, remove the center console piece over the shifter.
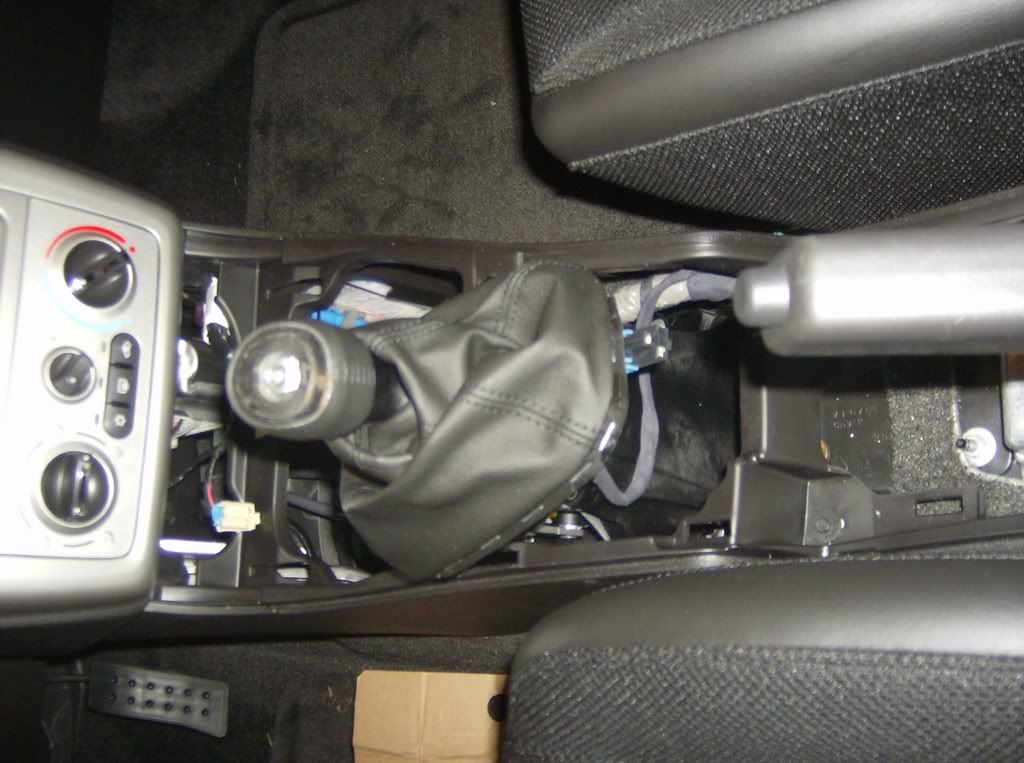
Next, with your flathead screwdriver, carefully pry up on the plastic piece that sits on top of your shifter knob. This is also clipped on in 3 places. Just pry up and it should come off. Then your car should look like this:
Next remove the T-25 torx bolt from the top of the shifter knob.
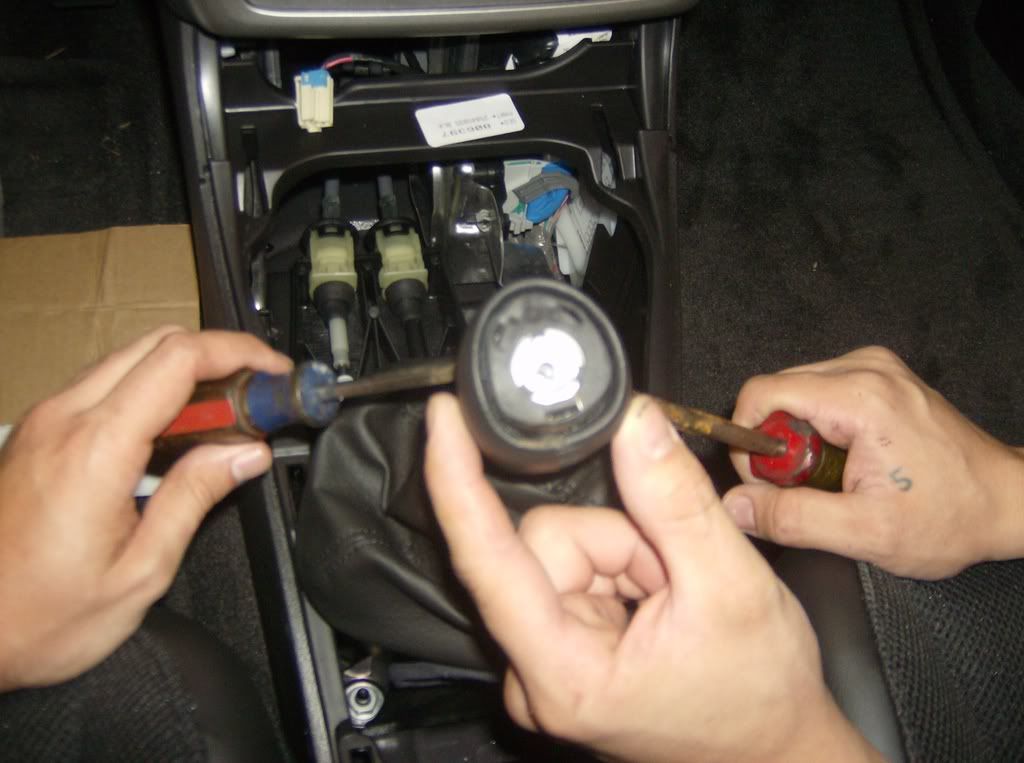
The next step is to remove the shift knob. To do so you need to get two flat heads under the shift knob, but above the reverse lockout mechanism. This is how it looked when me and my buddy were doing it:
It takes a LITTLE bit of effort to pop it off, so you shouldn't have to pry too hard. Once that's off, it should look like this: (with the spring on top of the shifter)
At this point, the whole shift boot and reverse lockout piece should lift straight off the shifter.
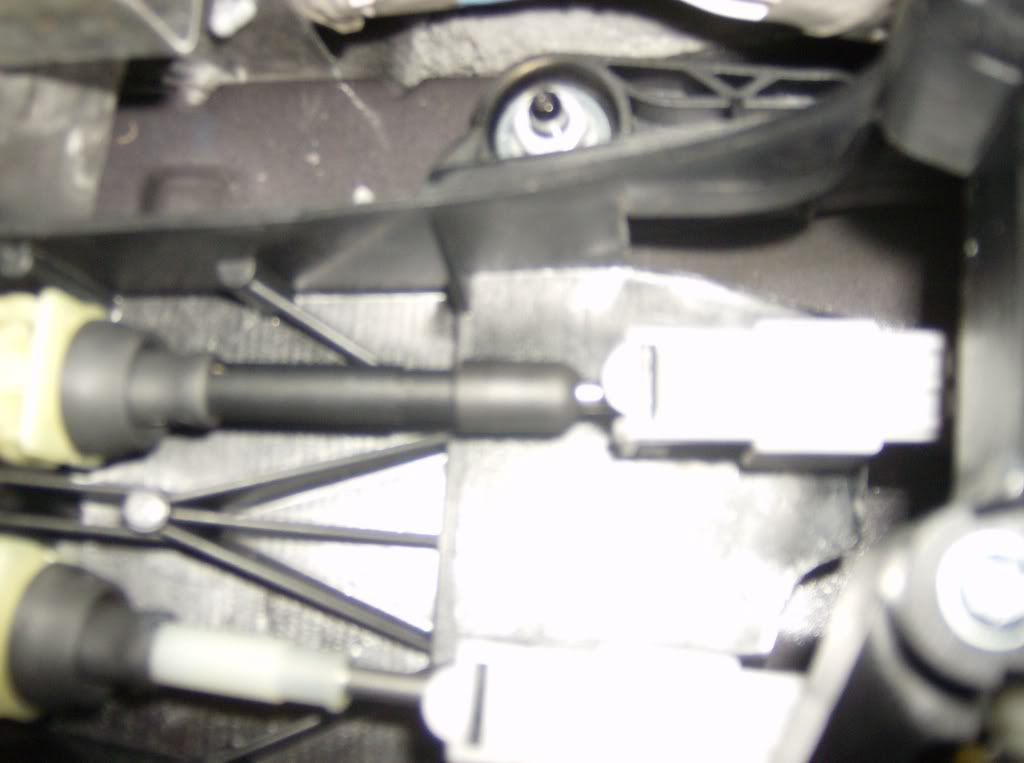
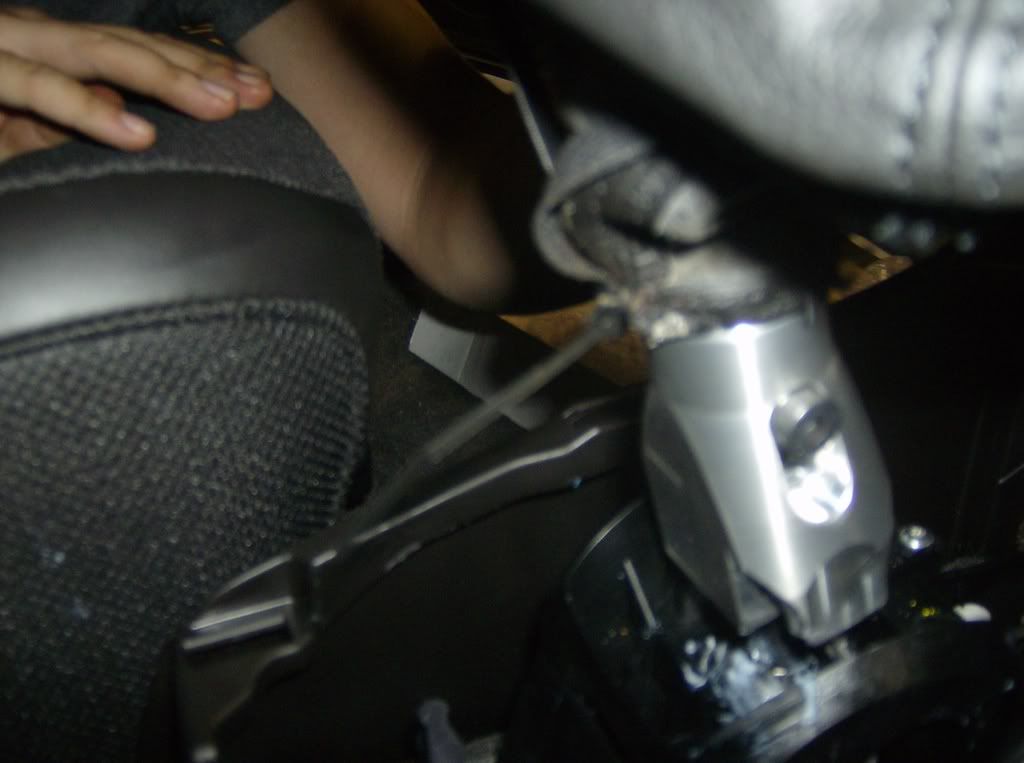
Next you have to release the shifter cable so you can remove the shifter. Here's how to do it. In front of the shifter there are two cables. The one on your right (passenger side) is the one that needs to come loose to get the shifter out. MAKE SURE YOUR CAR IS ON LEVEL SURFACE WITH THE EBRAKE ON. Then put the car in 4th gear. There is a plastic piece over the shifter cable on the right. You have to use a flat head to pry the front piece out and up a little. You'll hear it click. Don't worry it won't open up 100%, but the cable should slide freely out of the plastic clip.
Here's a bad picture of the cables and plastic pieces. Make sure you get the one on the right!
There are four T-20 torx screws around the shifter base. Just take them out. Then lift the top piece of the shifter base off.
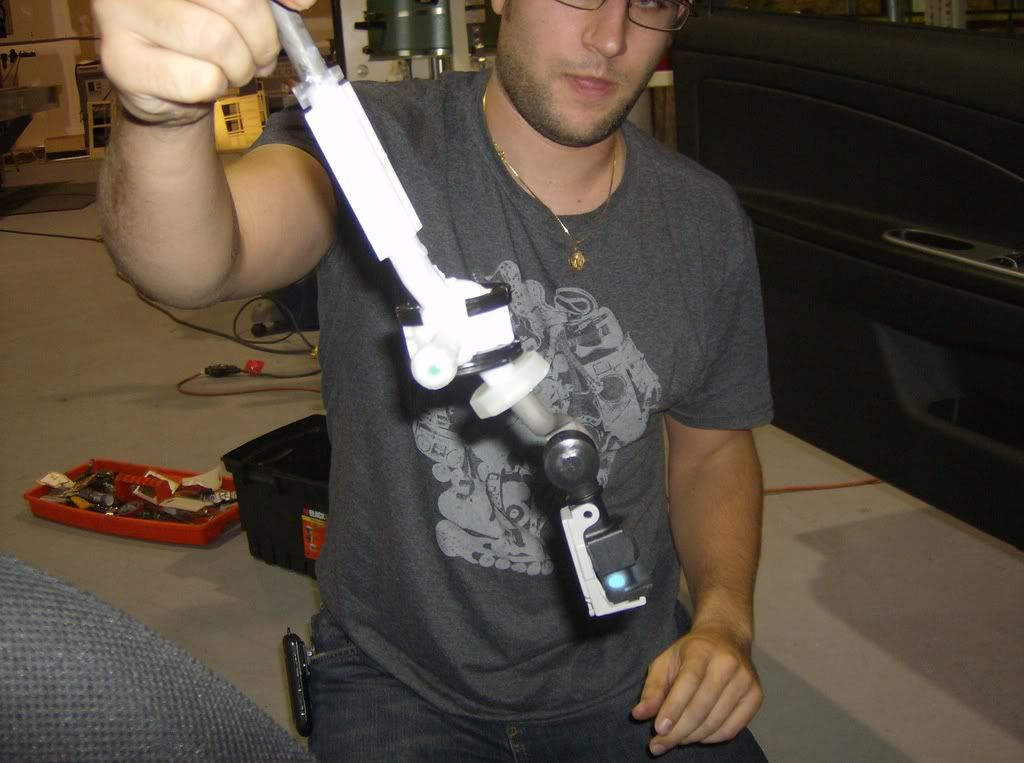
Next simply take out the shifter. The shifter cable should be disconnected from the plastic clip in the front. The rest should maybe take some wiggling, but then it's out and looks like this:
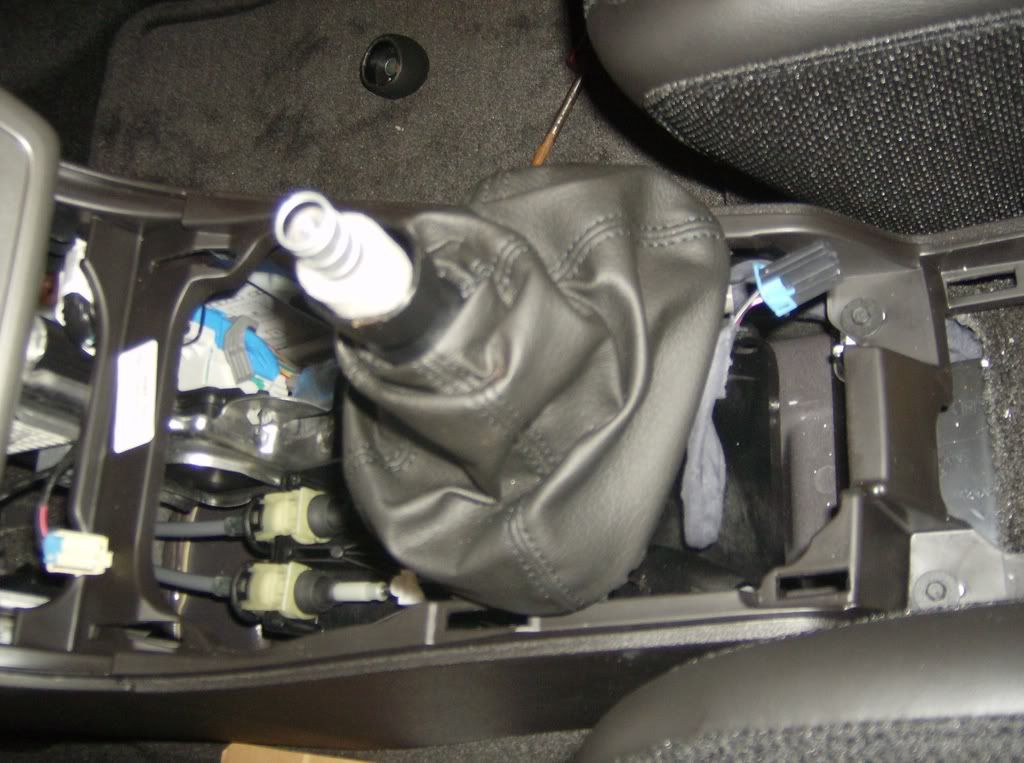
Now remember that plastic piece you opened up to slide out the shifter cable? You need to remove this from the shifter. Just pop the ball out of the socket on the shifter. Then you should have this:

This next part was a little tricky for me, but just be careful. The plastic "cup" that goes around the pivot ball on the shifter needs to come out. I think the S/C shifter gives you a tad more room to do this, but this was tough. There is a bump stop below the pivot cup that you have to use a flat head to rotate and pry up to get the pivot cup over. Be careful not to break it as you are using it for your new shifter! Mine cracked a bit, but it didn't break. Again...be careful!
Ok, now you're ready to start installing the new shifter. Here is where you need to start using the white lithium grease. Unfortunately I didn't have any with me. However, on the pass side of the shifter base my car has quite a bit of it just sitting on the plastic. Why? I have no idea. But I just took some from there and put it all over the pivot ball (big one) and the small pivot ball for the shifter cable housing. Apply liberally. This stuff's good.
Oh...and wipe off your hands...you're getting your new shifter and your car dirty with grease!
Now take that plastic pivot cup from your old shifter and put it on your new shifter. The "open" part of the cup should be facing up.
Next, attach the shifter cable housing (the plastic clip piece) on the bottom of your shifter. You may notice that the old shifter came out to 90 degrees at the bottom, but this shifter just goes straight down. This WILL NOT cause a problem...so chillax and continue.
Next you want to put this shifter assembly back in your car. It should just slide in. Slide the shifter cable housing over the shifter cable but DO NOT CLOSE IT YET. You will need to adjust it in a minute.
Make sure everything there is lined up. The piece that sticks out to your left (driver side) should have a white plastic cup that goes into the reverse lockout mechanism metal piece. Make sure that's in. Make sure the bar in the front of the shifter is also seated correctly. Make sure the pivot cup is fully seated in it's position.
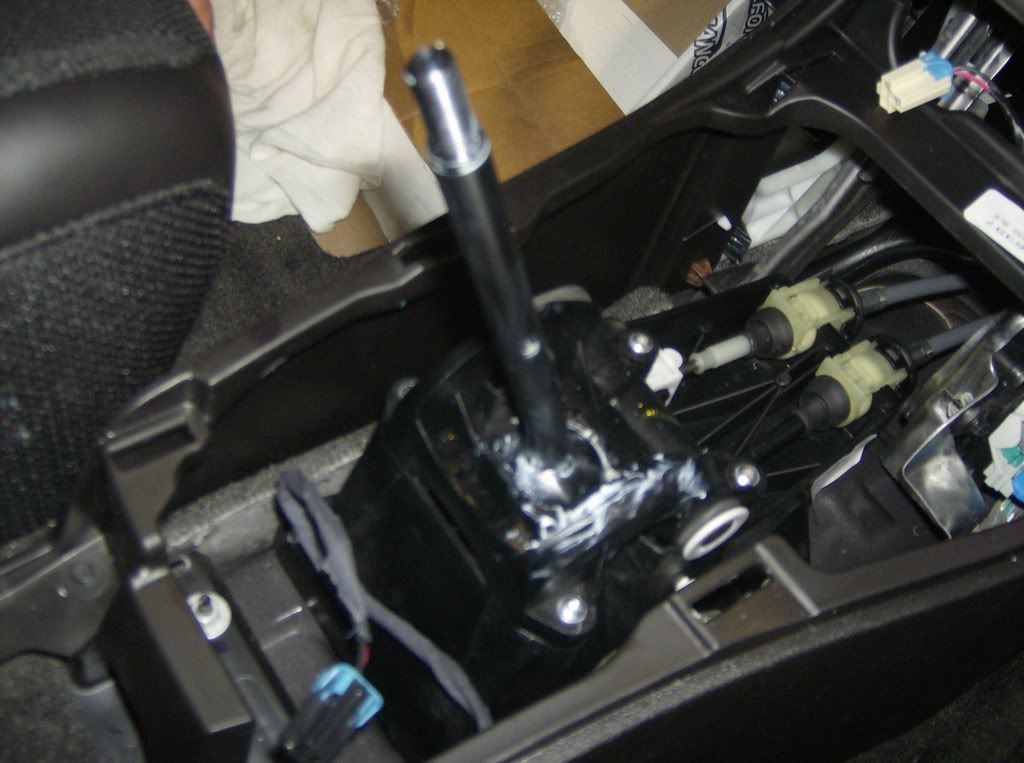
Next put the top half of the shifter base back on and use the four T-20 torx screws to tighten it down. You should look like this at this point:
Now you have to start adjusting the shifter cable housing. TWM recommends moving the housing forward (shifter goes back) until about 3/8" of silver shifter cable is exposed. Then close the clip. This is pretty much dead on...but you might have to tweak it a bit.
Next, take some more of your awesome white lithium grease and cover the whole shifter EXCEPT for the threaded part on top. Everything else that is exposed should be covered.
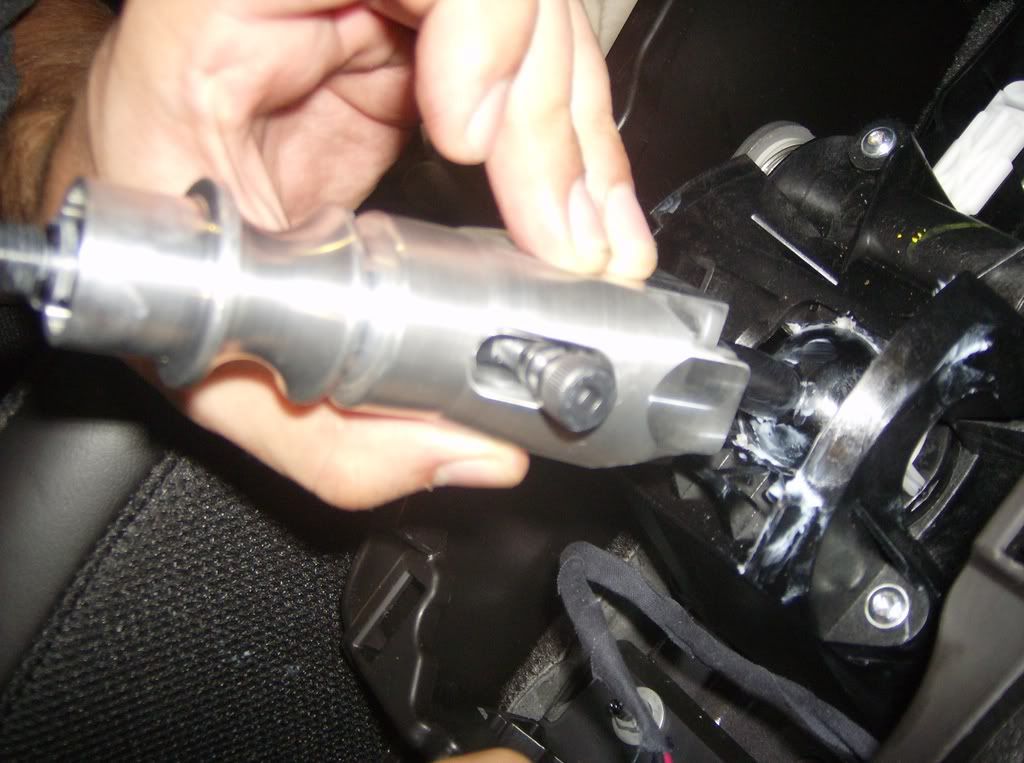
Next take the big metal piece from your new shifter (also referred to as the reverse lock) and slide it over your shifter with the slot facing the passenger seat.
Like this:
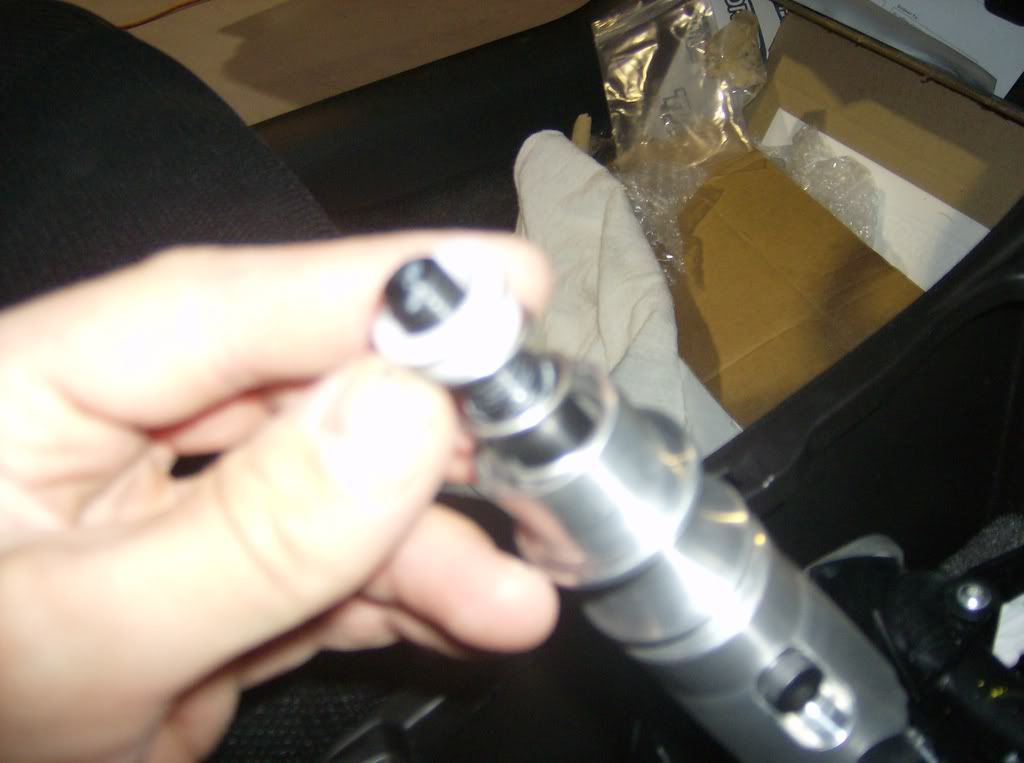
Next, take the reverse lockout bolt (it has a threaded part, then a bearing part, then a gripped head and an allen key hole on top), and screw it into the shifter from the slot on the passenger side of your reverse lock.
Here's the screw:
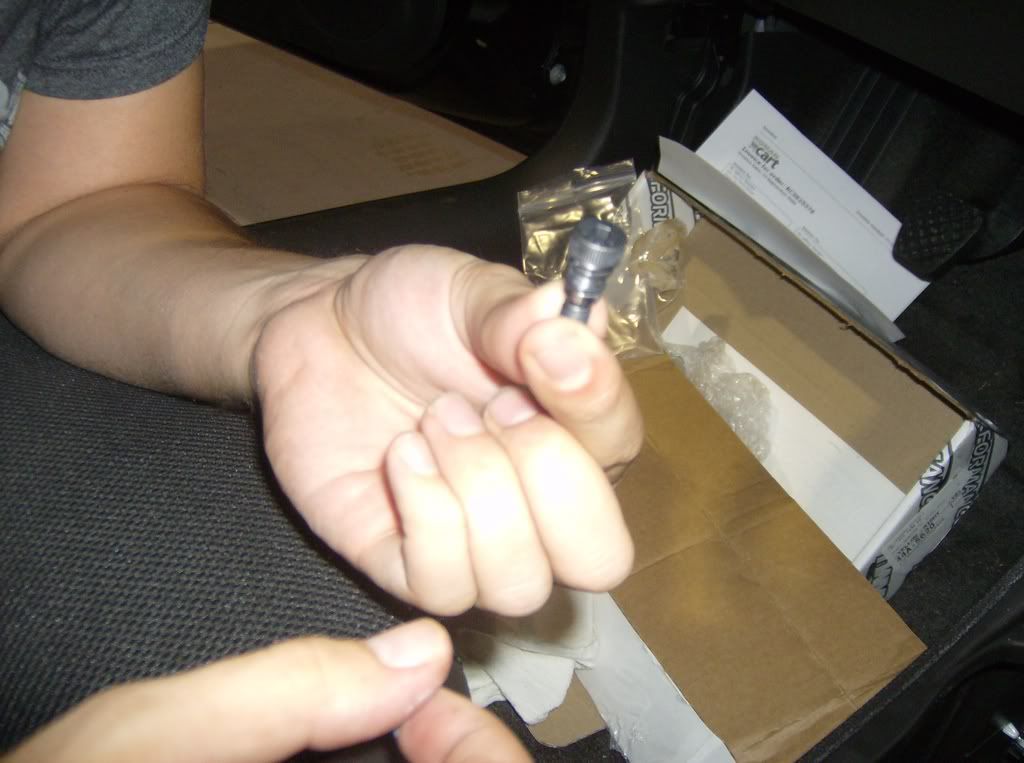
Here's where it goes in (the position of the screw in the slot does not matter. it's supposed to move)
Now tighten down this bolt with your 5/32 allen key.
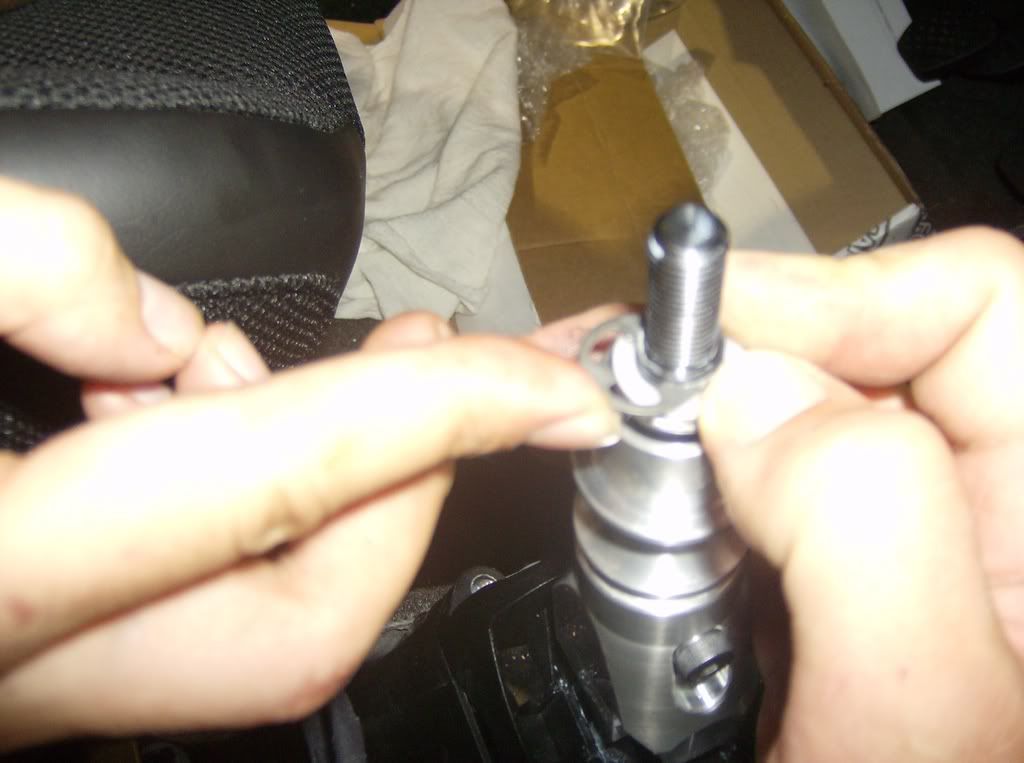
Next you will be installing the reverse lock spring. There are two pieces here. The spring attached to a white bushing, and a white bushing that is by itself.
Take the lone white bushing and slide it over the top of the shifter with the smaller diameter part on the bottom. The spring will rest on the top of this bushing. It should look like this:
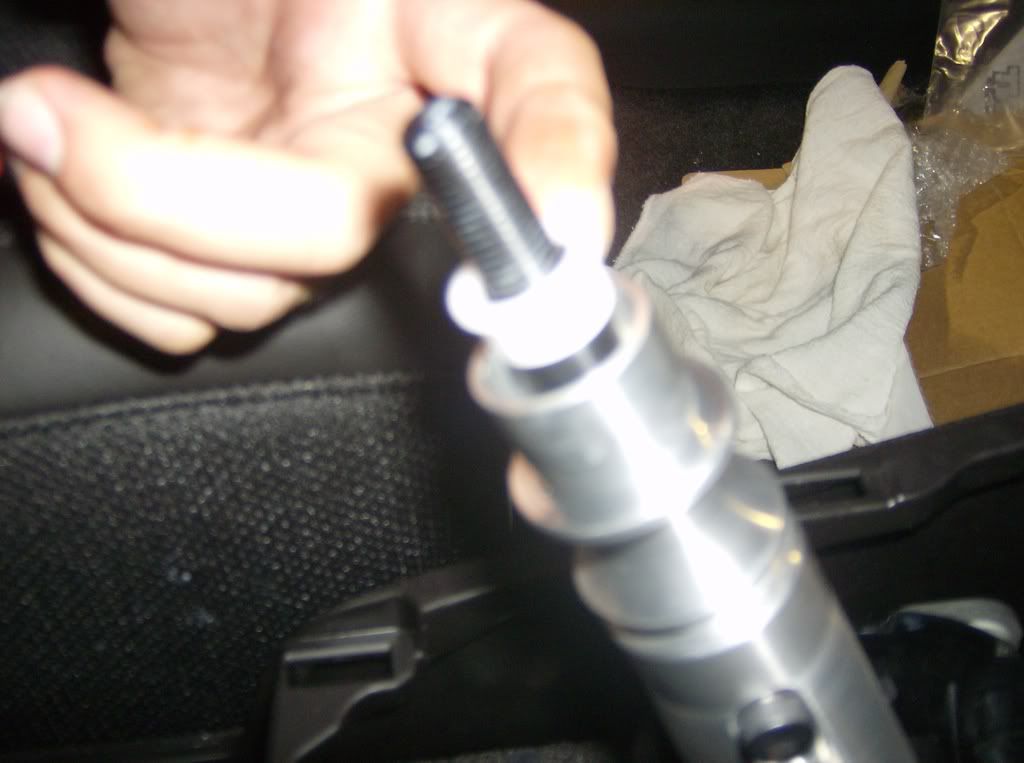
Next, take the spring/bushing combo and put it over the shifter with the spring part facing down. It should look like this:
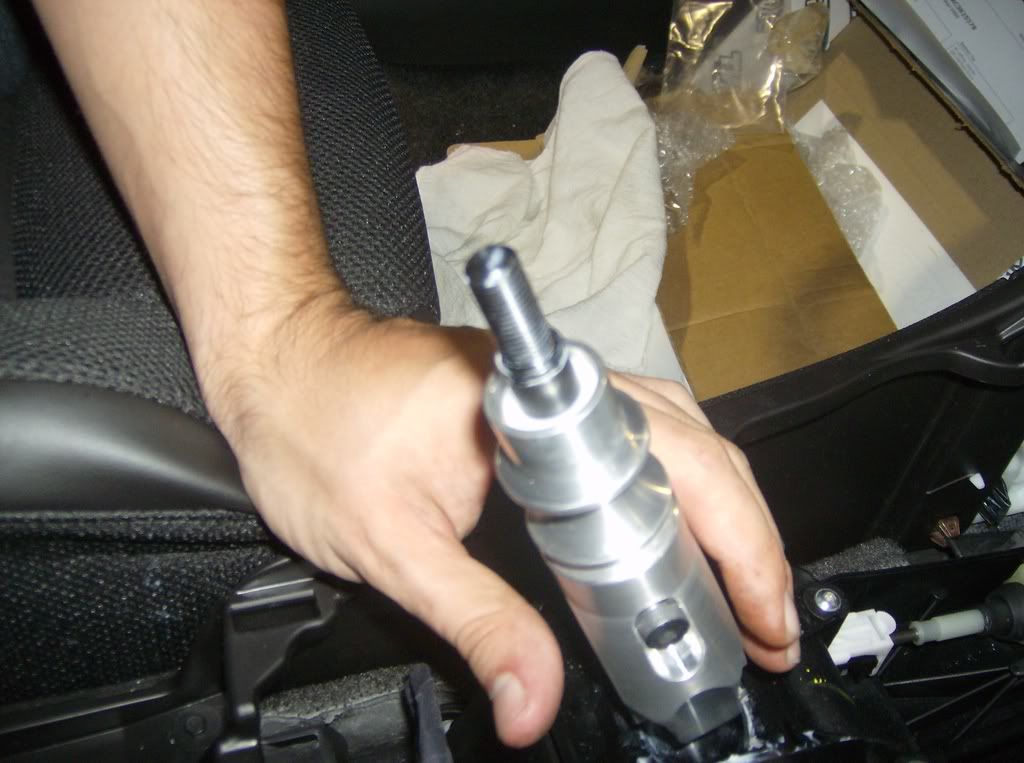
Next, push the spring down enough until you can see just below the threads there is a slot for an "E" clip (like a "C" clip but an extra piece in the middle). Take the provided clip and slide it in like so:
Ok, good job so far! Now came the tricky part. We went to see if the new shifter would go in every gear at this point. Now is a good time to make sure your shifter cables are adjusted properly so you don't have to take everything out again when it doesn't!
Now there are two adjustments you can make. The cable on the right will determine how far forward and back the shifter has to go to get into gear. We played with ours a few times, but ended up leaving the shifter cable housing just about where TWM said to put it. However, we had a problem where we were not able to get it to go into 5th gear and reverse!
Our problem was that we could not move the shifter over to the right enough to get into those gears. Here is where we adjust the shifter cable housing on the left side (it adjusts lateral movement).
First we opened the clip just like the other shifter cable housing so it was loose. Since we had to go to the right. My buddy held the shifter where it was and moved it over a little to the right each time we adjusted. Then we close the clip and try for every gear. It took a few times, but we finally got it.
For reverse, you have to make sure the lockout piece is lifted up and goes over the notch in the top part of the shifter base. Otherwise your reverse lockout is useless.
Once you're comfortable getting into ALL gears (1-2-3-4-5-R...BE SURE), you're ready to move one. Don't worry, all the hard stuff is done!
If you got the bushings, here is where you would install them. I didn't get them, so I'm moving along.....
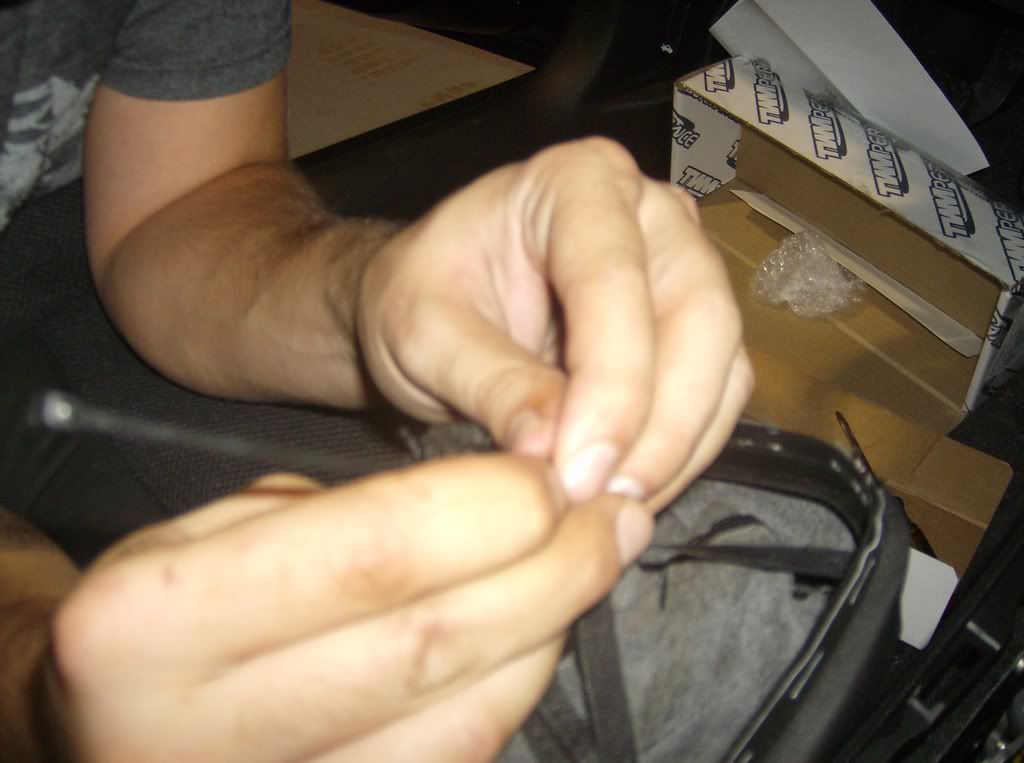
Go ahead and grab your shift boot that is still attached to the reverse lock out. It was a bit tough to cut the zip tie, but you'll get it off. Then just pull it out and the shift boot comes off. Be careful though, the spring in here popped out when I did it. Don't point it towards your face! It probably won't hurt you...but will be really annoying to have a red spot on your forehead!
Anyway, next is to "thread" in a new zip tie that was provided with your shifter. The shift boot needs to be inside out for this. This was a bit tough for me and took some time and patience to get it to go all the way around. DO NOT tighten it yet!!!
Next is to slide this over your shifter. There is a ring around the lockout piece for the top of the boot to zip tie around. Simply get it around there and tighten the zip tie closed. You should have this:
Now go ahead and take the front piece of the center console it slip it over the shifter and boot and pop it back into place. Orient the shift boot accordingly and snap it back in. Here you can put the cup holders and rear center console piece back in. Or you can do it at the end, doesn't matter. You're on the home stretch by now!
There is a jam nut and a threaded aluminum insert that you'll have to put on the shifter here.
First take the jam nut and hand tighten it on the shifter. Next thread on the threaded aluminum insert. Use a 15mm wrench (I used a box (line) wrench here). Tighten the insert on the jam nut JUST ENOUGH.
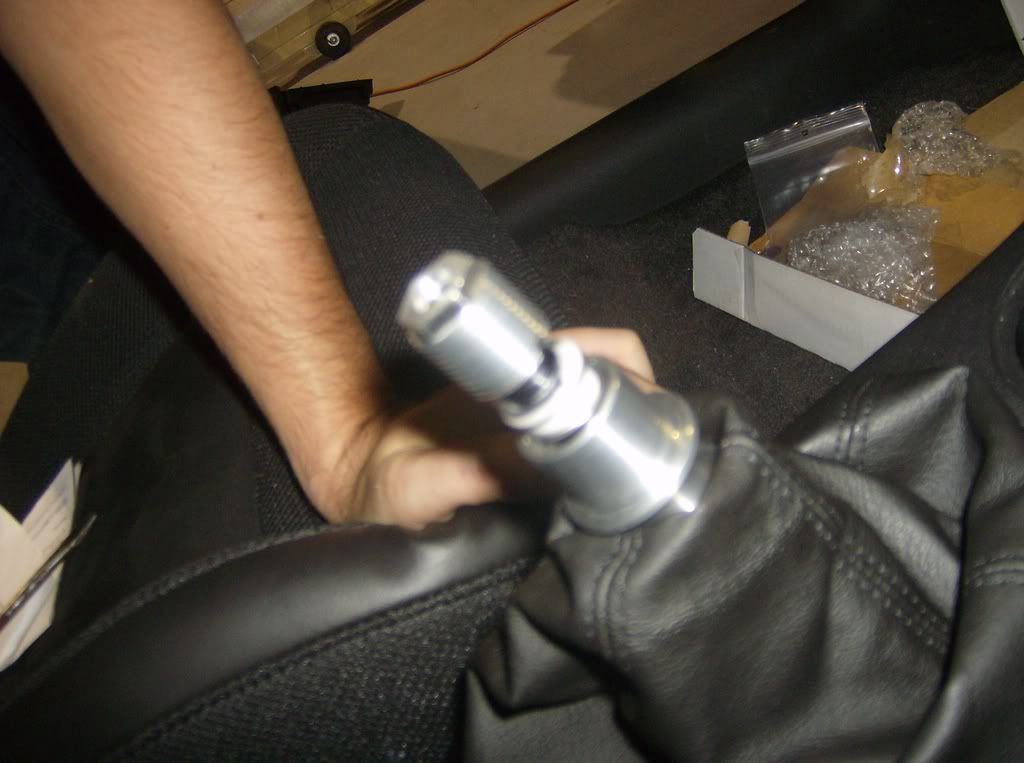
Now put on the shifter knob. If it is oriented the correct way when you first do it, consider yourself luck. If not, note how much in which direction it needs to be turned to face straight.
Take off the knob. Get a 15mm open wrench (TWM says 9/16") and a 15mm closed or open wrench. Used the open wrench on the jam nut and the other one on the top of the aluminum insert. Holding the insert with the wrench, turn the jam nut in the direction you need to adjust your shifter knob.
Now, tighten the insert by holding the jam nut and turning the insert until it's tight. Again, you don't need too much force here.
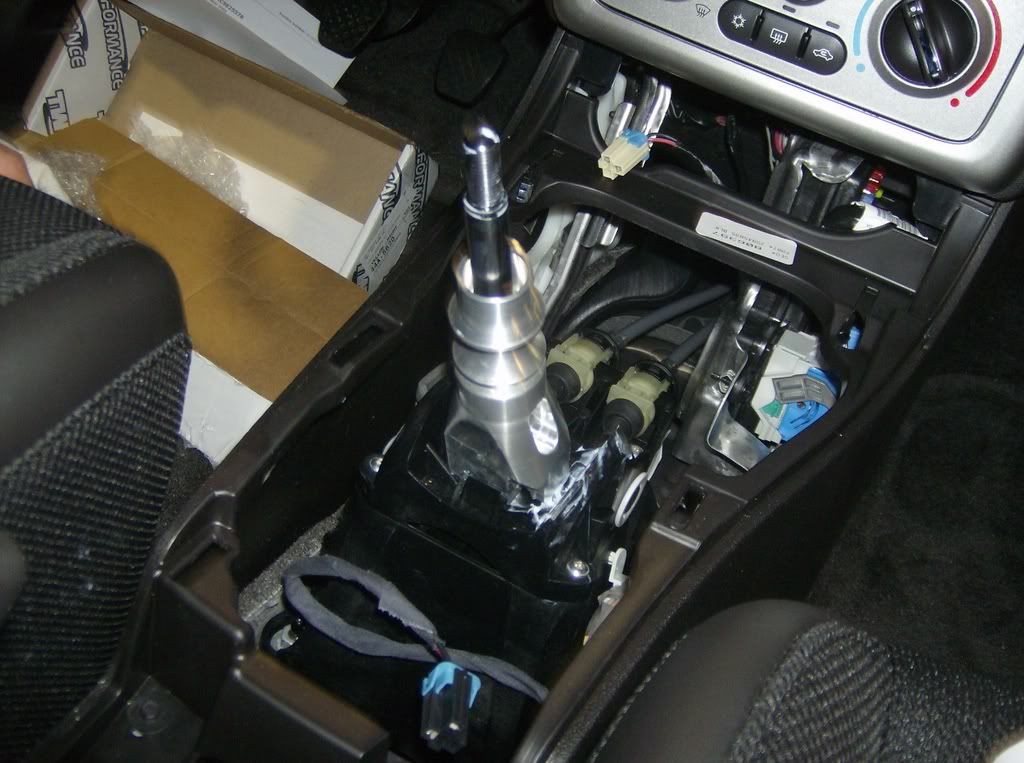
Try the shifter knob again. You may need to do this again until you get straight. Once you do, it looks like this:
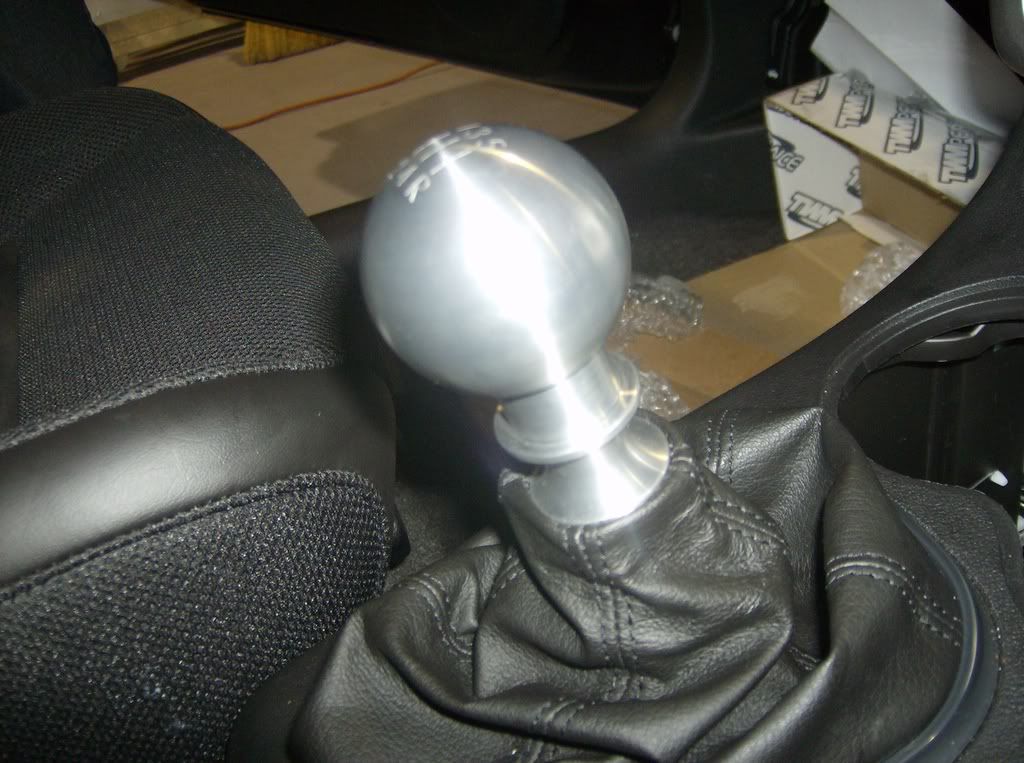
Then you're done! Clean up the mess you made, wash your hands and take it for a test drive. Make sure you can still get it into every gear (including Reverse!) If there are no problems, you're done and enjoy!
You will need:
(2) flat head screw drivers
(1) T-20 and (1) T-25 torx bits
(1) 15mm wrenches (they recommend (1) 15mm and (1) 9/16", but I used one 15mm)
(1) 5/32 Allen Key
(1) Wire cutters (or side cutters...or even just scissors)
Some white lithium grease. (I "found" some...but I'll explain that later)
An online version of the directions can be found here: http://www.twmperformance.com/manual...all-manual.pdf
I'm not going to have pics of everything since the online manual has a lot of good ones already...but I'll go through the basics and my experience with it.
First thing you have to do is get to the shifter by removing the center console. The first part to go is the middle piece around the e-brake. Simply lift it up (carefully) and it just pops out because it's held on by clips.
Then remove the cupholder by lifting that out. You can do it with your hands by pushing out/up from the inside..but if you're stuck a flathead can help you out. Just be careful not to mess up your plastic console pieces.
Next go under the console (with the cup holders out) and push up around the shifter boot to remove it from the center console. It will still be attached to the shifter knob, but the bottom will not be attached to the console
Next lift up on the front part of the center console. BE CAREFUL not to lift too hard as there are two cigarette lighter adapter wires here that need to be unclipped before you can completely remove this piece. Once you unclip the wires, remove the center console piece over the shifter.
Next, with your flathead screwdriver, carefully pry up on the plastic piece that sits on top of your shifter knob. This is also clipped on in 3 places. Just pry up and it should come off. Then your car should look like this:
Next remove the T-25 torx bolt from the top of the shifter knob.
The next step is to remove the shift knob. To do so you need to get two flat heads under the shift knob, but above the reverse lockout mechanism. This is how it looked when me and my buddy were doing it:
It takes a LITTLE bit of effort to pop it off, so you shouldn't have to pry too hard. Once that's off, it should look like this: (with the spring on top of the shifter)
At this point, the whole shift boot and reverse lockout piece should lift straight off the shifter.
Next you have to release the shifter cable so you can remove the shifter. Here's how to do it. In front of the shifter there are two cables. The one on your right (passenger side) is the one that needs to come loose to get the shifter out. MAKE SURE YOUR CAR IS ON LEVEL SURFACE WITH THE EBRAKE ON. Then put the car in 4th gear. There is a plastic piece over the shifter cable on the right. You have to use a flat head to pry the front piece out and up a little. You'll hear it click. Don't worry it won't open up 100%, but the cable should slide freely out of the plastic clip.
Here's a bad picture of the cables and plastic pieces. Make sure you get the one on the right!
There are four T-20 torx screws around the shifter base. Just take them out. Then lift the top piece of the shifter base off.
Next simply take out the shifter. The shifter cable should be disconnected from the plastic clip in the front. The rest should maybe take some wiggling, but then it's out and looks like this:
Now remember that plastic piece you opened up to slide out the shifter cable? You need to remove this from the shifter. Just pop the ball out of the socket on the shifter. Then you should have this:
This next part was a little tricky for me, but just be careful. The plastic "cup" that goes around the pivot ball on the shifter needs to come out. I think the S/C shifter gives you a tad more room to do this, but this was tough. There is a bump stop below the pivot cup that you have to use a flat head to rotate and pry up to get the pivot cup over. Be careful not to break it as you are using it for your new shifter! Mine cracked a bit, but it didn't break. Again...be careful!
Ok, now you're ready to start installing the new shifter. Here is where you need to start using the white lithium grease. Unfortunately I didn't have any with me. However, on the pass side of the shifter base my car has quite a bit of it just sitting on the plastic. Why? I have no idea. But I just took some from there and put it all over the pivot ball (big one) and the small pivot ball for the shifter cable housing. Apply liberally. This stuff's good.
Oh...and wipe off your hands...you're getting your new shifter and your car dirty with grease!
Now take that plastic pivot cup from your old shifter and put it on your new shifter. The "open" part of the cup should be facing up.
Next, attach the shifter cable housing (the plastic clip piece) on the bottom of your shifter. You may notice that the old shifter came out to 90 degrees at the bottom, but this shifter just goes straight down. This WILL NOT cause a problem...so chillax and continue.
Next you want to put this shifter assembly back in your car. It should just slide in. Slide the shifter cable housing over the shifter cable but DO NOT CLOSE IT YET. You will need to adjust it in a minute.
Make sure everything there is lined up. The piece that sticks out to your left (driver side) should have a white plastic cup that goes into the reverse lockout mechanism metal piece. Make sure that's in. Make sure the bar in the front of the shifter is also seated correctly. Make sure the pivot cup is fully seated in it's position.
Next put the top half of the shifter base back on and use the four T-20 torx screws to tighten it down. You should look like this at this point:
Now you have to start adjusting the shifter cable housing. TWM recommends moving the housing forward (shifter goes back) until about 3/8" of silver shifter cable is exposed. Then close the clip. This is pretty much dead on...but you might have to tweak it a bit.
Next, take some more of your awesome white lithium grease and cover the whole shifter EXCEPT for the threaded part on top. Everything else that is exposed should be covered.
Next take the big metal piece from your new shifter (also referred to as the reverse lock) and slide it over your shifter with the slot facing the passenger seat.
Like this:
Next, take the reverse lockout bolt (it has a threaded part, then a bearing part, then a gripped head and an allen key hole on top), and screw it into the shifter from the slot on the passenger side of your reverse lock.
Here's the screw:
Here's where it goes in (the position of the screw in the slot does not matter. it's supposed to move)
Now tighten down this bolt with your 5/32 allen key.
Next you will be installing the reverse lock spring. There are two pieces here. The spring attached to a white bushing, and a white bushing that is by itself.
Take the lone white bushing and slide it over the top of the shifter with the smaller diameter part on the bottom. The spring will rest on the top of this bushing. It should look like this:
Next, take the spring/bushing combo and put it over the shifter with the spring part facing down. It should look like this:
Next, push the spring down enough until you can see just below the threads there is a slot for an "E" clip (like a "C" clip but an extra piece in the middle). Take the provided clip and slide it in like so:
Ok, good job so far! Now came the tricky part. We went to see if the new shifter would go in every gear at this point. Now is a good time to make sure your shifter cables are adjusted properly so you don't have to take everything out again when it doesn't!
Now there are two adjustments you can make. The cable on the right will determine how far forward and back the shifter has to go to get into gear. We played with ours a few times, but ended up leaving the shifter cable housing just about where TWM said to put it. However, we had a problem where we were not able to get it to go into 5th gear and reverse!
Our problem was that we could not move the shifter over to the right enough to get into those gears. Here is where we adjust the shifter cable housing on the left side (it adjusts lateral movement).
First we opened the clip just like the other shifter cable housing so it was loose. Since we had to go to the right. My buddy held the shifter where it was and moved it over a little to the right each time we adjusted. Then we close the clip and try for every gear. It took a few times, but we finally got it.
For reverse, you have to make sure the lockout piece is lifted up and goes over the notch in the top part of the shifter base. Otherwise your reverse lockout is useless.
Once you're comfortable getting into ALL gears (1-2-3-4-5-R...BE SURE), you're ready to move one. Don't worry, all the hard stuff is done!
If you got the bushings, here is where you would install them. I didn't get them, so I'm moving along.....
Go ahead and grab your shift boot that is still attached to the reverse lock out. It was a bit tough to cut the zip tie, but you'll get it off. Then just pull it out and the shift boot comes off. Be careful though, the spring in here popped out when I did it. Don't point it towards your face! It probably won't hurt you...but will be really annoying to have a red spot on your forehead!
Anyway, next is to "thread" in a new zip tie that was provided with your shifter. The shift boot needs to be inside out for this. This was a bit tough for me and took some time and patience to get it to go all the way around. DO NOT tighten it yet!!!
Next is to slide this over your shifter. There is a ring around the lockout piece for the top of the boot to zip tie around. Simply get it around there and tighten the zip tie closed. You should have this:
Now go ahead and take the front piece of the center console it slip it over the shifter and boot and pop it back into place. Orient the shift boot accordingly and snap it back in. Here you can put the cup holders and rear center console piece back in. Or you can do it at the end, doesn't matter. You're on the home stretch by now!
There is a jam nut and a threaded aluminum insert that you'll have to put on the shifter here.
First take the jam nut and hand tighten it on the shifter. Next thread on the threaded aluminum insert. Use a 15mm wrench (I used a box (line) wrench here). Tighten the insert on the jam nut JUST ENOUGH.
Now put on the shifter knob. If it is oriented the correct way when you first do it, consider yourself luck. If not, note how much in which direction it needs to be turned to face straight.
Take off the knob. Get a 15mm open wrench (TWM says 9/16") and a 15mm closed or open wrench. Used the open wrench on the jam nut and the other one on the top of the aluminum insert. Holding the insert with the wrench, turn the jam nut in the direction you need to adjust your shifter knob.
Now, tighten the insert by holding the jam nut and turning the insert until it's tight. Again, you don't need too much force here.
Try the shifter knob again. You may need to do this again until you get straight. Once you do, it looks like this:
Then you're done! Clean up the mess you made, wash your hands and take it for a test drive. Make sure you can still get it into every gear (including Reverse!) If there are no problems, you're done and enjoy!
Last edited by TommyP; Oct 3, 2012 at 01:08 PM.


Member
Joined: 09-30-05
Posts: 349
Likes: 0
From: Richmond, TX
Has anyone else had an EXTREME amount of trouble trying to get the clip to close again?
I have been wrestling with this thing for what must be two hours, this simple little step.
I swear, it will close save for the HAIR'S LENGTH it needs to fasten shut.
Is there something wrong with the clip? I just have NOT been able to get the damn thing to close, and I cannot FATHOM what the problem is. It should be such a simple thing.
It closes fine when it's not around the yellow bit of shift linkage. But when it's in place, it just doesn't close.
Is there some kind of trick to it? My friend and I are at our wits end.
The thing I could see is that the yellow part of the shifter cable is not deep enough inside the clip. Basically, you should not be able to see the yellow part when you close the clip.
Check the picture on the step 24 on the install manual, this is what you should see when you close the clip:
Cobalt SS/SC short shifter install manual
Frank
TWM Performance
Check the picture on the step 24 on the install manual, this is what you should see when you close the clip:
Cobalt SS/SC short shifter install manual
Frank
TWM Performance
Member
Joined: 09-30-05
Posts: 349
Likes: 0
From: Richmond, TX
The thing I could see is that the yellow part of the shifter cable is not deep enough inside the clip. Basically, you should not be able to see the yellow part when you close the clip.
Check the picture on the step 24 on the install manual, this is what you should see when you close the clip:
Cobalt SS/SC short shifter install manual
Frank
TWM Performance
Check the picture on the step 24 on the install manual, this is what you should see when you close the clip:
Cobalt SS/SC short shifter install manual
Frank
TWM Performance

Frank
TWM

New Member
Joined: 10-30-15
Posts: 12
Likes: 0
From: ohio
hey guys, I know this is an old thread, but I just installed this short shifter in my 2010, and it feels great, the only problem I have seen is on the reverse lockout, when I engage it and put it in reverse, the metal shifter doesn't sit on the little plastic piece that holds the lockout up, if that makes sense, any ideas??

New Member
Joined: 10-07-14
Posts: 66
Likes: 1
From: ontario
Does 5th gear engage at the right place? Against the plastic piece all the way at the right.
I had the same problem when I first installed mine. May need to remove the left shift ball connection (if that makes sense) and reseat it. Then you use the cable clip to fine tune it to the right place. 5th should be against the plastic piece on the right, and reverse should slide into a groove on the plastic piece.
If you download the pdf in the first link pic 23 shows the main clip. Page 19 also talks about this.
New Member
Joined: 10-30-15
Posts: 12
Likes: 0
From: ohio

New Member
Joined: 10-30-15
Posts: 12
Likes: 0
From: ohio
Well like I said, it doesn't really bother me, nor does it affect the shifting of the car, I just didn't know if there was a simple solution to it. But for future references, how much are the OTTP short shifters? Do they install basically the same? And since I have a shift ball from twm, would that work on the threads of the ottp?
Originally Posted by 10nobalttc
Well like I said, it doesn't really bother me, nor does it affect the shifting of the car, I just didn't know if there was a simple solution to it. But for future references, how much are the OTTP short shifters? Do they install basically the same? And since I have a shift ball from twm, would that work on the threads of the ottp?
http://www.ottperformance.com/store/...27&idcategory=
New Member
Joined: 10-30-15
Posts: 12
Likes: 0
From: ohio
I fiddled with it for a long time and just gave up. The ottp one is the same install, its just a better quality piece. You wont be able to reuse your ball. Different thread pattern.
OTTP Short Throw Shifter 05+ Cobalt SS SC/TC
OTTP Short Throw Shifter 05+ Cobalt SS SC/TC

Thread
Thread Starter
Forum
Replies
Last Post
Delta coupe
Pictures & Videos
1
Sep 30, 2015 08:11 AM