
Appearance: How To: Paint YOur HeadLights (lots Of Pics) 56k (mabye)

Thread Starter
Senior Member
Joined: 05-23-05
Posts: 571
Likes: 0
From: Ajax, Ontario
How To: Paint YOur HeadLights (lots Of Pics) 56k (mabye)
For Starters You must either 1.Take the lights out of the car, or 2.Purchase a second set of lights... Method number 2 is probrbaly the prefered method but may cost a little xtra, reason i got a second pair is i may change my mind, and i needed the car... No car makes mike a unhappy person..
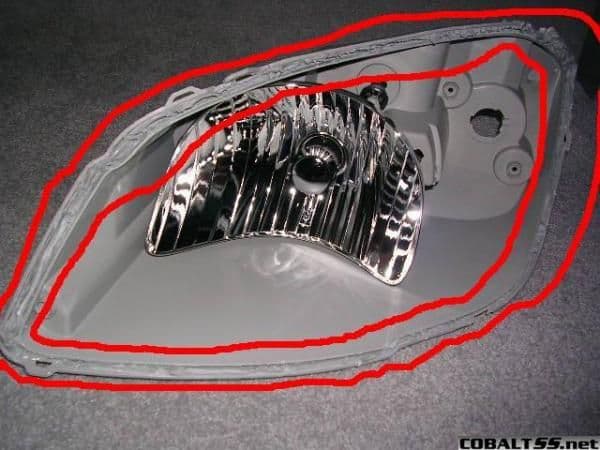
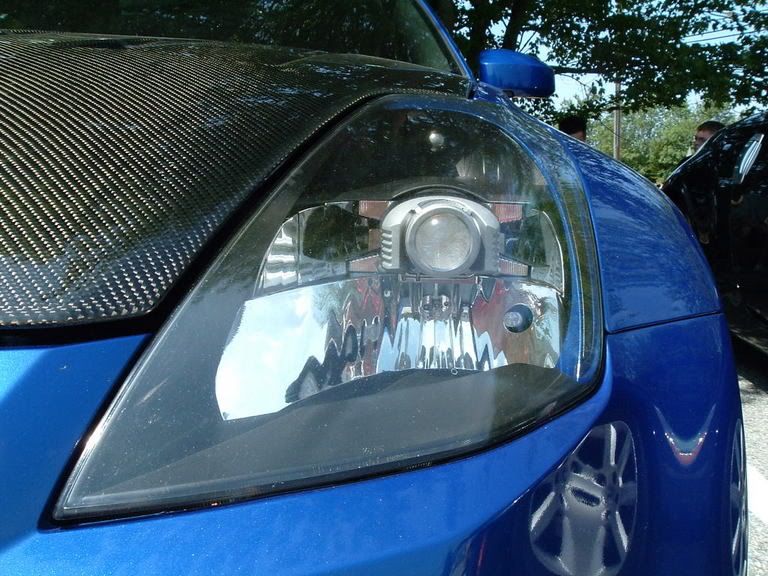
simple shots of the lights it self show there is not much to disassemble it.. the hardest part is heating up the entire housing and seperating the clear cover from the housing itself..

I first removed all the lights and connections as well as the rubber sealent for the main high/low beam...
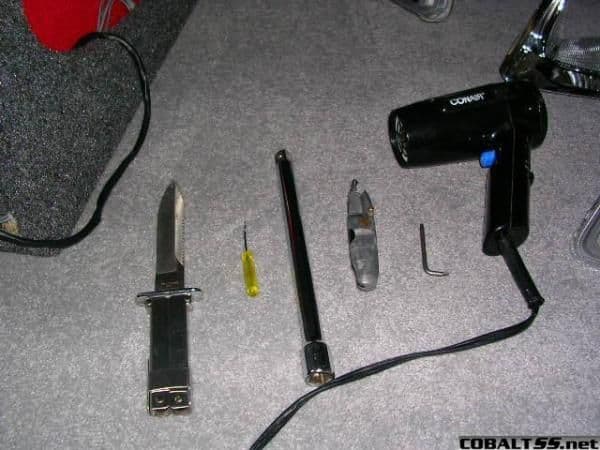
Basic tools are needed, Hairdryer (my choice), some people use a heat gun, but i didnt want tooo much heat created, a 1/2
extension, a few small straight screw drivers, two sharpe blades
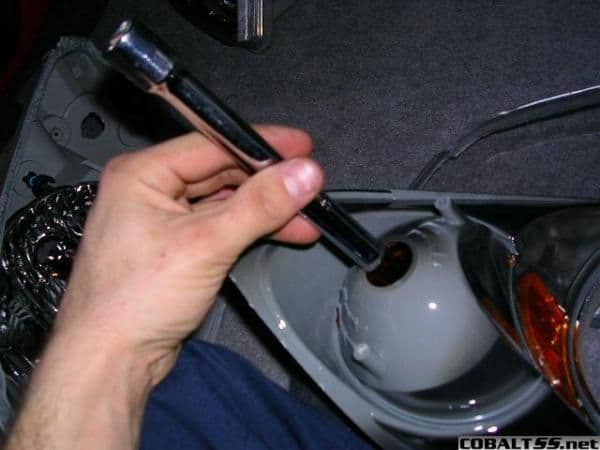
You somehow have to heat up the entire Headlight assembly, i took the hairdryer and aimed it into the back of the high/low beam hole, and held it there for a while, even while i was prying appart the housing from the clear plastic i left the hair
dyer in there so that it never hardened back.

after seperating the Housings i started by seperating the case itself from the chrome suroundings to be painted, there are 3hex screws on the back of the housing to be removed...

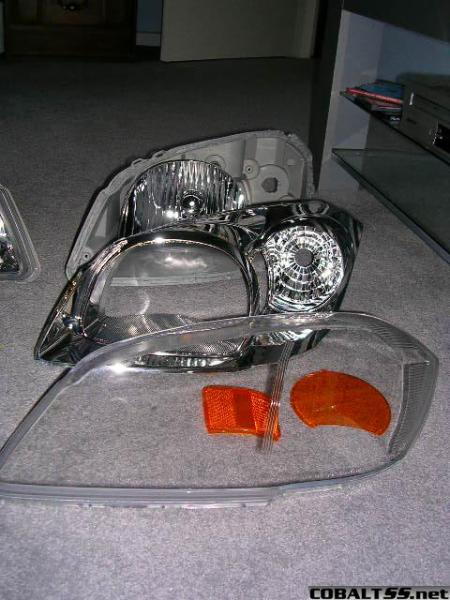
now with the hex screws out the reflector peice should come out.. and now you can remove the turn signal and side marker orange reflector..for the turn signal i used the 1/2 socket extension to push out the orange reflector..
for the side marker i just used the trusted old fingers (no special tool required) to pop out the lense

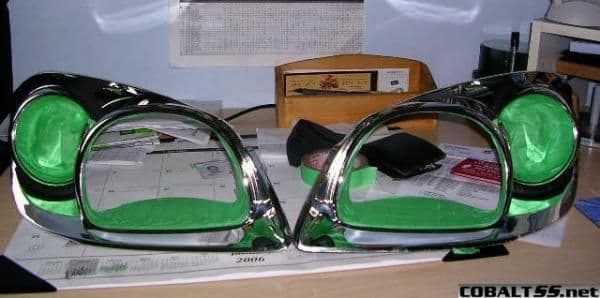
with everything dissasembled it should look something like this.
now that everything has been disassembled the hard work stars (yeah get ready for alot of beers and many headaches) tools for the job as well as i tired a dremal for a bit, but it heated up the sealent and then cause the dremal is going so fast it shot hot (i mean HOT) sealent everywhere....
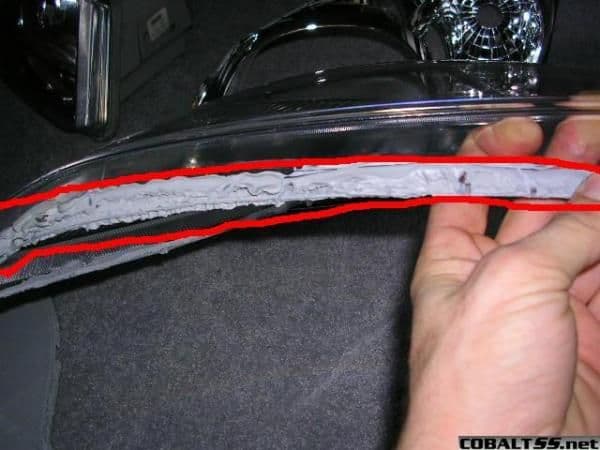
Scrape as much of the sealent away as possible, it will probrably get to the point where you cant take any more and just give up and say its enough, well it prorably is, just use alot of silicon when sealing back up again...
you should try and get as much off as possible in order to ensure a correct seal when you put everything back together (no leaks)
i taped off all areas that i didnt want the paint to go, inside the turn signal and around the high/low beam.... with painters tape (less sticky, and does not leave any residue when removing after painting has dried)...
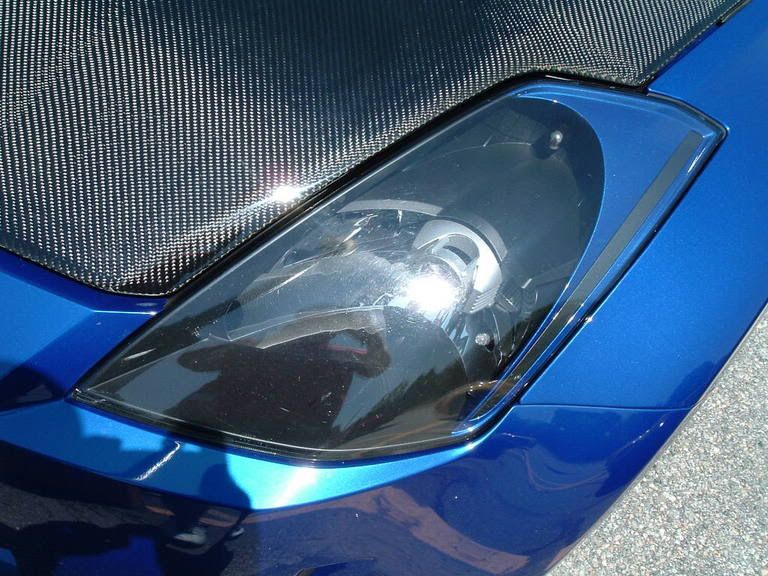
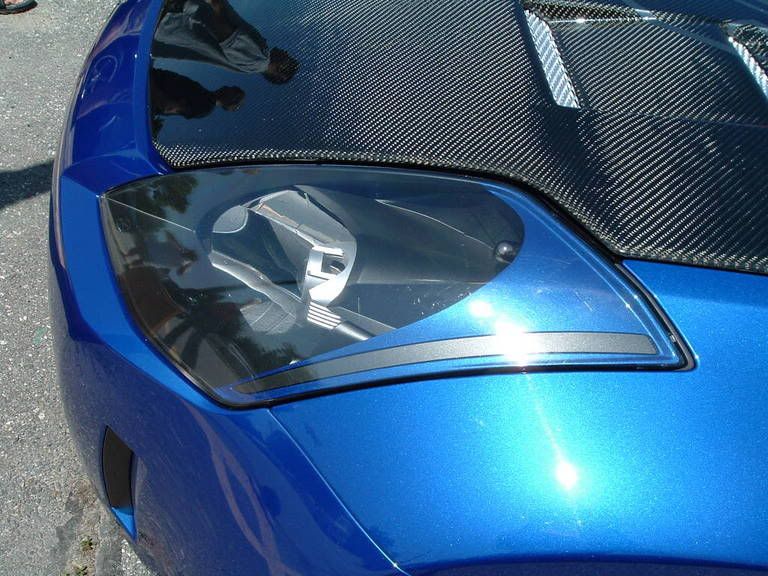
now when putting it all back together just reverse the disembly procedure but remember you need to go get orange bulbs instead of the clear OEM bulbs... and when sealing black sealent is what I intended on using but my Anus of a father used my caulking with out asking and i had to use clear stuff from my work van (little hand held bottle of it, i used 5 in toatal to do it all, may seem like alot but there was a lot of waste, i was not about to **** my pants trying to squeeze out the last drop of caulking) for the finished result put back in car , and enjoy..

simple shots of the lights it self show there is not much to disassemble it.. the hardest part is heating up the entire housing and seperating the clear cover from the housing itself..
I first removed all the lights and connections as well as the rubber sealent for the main high/low beam...
Basic tools are needed, Hairdryer (my choice), some people use a heat gun, but i didnt want tooo much heat created, a 1/2
extension, a few small straight screw drivers, two sharpe blades
You somehow have to heat up the entire Headlight assembly, i took the hairdryer and aimed it into the back of the high/low beam hole, and held it there for a while, even while i was prying appart the housing from the clear plastic i left the hair
dyer in there so that it never hardened back.
after seperating the Housings i started by seperating the case itself from the chrome suroundings to be painted, there are 3hex screws on the back of the housing to be removed...
now with the hex screws out the reflector peice should come out.. and now you can remove the turn signal and side marker orange reflector..for the turn signal i used the 1/2 socket extension to push out the orange reflector..
for the side marker i just used the trusted old fingers (no special tool required) to pop out the lense
with everything dissasembled it should look something like this.
now that everything has been disassembled the hard work stars (yeah get ready for alot of beers and many headaches) tools for the job as well as i tired a dremal for a bit, but it heated up the sealent and then cause the dremal is going so fast it shot hot (i mean HOT) sealent everywhere....
Scrape as much of the sealent away as possible, it will probrably get to the point where you cant take any more and just give up and say its enough, well it prorably is, just use alot of silicon when sealing back up again...
you should try and get as much off as possible in order to ensure a correct seal when you put everything back together (no leaks)
i taped off all areas that i didnt want the paint to go, inside the turn signal and around the high/low beam.... with painters tape (less sticky, and does not leave any residue when removing after painting has dried)...
now when putting it all back together just reverse the disembly procedure but remember you need to go get orange bulbs instead of the clear OEM bulbs... and when sealing black sealent is what I intended on using but my Anus of a father used my caulking with out asking and i had to use clear stuff from my work van (little hand held bottle of it, i used 5 in toatal to do it all, may seem like alot but there was a lot of waste, i was not about to **** my pants trying to squeeze out the last drop of caulking) for the finished result put back in car , and enjoy..


Senior Member
Joined: 10-26-05
Posts: 757
Likes: 0
From: New Lenox, IL
also the quick and easy way is to heat your oven to 200 and bake the housing for 25 mins. this works for pulling them apart and putting them back together. just did mine last night.
https://www.cobaltss.net/forums//showthread.php?t=16850
https://www.cobaltss.net/forums//showthread.php?t=16850

Thread Starter
Senior Member
Joined: 05-23-05
Posts: 571
Likes: 0
From: Ajax, Ontario
Originally Posted by cvenom2122
LOVE THE KNIFE! 


yeah i have had that for a while now..... everytime my mom finds it she takes it (stupid bizach)..
i should have replaced that with a butter knife or sumfin...........
Thread Starter
Senior Member
Joined: 05-23-05
Posts: 571
Likes: 0
From: Ajax, Ontario
well i had all the pictures while i was doing it.. (i think i do it for almost everything)
doing the actual write up took longer then doing the lights themselves.
but im happy with how they came out...
only thing i want now is special bulds from one of our supporting vendors they are silver when off but when you put turn signals on they turn orange....
that and next week car goes in for complete detail and emblem removal at the dealership.. that and im finally getting the road paint removed from the car...


Thread Starter
Senior Member
Joined: 05-23-05
Posts: 571
Likes: 0
From: Ajax, Ontario
there are 4 push clips that come off around the ligfhs, part of the front grille,
and when you take it out you have to play with it a little.. and wiggle back and forth,, it feels like it wont come out, but u have to get the right angle...
once you get it out once u will understand the whole right angle... if i can i will host mabye a video.. cause i have to change my turn signals one last time..

Banned
Joined: 03-31-06
Posts: 856
Likes: 0
From: Dallas, TX
to remove lights take off the 2 bolts on each one that is on the top holding lights onto the mounting brackets. the brackets are the part that connects to the actual frame of the car, and you can leave these on. Then they are very tricky to get in there. I had to pull on the bottom and outside at the same time. They are snug heh
Banned
Joined: 03-31-06
Posts: 856
Likes: 0
From: Dallas, TX
Originally Posted by mugencivicsi
there are 4 push clips that come off around the ligfhs, part of the front grille,
and when you take it out you have to play with it a little.. and wiggle back and forth,, it feels like it wont come out, but u have to get the right angle...
once you get it out once u will understand the whole right angle... if i can i will host mabye a video.. cause i have to change my turn signals one last time..
and when you take it out you have to play with it a little.. and wiggle back and forth,, it feels like it wont come out, but u have to get the right angle...
once you get it out once u will understand the whole right angle... if i can i will host mabye a video.. cause i have to change my turn signals one last time..
Banned
Joined: 03-31-06
Posts: 856
Likes: 0
From: Dallas, TX
I am going to go with clear turn signals until I find a good set somewhere
I am painting my headlights as we speak. Jesus christ that silicon is a bitch. My fingers hurt so bad! TIP : Use an oven at 200 degrees for 25 minutes, it heats the entire fixture perfectly! I did this, and after prying apart and hte silicon started to cool off i put em back in the oven so I could scoop it out better. made the second light 10x easier!

 That was a good how to. Now thanks a lot
 because now I have another job to do
Senior Member
Joined: 10-26-05
Posts: 757
Likes: 0
From: New Lenox, IL
Originally Posted by kadumel
I am painting my headlights as we speak. Jesus christ that silicon is a bitch. My fingers hurt so bad! TIP : Use an oven at 200 degrees for 25 minutes, it heats the entire fixture perfectly! I did this, and after prying apart and hte silicon started to cool off i put em back in the oven so I could scoop it out better. made the second light 10x easier!
hey, give credit were its due, homie