
Interior: How To: Replace shifter lights for automatics


Thread Starter
Junior Member
Joined: 09-29-07
Posts: 468
Likes: 0
From: new york
How To: Replace shifter lights for automatics
I�m not sure about anyone else but when the shifter lights for P, D, R, N, etc. went out in my car all I could ask myself was �is it a fuse, or is it a bulb?� I couldn�t find much information on it so I pieced together a how-to for myself using other threads that had nothing to do with the lights in order to figure this out. I decided to go ahead and make a how-to for anyone who was in the same boat I was in. First though, I recommend checking your fuses before you go tearing your console apart.
Total difficulty of this project is probably a 2.5-3 out of 10, it�s pretty easy, just the black cover over the letters is a pain to get out. As far as tools for the job, all you will need is one to loosen the tiny hex screw in the shifter knob. Everything else can be done by hand unless you�re like me and decide to use a small screwdriver to help pry up the black cover over the letters.
For starters you will need to remove the three top panels of your center console. All three of them just pop out of place. I made a how to a while ago for this so if you need it you can find it here�clicky click
Note: if you've read that how-to i just wanted to say that my cars interior is no longer black and gray, it is now black and red
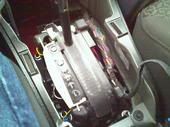
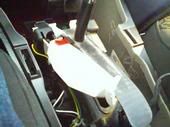
Alright, let�s begin. After the three panels of the top of the console are out you will be left with this�
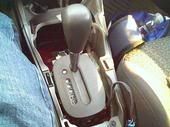
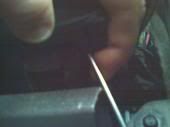
First thing you need to do is get the shifter pieces out of the way. To remove the knob you have to twist the �chrome� piece just a little bit counter clockwise and push down at the same time. This will expose the hex screw for the shift knob. Loosen that screw just enough to where you can pull the knob right off. Once the knob is gone the �chrome� piece will slide right off�Note: while removing the screw i scratched the top of the chrome piece just a bit but its nothing extremely noticeable so if you scratch yours don't panic. it shouldn't be noticeable unless your digging at it with a hacksaw or something.
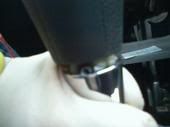

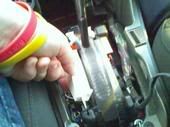
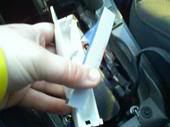
Next is the piece over the letters. There are four tabs holding this thing on. I found it easier to start in the bottom corner. And using a screwdriver [optional] pry up on the piece until it clears the tabs, it�s a pain in the butt but it will come off�
Once off you will be left with this ugly mug�
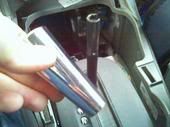
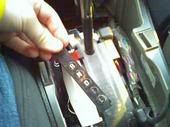
For this all you have to do is pull the piece with the letters off, its pretty much just sitting there�
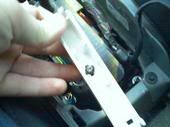
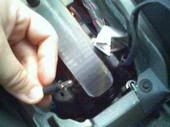
Once that is off you have to pull out the piece under it, this is where the bulb is located�
Pull it out at an angle, its just easier this way in my opinion�
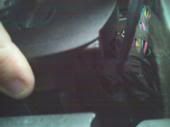
Take the top piece off that, like everything else it just pops off�
Look inside and there�s your blown bulb�
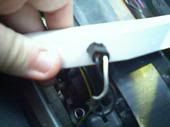
Now turn that piece over and check out the back. If you haven�t noticed by this point, all you need to do here is turn that plastic piece [I don�t remember which direction it has to go] and pull the bulb right out�
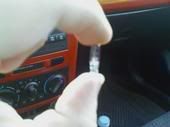
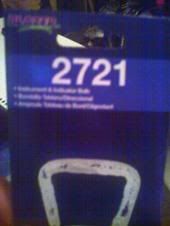
Here�s what I did at this point. I put that bulb and tools in the cupholder on the seat beside me and put the shifter assembly back together so I could drive the car and drove straight to autozone and picked up new bulbs. The ones I got seem to be a hair bigger, but they work. Since I just compared sizes between bulbs I have no clue what size they really are so here�s the label of the bulbs I got�cost me about $4 after tax for two bulbs...
As soon as I left the store I drove to a neighboring parking lot and took 10 minutes to tear everything apart again to replace the bulb. So not only is this fairly easy to do, it also doesn�t take very long. To put everything back together just reverse all the steps then admire the ability to see which gear you�re putting your car in at night! I know I did lol
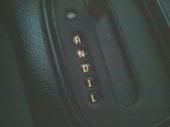
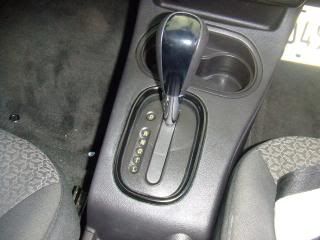
The lights are lit up in this pic, the sun was still kind of out when i took the pic so it's kind of hard to see the light. anyway i hope this helps!
Total difficulty of this project is probably a 2.5-3 out of 10, it�s pretty easy, just the black cover over the letters is a pain to get out. As far as tools for the job, all you will need is one to loosen the tiny hex screw in the shifter knob. Everything else can be done by hand unless you�re like me and decide to use a small screwdriver to help pry up the black cover over the letters.
For starters you will need to remove the three top panels of your center console. All three of them just pop out of place. I made a how to a while ago for this so if you need it you can find it here�clicky click
Note: if you've read that how-to i just wanted to say that my cars interior is no longer black and gray, it is now black and red
Alright, let�s begin. After the three panels of the top of the console are out you will be left with this�
First thing you need to do is get the shifter pieces out of the way. To remove the knob you have to twist the �chrome� piece just a little bit counter clockwise and push down at the same time. This will expose the hex screw for the shift knob. Loosen that screw just enough to where you can pull the knob right off. Once the knob is gone the �chrome� piece will slide right off�Note: while removing the screw i scratched the top of the chrome piece just a bit but its nothing extremely noticeable so if you scratch yours don't panic. it shouldn't be noticeable unless your digging at it with a hacksaw or something.
Next is the piece over the letters. There are four tabs holding this thing on. I found it easier to start in the bottom corner. And using a screwdriver [optional] pry up on the piece until it clears the tabs, it�s a pain in the butt but it will come off�
Once off you will be left with this ugly mug�
For this all you have to do is pull the piece with the letters off, its pretty much just sitting there�
Once that is off you have to pull out the piece under it, this is where the bulb is located�
Pull it out at an angle, its just easier this way in my opinion�
Take the top piece off that, like everything else it just pops off�
Look inside and there�s your blown bulb�
Now turn that piece over and check out the back. If you haven�t noticed by this point, all you need to do here is turn that plastic piece [I don�t remember which direction it has to go] and pull the bulb right out�
Here�s what I did at this point. I put that bulb and tools in the cupholder on the seat beside me and put the shifter assembly back together so I could drive the car and drove straight to autozone and picked up new bulbs. The ones I got seem to be a hair bigger, but they work. Since I just compared sizes between bulbs I have no clue what size they really are so here�s the label of the bulbs I got�cost me about $4 after tax for two bulbs...
As soon as I left the store I drove to a neighboring parking lot and took 10 minutes to tear everything apart again to replace the bulb. So not only is this fairly easy to do, it also doesn�t take very long. To put everything back together just reverse all the steps then admire the ability to see which gear you�re putting your car in at night! I know I did lol
The lights are lit up in this pic, the sun was still kind of out when i took the pic so it's kind of hard to see the light. anyway i hope this helps!
Last edited by TommyP; May 17, 2012 at 08:53 PM.


Senior Member
Joined: 11-20-07
Posts: 2,961
Likes: 1
From: Pittsburgh, Pistolvania

Senior Member
Joined: 03-19-09
Posts: 848
Likes: 0
From: Austin, TX


New Member
Joined: 12-16-10
Posts: 1
Likes: 0
Be aware the 2721 bulb used in this thread is a 6.4 volt bulb and the original was rated for 14 volts. the #37 sylvania bulb is a better replacement since it is for the same voltage.
The instructions on this step by step thread are great, I just had to replace the bulb myself and it took me less than 10 minutes, thanks for sharing.
The instructions on this step by step thread are great, I just had to replace the bulb myself and it took me less than 10 minutes, thanks for sharing.

New Member
Joined: 04-27-11
Posts: 13
Likes: 0
Ok nice post but what i'm curious about is what is the actual size light you need for that part. I did a project with my cobalt and i took all the manufactured lights out and replaced them with Blue LED lights. The last thing i have to do is replace the PRNDIL light and just need to know the size of the light. I plan on sticking some king of LED light in there that is blue..


New Member
Joined: 01-30-11
Posts: 60
Likes: 0
From: USA
Ok nice post but what i'm curious about is what is the actual size light you need for that part. I did a project with my cobalt and i took all the manufactured lights out and replaced them with Blue LED lights. The last thing i have to do is replace the PRNDIL light and just need to know the size of the light. I plan on sticking some king of LED light in there that is blue..


New Member
Joined: 01-10-13
Posts: 1
Likes: 0
From: Florida
This tutorial is great. However, I'm having a hell of a time getting the four tabs on the black piece of trim to cooperate. Even with a screwdriver I've been unsuccessful. Any tips or suggestions? I'd be grateful for any.


New Member
Joined: 09-04-08
Posts: 10
Likes: 0
From: melbourne, florida
Just wanted to put my experience down here so it will possibly help others...
There is suprisingly little info on this throughout the net so here goes....
The instructions above were good but where I got stuck was how to get the bulb out of the socket?
Sounds stupid but mine wouldn't come out and it wasn't straightforward with what I was supposed to do to get it out.
Well its like an old school x-mas light. You have to pull it out of the socket and mine was stuck and everything I tried didn't work.
I had to take pliers and gently try to pull it out but that didn't even work...
The light bulb broke and shot glass everywhere.
I used the pliers to grab the metal filament etc and it came out after pulling hard as hell.
The pack I bought was #37 bulb from AutoZone and came with a 2 pack of bulbs for a few bucks.
Good thing cause I put in the first bulb and couldn't see the light on (it was middle of the day) so I thought it was the wrong bulb and had to take it back out again...
Break-ity break...glass everywhere #2 because this light just doesn't want to pull out easily...repeat above steps and insert bulb #2.
Couldn't see the light on and put everything back together thinking everything had been for nothing...the problem had to be something else but what?
Well night time came and as it happens the bulb was working but was impossible to see during the day.
The design of this light is insane and after removing both bulbs I feel like they should've at lease put a base on the bulb like x-mas lights have but this was just the glass itself so imagine having to pull the glass part out of a string of x-mas lights without removing the plastic part that attaches to them and you get the idea of how ridiculous removing this bulb was. I hope I never have to do this again but I know exactly what to do now and so do you.
Note: The bulbs say 'long life' so hopefully they last forever.


Thread
Thread Starter
Forum
Replies
Last Post