
All Engines: How to: Replace your Radiator


Thread Starter
Senior Member
iTrader: (2)
Joined: 07-10-08
Posts: 1,708
Likes: 3
From: Washington Township, MI
How to: Replace your Radiator
Tools needed:
A new Radiator (or at least one that isn't broken)
New Radiator Hoses (if yours need to be replaced)
Metric Sockets
Metric Wrenches
Drain Pan
Coolant
Trans Fluid (If you have an auto)
So, you need to replace your radiator, but don't want to pay a shop lots of money to do it. I needed to.

1) You are going to want to remove the front bumper and headlights/buckets. You can find how-to's to do this, it's not very hard. There are a bunch of 7mm screws in the wheelwells and under the car, all in the splash guard, a few pins (don't forget the two in the crash bar), and a few 10mm bolts that connect the fascia to the fender. The headlights and buckets are just held on by 6 10mm bolts total per side.

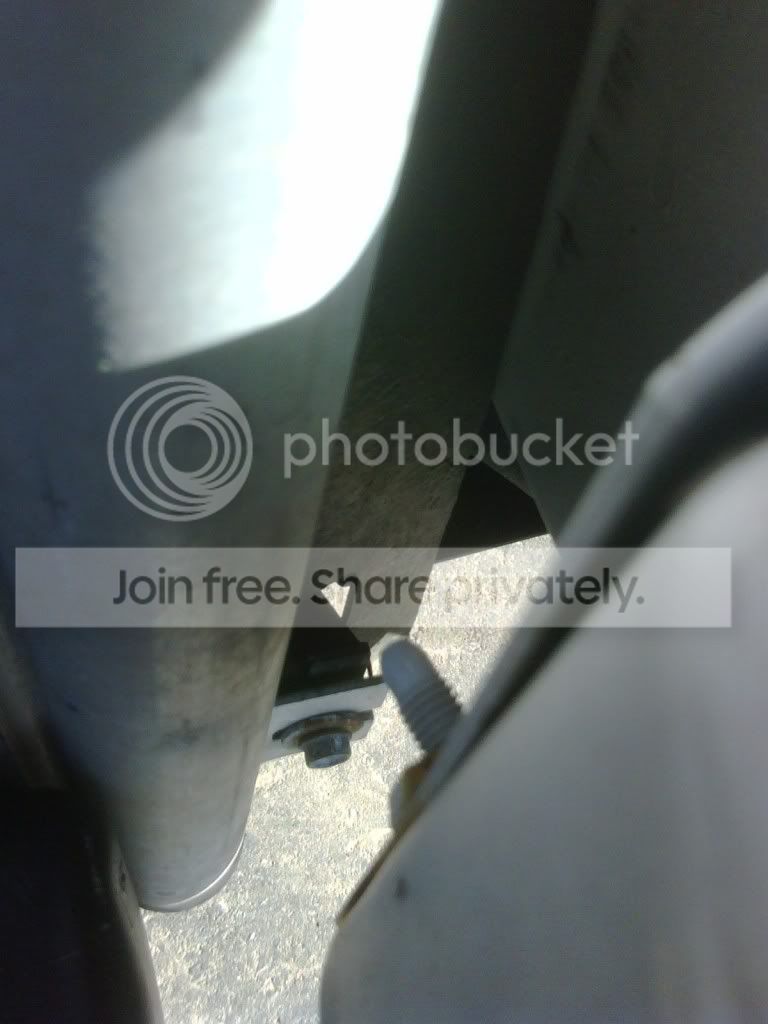
2) Now that you have the bumper off, you have lots of room to work. Place your drain pan under the passenger side lower mount of the radiator. There is a wing nut on the engine side of the radiator, at the bottom. Loosening this will allow the radiator to drain. Make sure you remove the cap from the surge tank, otherwise, hardly anything will come out!
You can see the drain "knob" on the bottom right of the radiator. If you loosen it too much, the plug will come out, and you'll have two streams of coolant coming out - and a huge mess on your hands. Leave it at least a couple threads in the hole.

3) Remove the metal upper brackets that keep the radiator in place (they just act as guides), and set aside. Remove the air deflector from the top of the radiator, it just pulls off. Also remove the side insulators from the radiator. You'll also want to unbolt the hood latch and move it out of your way.
4) Pull the lower radiator hose off the drive side of the radiator (or engine, or both). This is pretty self explanitory, but can be a pain in the ass due to the small work area (getting the clamp off is the hardest part). If the hose is going bad, or looks worn, replace it. Make sure the drain pan is under the hose, as a decent amount of coolant will come out.
5) Remove the upper radiator hose from the passenger side of the radiator. Again, replace the hose if needed. More coolant should come out, but not a lot.
6) Now, this step is only for automatics, if you have a manual, skip ahead to step 7.
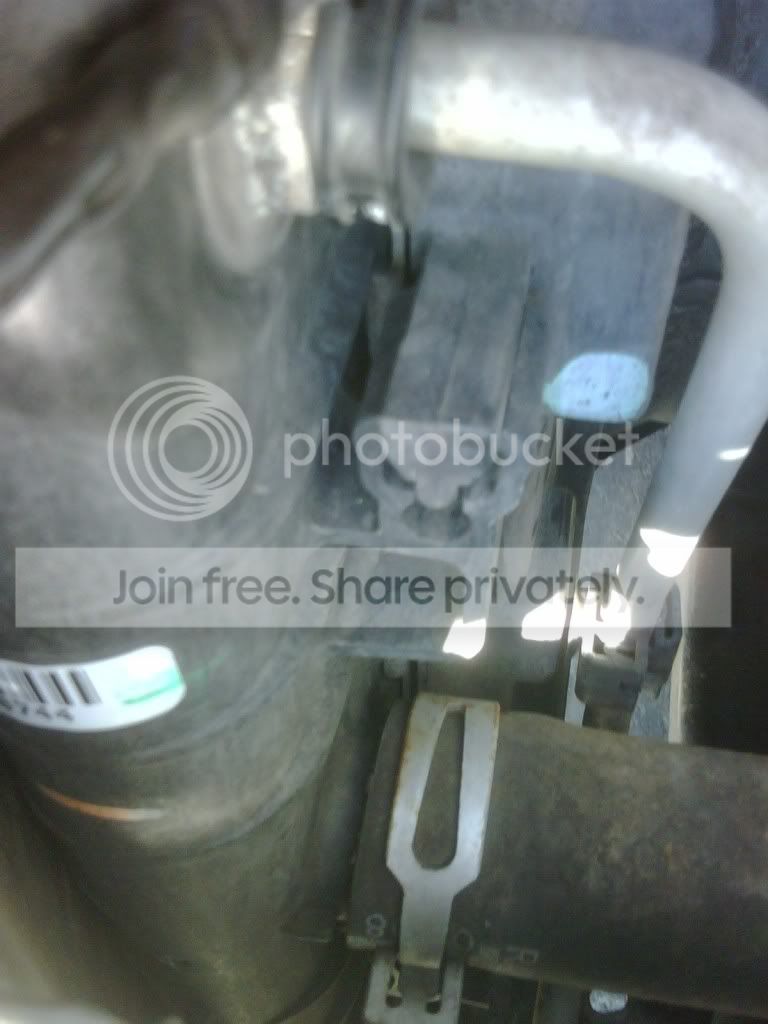
The tranmission cooler is integrated into the radiator, so yes, you have to remove the trans lines from the radiator. You can see them on the top and bottom of the radiator, drive side. Position your drain pan under the general area, and find a wrench that fits the nuts that hold the lines in the radiator (I believe it is a 19mm). Loosen the fittings, and give a nice gentle but firm tug to remove the lines from the trans (start with the bottom so you use gravity to your advantage), then once its drained, remove the top line - more fluid might come out.
7) The radiator is now pretty much drained of whatever fluids were in it. The only thing that is left is to unbolt it from the AC Condensor. There are two bolts that hole the condensor to the radiator, very easy to spot. Remove these, and make sure to support the condensor as it will fall, and being aluminum - will damage easily. Also try not to touch the fins, as they bend easily.
Here are the two bolts
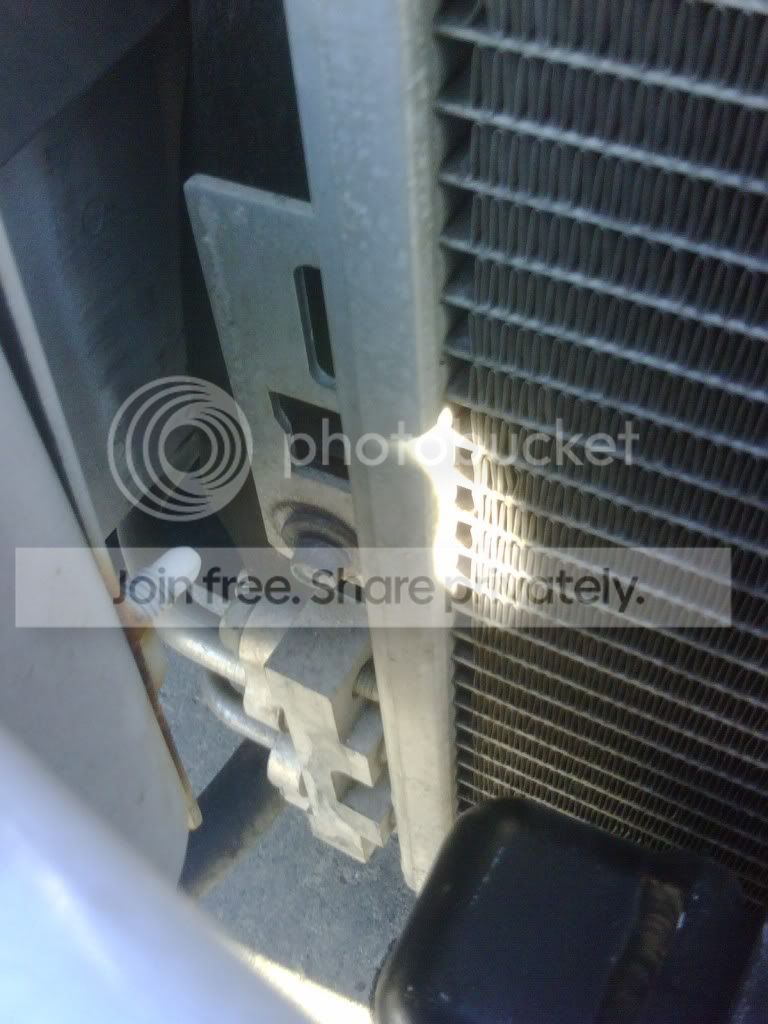
8) Detach the fan shroud from the radator by pulling up on it. It "hooks" into the radiator, and just needs to come out of those grab points.
You can see one of them (top, driver side) in this picture.
9) The radiator is free, and now may be removed. Just pull it straight up. It has two rubber insulators that hold it into the frame, and they may stay on the radiator or stay in the frame - just keep track of them. There are two flat insulating pads that fit between the radiator and the AC condensor. Make sure to keep an eye on these too.
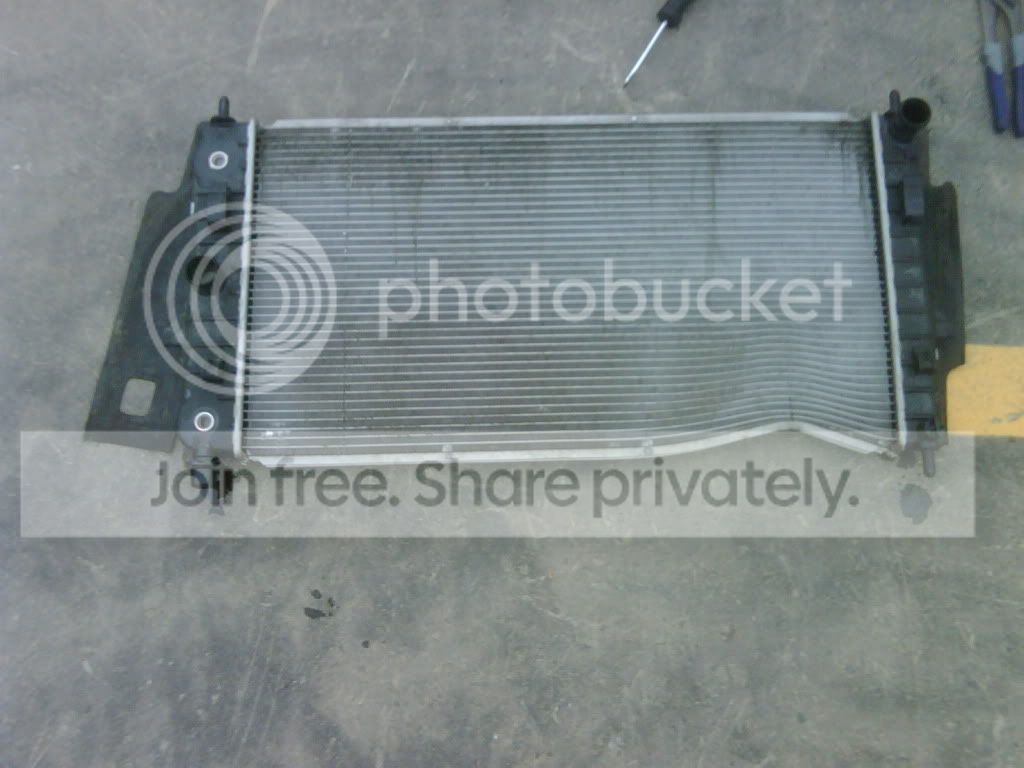
10) Now it's time for reassembly. Insert the new radiator into its home, making sure to have the rubber insulators in place so it sits snug in the frame.
11) Set the insulating pads onto the front plastic sides of radiator (the cutouts specify where they go). Then get the AC Condensor situated on the front of the radiator and bolt it to it. The bolts don't have to be super tight - don't strip the threads.
12) Reattach the fan shroud to the radiator by aligning all the clips into the radiator's "hooks" and push down. You can see if they're all in. Make sure of this and then move to the next step.
13) Reattach both of the radiator hoses, making sure the marks line up with the notches (if there are any, I know there are on the engine side), with new clamps if the old ones are bad or broken.
14) If you have a manual trans, skip to step 15.
Align the trans lines (if you have an auto)and screw the fittings into the radiator. Some radiators come with different thread sizes than the factory's so you may have to swap the fittings - there are small metal clips that need to be worked out of the fitting with a screwdriver or a pair of needlenose. Once you get the first one, it becomes easy. Just remove the clip, then pull the fitting off and put the new one on, and put the clip back on.
15) Reattach the hood latch, then put the side insulating pads on, followed by the top brackets and the air deflector.

Hopefully you made less of a mess than I did at this point.

16) Make sure the drain plug is tight (again, don't overdo it, because you may never get it out again, or worse, you'll strip the threads) and that everything looks good. Fill the surge tank with coolant till the cold fill line. It'll probably take about a gallon or so. Make sure you have extra because you will need it as the car bleeds off air.
17) Start the car and check for leaks. If there are none, keep an eye on the vehicle and let it warm up to operating temp (170+ degrees F) and let it sit there for a while.
18) If there still are no leaks and everything looks good, go ahead and reassemble the front fascia and headlights.
19) This step only applies to autos - you will be about a quart or so (buy two, just in case) at this point, so you will need to fill your trans up. You can have a shop do it, or if you have a lift, do it yourself. There is an allen fill plug on the back side of the trans (firewall side) that you remove while it is running. Add fluid through the fill cap on top, until you can feel the fluid with your finger at the bottom of the hole. (I take no responsibility for this step, as this is just the basics).
20) Drive the car around, make sure temps stay proper and in a good range. Park the car and wait for it to cool down completely. Top off the coolant to the cold fill line again. You may have to do this down the road too, don't be alarmed.
A new Radiator (or at least one that isn't broken)
New Radiator Hoses (if yours need to be replaced)
Metric Sockets
Metric Wrenches
Drain Pan
Coolant
Trans Fluid (If you have an auto)
So, you need to replace your radiator, but don't want to pay a shop lots of money to do it. I needed to.
1) You are going to want to remove the front bumper and headlights/buckets. You can find how-to's to do this, it's not very hard. There are a bunch of 7mm screws in the wheelwells and under the car, all in the splash guard, a few pins (don't forget the two in the crash bar), and a few 10mm bolts that connect the fascia to the fender. The headlights and buckets are just held on by 6 10mm bolts total per side.
2) Now that you have the bumper off, you have lots of room to work. Place your drain pan under the passenger side lower mount of the radiator. There is a wing nut on the engine side of the radiator, at the bottom. Loosening this will allow the radiator to drain. Make sure you remove the cap from the surge tank, otherwise, hardly anything will come out!
You can see the drain "knob" on the bottom right of the radiator. If you loosen it too much, the plug will come out, and you'll have two streams of coolant coming out - and a huge mess on your hands. Leave it at least a couple threads in the hole.
3) Remove the metal upper brackets that keep the radiator in place (they just act as guides), and set aside. Remove the air deflector from the top of the radiator, it just pulls off. Also remove the side insulators from the radiator. You'll also want to unbolt the hood latch and move it out of your way.
4) Pull the lower radiator hose off the drive side of the radiator (or engine, or both). This is pretty self explanitory, but can be a pain in the ass due to the small work area (getting the clamp off is the hardest part). If the hose is going bad, or looks worn, replace it. Make sure the drain pan is under the hose, as a decent amount of coolant will come out.
5) Remove the upper radiator hose from the passenger side of the radiator. Again, replace the hose if needed. More coolant should come out, but not a lot.
6) Now, this step is only for automatics, if you have a manual, skip ahead to step 7.
The tranmission cooler is integrated into the radiator, so yes, you have to remove the trans lines from the radiator. You can see them on the top and bottom of the radiator, drive side. Position your drain pan under the general area, and find a wrench that fits the nuts that hold the lines in the radiator (I believe it is a 19mm). Loosen the fittings, and give a nice gentle but firm tug to remove the lines from the trans (start with the bottom so you use gravity to your advantage), then once its drained, remove the top line - more fluid might come out.
7) The radiator is now pretty much drained of whatever fluids were in it. The only thing that is left is to unbolt it from the AC Condensor. There are two bolts that hole the condensor to the radiator, very easy to spot. Remove these, and make sure to support the condensor as it will fall, and being aluminum - will damage easily. Also try not to touch the fins, as they bend easily.
Here are the two bolts
8) Detach the fan shroud from the radator by pulling up on it. It "hooks" into the radiator, and just needs to come out of those grab points.
You can see one of them (top, driver side) in this picture.
9) The radiator is free, and now may be removed. Just pull it straight up. It has two rubber insulators that hold it into the frame, and they may stay on the radiator or stay in the frame - just keep track of them. There are two flat insulating pads that fit between the radiator and the AC condensor. Make sure to keep an eye on these too.
10) Now it's time for reassembly. Insert the new radiator into its home, making sure to have the rubber insulators in place so it sits snug in the frame.
11) Set the insulating pads onto the front plastic sides of radiator (the cutouts specify where they go). Then get the AC Condensor situated on the front of the radiator and bolt it to it. The bolts don't have to be super tight - don't strip the threads.
12) Reattach the fan shroud to the radiator by aligning all the clips into the radiator's "hooks" and push down. You can see if they're all in. Make sure of this and then move to the next step.
13) Reattach both of the radiator hoses, making sure the marks line up with the notches (if there are any, I know there are on the engine side), with new clamps if the old ones are bad or broken.
14) If you have a manual trans, skip to step 15.
Align the trans lines (if you have an auto)and screw the fittings into the radiator. Some radiators come with different thread sizes than the factory's so you may have to swap the fittings - there are small metal clips that need to be worked out of the fitting with a screwdriver or a pair of needlenose. Once you get the first one, it becomes easy. Just remove the clip, then pull the fitting off and put the new one on, and put the clip back on.
15) Reattach the hood latch, then put the side insulating pads on, followed by the top brackets and the air deflector.
Hopefully you made less of a mess than I did at this point.
16) Make sure the drain plug is tight (again, don't overdo it, because you may never get it out again, or worse, you'll strip the threads) and that everything looks good. Fill the surge tank with coolant till the cold fill line. It'll probably take about a gallon or so. Make sure you have extra because you will need it as the car bleeds off air.
17) Start the car and check for leaks. If there are none, keep an eye on the vehicle and let it warm up to operating temp (170+ degrees F) and let it sit there for a while.
18) If there still are no leaks and everything looks good, go ahead and reassemble the front fascia and headlights.
19) This step only applies to autos - you will be about a quart or so (buy two, just in case) at this point, so you will need to fill your trans up. You can have a shop do it, or if you have a lift, do it yourself. There is an allen fill plug on the back side of the trans (firewall side) that you remove while it is running. Add fluid through the fill cap on top, until you can feel the fluid with your finger at the bottom of the hole. (I take no responsibility for this step, as this is just the basics).
20) Drive the car around, make sure temps stay proper and in a good range. Park the car and wait for it to cool down completely. Top off the coolant to the cold fill line again. You may have to do this down the road too, don't be alarmed.

Thread Starter
Senior Member
iTrader: (2)
Joined: 07-10-08
Posts: 1,708
Likes: 3
From: Washington Township, MI
Do NOT follow these steps unless you'd like to end up with this issue - or dead.
Step 1) Jack vehicle up incorrectly using front crossmember.
Step 2) Have jackstand placed under radiator while waiting to go under the subframe
Step 3) Have jack slip out from under crossmember, letting car fall down from semi-jacked-up stance
Step 4) Vehicle will come to rest on jack stand, via radiator
Step 5) Radiator begins dripping coolant as you frantically begin to jack the vehicle up again trying to get it off of the stand
Yep. That's what happened. And I was doing my brakes, haha.


Just want to update this real fast, did this on a 2008 LT sedan tonight, absolutely no reason whatsoever to remove the front bumper, everything is completely accessible from either under the car, or with the headlights removed. It can be a bitch trying to get the new one up into place and re-installing the lower mounts again, it helps immensely to have two sets of hands. There was no issue with height though with a regular floor jack. Went with TYC 2608 from rockauto for about 90 bucks, which was a fantastic choice. Very high quality radiator, and came with all the conversion fittings for converting the trans-cooler lines over to threaded barbs. Piece of cake to reinstall.


Thread Starter
Senior Member
iTrader: (2)
Joined: 07-10-08
Posts: 1,708
Likes: 3
From: Washington Township, MI

Thread
Thread Starter
Forum
Replies
Last Post
DANRICKARD
Problems/Service/Maintenance
8
Oct 1, 2015 12:08 AM