
Interior: How To Shorten Your B&M Shifter

Thread Starter
Senior Member
Joined: 07-08-05
Posts: 6,200
Likes: 0
From: Niceville, FL
How To Shorten Your B&M Shifter **Updated w/ Pics**
Tools Needed:
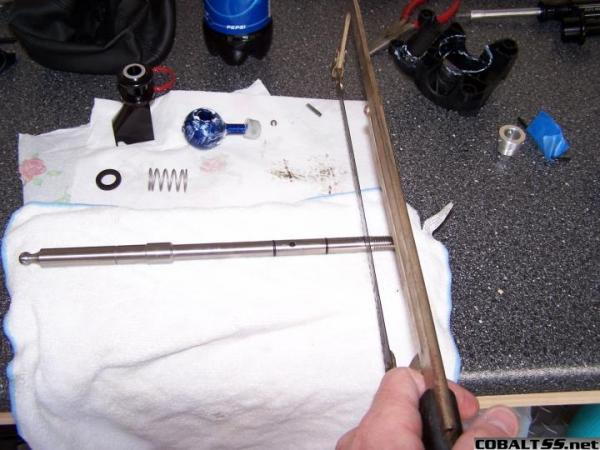
1. Hacksaw
2. Metal Punch or siutable substitute
3. Hammer
4. Sander, grinder, or metal file
5. Die (for threading, don't remember which one)
6. Tape Measure
7. Sharpie Marker
Let�s Get Started
1. Remove the shifter from the assembly in reverse of how you installed it originally.
2. Remove the shift knob.
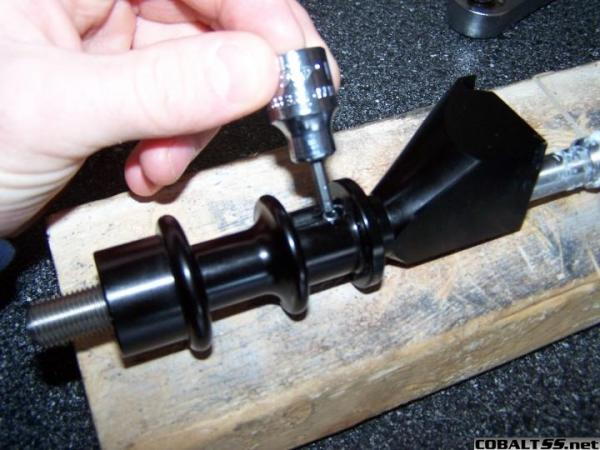
3. Use hammer and metal punch to remove the roll pin located in the black reverse-lockout part.
4. Take a measurement from the top of the shifter to the top of the reverse-lockout. You�ll need to maintain this distance when you cut the shifter later.
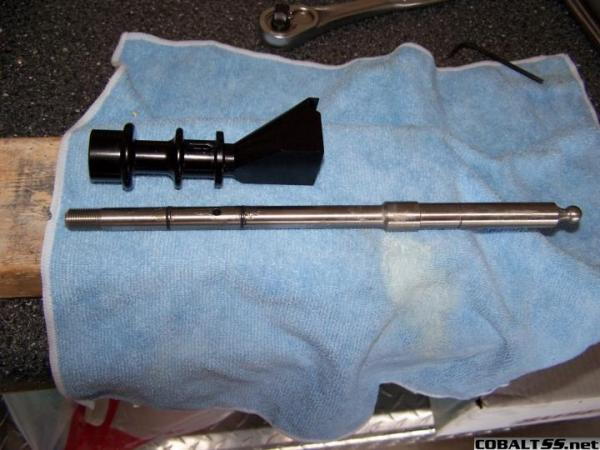
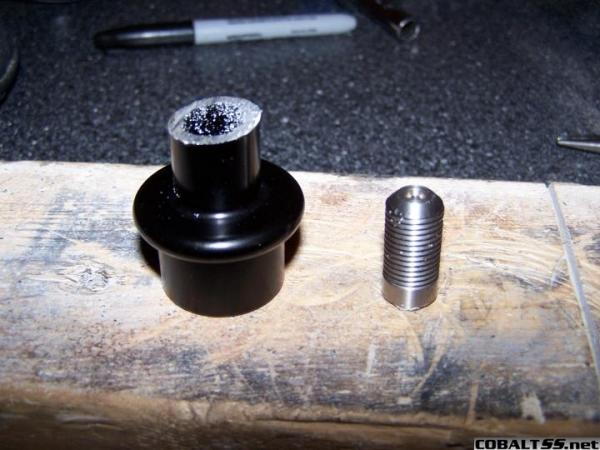
5. Remove the black reverse-lockout from the shifter.
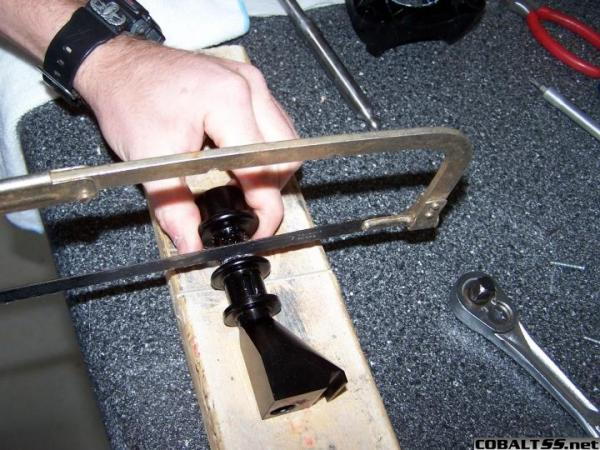
6. Cut the reverse lock out part just above the lower rib where your fingers go to pull up. The new pull up place will be located where the roll pin is.
7. Sand the cut edge smooth and almost flush with the old lower rib what has now become the new top rib.
8. Place the reverse lockout back on the shifter and ensure it's faced in the correction postion on the shifter. Use your measurement from earlier to make a cutting mark on the shifter itself to maintain the proper pull-up distance. **Ensure when measuring that the reverse-lockout doesn�t go further down than the roll pin would allow it.**If you are using the Sparco shift knob, compensate for the distance the adapter piece goes onto the shifter.**
9. You can either use the Die now to continue the threads down to where the new ones will need to be (easier), or cut first and then thread after. **Threads should be made for the same distance from the new cut mark as they were from the original top of the shifter. If threading first, leave the Die on when you make the cut, then remove it because it will clean the threads while it�s removed for easier screw on and off capability. If you plan on Using the Sparco knob, no threading is necessary.**
10. File or sand smooth the edges from the cut, and remove the Die if necessary.
11. Place reverse-lockout back onto shifter and reinstall the roll pin.
12. Reinstall the shifter back into its assembly.
13. The shift boot will reside below the new pull-up section.
14. Install the spring and shift knob of your choice. **It is not necessary, buy you can use a rubber washer to prevent the spring from vibrating on the reverse-lockout where you cut and sanded since there is no longer a cup there to hold it in place. If using the Sparco knob, you will have to center the adapter piece in order for the reverse lockout to slide up into the knob easily.**
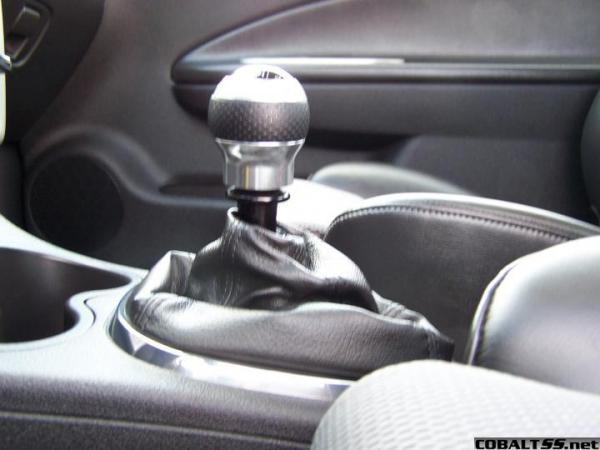
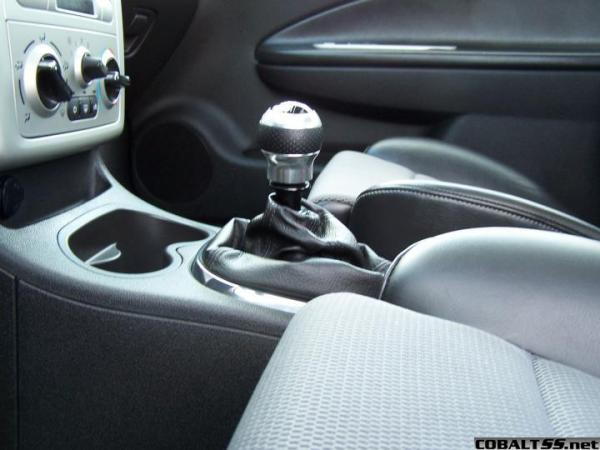
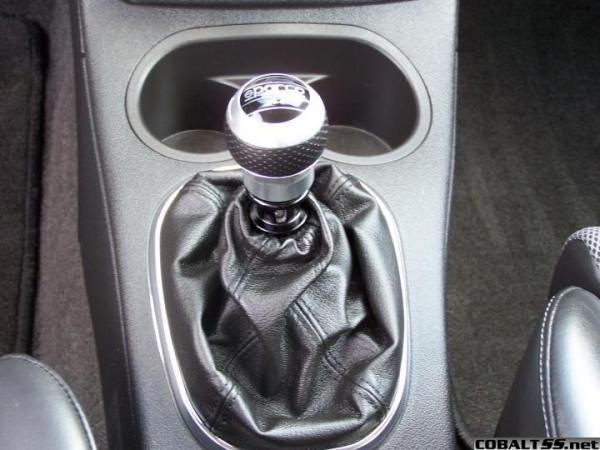
15. I used the Sparco Globe-X because it feels great, had some leather on it to grip, and it is designed for the reverse-lockout part. You can order it throught TurboTech Racing if you want one. You could also reuse the stock shifter since it is nicely weighted. To do so just drill and press a threaded bushing into it. I disliked the B&M knob because it was awkward and cheap feeling, but you can use that as well.
16. Enjoy ripping through your shorter shifts now!
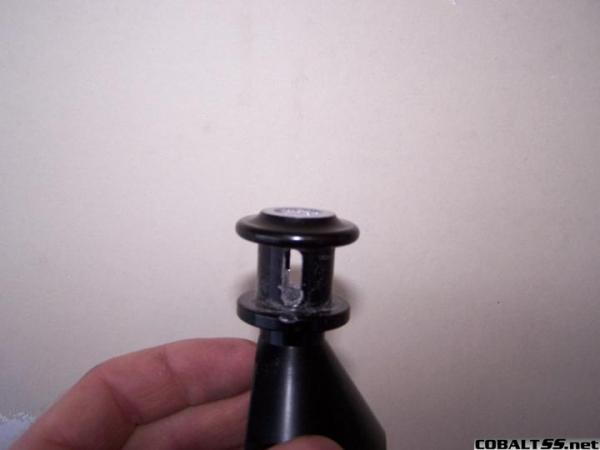
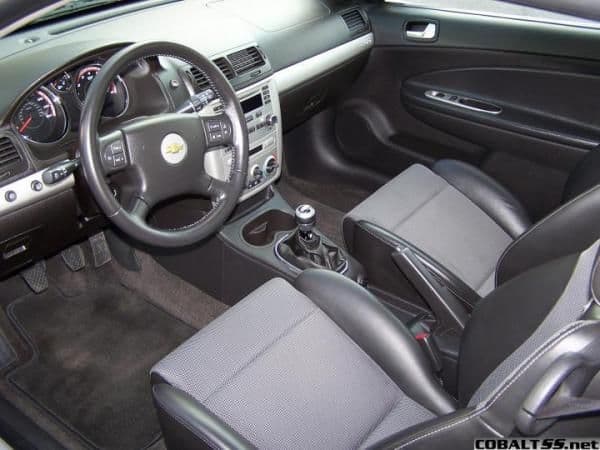
Here is a couple pics of the finished setup. I'll post more pics during the process when I do my friends within the next week or so.
1. Hacksaw
2. Metal Punch or siutable substitute
3. Hammer
4. Sander, grinder, or metal file
5. Die (for threading, don't remember which one)
6. Tape Measure
7. Sharpie Marker
Let�s Get Started
1. Remove the shifter from the assembly in reverse of how you installed it originally.
2. Remove the shift knob.
3. Use hammer and metal punch to remove the roll pin located in the black reverse-lockout part.
4. Take a measurement from the top of the shifter to the top of the reverse-lockout. You�ll need to maintain this distance when you cut the shifter later.
5. Remove the black reverse-lockout from the shifter.
6. Cut the reverse lock out part just above the lower rib where your fingers go to pull up. The new pull up place will be located where the roll pin is.
7. Sand the cut edge smooth and almost flush with the old lower rib what has now become the new top rib.
8. Place the reverse lockout back on the shifter and ensure it's faced in the correction postion on the shifter. Use your measurement from earlier to make a cutting mark on the shifter itself to maintain the proper pull-up distance. **Ensure when measuring that the reverse-lockout doesn�t go further down than the roll pin would allow it.**If you are using the Sparco shift knob, compensate for the distance the adapter piece goes onto the shifter.**
9. You can either use the Die now to continue the threads down to where the new ones will need to be (easier), or cut first and then thread after. **Threads should be made for the same distance from the new cut mark as they were from the original top of the shifter. If threading first, leave the Die on when you make the cut, then remove it because it will clean the threads while it�s removed for easier screw on and off capability. If you plan on Using the Sparco knob, no threading is necessary.**
10. File or sand smooth the edges from the cut, and remove the Die if necessary.
11. Place reverse-lockout back onto shifter and reinstall the roll pin.
12. Reinstall the shifter back into its assembly.
13. The shift boot will reside below the new pull-up section.
14. Install the spring and shift knob of your choice. **It is not necessary, buy you can use a rubber washer to prevent the spring from vibrating on the reverse-lockout where you cut and sanded since there is no longer a cup there to hold it in place. If using the Sparco knob, you will have to center the adapter piece in order for the reverse lockout to slide up into the knob easily.**
15. I used the Sparco Globe-X because it feels great, had some leather on it to grip, and it is designed for the reverse-lockout part. You can order it throught TurboTech Racing if you want one. You could also reuse the stock shifter since it is nicely weighted. To do so just drill and press a threaded bushing into it. I disliked the B&M knob because it was awkward and cheap feeling, but you can use that as well.
16. Enjoy ripping through your shorter shifts now!
Here is a couple pics of the finished setup. I'll post more pics during the process when I do my friends within the next week or so.
Last edited by TommyP; Oct 3, 2012 at 01:10 PM. Reason: Added more pictures during the process


Senior Member
Joined: 01-24-06
Posts: 765
Likes: 0
From: Warranty Chevrolet, Maryland
If you want a real short shifter get the TWM. Its adjustable you can make it just as short by screwing the knob down. I got one and love it. Exellent write up though,very complete and pics ta-boot

Member
Joined: 04-23-06
Posts: 214
Likes: 0
From: toronto, canada
i got the exact same setup as 2k5 he helped me through most of the steps and i love it... the throws are so short the only thing is the knob... in the winter its freezing but in the summer is boiling lol all and all i love it
Thread Starter
Senior Member
Joined: 07-08-05
Posts: 6,200
Likes: 0
From: Niceville, FL
Yes, I made a short shifter even shorter. I have had many requests for info on it, so I made a how-to finally. I'll be doing another tomorrow, so I'll post pics during the process. I just installed new linkage today since mine broke due to the Clutcmasters Fiasco. The shortened B&M works great with the new linkage. If you don't kill the gears you shouldn't have a problem. The shifter slides in just as easy as the factory one did, but you won't miss third with this setup!
Thread Starter
Senior Member
Joined: 07-08-05
Posts: 6,200
Likes: 0
From: Niceville, FL
Now my cousin in NH is begging me to do his when I go back to visit the family. Bump for Pictures Update!
Last edited by 2K5SS/SC?; Jan 22, 2007 at 03:11 PM. Reason: Automerged Doublepost


Member
Joined: 06-13-07
Posts: 348
Likes: 0
From: Memphis, TN or Enterprise,AL
Wow, I actually manned up and did this with one of my buddies. It was a success and I def recommend this topeople who want that really short throw. It feels great!!
Somebody stated that this is a "short short throw shifter" because we are shortening the B&M. Well, technically it is a short-short-short throw shifter because our stock shifter is considered a short throw
Somebody stated that this is a "short short throw shifter" because we are shortening the B&M. Well, technically it is a short-short-short throw shifter because our stock shifter is considered a short throw

ok first off this 2K5SS dude.....hes a awesome fucken person, i PM'd him out of the blue oneday and asked him if he would do this for me since i was too fucken lazy to try it myself and didnt really have the tools and he PM'd me back THE SAME DAY and said no problem without any hesitation at all. then i ordered brand new stuff and had it shipped to his door he could have easily taken my stuff and never talked to me again but not only did he not do that he PM'd me everytime with any type of news he had even just to say he hadnt gotten anything yet but was still watching his mail and he did A+ work on my shifter and it feels GREAT i had the hurst one before this one and just the day before i got it in the mail my hurst decide to take a **** in the middle of driving. i guess the cheap ass ring they use to retain the shifter in place decide to come off and the entire shifter just started spinning and made it increasingly hard to find gears but the B&M doesnt work like that it has two hex screws that hold the shifter together and its nice and tight and doesnt seem like its ever going any where for anyone looking for a shifter i really 100% recomend the B&M over the hurst which is funny because they are the same company so i really dont get that one but yea....
overall this shifter being shorter is awesome and i love it and Bill is a AWESOME person and im glad theres people like him still around.
overall this shifter being shorter is awesome and i love it and Bill is a AWESOME person and im glad theres people like him still around.

Thread
Thread Starter
Forum
Replies
Last Post
Cptnslo
Complete Cars
9
Sep 24, 2015 09:32 AM
The Rookie24
Drivetrain
3
Sep 20, 2015 04:33 PM