
2.0 LNF Suspension: R1 Concepts rear brakes install


Thread Starter
Senior Member
Joined: 05-28-06
Posts: 819
Likes: 0
From: Kings Bay, GA
R1 Concepts rear brakes install
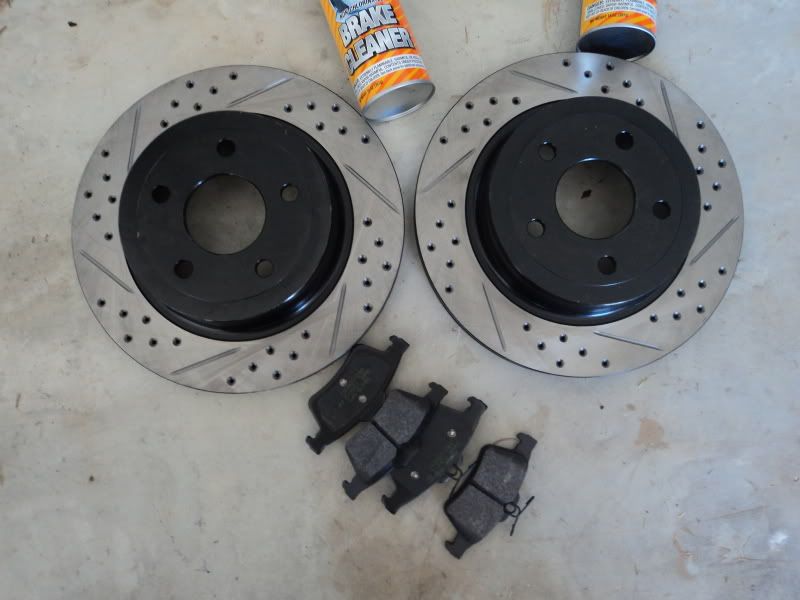
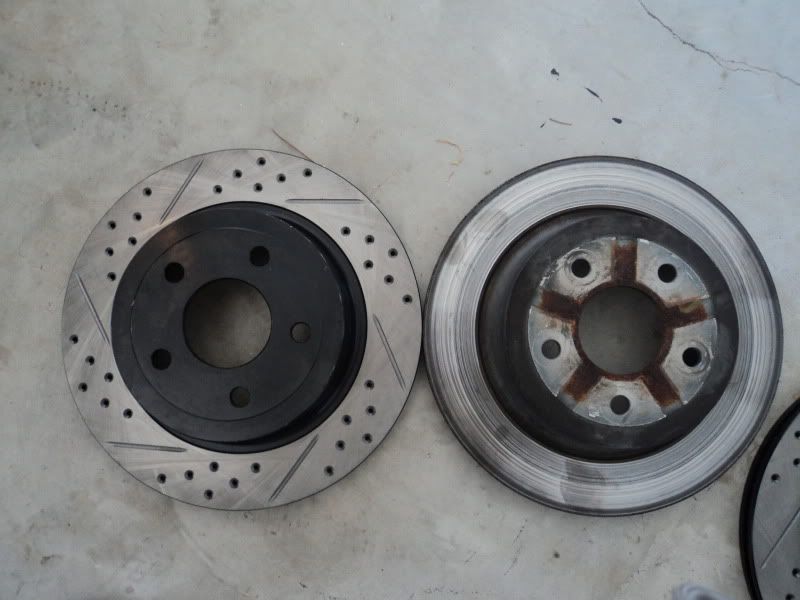
Well this is my first attempt at a "how to" thread so here goes. First get your new pads and rotors layed out and grab a 4-way and jack. break loose the lugs while the car is still on the ground. then lift it just enough to get the tire off the ground. Place a jack stand if you want. I didn't because i wasn't getting under the car, BUT in all honesty you should.

I chose to remove the retaining clip at this point.
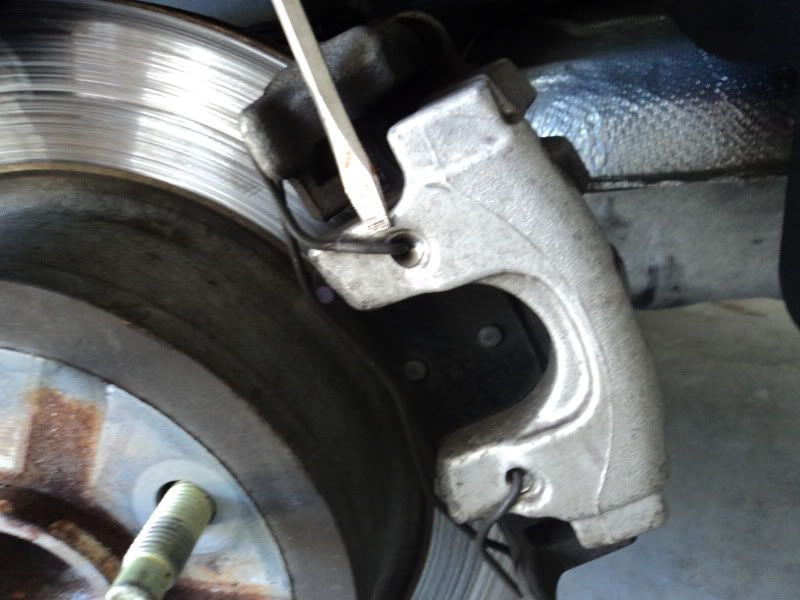
Next use a TORX 40 to remove the caliper. there are two bolts.
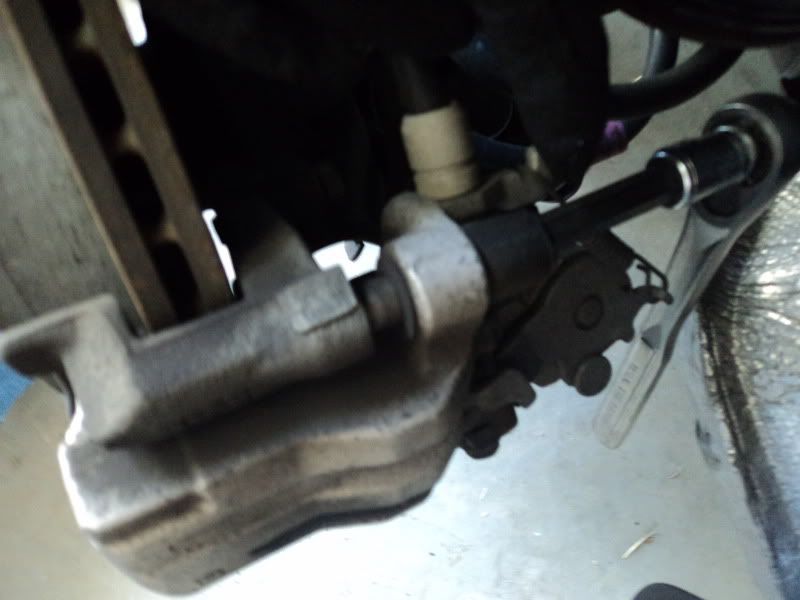
Now grab a 15mm wrench and A-LOT of muscle and remove the caliper bracket. there are two bolts.

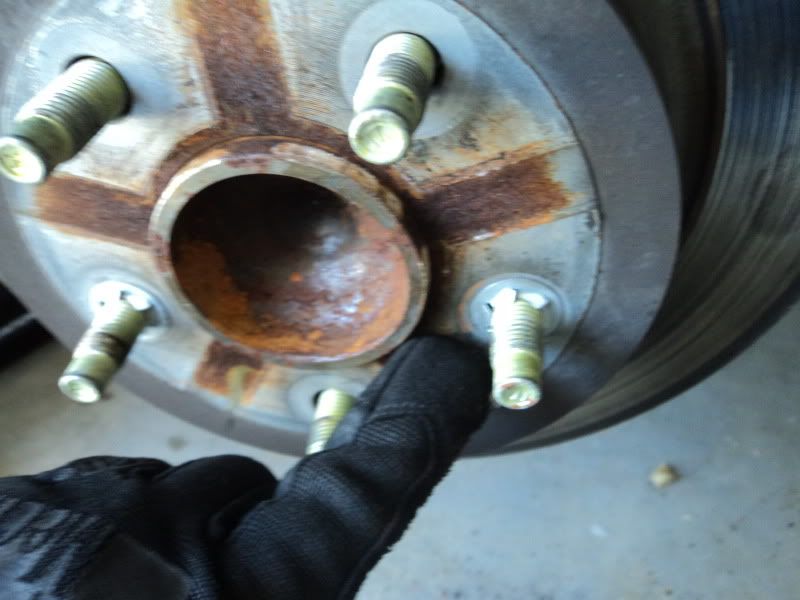
Now remove the little washer things. retain them if you want. some throw them away. I chose to keep mine for reinstall.
Looking good....
take the time to clean all you want. then grab the special tool from autozone, OR use a set of needle nose pliers and inset them into the two little slots on the pistion. turn counter clockwise and push like a mother to force the pistion back in. Its a chore but just keep at it and it will be flush in no time.
Install the new rotor and the little washers if you kept them
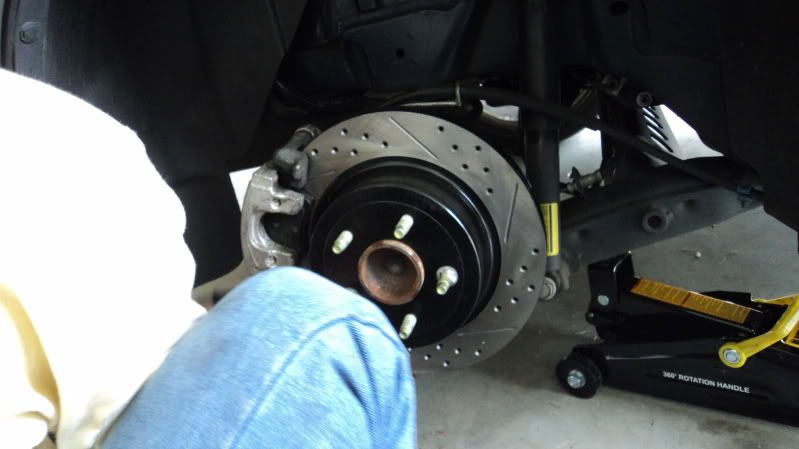
next the caliper bracket and then slide in the new pads and reinstall the caliper. Don't forget the big spring clip on the outside.
IMPORTANT NOTE!!!! Make sure to pump the E-brake handle until it will work again BEFORE you go for a drive.
Lastly enjoy your new brakes. Stay tuned for the fronts....
I chose to remove the retaining clip at this point.
Next use a TORX 40 to remove the caliper. there are two bolts.
Now grab a 15mm wrench and A-LOT of muscle and remove the caliper bracket. there are two bolts.
Now remove the little washer things. retain them if you want. some throw them away. I chose to keep mine for reinstall.
Looking good....
take the time to clean all you want. then grab the special tool from autozone, OR use a set of needle nose pliers and inset them into the two little slots on the pistion. turn counter clockwise and push like a mother to force the pistion back in. Its a chore but just keep at it and it will be flush in no time.
Install the new rotor and the little washers if you kept them
next the caliper bracket and then slide in the new pads and reinstall the caliper. Don't forget the big spring clip on the outside.
IMPORTANT NOTE!!!! Make sure to pump the E-brake handle until it will work again BEFORE you go for a drive.
Lastly enjoy your new brakes. Stay tuned for the fronts....

Senior Member
Joined: 08-06-08
Posts: 3,405
Likes: 7
From: Federal Way
nice...two things tho...
1. i changed mines last week and my caliper slides were bone dry so I i greased them up
2. on both sides the the caliper came right out without loosening the torx bolt =S..
1. i changed mines last week and my caliper slides were bone dry so I i greased them up
2. on both sides the the caliper came right out without loosening the torx bolt =S..


Senior Member
Joined: 08-06-08
Posts: 3,405
Likes: 7
From: Federal Way
after i unbolted the caliper...the bracket slid all the way out from the caliper....i greased it then slid it back in....i didnt need no torx or nothing...it was wierd and i was suspect but the drivers side came of the same way
Last edited by alerosaint; Mar 10, 2011 at 01:13 PM.


Good write up. I am about to install these too, You got the premiums, I just got the eline series because my rotors were so bad they couldn't get shaved....
How much install time from start to finish did it take including prep? The reason I ask is because I'm pulling my wheels off tomorrow for powdercoat and I hope I have all my shipping timed so when the wheels are done, the rotors and pads arrive just in time to repaint the calipers, install the rotors and pads, then put new powdered rims back on =)
How much install time from start to finish did it take including prep? The reason I ask is because I'm pulling my wheels off tomorrow for powdercoat and I hope I have all my shipping timed so when the wheels are done, the rotors and pads arrive just in time to repaint the calipers, install the rotors and pads, then put new powdered rims back on =)


when i attempted this my rear brake piston wouldn't even budge at all. it bent my C clamp
no way for me to slide my new pads in.
any help would be great
and no i didnt leave the parking break on. reservoir r cap is open aswell
no way for me to slide my new pads in.
any help would be great
and no i didnt leave the parking break on. reservoir r cap is open aswell
Thread Starter
Senior Member
Joined: 05-28-06
Posts: 819
Likes: 0
From: Kings Bay, GA
Good write up. I am about to install these too, You got the premiums, I just got the eline series because my rotors were so bad they couldn't get shaved....
How much install time from start to finish did it take including prep? The reason I ask is because I'm pulling my wheels off tomorrow for powdercoat and I hope I have all my shipping timed so when the wheels are done, the rotors and pads arrive just in time to repaint the calipers, install the rotors and pads, then put new powdered rims back on =)
How much install time from start to finish did it take including prep? The reason I ask is because I'm pulling my wheels off tomorrow for powdercoat and I hope I have all my shipping timed so when the wheels are done, the rotors and pads arrive just in time to repaint the calipers, install the rotors and pads, then put new powdered rims back on =)


Senior Member
Joined: 06-21-05
Posts: 5,060
Likes: 0
From: London, Ontario
One thing to look out for on the rears after re-assembling the caliper is the retainer clip (assuming you take the assembly apart to do pads at the same time). They don't particularly like being re-used once they're removed more than once and you might start to notice a noise from the rear of your car that's hard to describe.
Basically, to avoid this, I'd recommend once everything is back in place/tightened up, but while the wheel is still off, see if you can rock the caliper up/down at all. If the clip is still holding strong, there should be 0 play in it. If it's failing, you'll be able to move the caliper and you'll hear the pad clicking when you do this.
Figured it was good to point out here since it happened to me about 2 weeks after I put the rotors on .
.
Basically, to avoid this, I'd recommend once everything is back in place/tightened up, but while the wheel is still off, see if you can rock the caliper up/down at all. If the clip is still holding strong, there should be 0 play in it. If it's failing, you'll be able to move the caliper and you'll hear the pad clicking when you do this.
Figured it was good to point out here since it happened to me about 2 weeks after I put the rotors on
.


It is not a torx 40, it is an allen key
The compress tool is this and worth the purchase price:
KD Tools Disc Brake Piston Tool KDT3163: Buy the right Brake Tools at Advance Auto Parts

Pull the guide pins out regardless if you need to or not because they need grease.
Those flat washes have something to do with the TPMS, keep them. Ive left them off and have the TPMS light come on.
Good write up, but needed this stuff added to it since some of it was wrong.
Oh, also, do not remove your lug nuts with the wheel on the ground. Crack them lose (1/4 turn) and then jack up the car.
The compress tool is this and worth the purchase price:
KD Tools Disc Brake Piston Tool KDT3163: Buy the right Brake Tools at Advance Auto Parts
Pull the guide pins out regardless if you need to or not because they need grease.
Those flat washes have something to do with the TPMS, keep them. Ive left them off and have the TPMS light come on.
Good write up, but needed this stuff added to it since some of it was wrong.
Oh, also, do not remove your lug nuts with the wheel on the ground. Crack them lose (1/4 turn) and then jack up the car.

