
2.0 LNF Engine: Updated guide on how to install ZZP's Borg Warner Turbo (ZFR)


Updated guide on how to install ZZP's Borg Warner Turbo (ZFR)
This guide builds on my original installation steps of ZZP’s Borg Warner (ZFR) turbo. ZZP has made some changes to their turbo over the years and also I found a particular area of failure that’s worth mentioning which could lead to a short lifespan for the ZFR.
Here is the original install guide if you have not seen it. If a mod could correct the spelling of "installation" in the title, that would be nice lol. I can't seem to edit that.
https://www.cobaltss.net/forums/how-...allion-287559/
Here is another post regarding the turbo’s fitment and taking special caution I did not mention about the AC line that runs along the firewall.
https://www.cobaltss.net/forums/2-0l...2/#post6744534
Assuming you’re caught up now and ready to install the new turbo, I listed the changes and potential issues below:
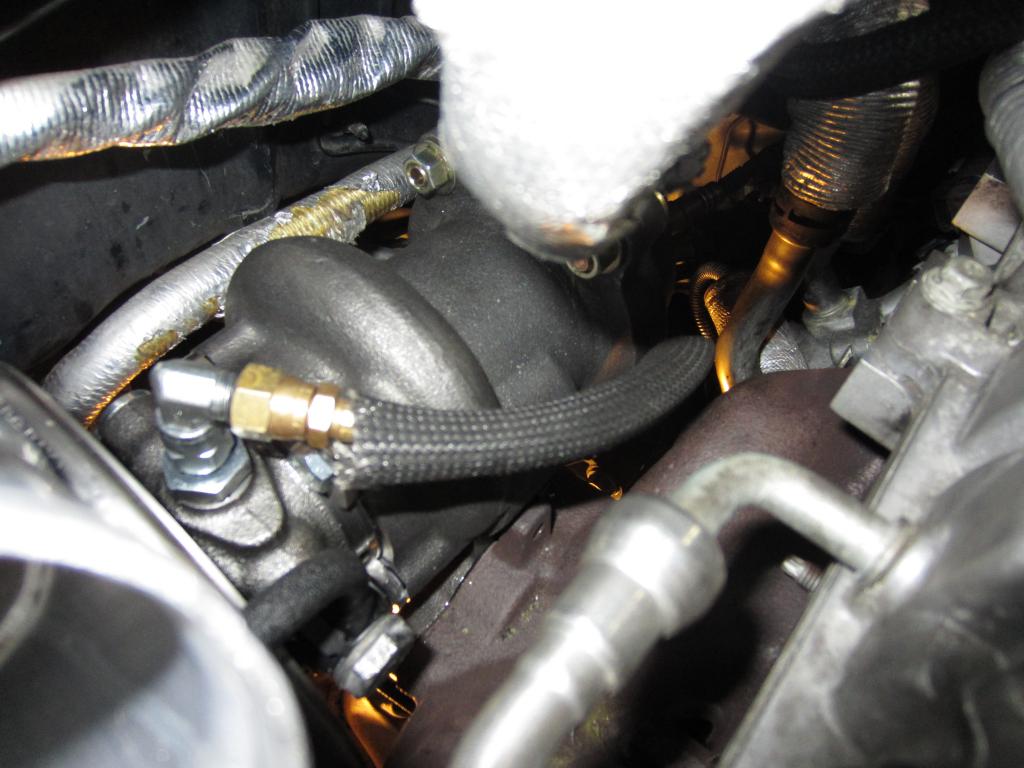
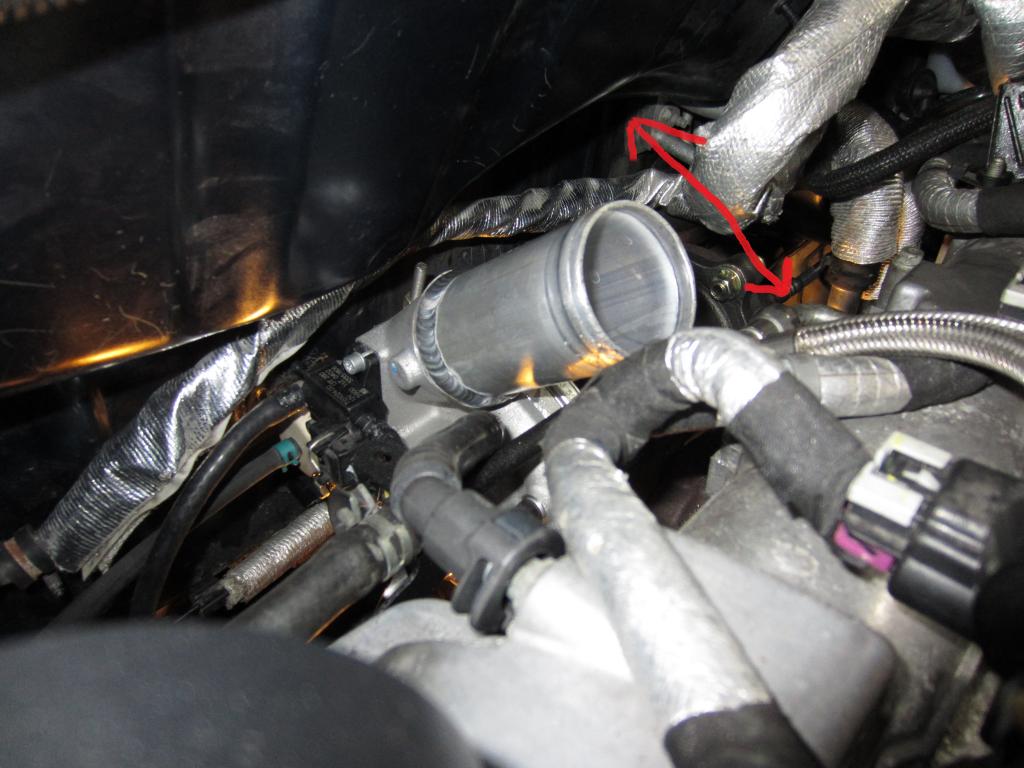
The most important issue I ran into is the oil feed line route. It runs from the top of the turbo to the bottom towards the oil pan. Sometime after 2 years of use, the line started touching the exhaust manifold. The heat burned through the sleeve covering steel braided line and then created a pin hole into the steel itself. It took me about 3 days to have time to locate the leak and 3 weeks to get a new oil line from ZZP (customer service issues I guess, was hard to get ahold of them). I did drive the car about a week with the oil leak, but I assume that was enough to starve the bearings and cause them to become noisy which is why I bought another turbo. You can see the way I routed the new turbo’s oil feed line. It’s important to get the line in between the exhaust manifold and turbo housing without touching/rubbing either of them. You only have about an inch of room. It may be worthwhile checking the line with a flashlight every 6 months to make sure the line has not shifted causing it to rest on either of the hot surfaces.
The length of the compressor side snout has changed significantly. ZZP welded on a longer snout to support direct fitment of the stock air charge piping as well as any non-ZZP aftermarket charge pipes. While this is smart, it adds additional fitment issues during installation.
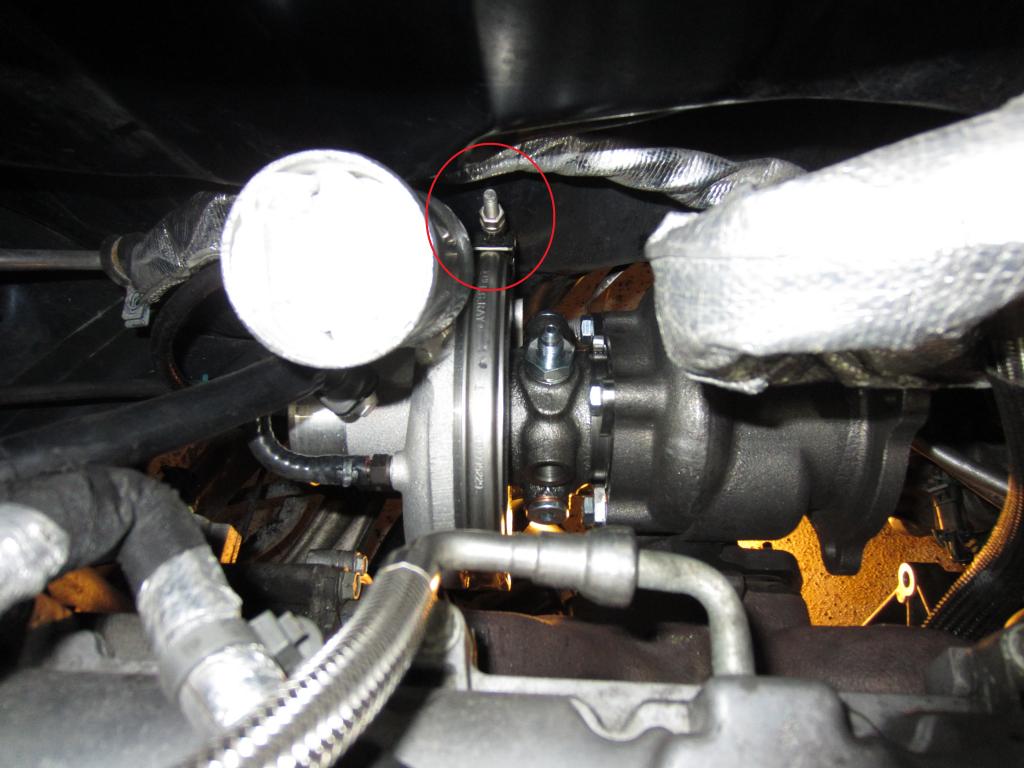
For me, I was unable to actually get the turbo mounted onto the exhaust manifold studs even with the engine mounts being loose. The tip of the compressor outlet kept hitting the valve cover. I had to loosen the nut on the compressor clamp shown here in the picture below. Just loosen the nut enough so that the compressor slides up and down. Do not remove the clamp completely.
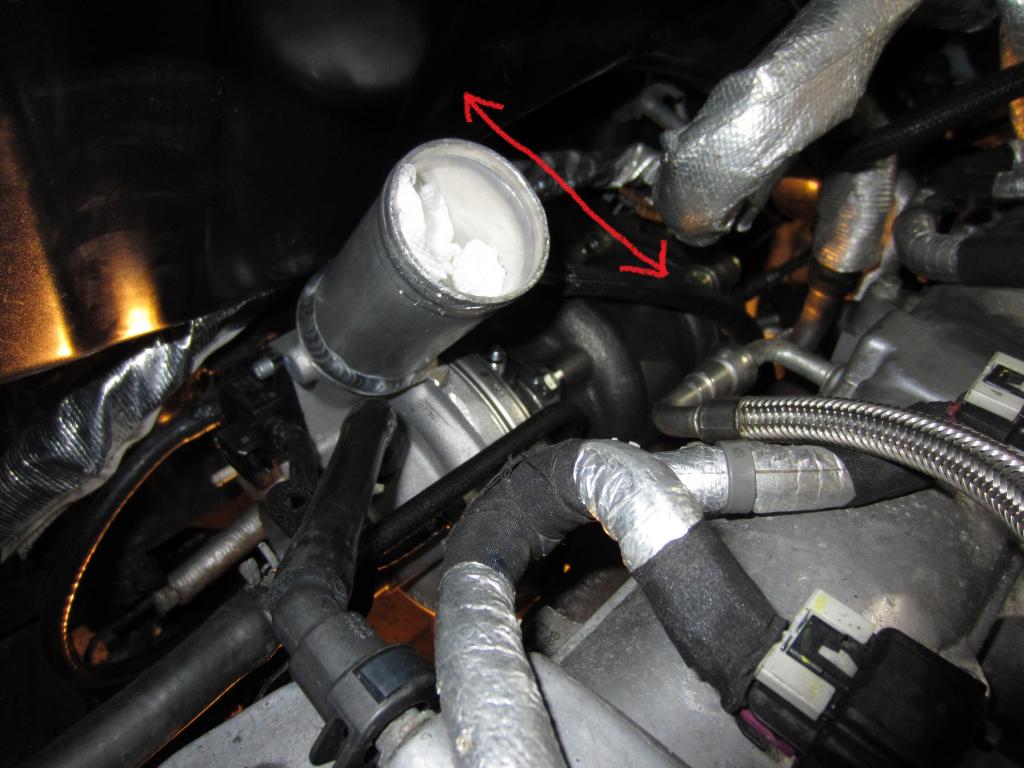
Afterward, you’ll be able to slide the compressor outlet snout to allow for mounting onto the exhaust manifold. Leave it loose until you are at the point of installing your charge pipe. This will allow you get an in-line fit for your coupler that connects the charge pipe.
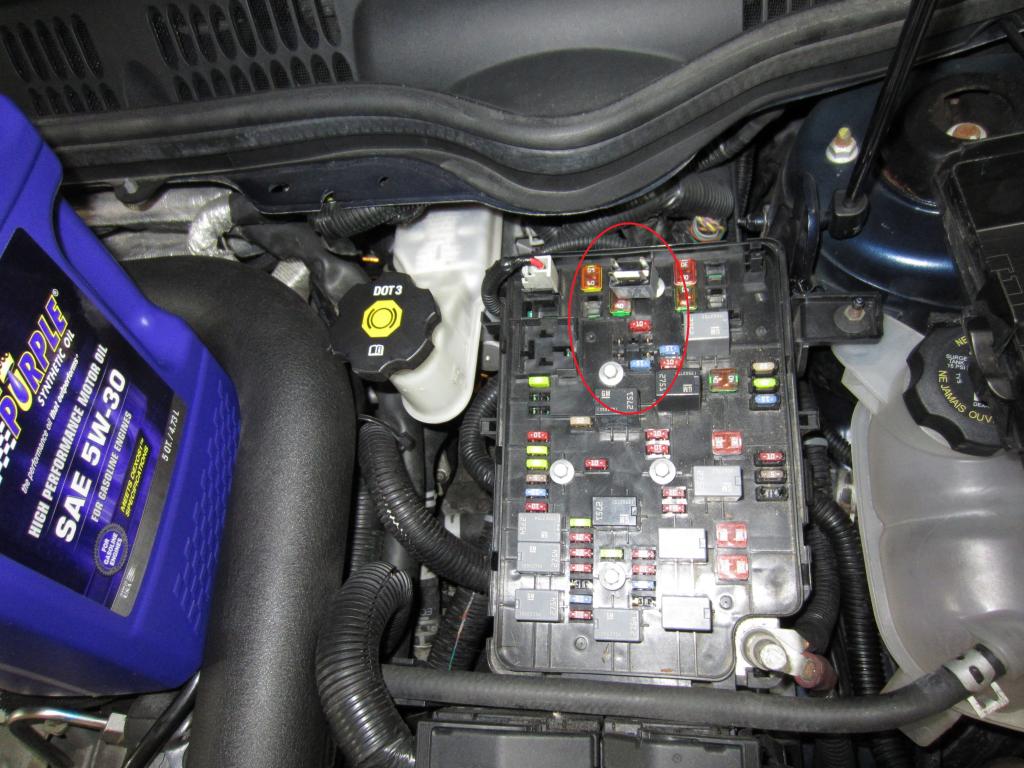
Lastly, what I did not specifically cover in the original guide, but did mention was priming the turbo. Pull the fuel pump fuse located below. You can do this before you start the work and allow the engine to die out or if you forget you can do this after you finish installation. This will allow you to crank the engine over without actually starting the car. The oil pump still works during the engine cranking process and supplies fresh oil to the turbo which lubricates the bearings before actually idling the car and checking for leaks, etc.
Here is the original install guide if you have not seen it. If a mod could correct the spelling of "installation" in the title, that would be nice lol. I can't seem to edit that.
https://www.cobaltss.net/forums/how-...allion-287559/
Here is another post regarding the turbo’s fitment and taking special caution I did not mention about the AC line that runs along the firewall.
https://www.cobaltss.net/forums/2-0l...2/#post6744534
Assuming you’re caught up now and ready to install the new turbo, I listed the changes and potential issues below:
The most important issue I ran into is the oil feed line route. It runs from the top of the turbo to the bottom towards the oil pan. Sometime after 2 years of use, the line started touching the exhaust manifold. The heat burned through the sleeve covering steel braided line and then created a pin hole into the steel itself. It took me about 3 days to have time to locate the leak and 3 weeks to get a new oil line from ZZP (customer service issues I guess, was hard to get ahold of them). I did drive the car about a week with the oil leak, but I assume that was enough to starve the bearings and cause them to become noisy which is why I bought another turbo. You can see the way I routed the new turbo’s oil feed line. It’s important to get the line in between the exhaust manifold and turbo housing without touching/rubbing either of them. You only have about an inch of room. It may be worthwhile checking the line with a flashlight every 6 months to make sure the line has not shifted causing it to rest on either of the hot surfaces.

The length of the compressor side snout has changed significantly. ZZP welded on a longer snout to support direct fitment of the stock air charge piping as well as any non-ZZP aftermarket charge pipes. While this is smart, it adds additional fitment issues during installation.

For me, I was unable to actually get the turbo mounted onto the exhaust manifold studs even with the engine mounts being loose. The tip of the compressor outlet kept hitting the valve cover. I had to loosen the nut on the compressor clamp shown here in the picture below. Just loosen the nut enough so that the compressor slides up and down. Do not remove the clamp completely.

Afterward, you’ll be able to slide the compressor outlet snout to allow for mounting onto the exhaust manifold. Leave it loose until you are at the point of installing your charge pipe. This will allow you get an in-line fit for your coupler that connects the charge pipe.


Lastly, what I did not specifically cover in the original guide, but did mention was priming the turbo. Pull the fuel pump fuse located below. You can do this before you start the work and allow the engine to die out or if you forget you can do this after you finish installation. This will allow you to crank the engine over without actually starting the car. The oil pump still works during the engine cranking process and supplies fresh oil to the turbo which lubricates the bearings before actually idling the car and checking for leaks, etc.

Last edited by Macgyver2484; Oct 25, 2014 at 01:56 AM.

I checked mine, the thermal cloth is just bearly not touching the turbo and not at all the manifold. u can tell that it is weakening where it is closest to the turbo though. the line itself has lots of room before it would touch. this is good to know, now I will buy some thermal shielding and replace the stuff on the line every once in a while. or just buy a new line every couple years.

Thread
Thread Starter
Forum
Replies
Last Post