My latest project (no more ghetto gauges)
 10-19-2012, 11:48 PM
#1

My latest project (no more ghetto gauges)
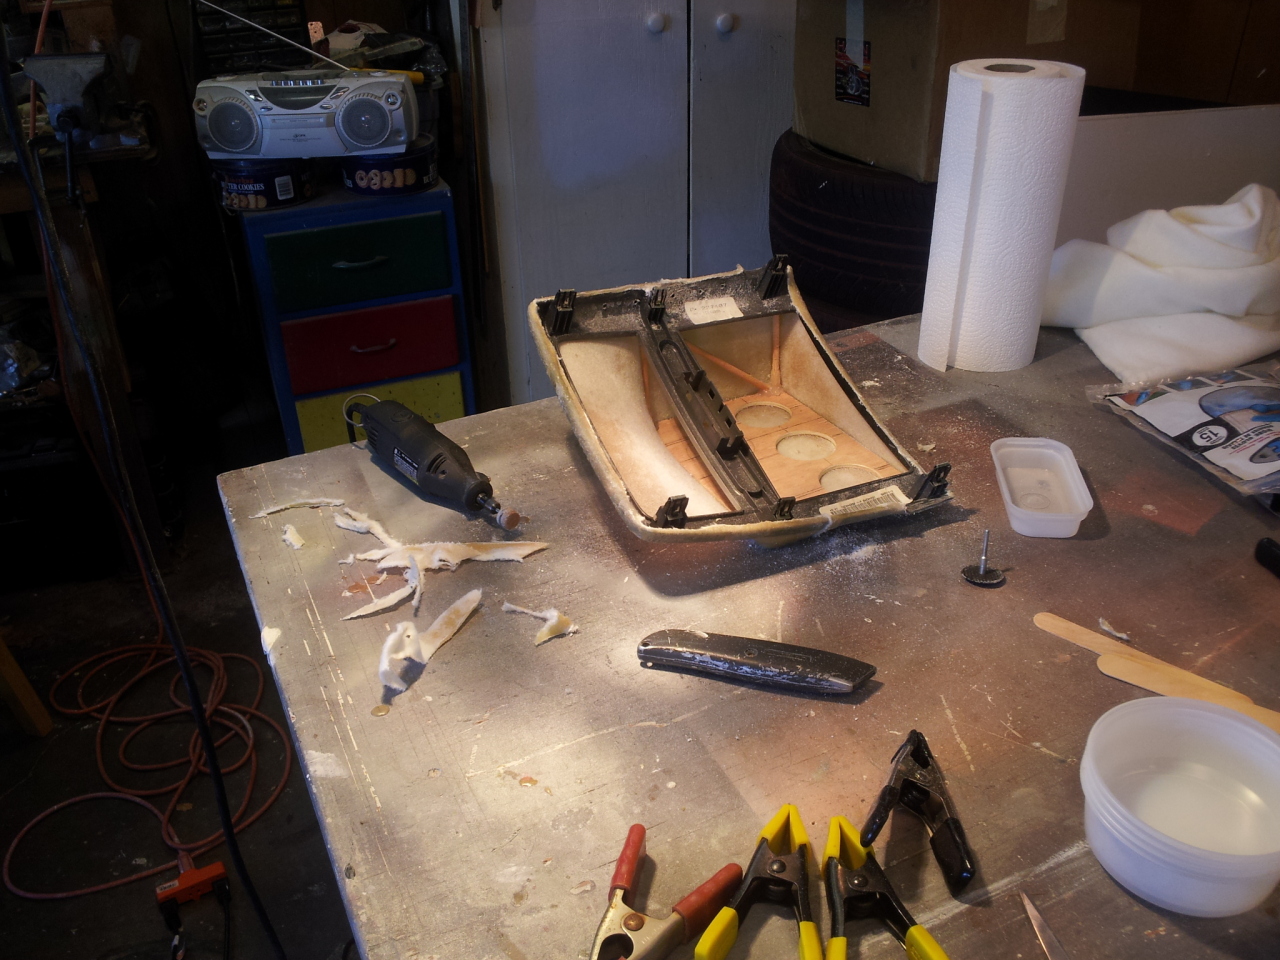
so two of my gauges have been "ghetto rigged" for a while and never really had a proper home. so with the season over i decided to embark on a new project and give them a home.
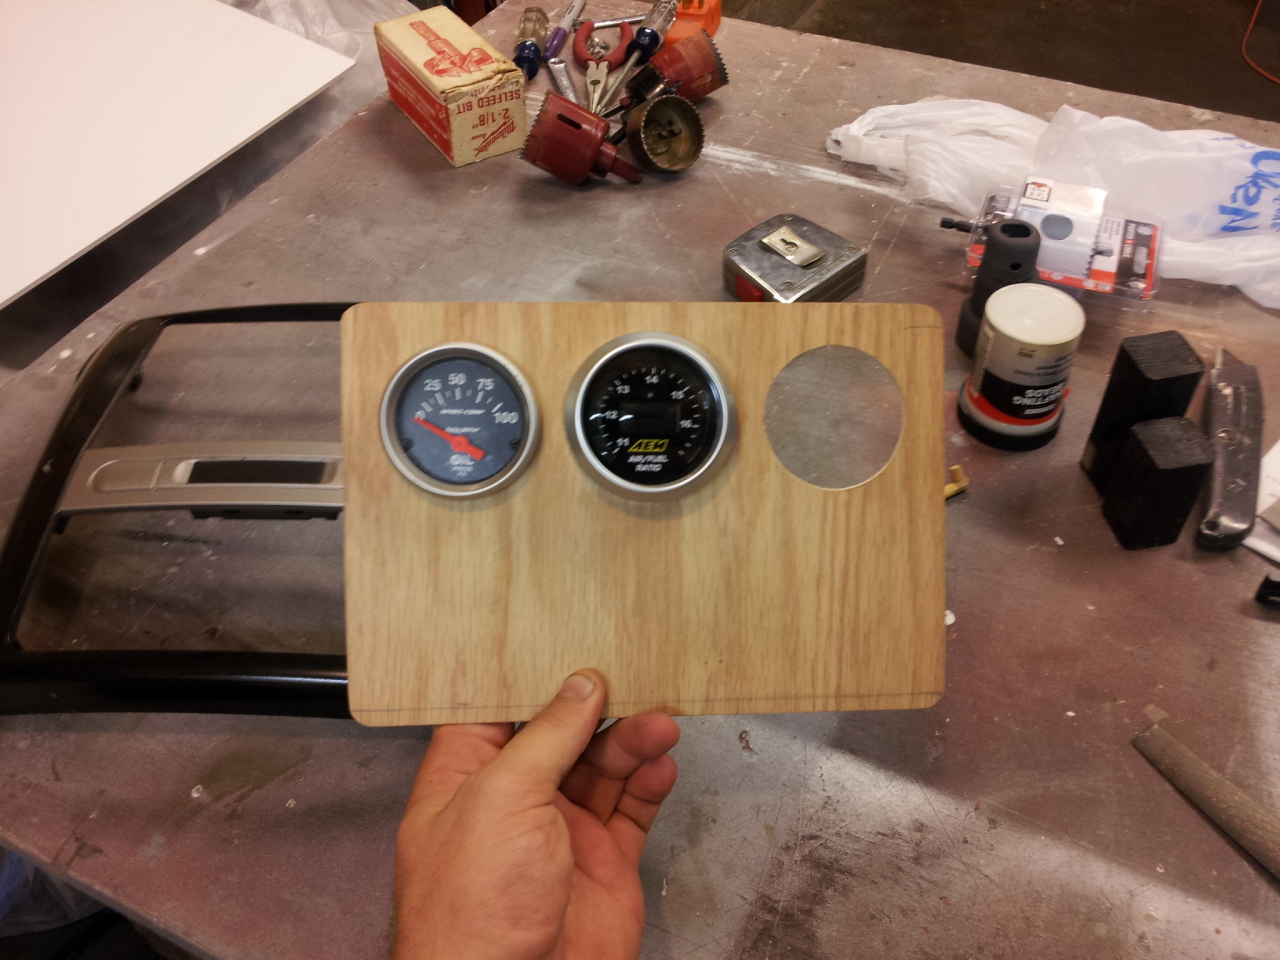
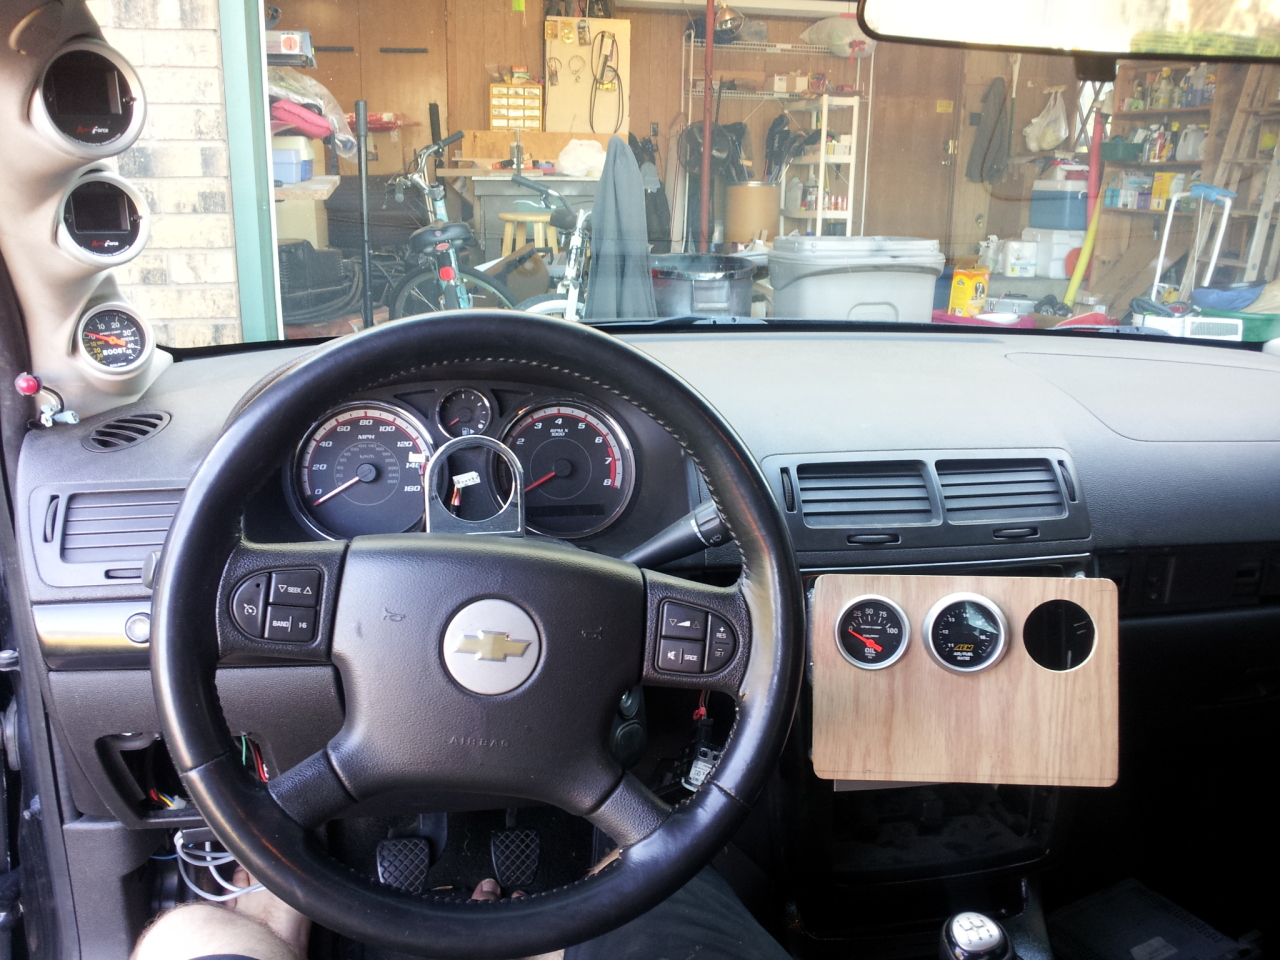
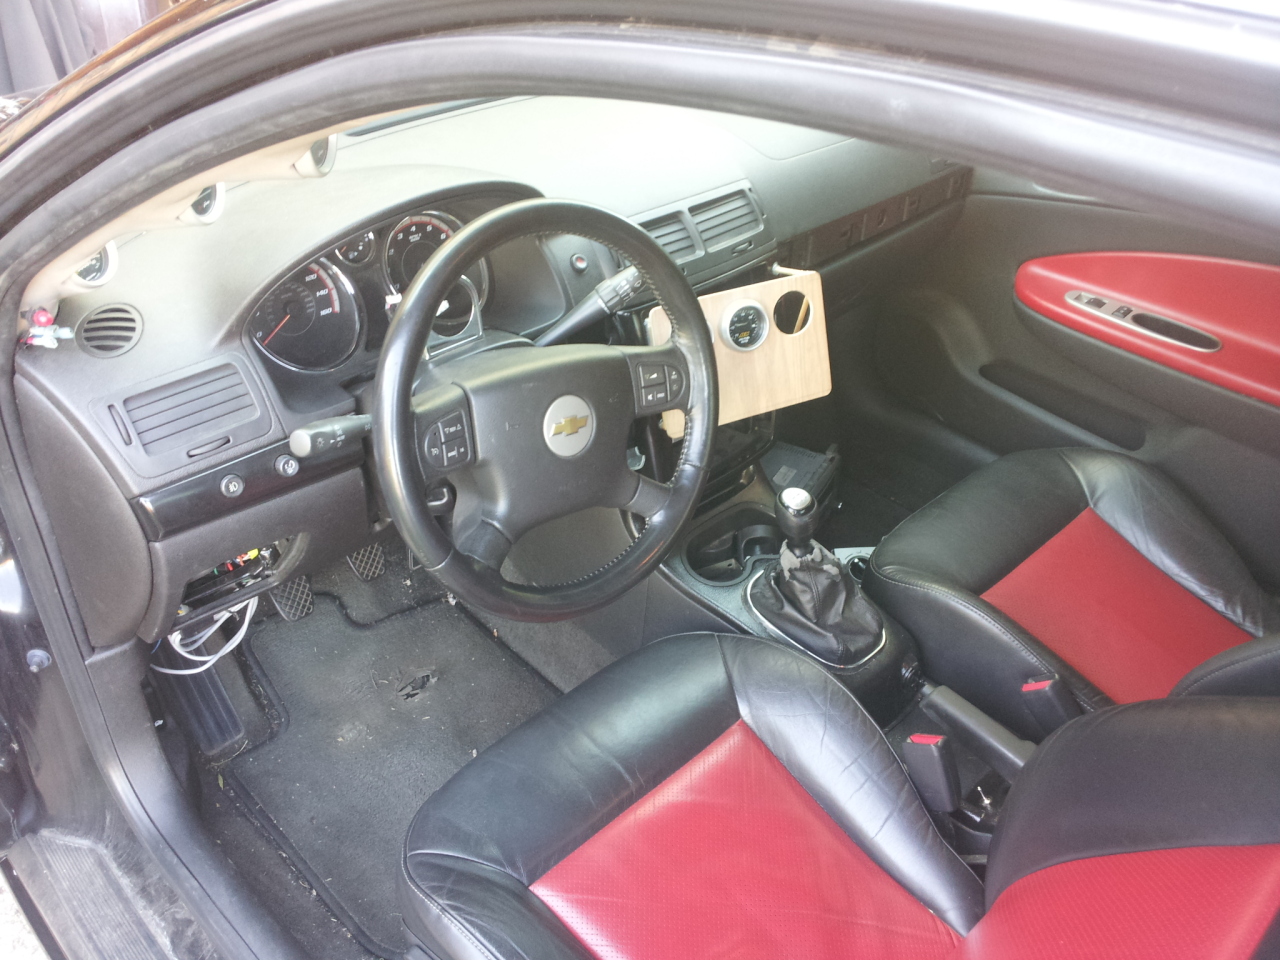
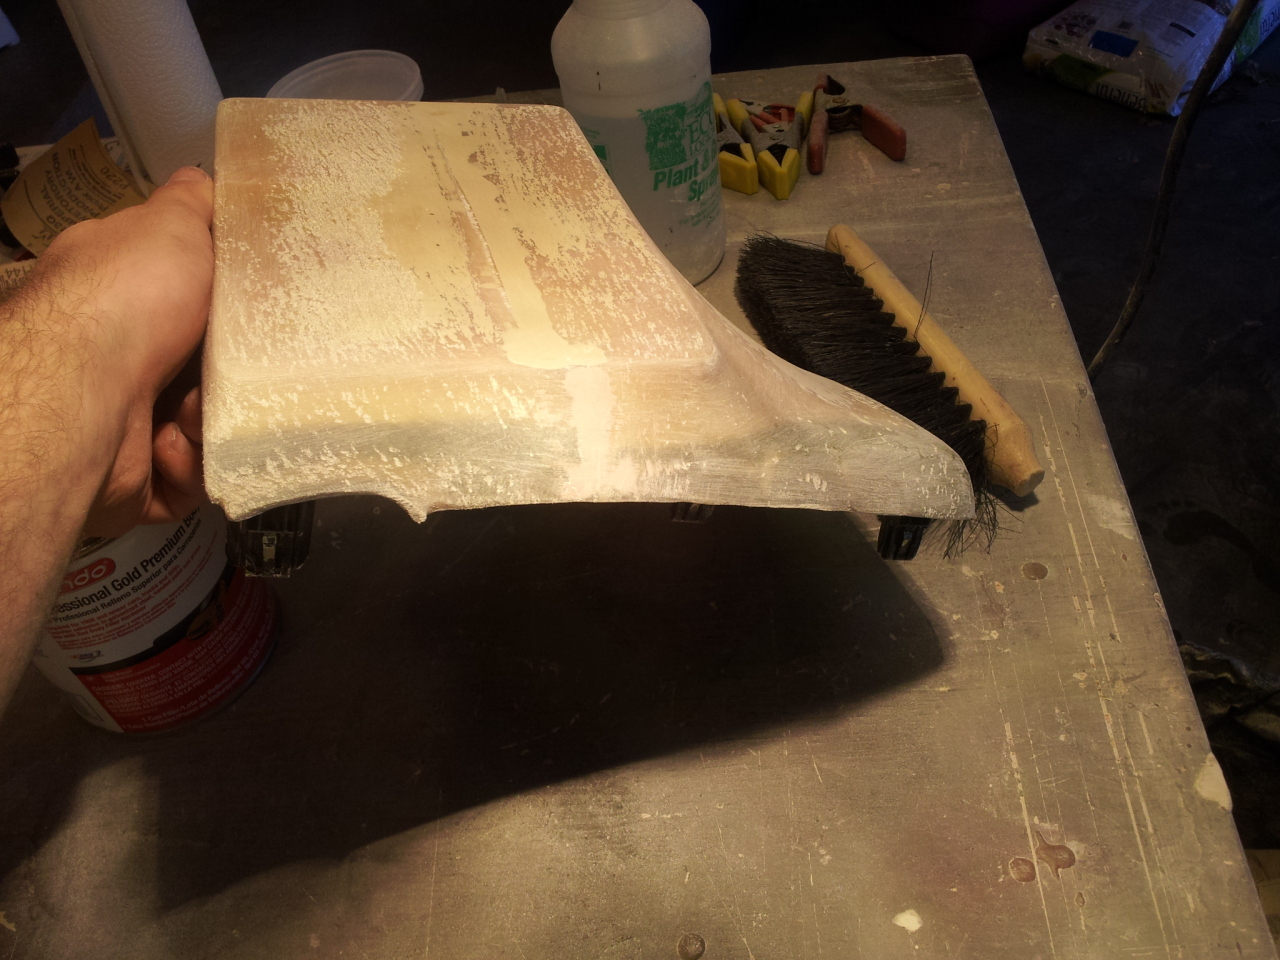
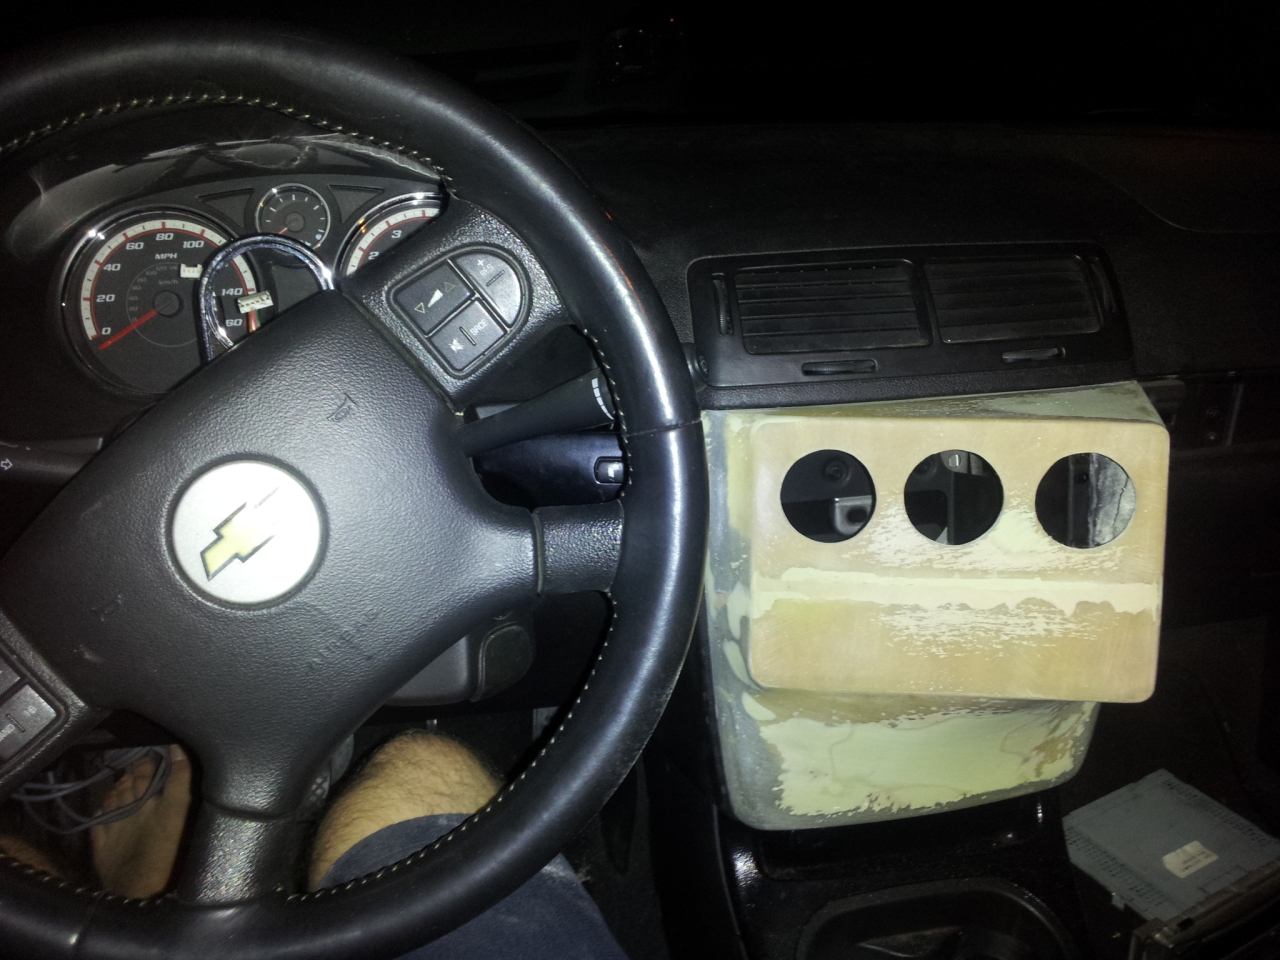
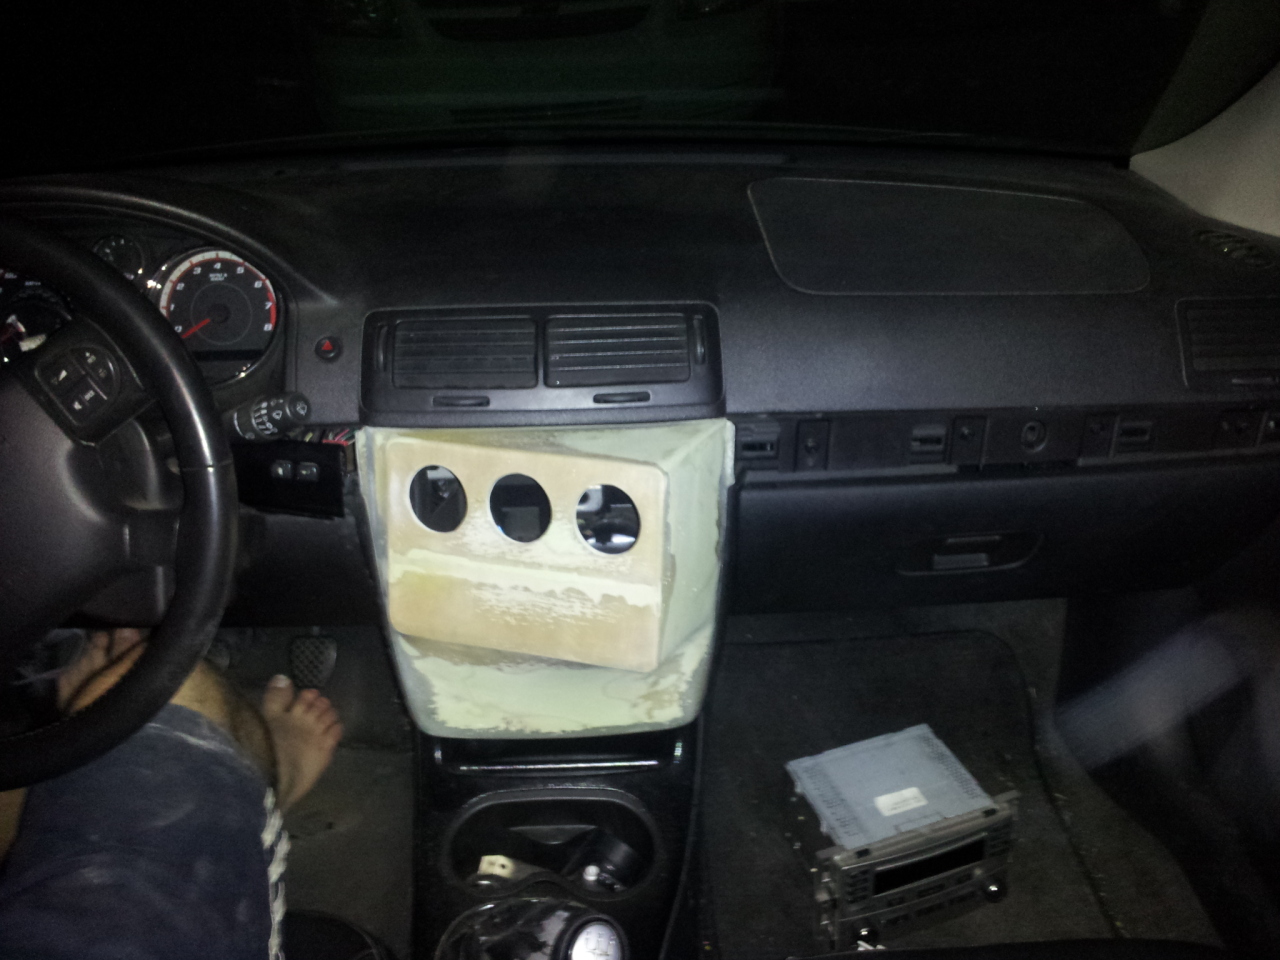
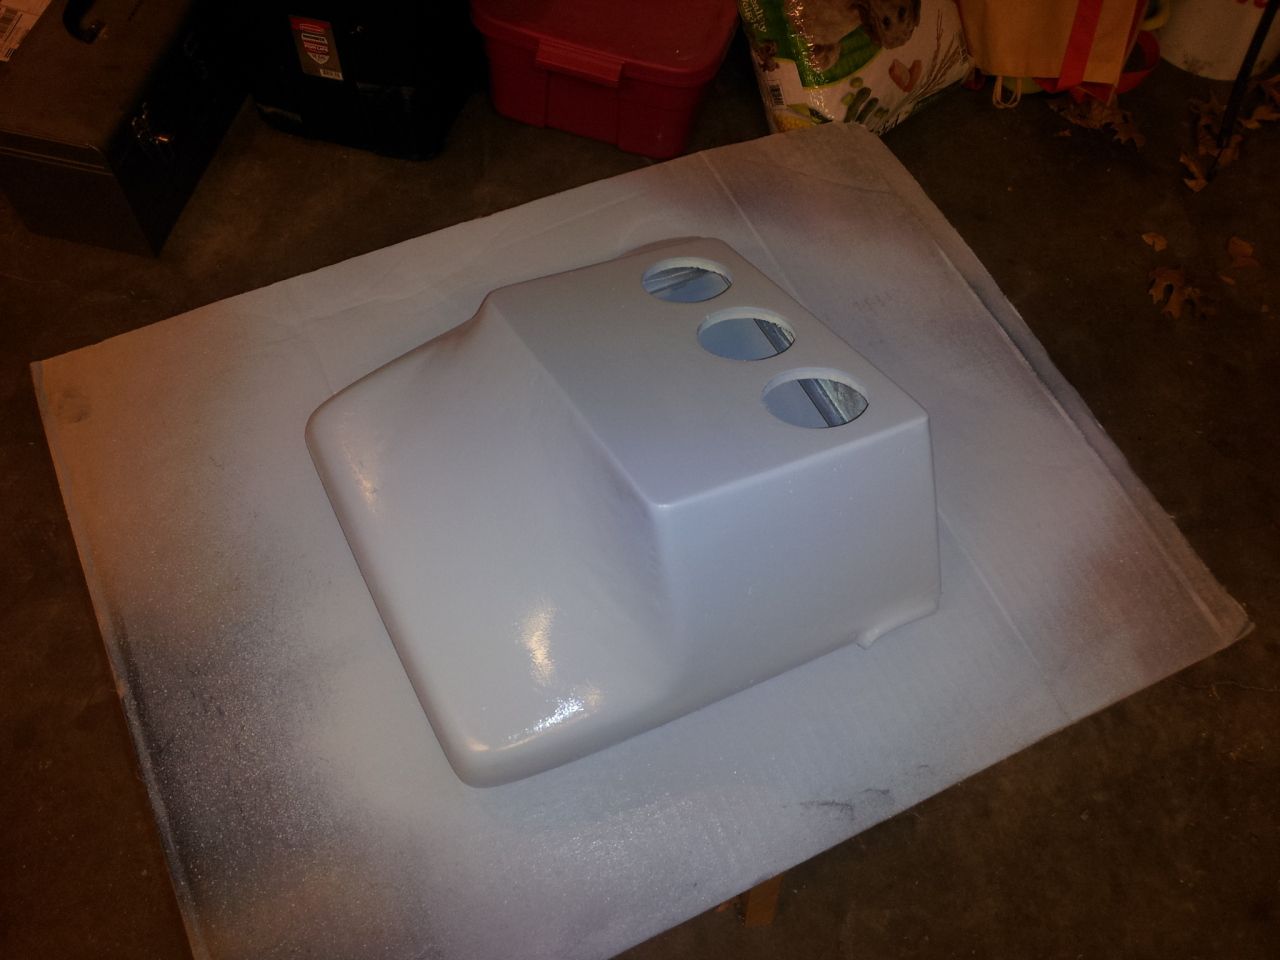
i haven't had any hvac system since june of '11, no compressor, no condensor, no lines, nada. and since the car is on 110 only and i hardly drive it on the street i said to hell with the radio and hvac controls. and started making a new dash piece to house my current oil pressure on the left, aem afr in the middle, and an egt gauge that is the same model as the oil pressure on the right. i'll also be moving my water pump switch up there that is currently located down by the ebrake. and putting the line lock button next to that. and bolting on a Biondo terminator button to the side (more on that later)
heres some pictures.
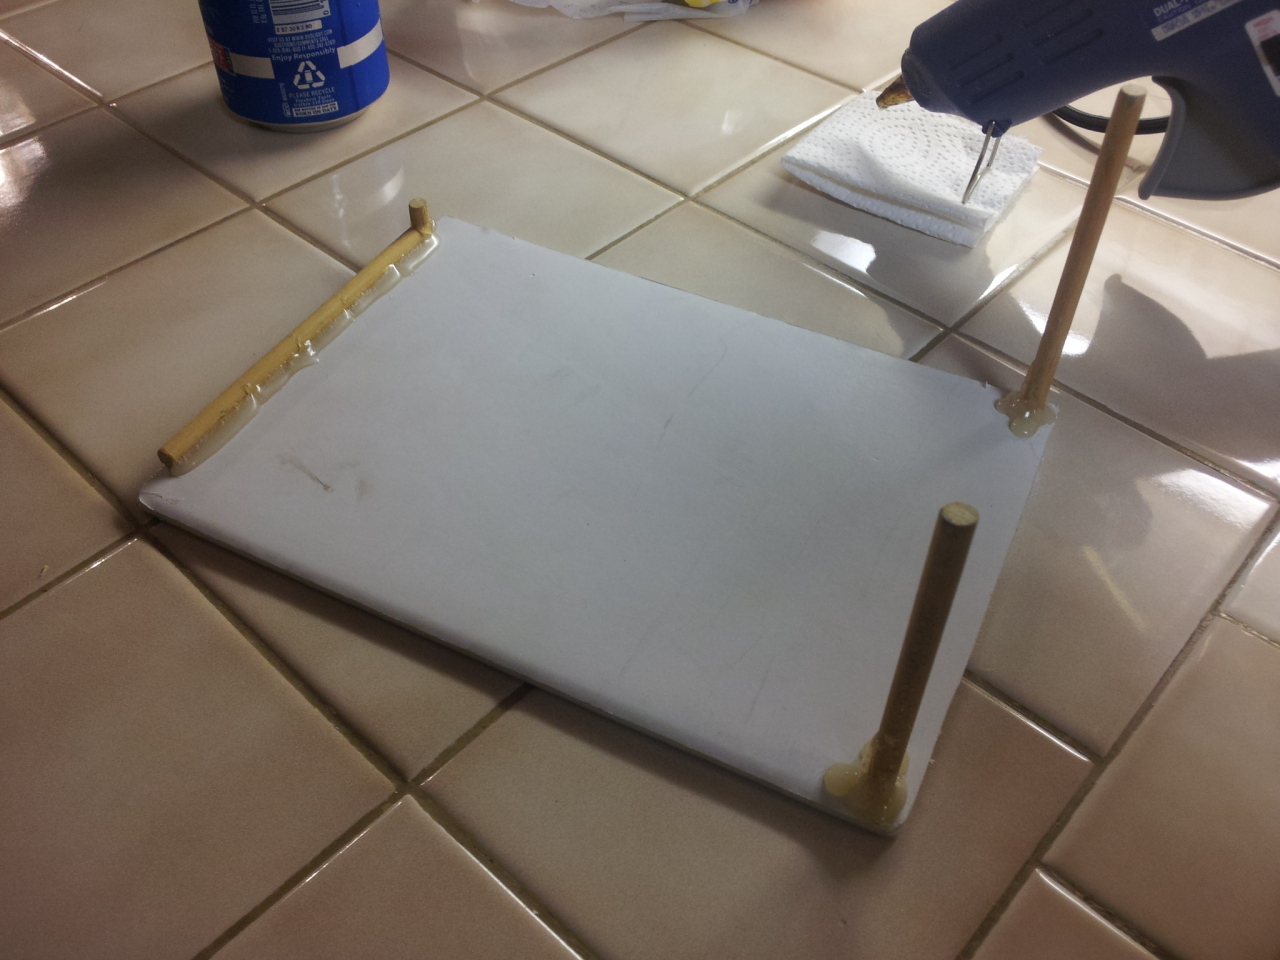
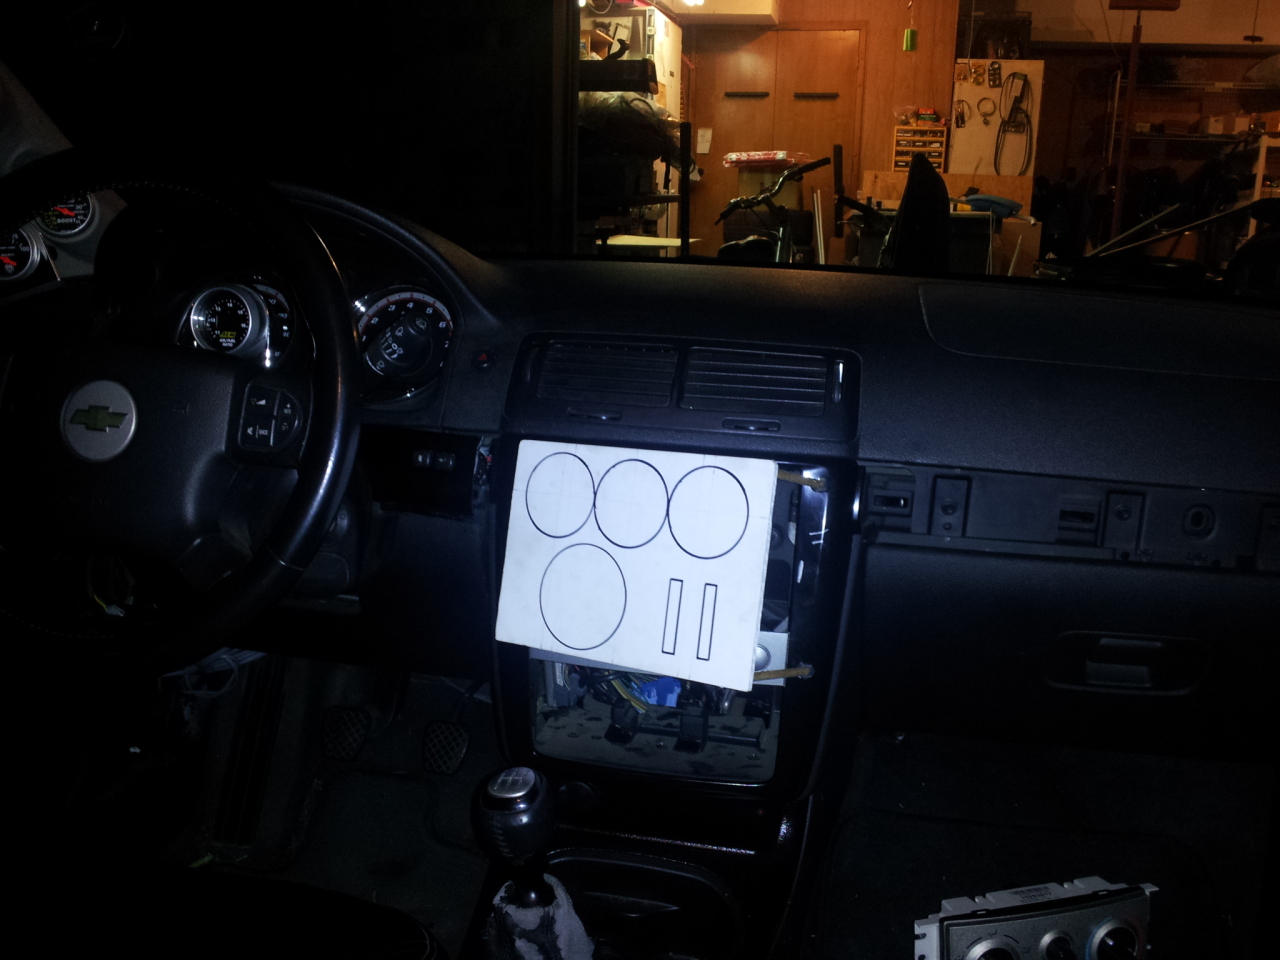
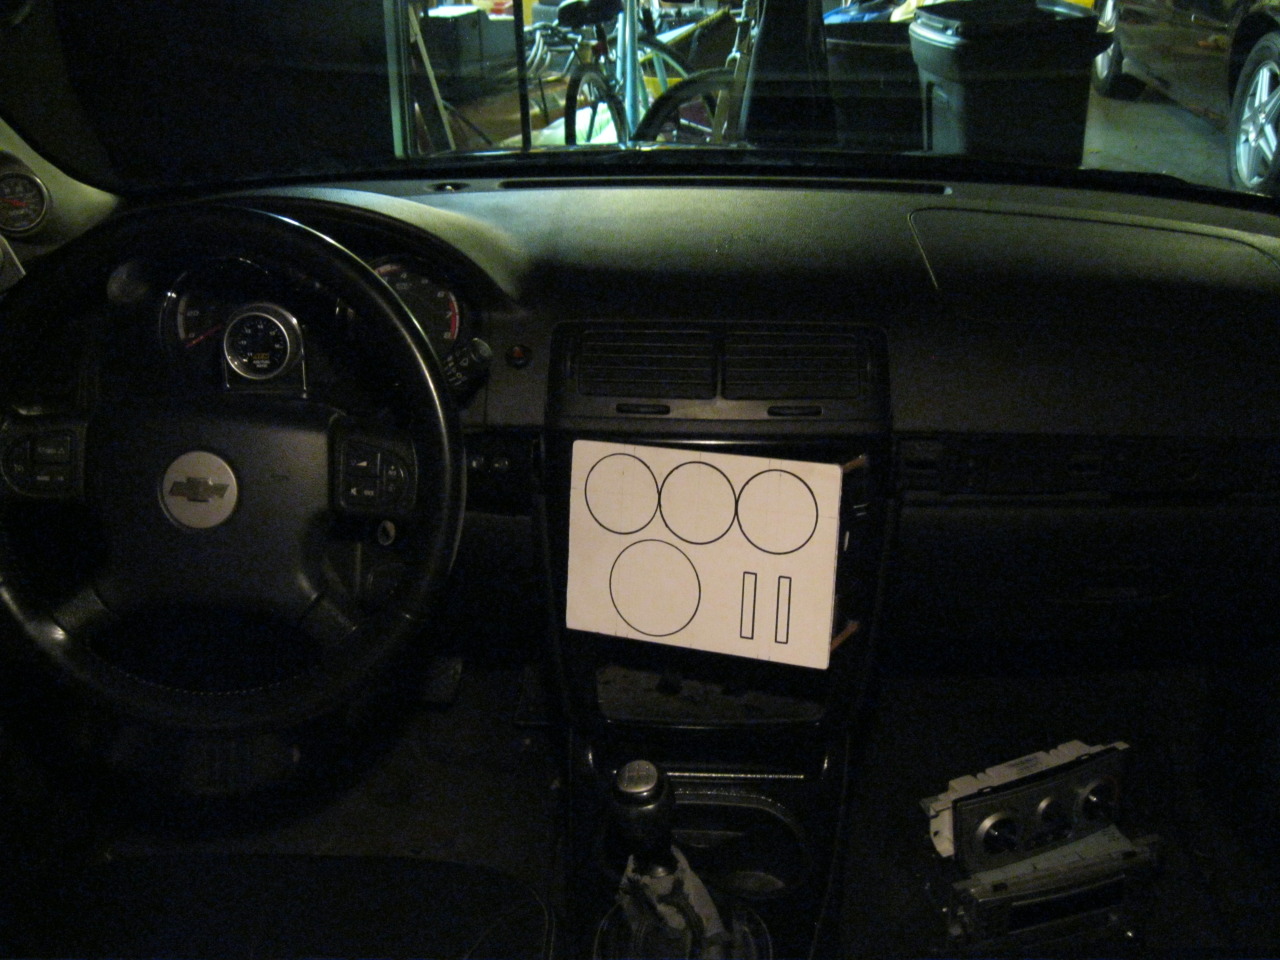
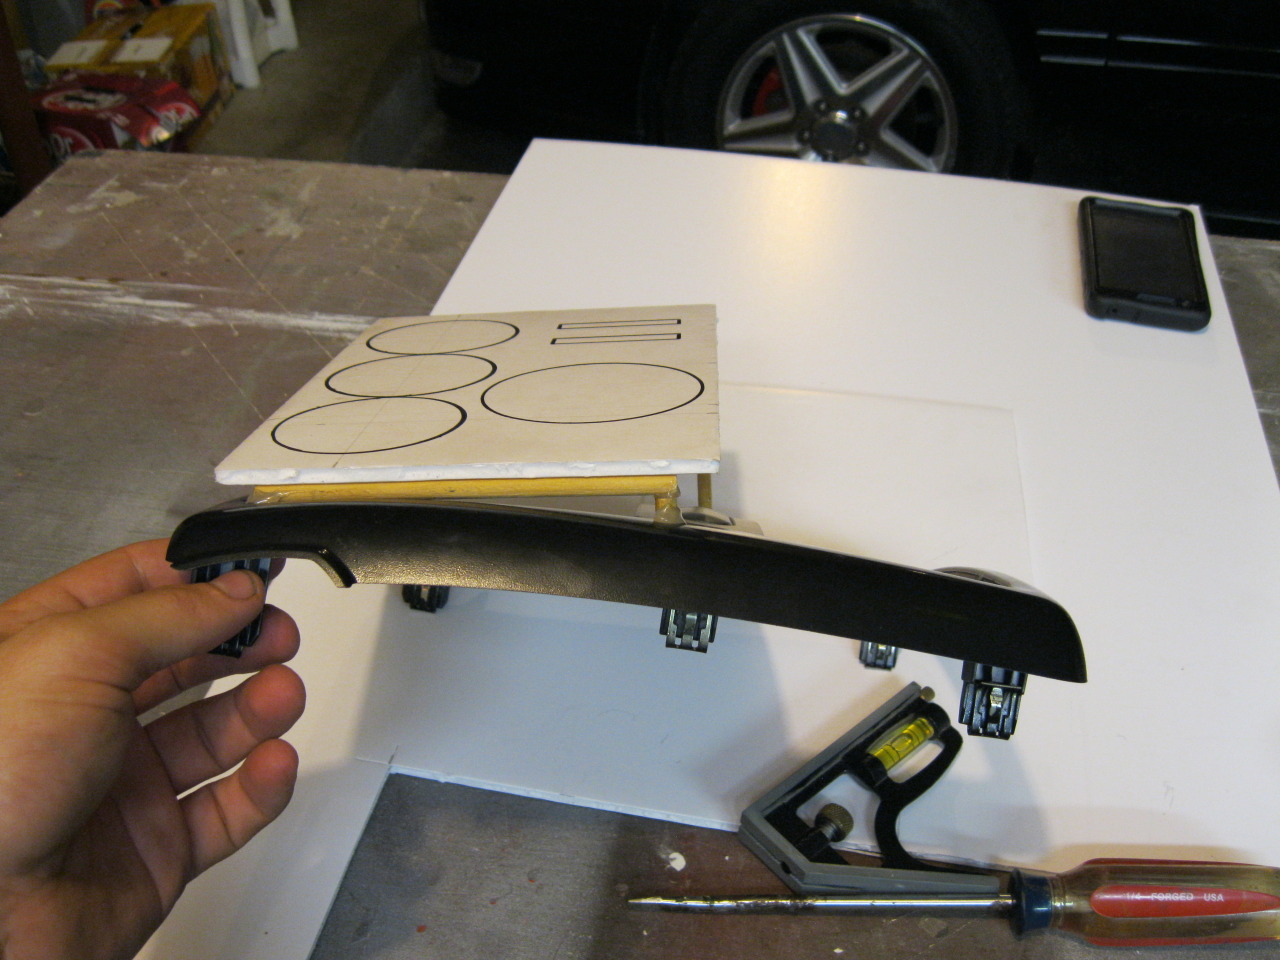


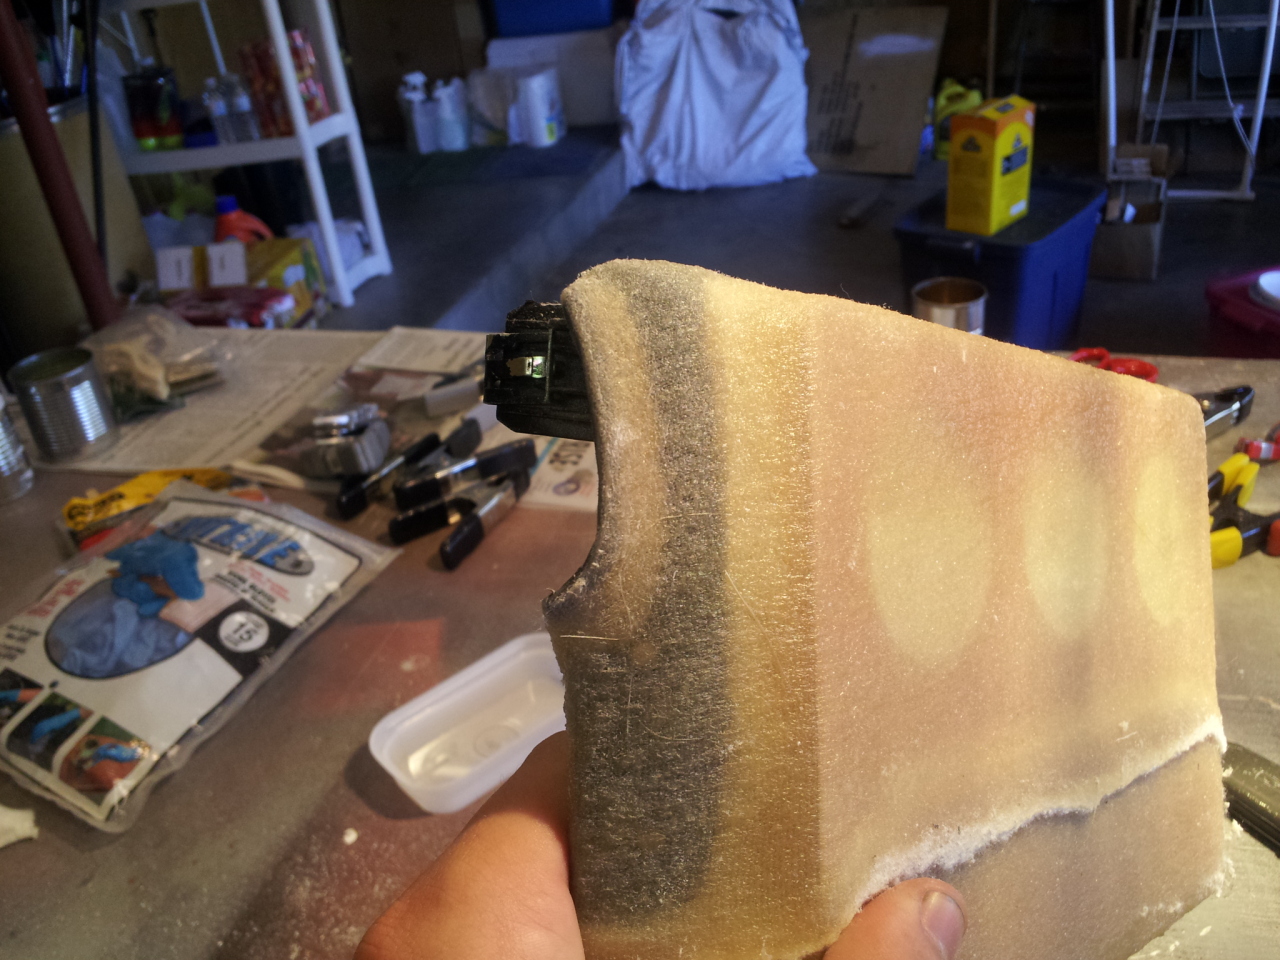
with the four different 90* i couldn't wrap it all at once, reason for the wrinkle in this next picture, so i decided to just half it and then bond then together.

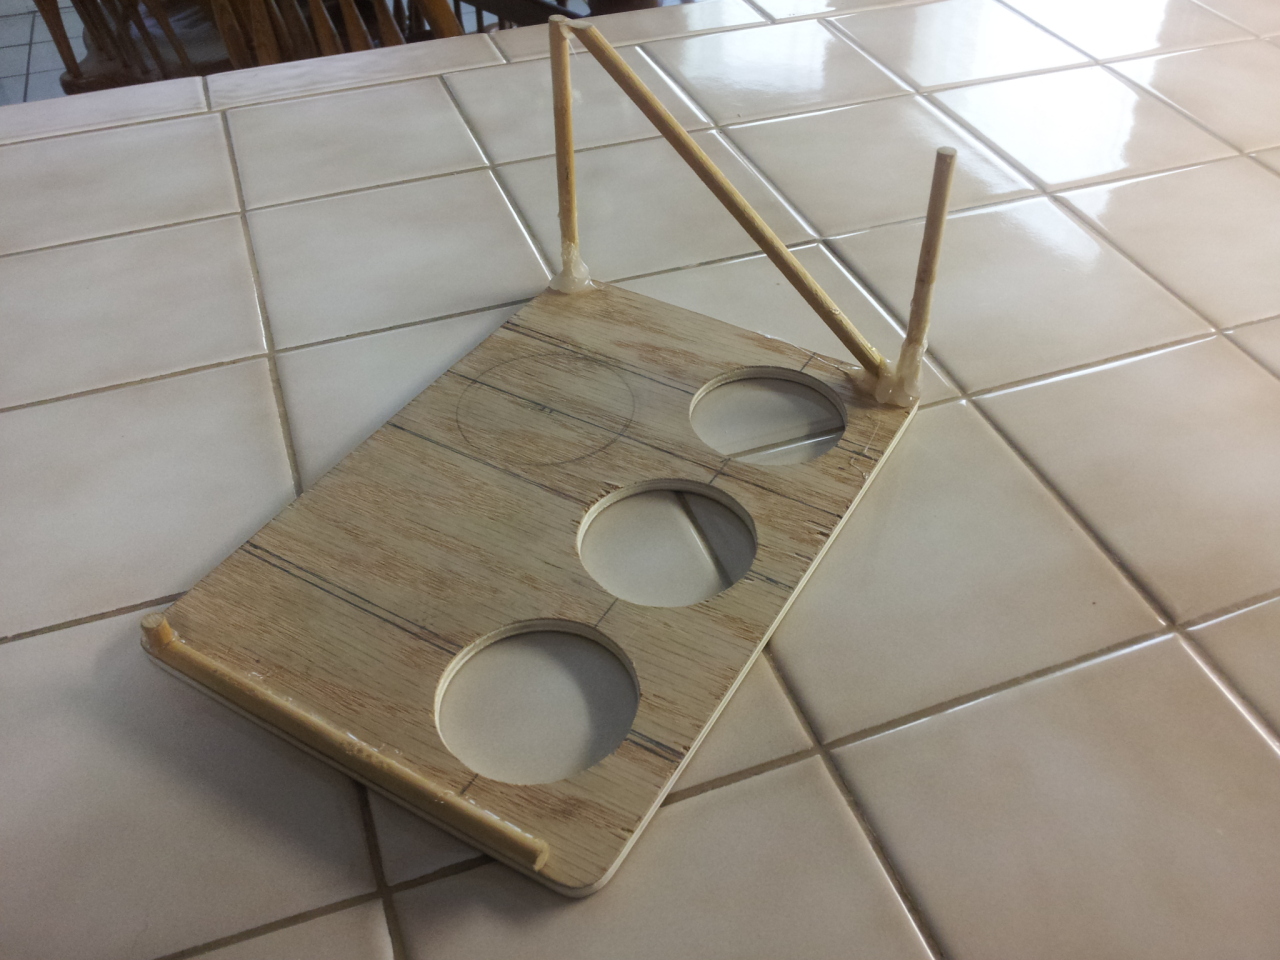
got it all solid and started on the dremel.

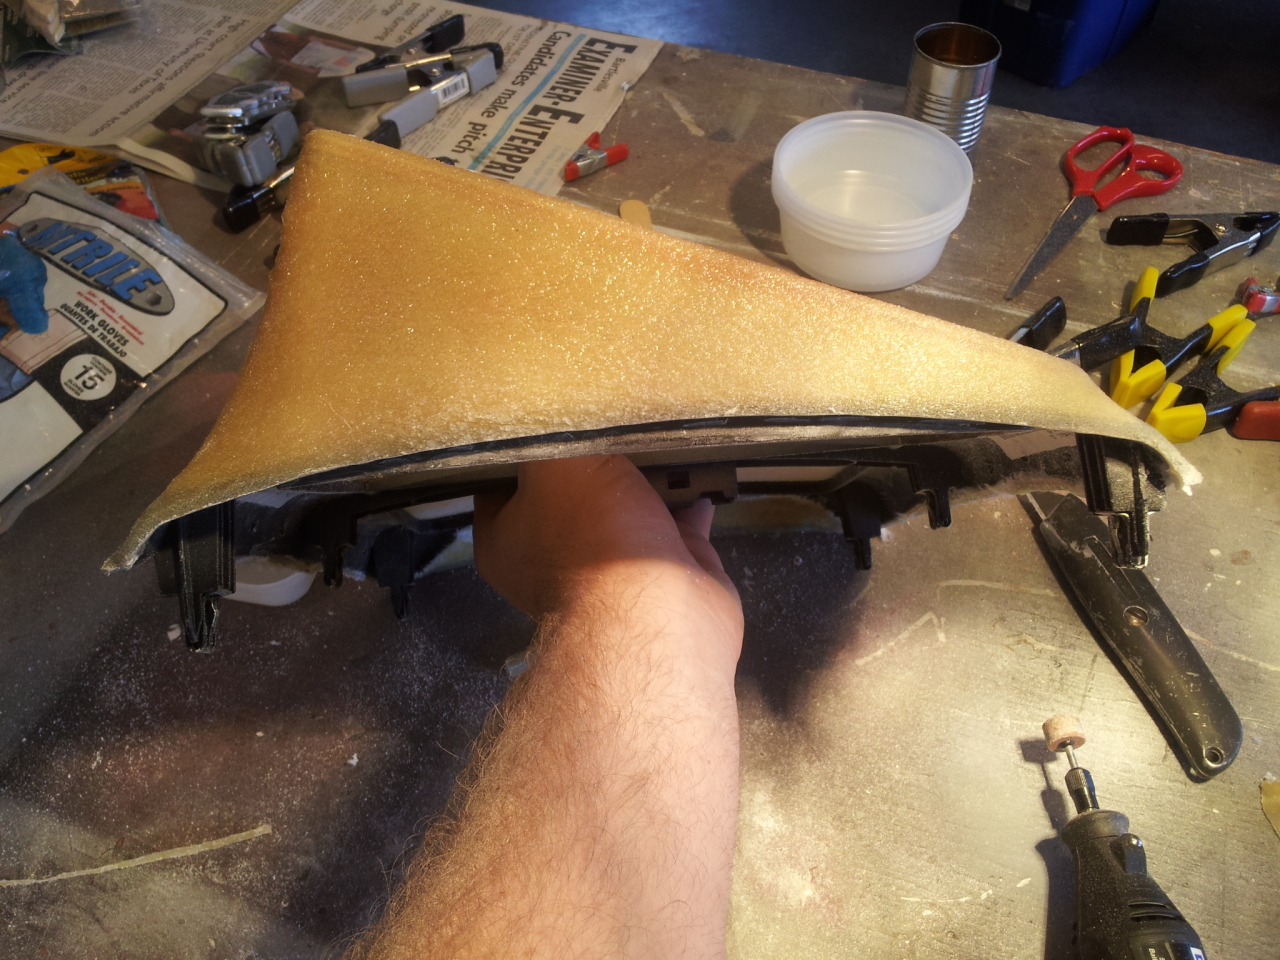
used the cone grinder to take off the over lap and put a grove right down the middle to fill so i could sand and make sure it was all level.
i haven't had any hvac system since june of '11, no compressor, no condensor, no lines, nada. and since the car is on 110 only and i hardly drive it on the street i said to hell with the radio and hvac controls. and started making a new dash piece to house my current oil pressure on the left, aem afr in the middle, and an egt gauge that is the same model as the oil pressure on the right. i'll also be moving my water pump switch up there that is currently located down by the ebrake. and putting the line lock button next to that. and bolting on a Biondo terminator button to the side (more on that later)
heres some pictures.
with the four different 90* i couldn't wrap it all at once, reason for the wrinkle in this next picture, so i decided to just half it and then bond then together.
got it all solid and started on the dremel.
used the cone grinder to take off the over lap and put a grove right down the middle to fill so i could sand and make sure it was all level.
 10-19-2012, 11:48 PM
#2
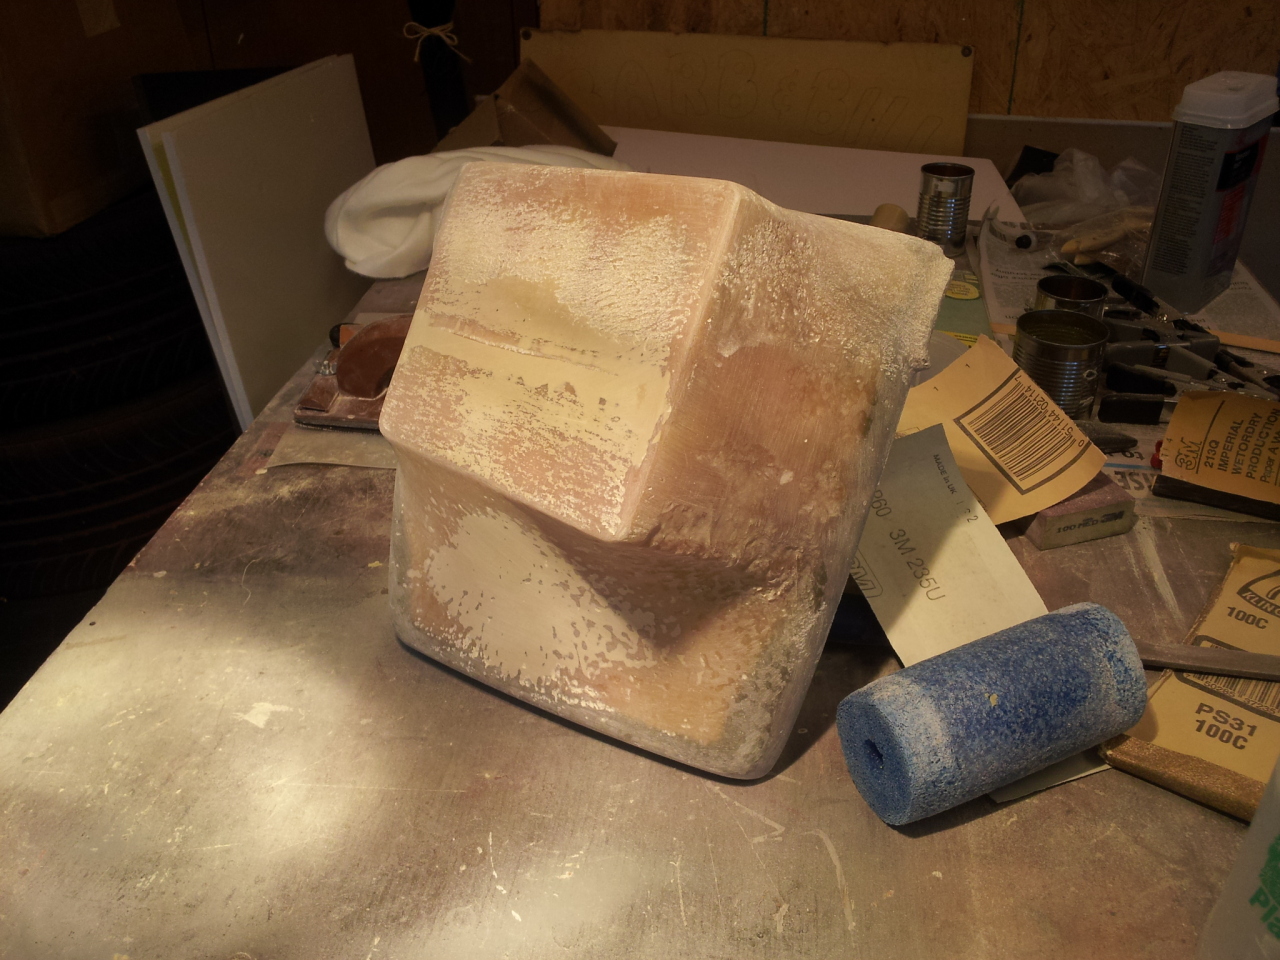
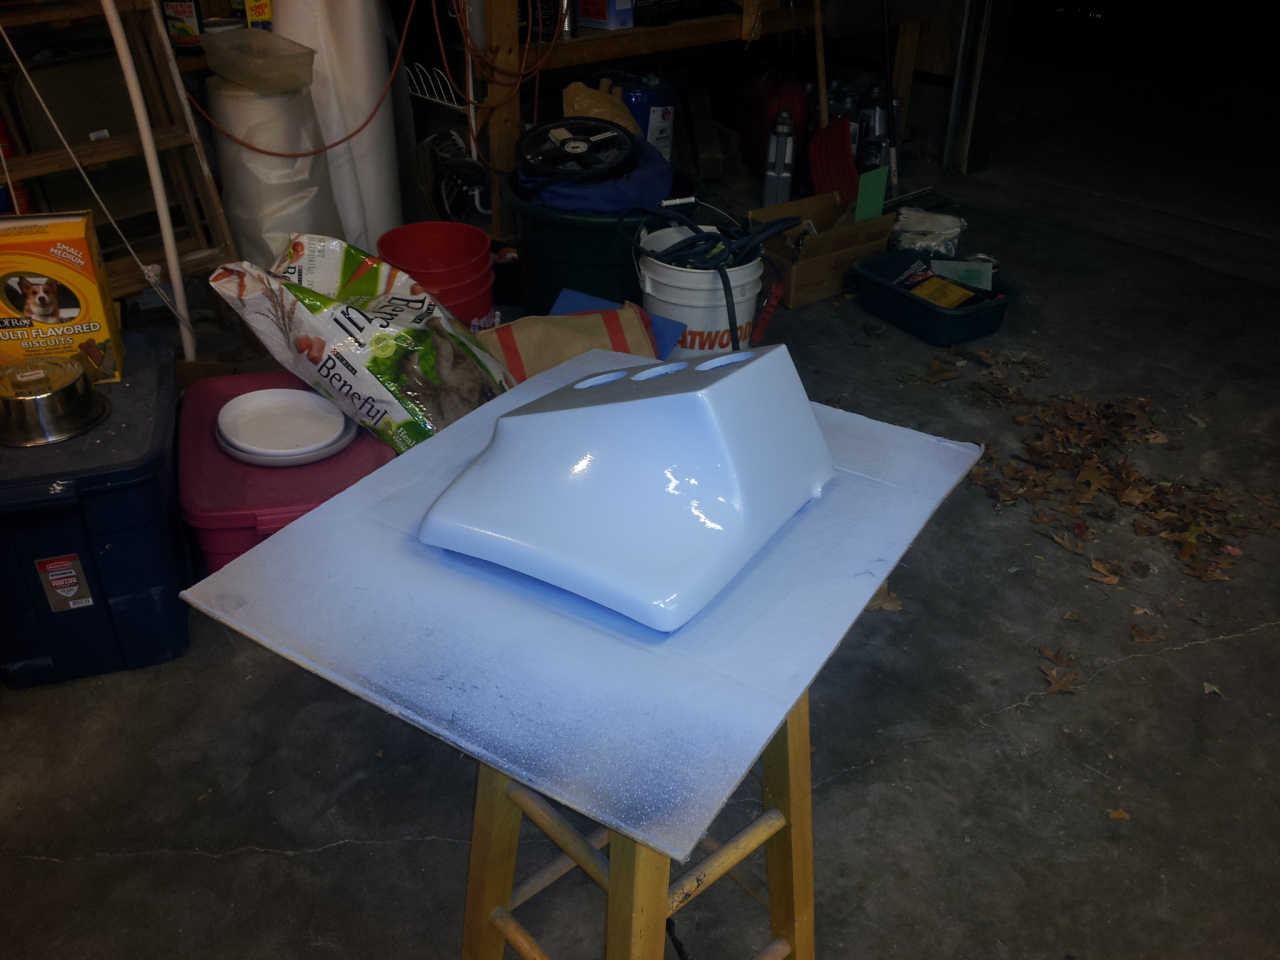
then finished evening out the back and moved on to final forming

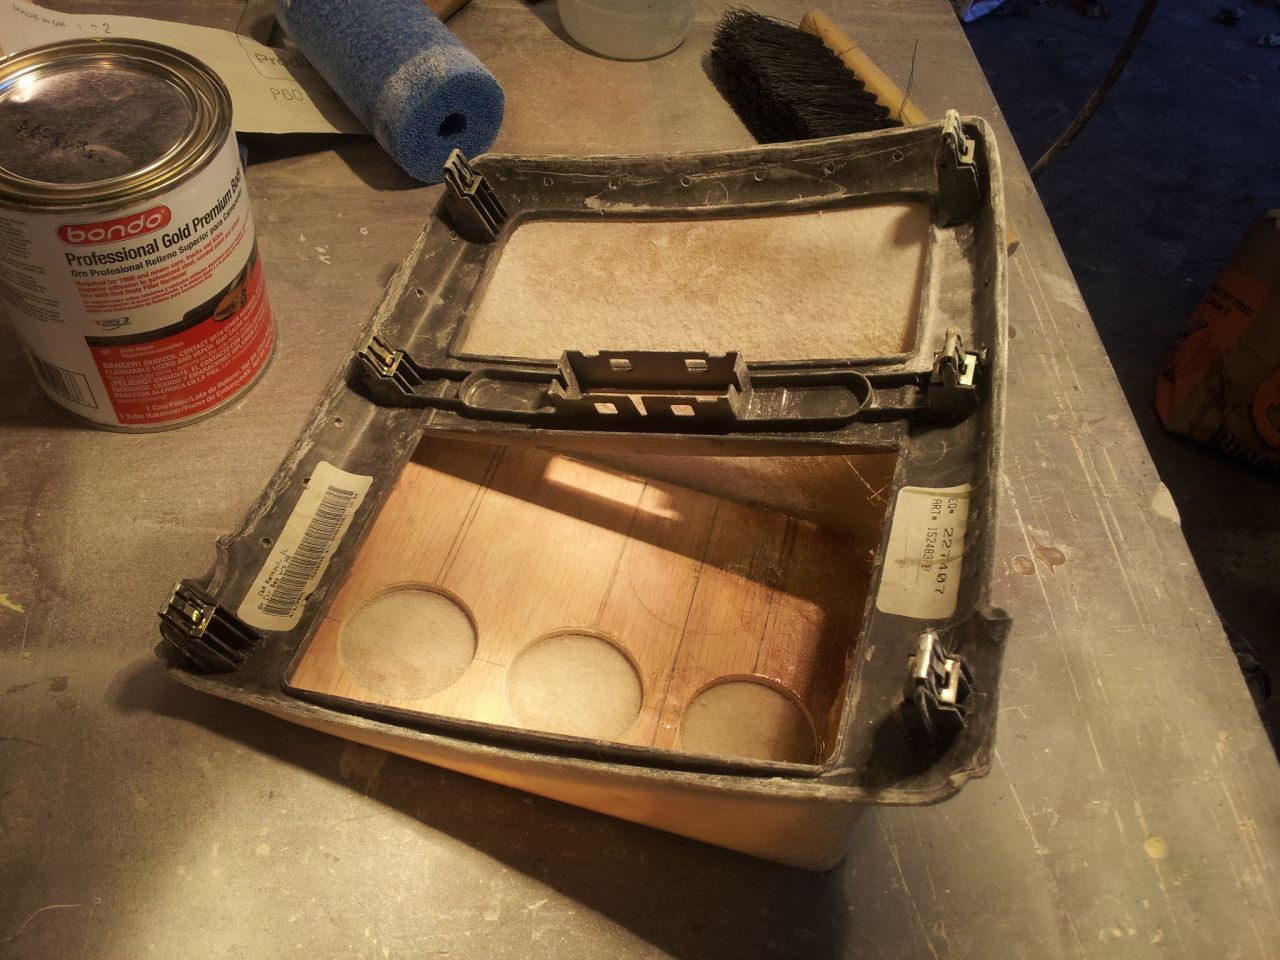
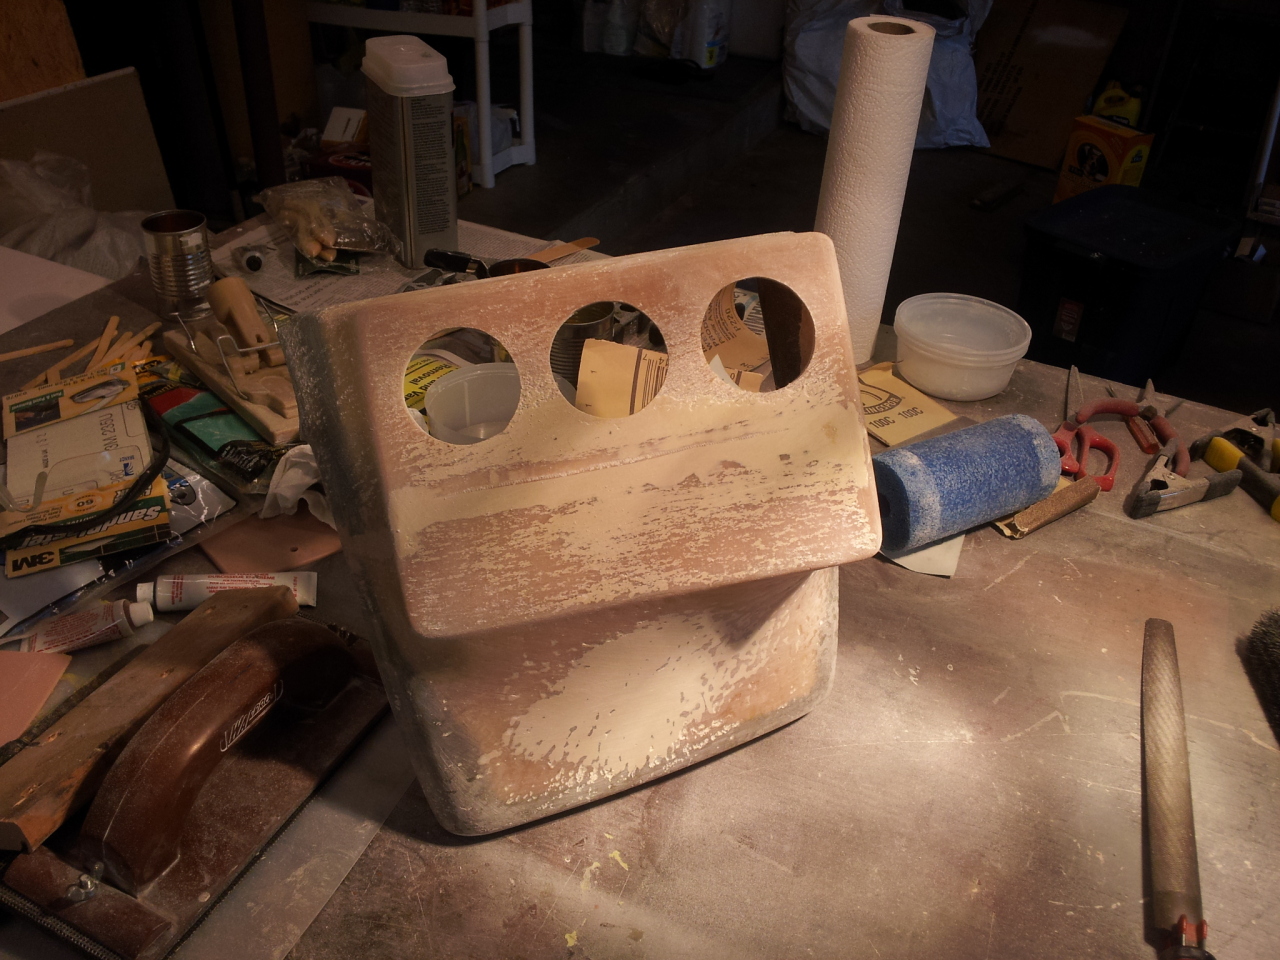
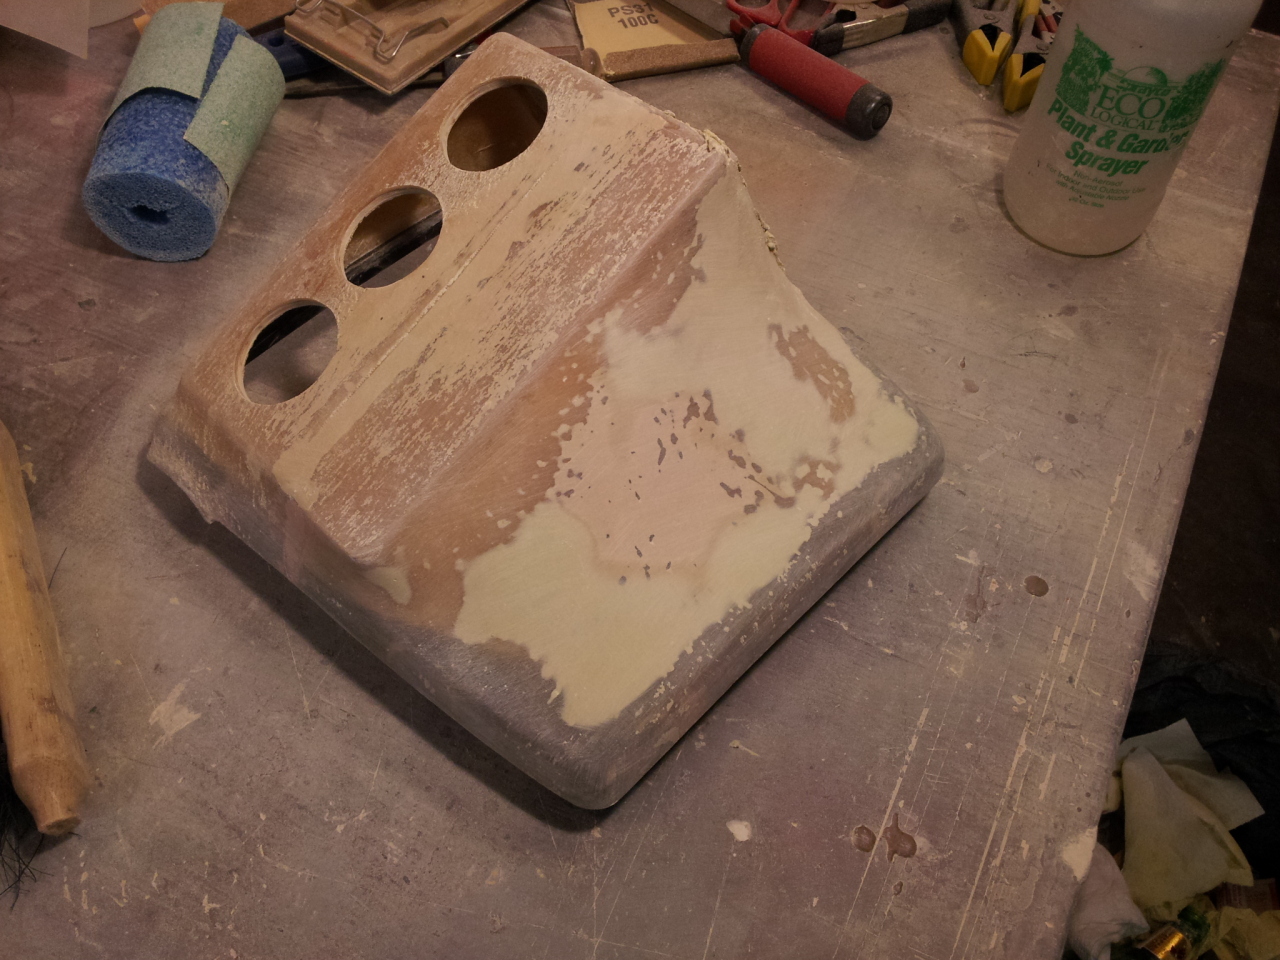
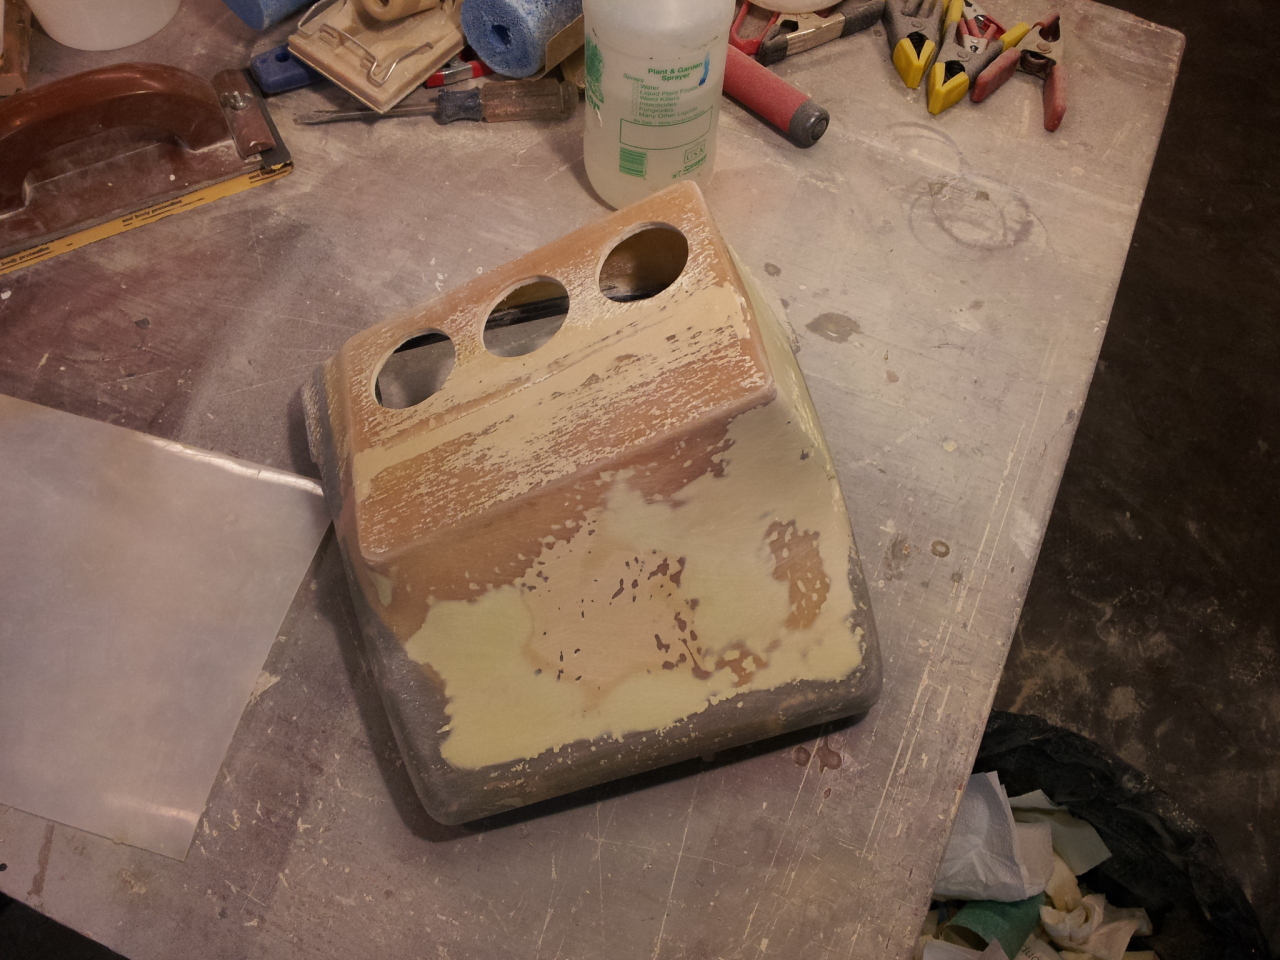
and so after four solid days of wearing a dust mask and covered in resin and fiberglass and filler dust here we are now. using some build up primer and then i'll spot fill the pin holes and re sand. the whole dash trim will be hydro dipped in a carbon fiber pattern. should look pretty sweet.
now back to the biondo button.
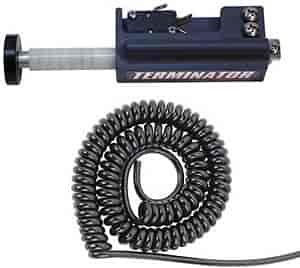
its kind of like a delay box without running a delay box. with the travel of the button. you can "delay" the release up to .045 seconds. it comes with spacers and a guide to using which spacers nets what delay. i'll be wiring this up to my clutch magnet. going to be using an electro magnet mounted to the floor, and a metal disk on the clutch pedal. and i'll have the button wired up in line as a switch. so when i roll in to the beams i can depress the clutch. push the button down and lock the pedal and get on the launch control. that way i can lightly use the brake pedal to keep from inching forward out of the beams instead of the ebrake. so instead of having a foot on the gas, a foot on the clutch, one hand on the wheel, and one on the ebrake. i can just hold the button, get on the gas and tap the break. much easier to focus, and letting off a button is much better than trying to time letting off the clutch.
and so after four solid days of wearing a dust mask and covered in resin and fiberglass and filler dust here we are now. using some build up primer and then i'll spot fill the pin holes and re sand. the whole dash trim will be hydro dipped in a carbon fiber pattern. should look pretty sweet.
now back to the biondo button.
its kind of like a delay box without running a delay box. with the travel of the button. you can "delay" the release up to .045 seconds. it comes with spacers and a guide to using which spacers nets what delay. i'll be wiring this up to my clutch magnet. going to be using an electro magnet mounted to the floor, and a metal disk on the clutch pedal. and i'll have the button wired up in line as a switch. so when i roll in to the beams i can depress the clutch. push the button down and lock the pedal and get on the launch control. that way i can lightly use the brake pedal to keep from inching forward out of the beams instead of the ebrake. so instead of having a foot on the gas, a foot on the clutch, one hand on the wheel, and one on the ebrake. i can just hold the button, get on the gas and tap the break. much easier to focus, and letting off a button is much better than trying to time letting off the clutch.
 10-20-2012, 01:18 AM
#6
i could put a single DIN in there if i really wanted.
but come to think of it. i could just leave my radio installed behind the piece. i mean with the driver controls i can just mute it if i want to have it off. switch between my presets, volume, i don't use cds or fm so really i guess i could still have it... hahah
but i'd rather just leave it out..
but come to think of it. i could just leave my radio installed behind the piece. i mean with the driver controls i can just mute it if i want to have it off. switch between my presets, volume, i don't use cds or fm so really i guess i could still have it... hahah
but i'd rather just leave it out..

 10-20-2012, 06:27 AM
#13
Senior Member

i could put a single DIN in there if i really wanted.
but come to think of it. i could just leave my radio installed behind the piece. i mean with the driver controls i can just mute it if i want to have it off. switch between my presets, volume, i don't use cds or fm so really i guess i could still have it... hahah
but i'd rather just leave it out..
but come to think of it. i could just leave my radio installed behind the piece. i mean with the driver controls i can just mute it if i want to have it off. switch between my presets, volume, i don't use cds or fm so really i guess i could still have it... hahah
but i'd rather just leave it out..


 10-22-2012, 09:33 PM
#20
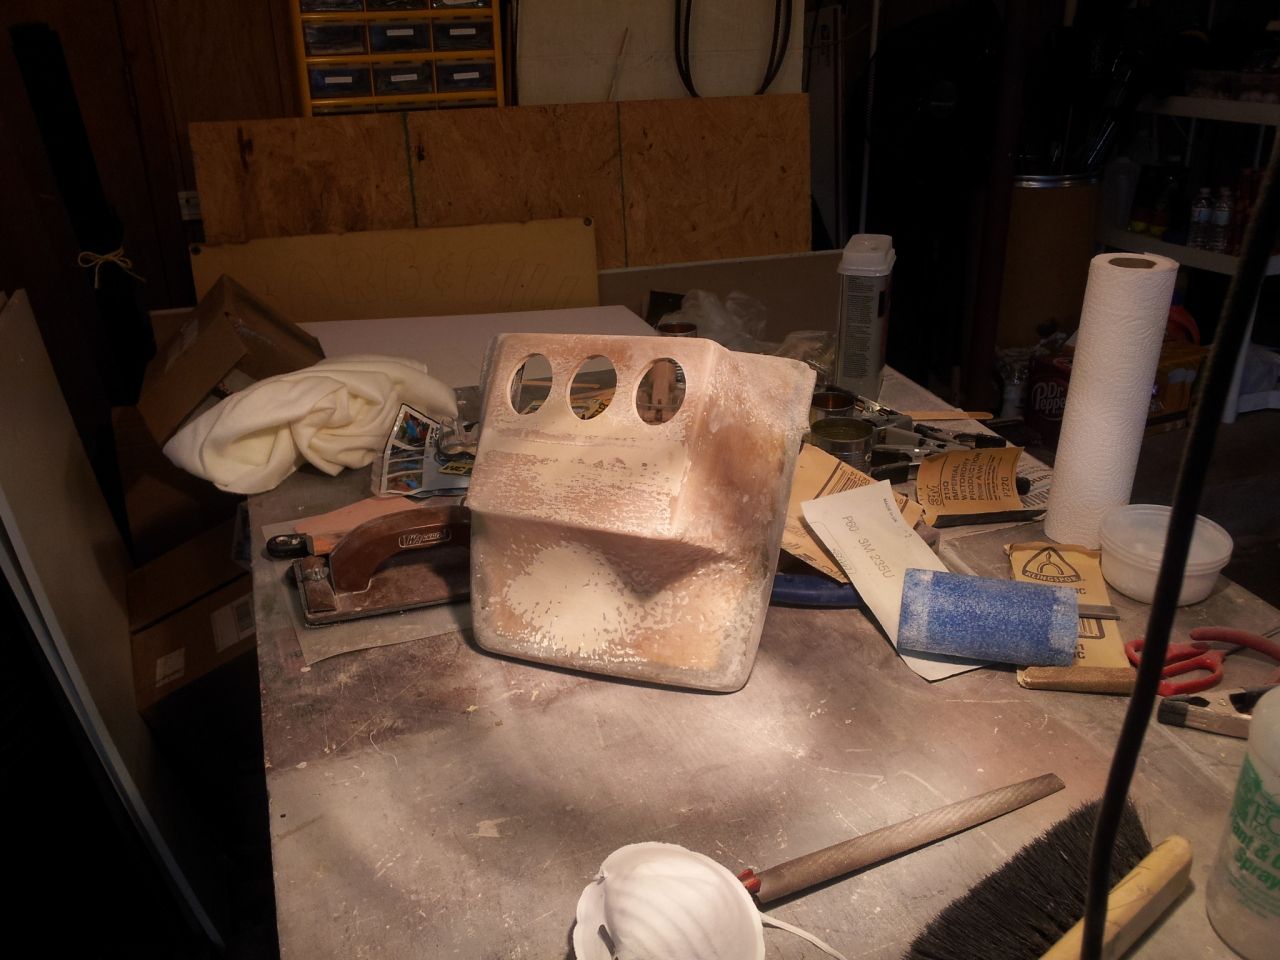
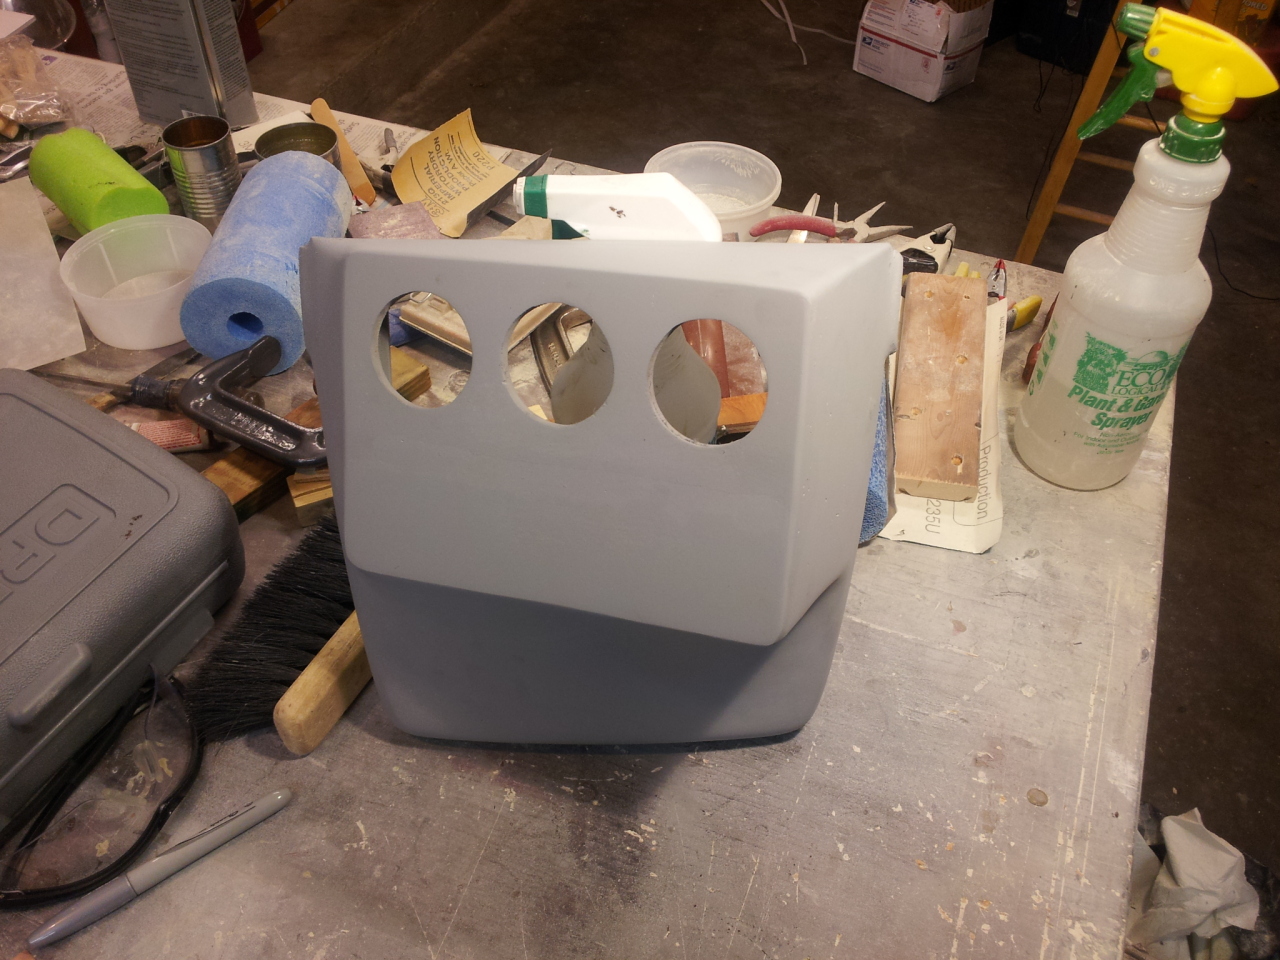
i haven't touched it since i made the thread though. i just gave the primer a light sanding and then put on some glazing and spot putty a while ago. i'll sand that here in about 20 minutes and then let it cool down and prime it again. if it looks decent then it'll get black tomorrow and then off to the dipper with the rest of the trim.
 10-22-2012, 11:28 PM
#21
took care of some of the pin holes but i'm still not happy with the bottom curved area. even though its beyond met what i need it to do. i still want it to look good so i'll take care of it tomorrow and update again.

