


CEL P0455 Help!!!


CEL P0455 Help!!!
I randomly keep getting the "Check gas cap " and P0455 code. I changed the gas cap already....any ideas? I recently put on a throttle body spacer tapped for meth...could that be it? Thanks
bump
helpy helpy
bump
helpy helpy
Last edited by TurboTommy; Jun 17, 2009 at 10:19 AM. Reason: Automerged Doublepost


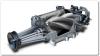
Accidently found this on another thread
EDIT: Boys and girls, here is what that little black box does:
An evaporative canister is part of the evaporative system that is within the emission system. Hydrocarbons are a form of pollution that gasoline releases as it evaporates or after is is burned. While fuel is stored inside the tank, fumes build up and are retained inside this canister. The canister contains charcoal that absorbs the hydrocarbons. When the engine is started, a valve opens that allows fresh air to come in and purge the fumes (hydrocarbons) into the air intake and then into the combustion chamber for burning. I understand that more hydrocarbons are released into the atmosphere by leaving your fuel cap off, than what comes out of your tailpipe while the engine runs. If there is a leak anywhere in the evaporative system, such as a bad hose, canister leak or leaving the fuel cap loose, the check engine light will set.
EDIT: Boys and girls, here is what that little black box does:
An evaporative canister is part of the evaporative system that is within the emission system. Hydrocarbons are a form of pollution that gasoline releases as it evaporates or after is is burned. While fuel is stored inside the tank, fumes build up and are retained inside this canister. The canister contains charcoal that absorbs the hydrocarbons. When the engine is started, a valve opens that allows fresh air to come in and purge the fumes (hydrocarbons) into the air intake and then into the combustion chamber for burning. I understand that more hydrocarbons are released into the atmosphere by leaving your fuel cap off, than what comes out of your tailpipe while the engine runs. If there is a leak anywhere in the evaporative system, such as a bad hose, canister leak or leaving the fuel cap loose, the check engine light will set.

Senior Member
Joined: 12-21-06
Posts: 1,618
Likes: 0
From: WV
HERE IS THE DIAGNOSTIC FROM GM, ALSO INCLUDED IS 2 PI BULLITENS, HOPE THIS HELPS, BUT IT MAY JUST NEED REPROGRAMMED.
DTC P0455
System Description
The control module tests the evaporative emission (EVAP) system for a large leak. The control module monitors the fuel tank pressure (FTP) sensor signal to determine the EVAP system vacuum level. When the conditions for running are met, the control module commands the EVAP canister purge solenoid valve OPEN and the EVAP vent solenoid valve CLOSED . This allows engine vacuum to enter the EVAP system. At a calibrated time, or vacuum level, the control module commands the EVAP canister purge solenoid valve closed, sealing the system, and monitors the FTP sensor input in order to determine the EVAP system vacuum level. If the system is unable to achieve the calibrated vacuum level, or the vacuum level decreases too rapidly, this DTC sets.
The following table illustrates the relationship between the ON and OFF states, and the OPEN or CLOSED states of the EVAP canister purge and vent solenoid valves.
Control Module Command
EVAP Canister Purge Solenoid Valve
EVAP Canister Vent Solenoid Valve
ON
Open
Closed
OFF
Closed
Open
DTC Descriptor
This diagnostic procedure supports the following DTC:
DTC P0455 Evaporative Emission (EVAP) System Large Leak
Conditions for Running the DTC
• DTCs P0068, P0069, P0095, P0096, P0097, P0098, P0106, P0107, P0108, P0112, P0113, P0117, P0118, P0120, P0121, P0125, P0128, P0130, P0131, P0132, P0133, P0134, P0135, P0136, P0137, P0138, P0140, P0141, P0220, P0442, P0443, P0449, P0452, P0453, P0496, P0502, P0562, P0563, P0641, P0651, P1133, P1134 are not set.
• The engine is running.
• The ignition voltage is between 10-18 volts.
• The barometric pressure (BARO) is more than 74 kPa.
• The fuel level is between 15-85 percent.
• The start-up engine coolant temperature (ECT) is between 4-65°C (39-149°F).
• The start-up intake air temperature (IAT) is between 4-75°C (39-167°F).
• The start-up ECT and IAT are within 8°C (16°F) of each other.
• DTC P0455 runs once per cold start drive cycle once the above conditions are met.
Conditions For Setting the DTC
The EVAP system is not able to achieve or maintain vacuum during the diagnostic test for up to 13 minutes.
Action Taken When the DTC Sets
• The control module illuminates the malfunction indicator lamp (MIL) on the second consecutive ignition cycle that the diagnostic runs and fails.
• The control module records the operating conditions at the time the diagnostic fails. The first time the diagnostic fails, the control module stores this information in the Failure Records. If the diagnostic reports a failure on the second consecutive ignition cycle, the control module records the operating conditions at the time of the failure. The control module writes the operating conditions to the Freeze Frame and updates the Failure Records.
Conditions for Clearing the MIL/DTC
• The control module turns OFF the malfunction indicator lamp (MIL) after 3 consecutive ignition cycles that the diagnostic runs and does not fail.
• A current DTC, Last Test Failed, clears when the diagnostic runs and passes.
• A history DTC clears after 40 consecutive warm-up cycles, if no failures are reported by this or any other emission related diagnostic.
• Clear the MIL and the DTC with a scan tool.
Diagnostic Aids
• To help locate intermittent leaks, use the J 41413-200 Evaporative Emissions System Tester (EEST) to introduce smoke into the EVAP system. Move all EVAP components while observing smoke with aJ 41413-SPT High Intensity White Light. Introducing smoke in 15-second intervals will allow less pressure into the EVAP system. When the system is less pressurized, the smoke will sometimes escape in a more condensed manner.
• A temporary blockage in the EVAP canister purge solenoid valve, purge pipe or EVAP canister could cause an intermittent condition. Inspect and repair any restriction in the EVAP system.
• To improve the visibility of the smoke exiting the EVAP system, observe the suspected leak area from different angles with a J 41413-SPT .
• Reviewing the Failure Records vehicle mileage since the diagnostic test last failed may help determine how often the condition that caused the DTC to be set occurs. This may assist in diagnosing the condition.
• For intermittent conditions, refer to Intermittent Conditions .
Test Description
The numbers below refer to the step numbers on the diagnostic table.
Introducing smoke in 15 second intervals may allow smaller leak areas to be more noticeable. When the system is less pressurized, the smoke will sometimes escape in a more condensed manner.
This step verifies proper operation of the FTP sensor.
A normal operating FTP sensor should increase above 5 inches of H2O and stop between 6-7 inches of H2O.
Step
Action
Values
Yes
No
Schematic Reference: Evaporative Emissions Hose Routing Diagram
1
Did you perform the Diagnostic System Check - Vehicle?
--
Go to Step 2
Go to Diagnostic System Check - Vehicle
2
Inspect the evaporative emission (EVAP) system for the following conditions:
• Loose, missing, or damaged service port schrader valve
• Loose, incorrect, missing, or damaged fuel fill cap
• A damaged EVAP canister purge solenoid valve
Raise the vehicle on a hoist. Refer to Lifting and Jacking the Vehicle .
Inspect the EVAP system for the following conditions:
• Disconnected, improperly routed, kinked, or damaged EVAP pipes and hoses
• A damaged EVAP canister vent solenoid valve or EVAP canister
Did you find and correct the condition?
--
Go to Step 21
Go to Step 3
3
Important: Larger volume fuel tanks and/or those with lower fuel levels may require several minutes for the floating indicator to stabilize.
Turn OFF the ignition.
Important: Refer to the J 41413-200 Evaporative Emissions System Tester (EEST) operation for detailed instructions.
Install the GE-41415-50 Fuel Tank Cap Adapter to the fuel fill pipe.
Use the flow meter on the J 41413-200 to determine if there is a leak greater than 0.51 mm (0.02 in) in the EVAP system.
Compare the flow meter stable floating indicator position to the red flag.
Is the floating indicator below the red flag?
--
Go to Step 6
Go to Step 4
4
Important: Ensure that the vehicle underbody temperature is similar to the ambient temperature and allow the surrounding air to stabilize before starting the diagnostic procedure. System flow will be less with higher temperatures.
Turn OFF the ignition.
With the J 41413-200 connected to the vehicle filler neck, apply smoke to the EVAP system.
Did you locate and repair a leak source?
--
Go to Step 21
Go to Step 5
5
Disconnect the GE-41415-50 from the fuel fill pipe.
Install the fuel fill cap to the fuel fill pipe.
Connect the J 41413-200 nitrogen/smoke supply hose to the EVAP service port.
Use the remote switch to introduce smoke into the EVAP system.
Inspect the entire EVAP system for exiting smoke with a the J 41413-SPT High Intensity White Light.
Continue to introduce smoke at 15-second intervals until the leak source has been located.
Did you locate and repair a leak source?
--
Go to Step 21
Go to Step 6
6
Use the remote switch to stop introducing smoke, if necessary.
Install the GE-41415-50 to the fuel fill pipe.
Connect the J 41413-200 nitrogen/smoke supply hose and vehicle fuel fill cap to the GE-41415-50 .
Command the EVAP canister vent solenoid valve open with a scan tool.
Compare the fuel tank pressure sensor parameter with a scan tool to the J 41413-200 pressure/vacuum gage.
Is the difference between the 2 gages less than the specified value?
1 in H2O
Go to Step 7
Go to Step 14
7
Seal the EVAP system using the EVAP Purge/Seal function with a scan tool.
Turn the nitrogen/smoke valve on the J 41413-200 control panel to NITROGEN.
Use the J 41413-200 to pressurize the EVAP system to the first specified value.
Is the fuel tank pressure sensor parameter more than the second specified value?
10 in H2O
5 in H2O
Go to Step 8
Go to Step 14
8
Use the remote switch to stop introducing nitrogen into the EVAP system.
Increase the EVAP canister purge solenoid valve to 100 percent.
Is the fuel tank pressure sensor parameter less than the specified value?
1 in H2O
Go to Step 9
Go to Step 11
9
Connect the nitrogen/smoke hose to the EVAP service port.
Remove the GE-41415-50 .
Install the fuel fill cap to the fuel fill pipe.
Start the engine.
Allow the engine to idle.
Use the purge/seal function to seal the system, with a scan tool.
Command the EVAP canister purge solenoid valve to 30 percent.
Observe the vacuum/pressure gage on the J 41413-200 and the FTP parameter on the scan tool.
Allow the vacuum to increase on the gage of the J 41413-200 , until it reaches approximately 16 inches H2O or until the vacuum reached the abort limit on a scan tool.
Use the purge/seal function to seal the system, with a scan tool.
Was the difference between the 2 gages less than the specified value?
1 in H2O
Go to Step 10
Go to Step 14
10
Did the FTP parameter on a scan tool display more than the specified value?
3.2 V
Go to Diagnostic Aids
Go to Step 17
11
Disconnect the EVAP canister purge pipe from the EVAP purge solenoid valve.
Is the fuel tank pressure sensor parameter less than the specified value?
1 in H2O
Go to Step 18
Go to Step 12
12
Disconnect the EVAP purge pipe at the EVAP canister.
Is the fuel tank pressure sensor parameter less than the specified value?
1 in H2O
Go to Step 19
Go to Step 13
13
Disconnect the EVAP vapor pipe at the EVAP canister.
Is the fuel tank pressure sensor parameter less than the specified value?
1 in H2O
Go to Step 20
Go to Step 16
14
Test for an intermittent and for a poor connection at the fuel tank pressure (FTP) sensor. Refer to Testing for Intermittent Conditions and Poor Connections and Connector Repairs .
Did you find and correct the condition?
--
Go to Step 21
Go to Step 15
15
Test the low reference circuit of the FTP sensor for an open or for high resistance.
Did you find and correct the condition?
--
Go to Step 21
Go to Step 17
16
Repair the pinched or obstructed EVAP vapor pipe.
Did you complete the repair?
--
Go to Step 21
--
17
Replace the FTP sensor. Refer to Fuel Tank Pressure Sensor Replacement .
Did you complete the replacement?
--
Go to Step 21
--
18
Replace the EVAP canister purge solenoid valve. Refer to Evaporative Emission Canister Purge Solenoid Valve Replacement .
Did you complete the replacement?
--
Go to Step 21
--
19
Repair the restriction in the EVAP purge pipe.
Did you complete the repair?
--
Go to Step 21
--
20
Replace the EVAP canister. Refer to Evaporative Emission Canister Replacement .
Did you complete the replacement?
--
Go to Step 21
--
21
Important: Larger volume fuel tanks and/or those with lower fuel levels may require several minutes for the floating indicator to stabilize.
Important: Refer to the J 41413-200 operation manual for detailed instructions.
Use the flow meter on the J 41413-200 to determine if there is a leak greater than 0.51 mm (0.02 in) in the EVAP system.
Compare the flow meter stable floating indicator position to the red flag.
Is the floating indicator below the red flag?
--
Go to Step 22
Go to Step 4
22
Observe the J 41413-200 pressure/vacuum gage.
Increase the EVAP purge solenoid valve to 100 percent.
Does the pressure decrease?
--
Go to Step 23
Go to Step 2
23
Compare the FTP sensor parameter with a scan tool to the J 41413-200 pressure/vacuum gage.
Is the difference between the 2 gages less than the specified value?
1 in H2O
Go to Step 24
Go to Step 2
24
Observe the Capture Info with a scan tool.
Are there any DTCs that have not been diagnosed?
--
Go to Diagnostic Trouble Code (DTC) List - Vehicle
System OK
--------------------------------------------------------------------------------
#PIP4078A: SES Light Due To DTCs P0449 P0455 And/Or P2431 - Reprogram ECM - keywords calibration CEL check DTC engine lamp line MIL no program repeat - (Jun 22, 2007)
Subject: SES Light due to DTCs P0449, P0455, and/or P2431 - Reprogram ECM
Models: 2007 Chevrolet Cobalt
2007 Chevrolet HHR
2007 Saturn Ion
2007 Pontiac G5
with 2.2L Engine (VIN D or F - RPO L61)
or 2.4L Engine (VIN B or P - RPO LE5)
--------------------------------------------------------------------------------
This PI was superseded to update applications and Recommendation/Instructions. Please discard PIP4078.
--------------------------------------------------------------------------------
The following diagnosis might be helpful if the vehicle exhibits the symptom(s) described in this PI
#PIP3746A: SES Light Due To A P0442 and/or P0455 DTC - Inspect Evap Pipe At Fuel Tank - keywords lamp leak line - (Aug 4, 2006)
Subject: SES Light due to a P0442 and/or P0455 DTC
Models: 2006-2007 Chevrolet Cobalt, Cobalt SS
2007 Pontiac G5
2006 Pontiac Pursuit (Canada Only)
2006-2007 Saturn Ion, Ion Redline
--------------------------------------------------------------------------------
This PI was created to include 2007 Models. Please discard PIP3746.
--------------------------------------------------------------------------------
The following diagnosis might be helpful if the vehicle exhibits the symptom(s) described in this PI.
Condition/Concern:
On rare occasions, a SES light may be experienced due to a P0442 and/or a P0455 DTC.
Recommendation/Instructions:
If the SI diagnostics do not isolate a cause for this concern, inspect the accordion style EVAP line shown below for a small hole. If a hole is present, it will be necessary to replace the complete fuel tank since this line is not serviced separately. The new fuel tank will come with a new line.
Please follow this diagnostic or repair process thoroughly and complete each step. If the condition exhibited is resolved without completing every step, the remaining steps do not need to be performed.
GM bulletins are intended for use by professional technicians, NOT a "do-it-yourselfer". They are written to inform these technicians of conditions that may occur on some vehicles, or to provide information that could assist in the proper service of a vehicle. Properly trained technicians have the equipment, tools, safety instructions, and know-how to do a job properly and safely. If a condition is described, DO NOT assume that the bulletin applies to your vehicle, or that your vehicle will have that condition. See your GM dealer for information on whether your vehicle may benefit from the information.
WE SUPPORT VOLUNTARY TECHNICIAN CERTIFICATION
DTC P0455
System Description
The control module tests the evaporative emission (EVAP) system for a large leak. The control module monitors the fuel tank pressure (FTP) sensor signal to determine the EVAP system vacuum level. When the conditions for running are met, the control module commands the EVAP canister purge solenoid valve OPEN and the EVAP vent solenoid valve CLOSED . This allows engine vacuum to enter the EVAP system. At a calibrated time, or vacuum level, the control module commands the EVAP canister purge solenoid valve closed, sealing the system, and monitors the FTP sensor input in order to determine the EVAP system vacuum level. If the system is unable to achieve the calibrated vacuum level, or the vacuum level decreases too rapidly, this DTC sets.
The following table illustrates the relationship between the ON and OFF states, and the OPEN or CLOSED states of the EVAP canister purge and vent solenoid valves.
Control Module Command
EVAP Canister Purge Solenoid Valve
EVAP Canister Vent Solenoid Valve
ON
Open
Closed
OFF
Closed
Open
DTC Descriptor
This diagnostic procedure supports the following DTC:
DTC P0455 Evaporative Emission (EVAP) System Large Leak
Conditions for Running the DTC
• DTCs P0068, P0069, P0095, P0096, P0097, P0098, P0106, P0107, P0108, P0112, P0113, P0117, P0118, P0120, P0121, P0125, P0128, P0130, P0131, P0132, P0133, P0134, P0135, P0136, P0137, P0138, P0140, P0141, P0220, P0442, P0443, P0449, P0452, P0453, P0496, P0502, P0562, P0563, P0641, P0651, P1133, P1134 are not set.
• The engine is running.
• The ignition voltage is between 10-18 volts.
• The barometric pressure (BARO) is more than 74 kPa.
• The fuel level is between 15-85 percent.
• The start-up engine coolant temperature (ECT) is between 4-65°C (39-149°F).
• The start-up intake air temperature (IAT) is between 4-75°C (39-167°F).
• The start-up ECT and IAT are within 8°C (16°F) of each other.
• DTC P0455 runs once per cold start drive cycle once the above conditions are met.
Conditions For Setting the DTC
The EVAP system is not able to achieve or maintain vacuum during the diagnostic test for up to 13 minutes.
Action Taken When the DTC Sets
• The control module illuminates the malfunction indicator lamp (MIL) on the second consecutive ignition cycle that the diagnostic runs and fails.
• The control module records the operating conditions at the time the diagnostic fails. The first time the diagnostic fails, the control module stores this information in the Failure Records. If the diagnostic reports a failure on the second consecutive ignition cycle, the control module records the operating conditions at the time of the failure. The control module writes the operating conditions to the Freeze Frame and updates the Failure Records.
Conditions for Clearing the MIL/DTC
• The control module turns OFF the malfunction indicator lamp (MIL) after 3 consecutive ignition cycles that the diagnostic runs and does not fail.
• A current DTC, Last Test Failed, clears when the diagnostic runs and passes.
• A history DTC clears after 40 consecutive warm-up cycles, if no failures are reported by this or any other emission related diagnostic.
• Clear the MIL and the DTC with a scan tool.
Diagnostic Aids
• To help locate intermittent leaks, use the J 41413-200 Evaporative Emissions System Tester (EEST) to introduce smoke into the EVAP system. Move all EVAP components while observing smoke with aJ 41413-SPT High Intensity White Light. Introducing smoke in 15-second intervals will allow less pressure into the EVAP system. When the system is less pressurized, the smoke will sometimes escape in a more condensed manner.
• A temporary blockage in the EVAP canister purge solenoid valve, purge pipe or EVAP canister could cause an intermittent condition. Inspect and repair any restriction in the EVAP system.
• To improve the visibility of the smoke exiting the EVAP system, observe the suspected leak area from different angles with a J 41413-SPT .
• Reviewing the Failure Records vehicle mileage since the diagnostic test last failed may help determine how often the condition that caused the DTC to be set occurs. This may assist in diagnosing the condition.
• For intermittent conditions, refer to Intermittent Conditions .
Test Description
The numbers below refer to the step numbers on the diagnostic table.
Introducing smoke in 15 second intervals may allow smaller leak areas to be more noticeable. When the system is less pressurized, the smoke will sometimes escape in a more condensed manner.
This step verifies proper operation of the FTP sensor.
A normal operating FTP sensor should increase above 5 inches of H2O and stop between 6-7 inches of H2O.
Step
Action
Values
Yes
No
Schematic Reference: Evaporative Emissions Hose Routing Diagram
1
Did you perform the Diagnostic System Check - Vehicle?
--
Go to Step 2
Go to Diagnostic System Check - Vehicle
2
Inspect the evaporative emission (EVAP) system for the following conditions:
• Loose, missing, or damaged service port schrader valve
• Loose, incorrect, missing, or damaged fuel fill cap
• A damaged EVAP canister purge solenoid valve
Raise the vehicle on a hoist. Refer to Lifting and Jacking the Vehicle .
Inspect the EVAP system for the following conditions:
• Disconnected, improperly routed, kinked, or damaged EVAP pipes and hoses
• A damaged EVAP canister vent solenoid valve or EVAP canister
Did you find and correct the condition?
--
Go to Step 21
Go to Step 3
3
Important: Larger volume fuel tanks and/or those with lower fuel levels may require several minutes for the floating indicator to stabilize.
Turn OFF the ignition.
Important: Refer to the J 41413-200 Evaporative Emissions System Tester (EEST) operation for detailed instructions.
Install the GE-41415-50 Fuel Tank Cap Adapter to the fuel fill pipe.
Use the flow meter on the J 41413-200 to determine if there is a leak greater than 0.51 mm (0.02 in) in the EVAP system.
Compare the flow meter stable floating indicator position to the red flag.
Is the floating indicator below the red flag?
--
Go to Step 6
Go to Step 4
4
Important: Ensure that the vehicle underbody temperature is similar to the ambient temperature and allow the surrounding air to stabilize before starting the diagnostic procedure. System flow will be less with higher temperatures.
Turn OFF the ignition.
With the J 41413-200 connected to the vehicle filler neck, apply smoke to the EVAP system.
Did you locate and repair a leak source?
--
Go to Step 21
Go to Step 5
5
Disconnect the GE-41415-50 from the fuel fill pipe.
Install the fuel fill cap to the fuel fill pipe.
Connect the J 41413-200 nitrogen/smoke supply hose to the EVAP service port.
Use the remote switch to introduce smoke into the EVAP system.
Inspect the entire EVAP system for exiting smoke with a the J 41413-SPT High Intensity White Light.
Continue to introduce smoke at 15-second intervals until the leak source has been located.
Did you locate and repair a leak source?
--
Go to Step 21
Go to Step 6
6
Use the remote switch to stop introducing smoke, if necessary.
Install the GE-41415-50 to the fuel fill pipe.
Connect the J 41413-200 nitrogen/smoke supply hose and vehicle fuel fill cap to the GE-41415-50 .
Command the EVAP canister vent solenoid valve open with a scan tool.
Compare the fuel tank pressure sensor parameter with a scan tool to the J 41413-200 pressure/vacuum gage.
Is the difference between the 2 gages less than the specified value?
1 in H2O
Go to Step 7
Go to Step 14
7
Seal the EVAP system using the EVAP Purge/Seal function with a scan tool.
Turn the nitrogen/smoke valve on the J 41413-200 control panel to NITROGEN.
Use the J 41413-200 to pressurize the EVAP system to the first specified value.
Is the fuel tank pressure sensor parameter more than the second specified value?
10 in H2O
5 in H2O
Go to Step 8
Go to Step 14
8
Use the remote switch to stop introducing nitrogen into the EVAP system.
Increase the EVAP canister purge solenoid valve to 100 percent.
Is the fuel tank pressure sensor parameter less than the specified value?
1 in H2O
Go to Step 9
Go to Step 11
9
Connect the nitrogen/smoke hose to the EVAP service port.
Remove the GE-41415-50 .
Install the fuel fill cap to the fuel fill pipe.
Start the engine.
Allow the engine to idle.
Use the purge/seal function to seal the system, with a scan tool.
Command the EVAP canister purge solenoid valve to 30 percent.
Observe the vacuum/pressure gage on the J 41413-200 and the FTP parameter on the scan tool.
Allow the vacuum to increase on the gage of the J 41413-200 , until it reaches approximately 16 inches H2O or until the vacuum reached the abort limit on a scan tool.
Use the purge/seal function to seal the system, with a scan tool.
Was the difference between the 2 gages less than the specified value?
1 in H2O
Go to Step 10
Go to Step 14
10
Did the FTP parameter on a scan tool display more than the specified value?
3.2 V
Go to Diagnostic Aids
Go to Step 17
11
Disconnect the EVAP canister purge pipe from the EVAP purge solenoid valve.
Is the fuel tank pressure sensor parameter less than the specified value?
1 in H2O
Go to Step 18
Go to Step 12
12
Disconnect the EVAP purge pipe at the EVAP canister.
Is the fuel tank pressure sensor parameter less than the specified value?
1 in H2O
Go to Step 19
Go to Step 13
13
Disconnect the EVAP vapor pipe at the EVAP canister.
Is the fuel tank pressure sensor parameter less than the specified value?
1 in H2O
Go to Step 20
Go to Step 16
14
Test for an intermittent and for a poor connection at the fuel tank pressure (FTP) sensor. Refer to Testing for Intermittent Conditions and Poor Connections and Connector Repairs .
Did you find and correct the condition?
--
Go to Step 21
Go to Step 15
15
Test the low reference circuit of the FTP sensor for an open or for high resistance.
Did you find and correct the condition?
--
Go to Step 21
Go to Step 17
16
Repair the pinched or obstructed EVAP vapor pipe.
Did you complete the repair?
--
Go to Step 21
--
17
Replace the FTP sensor. Refer to Fuel Tank Pressure Sensor Replacement .
Did you complete the replacement?
--
Go to Step 21
--
18
Replace the EVAP canister purge solenoid valve. Refer to Evaporative Emission Canister Purge Solenoid Valve Replacement .
Did you complete the replacement?
--
Go to Step 21
--
19
Repair the restriction in the EVAP purge pipe.
Did you complete the repair?
--
Go to Step 21
--
20
Replace the EVAP canister. Refer to Evaporative Emission Canister Replacement .
Did you complete the replacement?
--
Go to Step 21
--
21
Important: Larger volume fuel tanks and/or those with lower fuel levels may require several minutes for the floating indicator to stabilize.
Important: Refer to the J 41413-200 operation manual for detailed instructions.
Use the flow meter on the J 41413-200 to determine if there is a leak greater than 0.51 mm (0.02 in) in the EVAP system.
Compare the flow meter stable floating indicator position to the red flag.
Is the floating indicator below the red flag?
--
Go to Step 22
Go to Step 4
22
Observe the J 41413-200 pressure/vacuum gage.
Increase the EVAP purge solenoid valve to 100 percent.
Does the pressure decrease?
--
Go to Step 23
Go to Step 2
23
Compare the FTP sensor parameter with a scan tool to the J 41413-200 pressure/vacuum gage.
Is the difference between the 2 gages less than the specified value?
1 in H2O
Go to Step 24
Go to Step 2
24
Observe the Capture Info with a scan tool.
Are there any DTCs that have not been diagnosed?
--
Go to Diagnostic Trouble Code (DTC) List - Vehicle
System OK
--------------------------------------------------------------------------------
#PIP4078A: SES Light Due To DTCs P0449 P0455 And/Or P2431 - Reprogram ECM - keywords calibration CEL check DTC engine lamp line MIL no program repeat - (Jun 22, 2007)
Subject: SES Light due to DTCs P0449, P0455, and/or P2431 - Reprogram ECM
Models: 2007 Chevrolet Cobalt
2007 Chevrolet HHR
2007 Saturn Ion
2007 Pontiac G5
with 2.2L Engine (VIN D or F - RPO L61)
or 2.4L Engine (VIN B or P - RPO LE5)
--------------------------------------------------------------------------------
This PI was superseded to update applications and Recommendation/Instructions. Please discard PIP4078.
--------------------------------------------------------------------------------
The following diagnosis might be helpful if the vehicle exhibits the symptom(s) described in this PI
#PIP3746A: SES Light Due To A P0442 and/or P0455 DTC - Inspect Evap Pipe At Fuel Tank - keywords lamp leak line - (Aug 4, 2006)
Subject: SES Light due to a P0442 and/or P0455 DTC
Models: 2006-2007 Chevrolet Cobalt, Cobalt SS
2007 Pontiac G5
2006 Pontiac Pursuit (Canada Only)
2006-2007 Saturn Ion, Ion Redline
--------------------------------------------------------------------------------
This PI was created to include 2007 Models. Please discard PIP3746.
--------------------------------------------------------------------------------
The following diagnosis might be helpful if the vehicle exhibits the symptom(s) described in this PI.
Condition/Concern:
On rare occasions, a SES light may be experienced due to a P0442 and/or a P0455 DTC.
Recommendation/Instructions:
If the SI diagnostics do not isolate a cause for this concern, inspect the accordion style EVAP line shown below for a small hole. If a hole is present, it will be necessary to replace the complete fuel tank since this line is not serviced separately. The new fuel tank will come with a new line.
Please follow this diagnostic or repair process thoroughly and complete each step. If the condition exhibited is resolved without completing every step, the remaining steps do not need to be performed.
GM bulletins are intended for use by professional technicians, NOT a "do-it-yourselfer". They are written to inform these technicians of conditions that may occur on some vehicles, or to provide information that could assist in the proper service of a vehicle. Properly trained technicians have the equipment, tools, safety instructions, and know-how to do a job properly and safely. If a condition is described, DO NOT assume that the bulletin applies to your vehicle, or that your vehicle will have that condition. See your GM dealer for information on whether your vehicle may benefit from the information.
WE SUPPORT VOLUNTARY TECHNICIAN CERTIFICATION
Senior Member
Joined: 12-21-06
Posts: 1,618
Likes: 0
From: WV
Hate to say it, but in my opinion you should take it somewhere that has an evap leak detector, you will not see any fluid by just looking at the line and the chances of seeing the pinhole in a line are slim. We use a smoke machine that induces white smoke into the evap system, then you can see the leak, you also have to have a scan tool to purge and seal the system, best bet is to call your most reputable local dealer and let them help you... Good luck...
Evap, leaks vapor not fluid!!!
Evap, leaks vapor not fluid!!!

New Member
Joined: 03-27-09
Posts: 138
Likes: 0
From: Orlando, FL
I actually just had my car at the dealer on Monday for this problem. I was throwing 2 Evap codes. One for small leak and another for large leak. It turned out that I have a bad purge solenoid.
Last edited by wilson79; Jun 18, 2009 at 09:45 PM.
Senior Member
Joined: 12-21-06
Posts: 1,618
Likes: 0
From: WV
Lol, it's a purge solenoid, you have 2 sol. in your evap system, one back by the tank at the canister called the vent sol., the other up at the engine called a PURGE soleniod...
Senior Member
Joined: 12-21-06
Posts: 1,618
Likes: 0
From: WV
BUT, i would NOT throw parts at it, take it in and have it checked. I have seen very few purge valves, several vent valves, some bad wiring, occasionally the seal on the top of the tank will be no good, ect, ect, could be alot of things...

New Member
Joined: 07-02-09
Posts: 1
Likes: 0
From: Texas
EVAP purge valve location
Does anyone know where the EVAP purge valve is located on 2.2 cobalt. if so PLEASE tell me i have been having a hard time finding it on my car and on the internet. i know what it looks like but im still having trouble.

Joined: 12-30-07
Posts: 14,079
Likes: 197
From: NEPA
I would randomly get the "Check Gas Cap" message along with the P0455 EVAP CEL. I got this warning message shortly after I changed my fuel filter. I read a lot of threads about this, and how it could be a number of things concerning your fuel lines and EVAP system. Well, with the luck I have, I never would have thought it was really only the gas cap, so I got under my car and checked all my lines. I reconnected and checked all connections on my fuel filter, along with making sure none of my lines were damaged. Everything checked out ok, but I was still getting the message. I then knew for sure it was the gas cap. I went to the dealer, picked up a gas cap free of charge, and installed it myself. No more "Check Gas Cap" message / CEL, and I must say the new gas cap locks much tighter than the one that came on my car from the factory 

Thread
Thread Starter
Forum
Replies
Last Post