
Other/Misc: Brembo Swap on LSJ


Thread Starter
Senior Member
Joined: 04-08-06
Posts: 2,395
Likes: 3
From: Charlotte, NC
Brembo Swap on LSJ
Well after a few track sessions, I decided to up the brakes on the car. Decided to put a set of Brembos on from the LNF. Decided to snap a few pictures along the way, maybe it will help someone else looking to do the same.
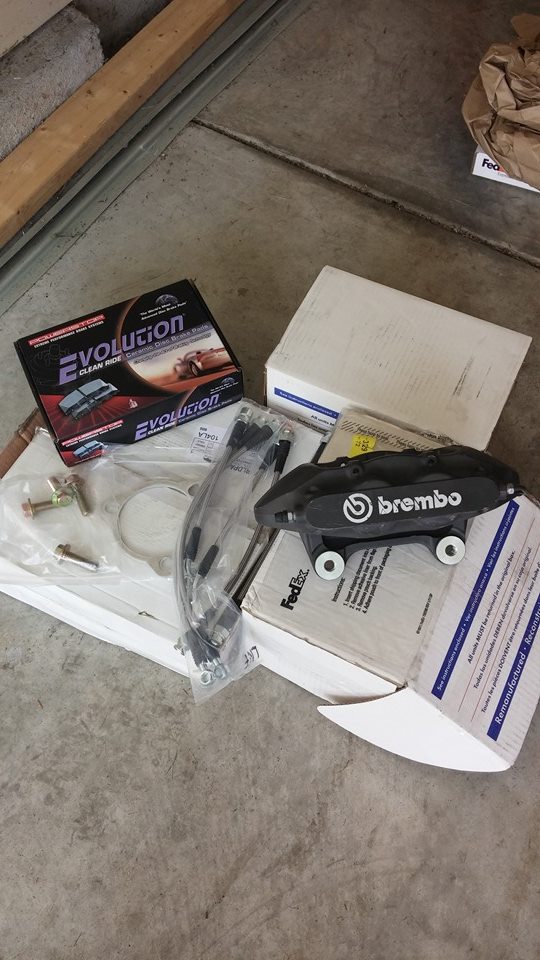
List of Parts needed
-Calipers
-Rotors
-Pads (running a different set of pads and rotors for track days)
-Brake lines (I decided to upgrade to braided steel lines all the way around)
-Shims (can be acquired from CED)
-Caliper mounting bolts (stock bolts will not work)
-Brake Fluid
Here is a picture of the parts about to go on.
First thing's first. Jack the car up and remove the front wheels.
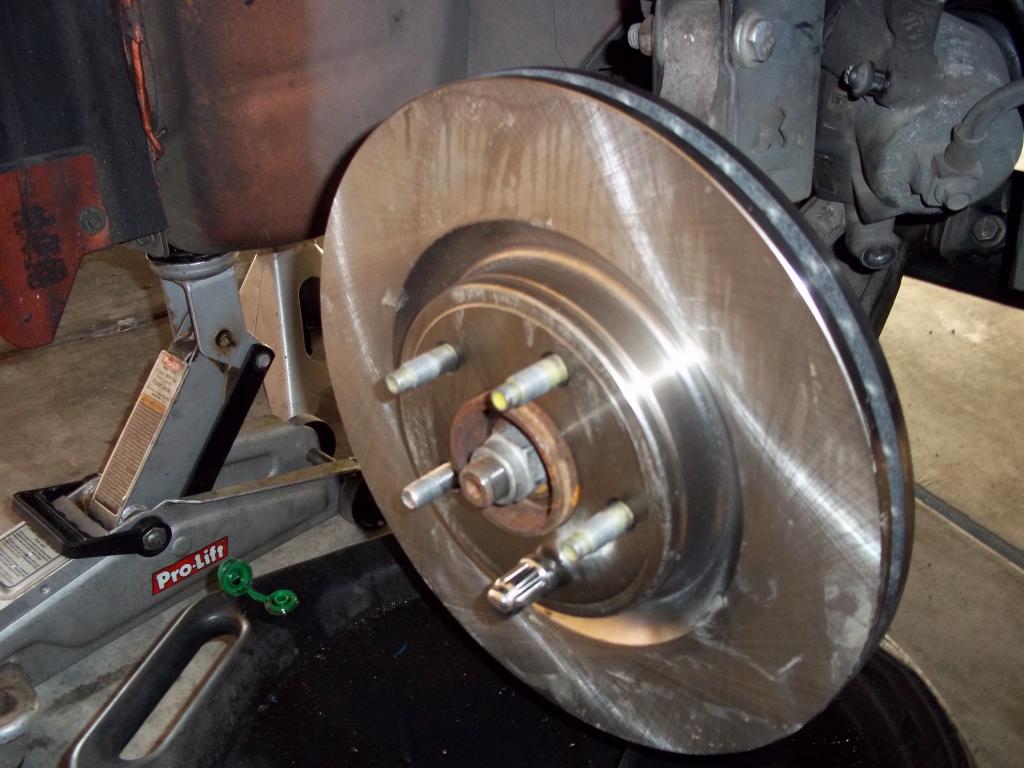
Here is the stock rotor/caliper set up. first thing needed to do is to remove the caliper, pad bracket, rotor and axle nut.
1. Remove the 30mm axle nut from the axle (an impact gun makes this much easier)
if the axle is not wanting to move after removing the nut...thread the nut back on to the axle until it is flush with the axle (to save the threads on the axle) and give it a good smack with a hammer to free it up then remove the nut.
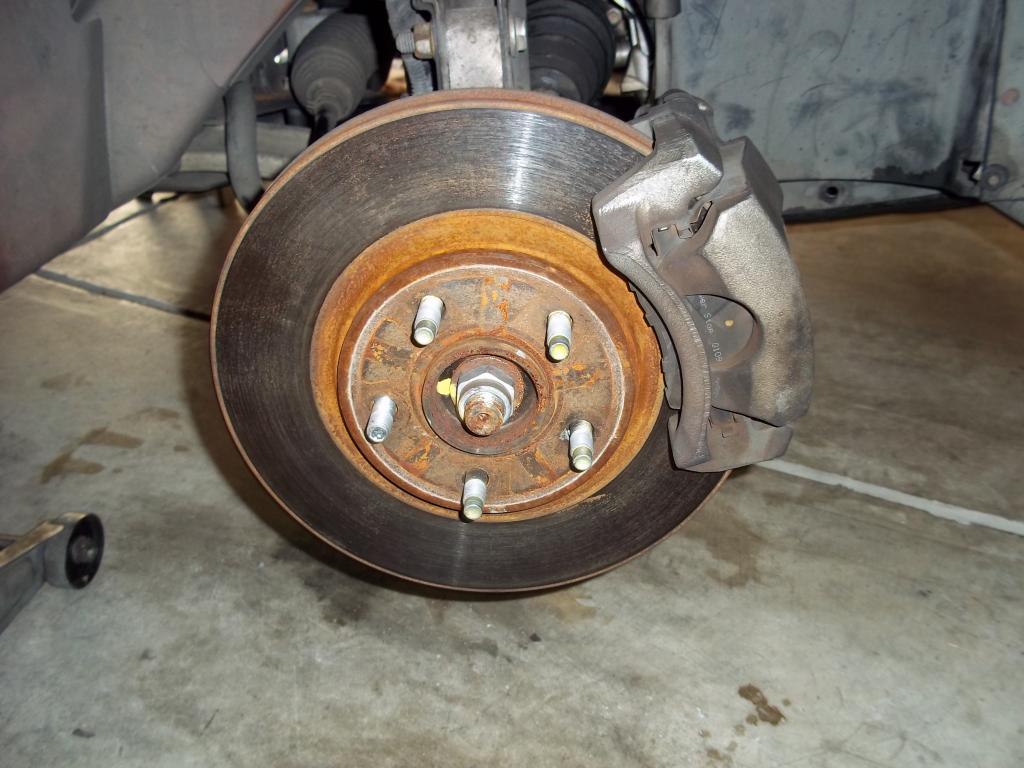
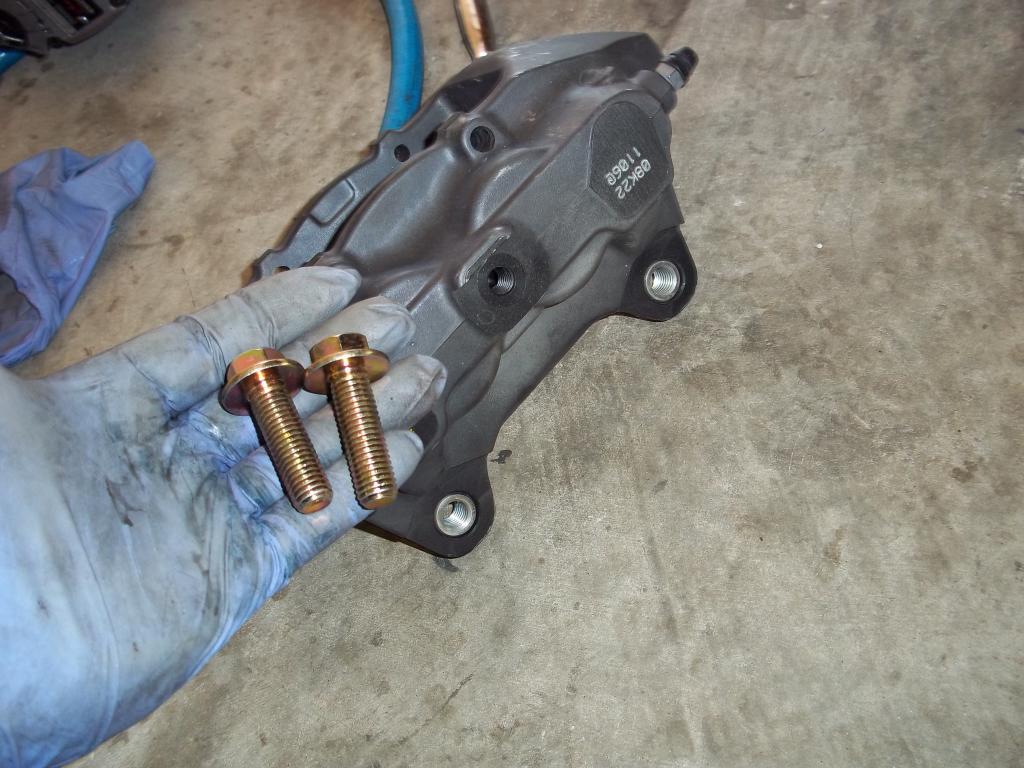
2. Next you need to remove the caliper and mounting bracket. You will need a 14mm and 15mm socket. There are two bolts holding the caliper on, then after the caliper is removed you can remove the 2 bolts holding the pad bracket.
3. After removing the caliper and pad bracket, you can slide the rotor off and should be left with just the hub.
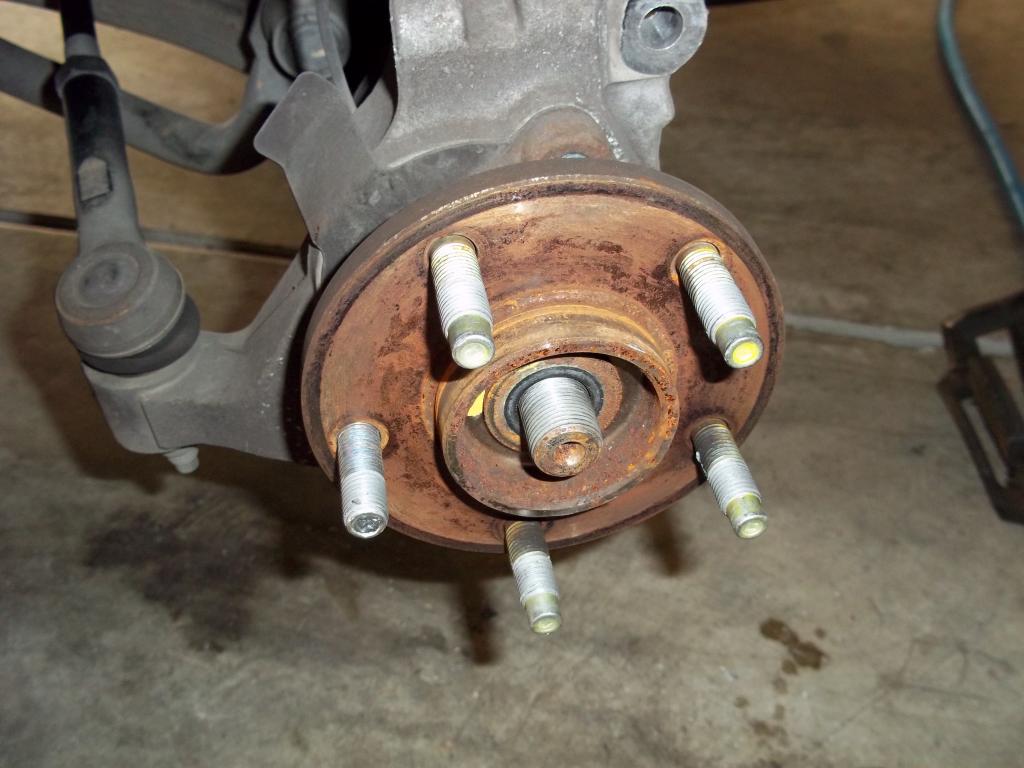
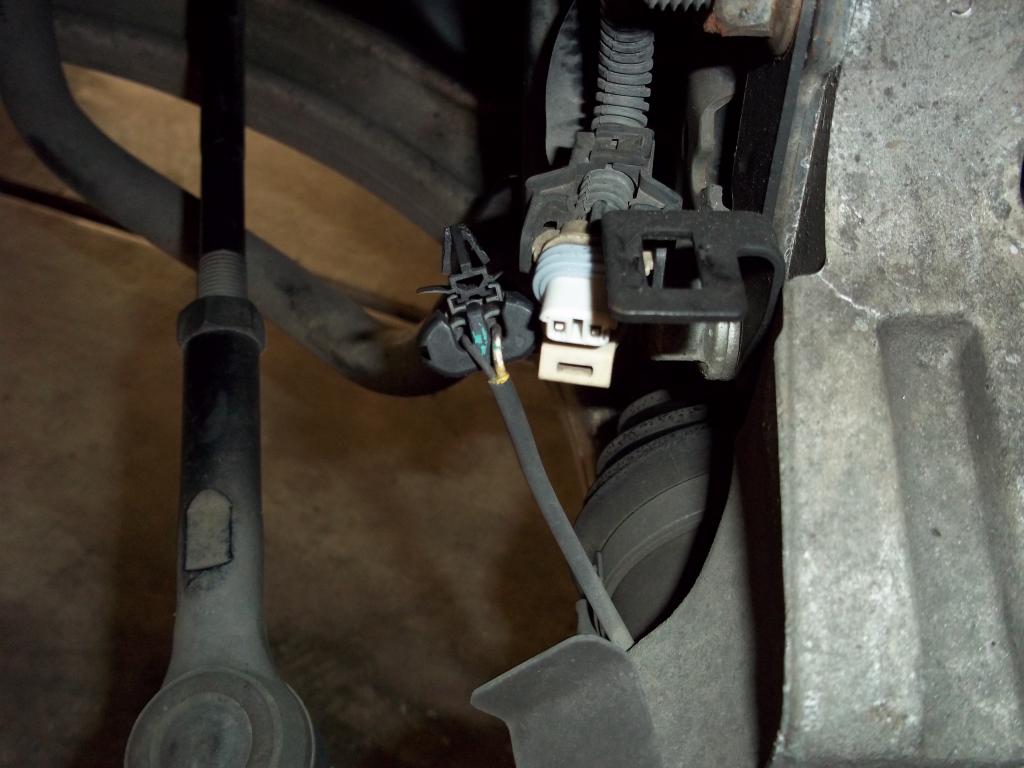
4. Next you will want to unclip the abs connector and remove it from the bracket
5. After that remove the 3 15mm bolts from the back of the hub, and remove the hub and spacer from the car.
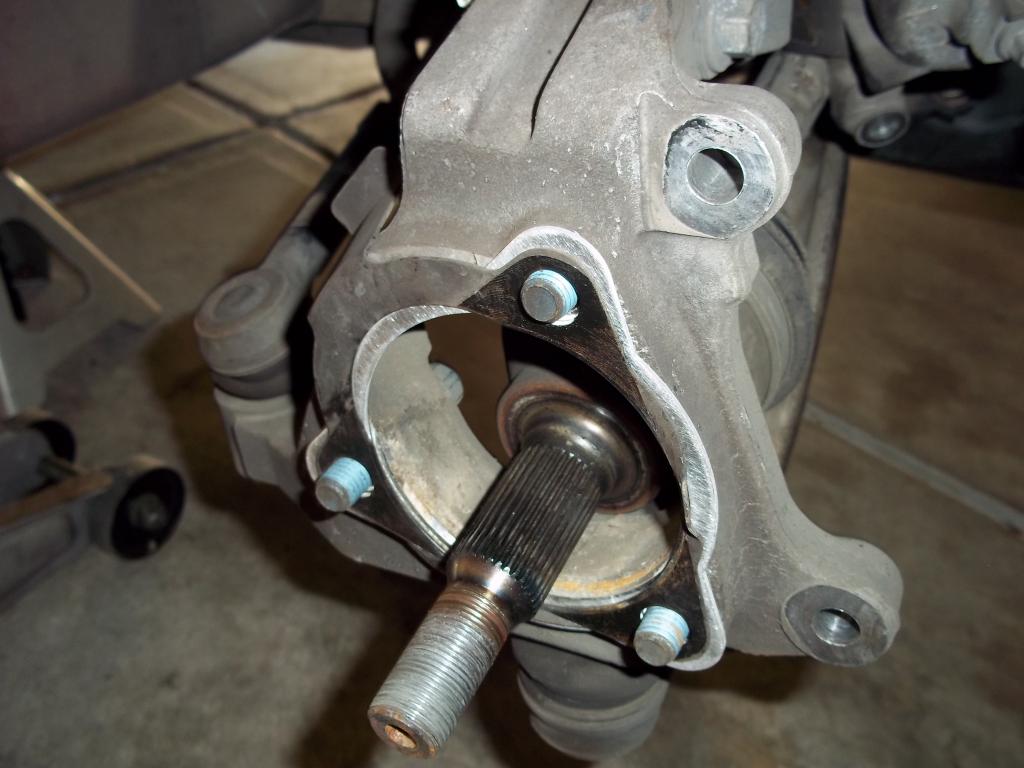
6. Now there is a spacer needed to go between the factory spacer and the steering knuckle. This is used to center the rotor in the middle of the caliper.
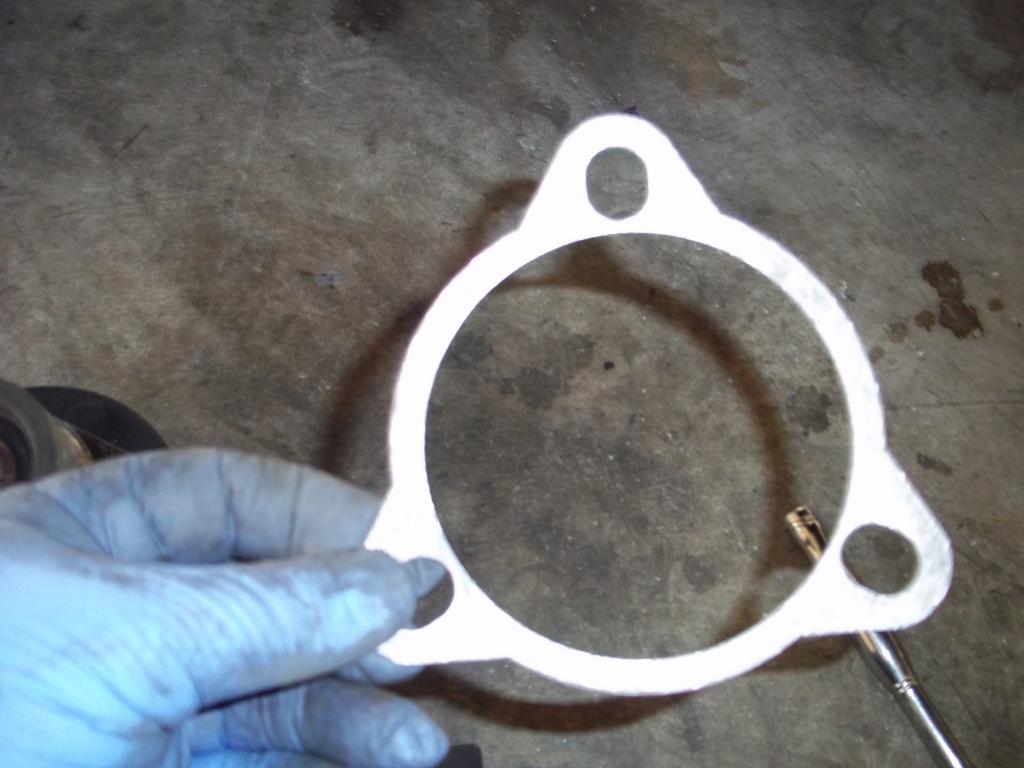
and installed
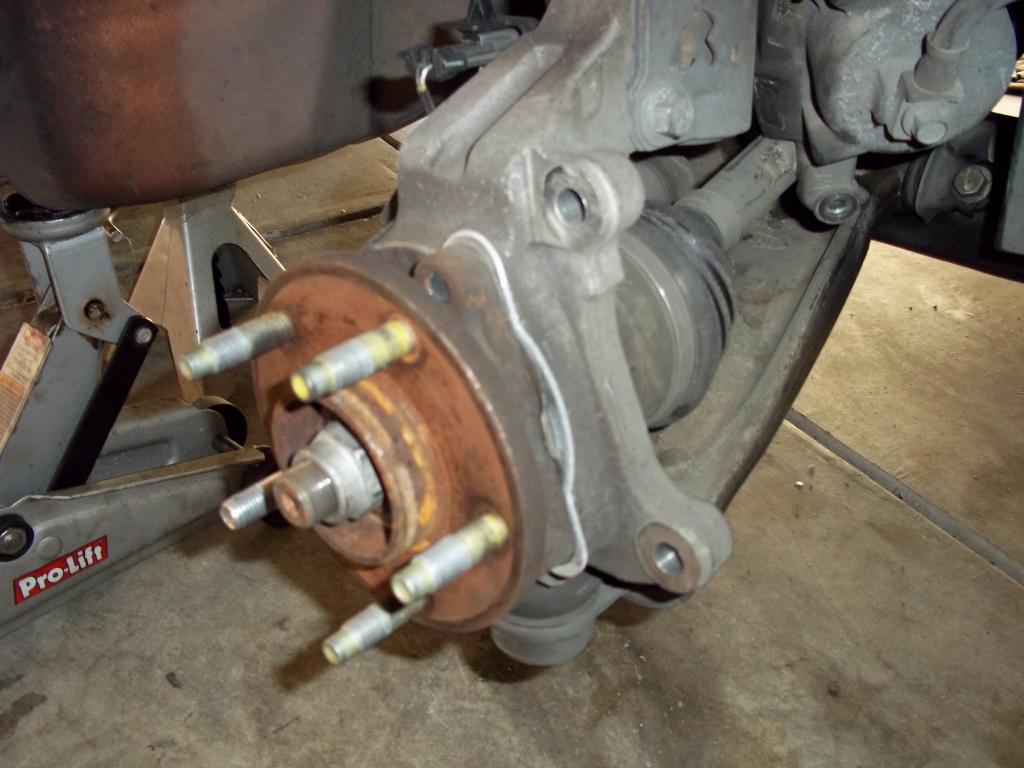
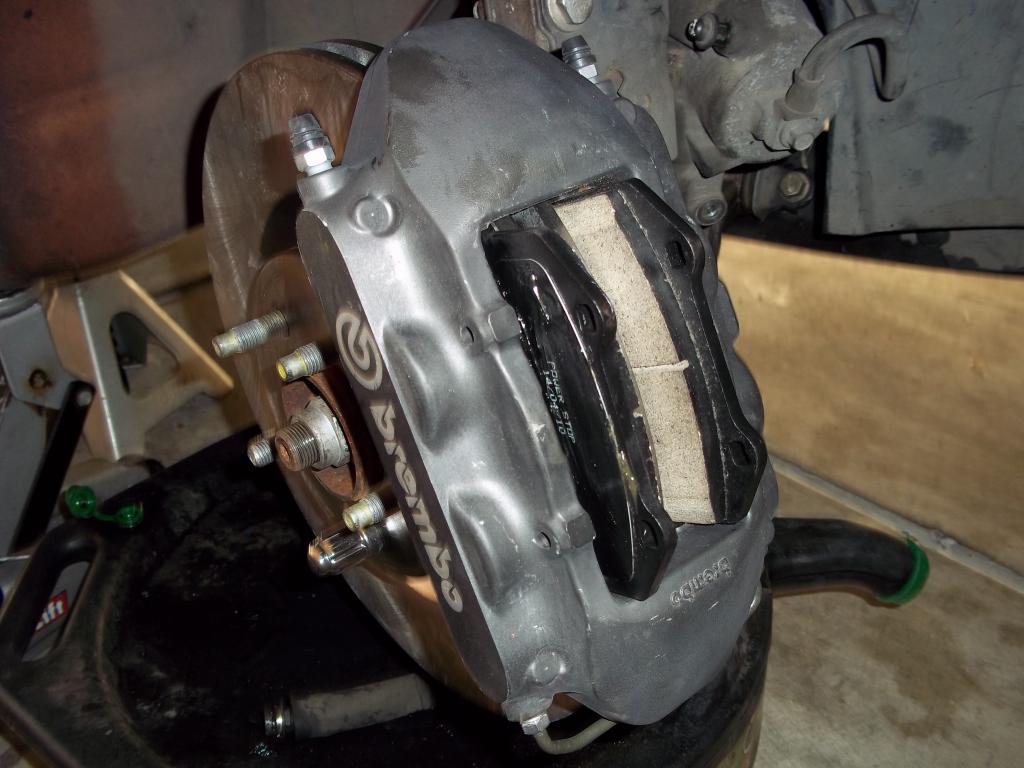
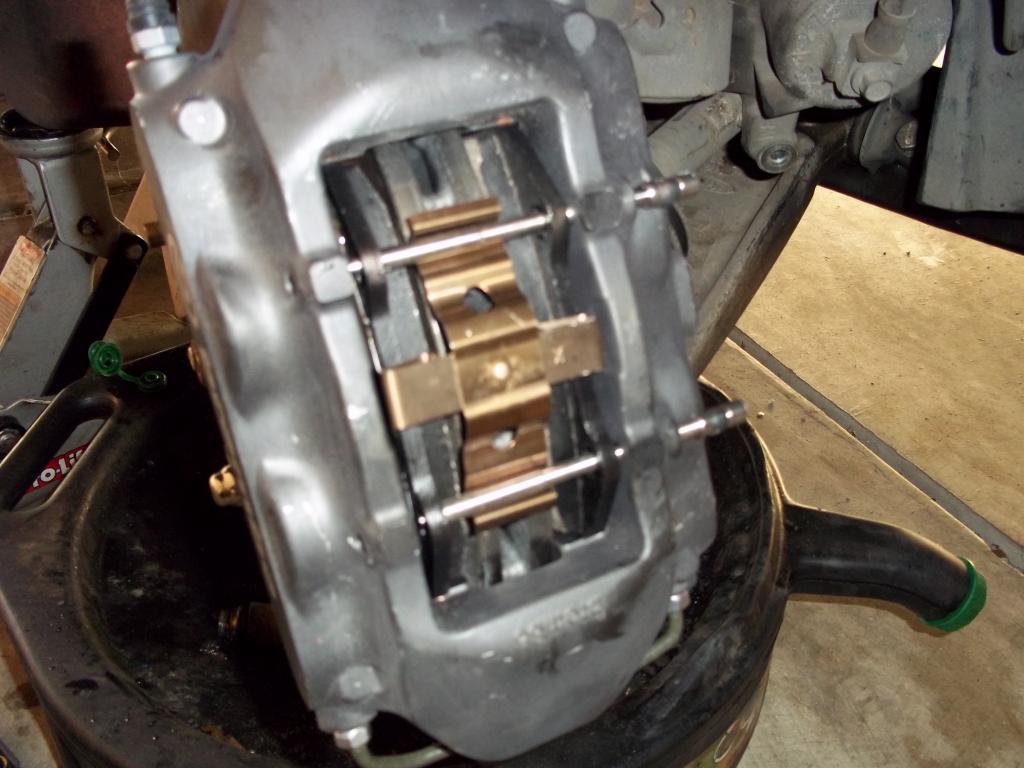
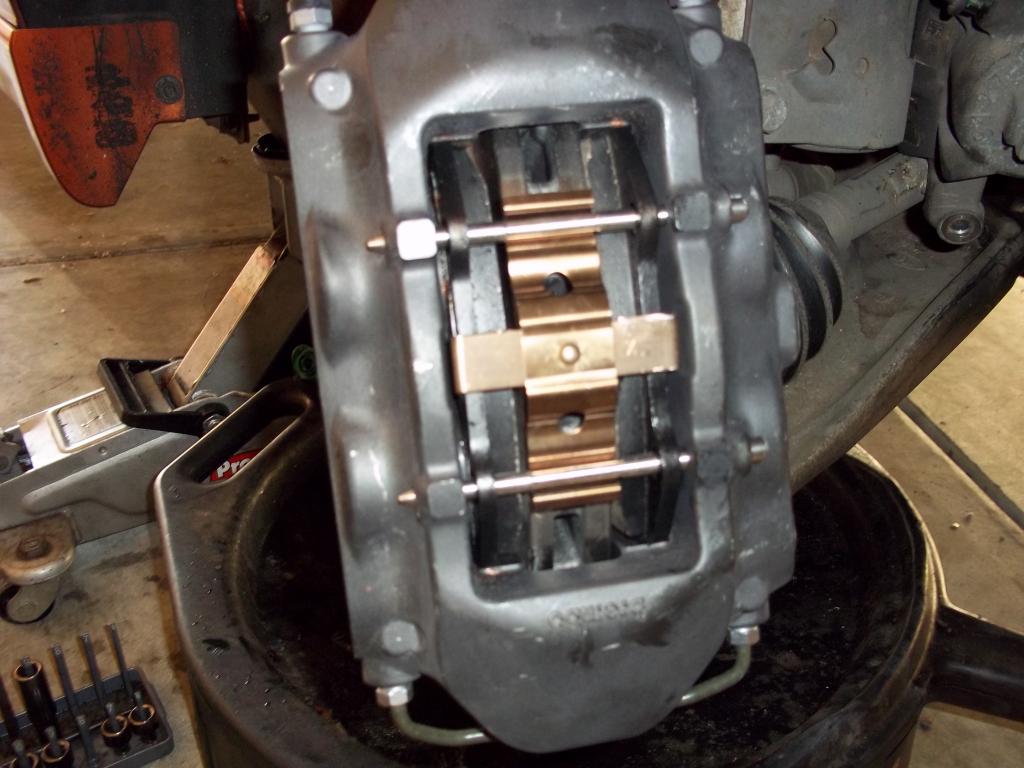
7. Install the rotor (I usually run a lug nut on to hold the rotor in place while mounting the caliper and stuff)
8. Use the new bolts and install and torque the caliper to the knuckle (tq spec. 96 lb. ft.) and make sure the rotor is centered in the caliper.
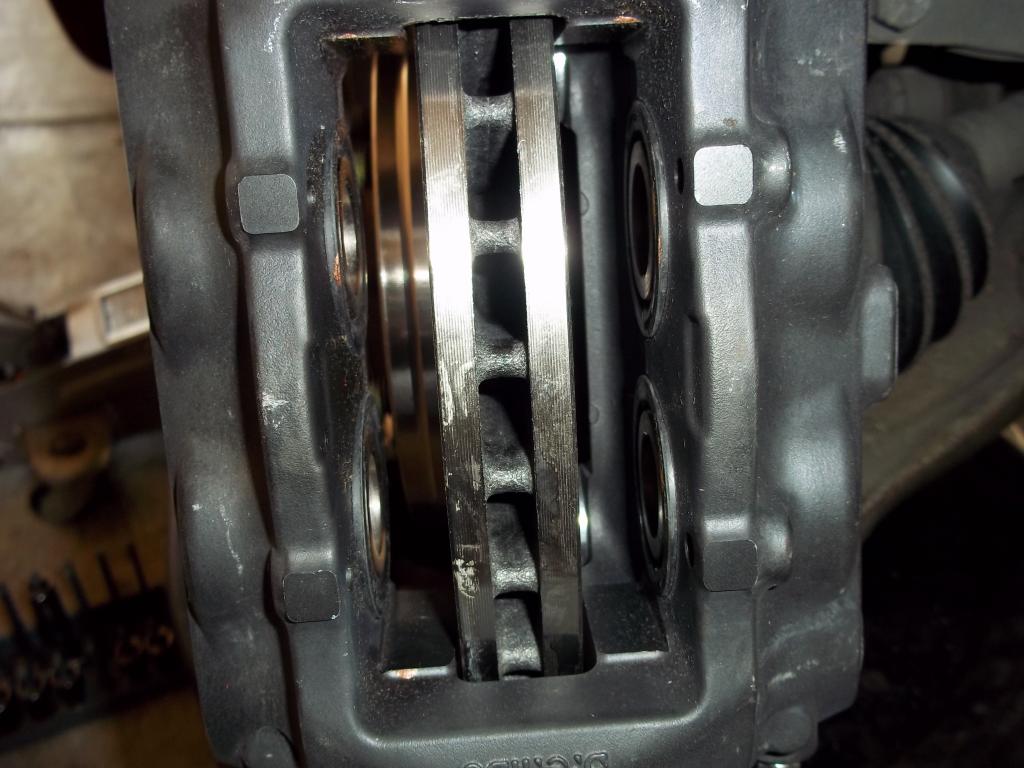
9. Next up , install the pads and pins. Pads will slide in from the top, then install the retaining pins from the inside out. I used at little hammer and punch to make sure they seated all the way down.
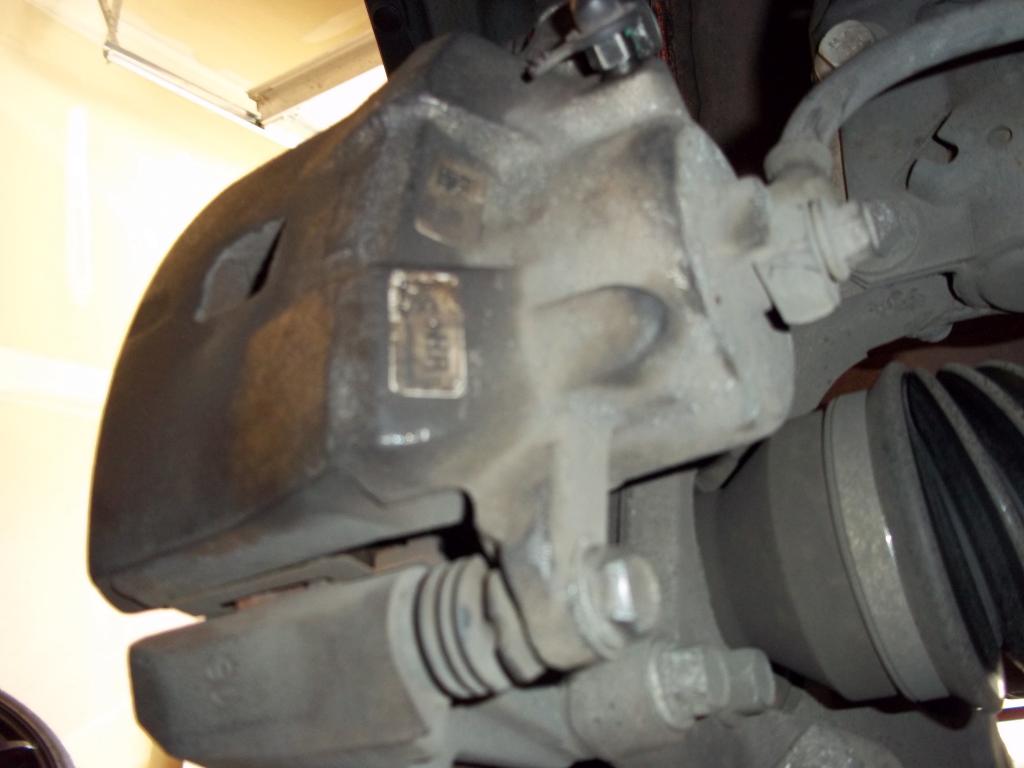
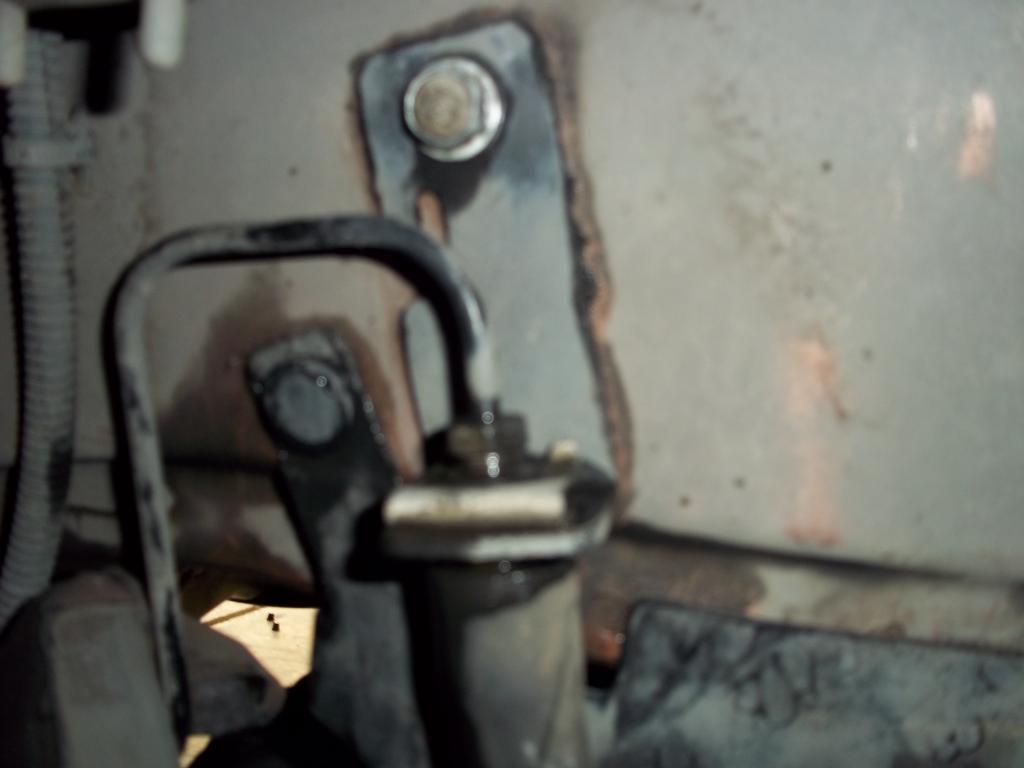
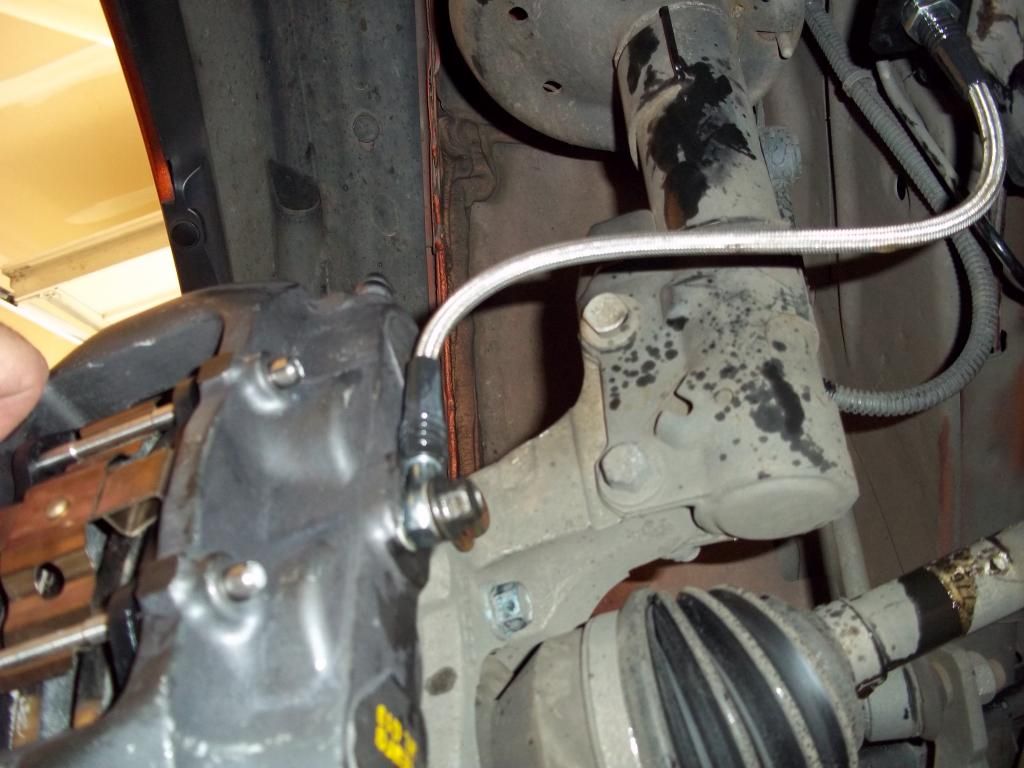
10. Next you will need to install the new brake line. I went with braided steel lines instead of O.E. lines. You will need to banjo bolt from the old caliper, and some crush washers. First take the 13mm fitting loose from the stock brake line, remove the lock tab that holds the flex tube from the bracket as pictured here.
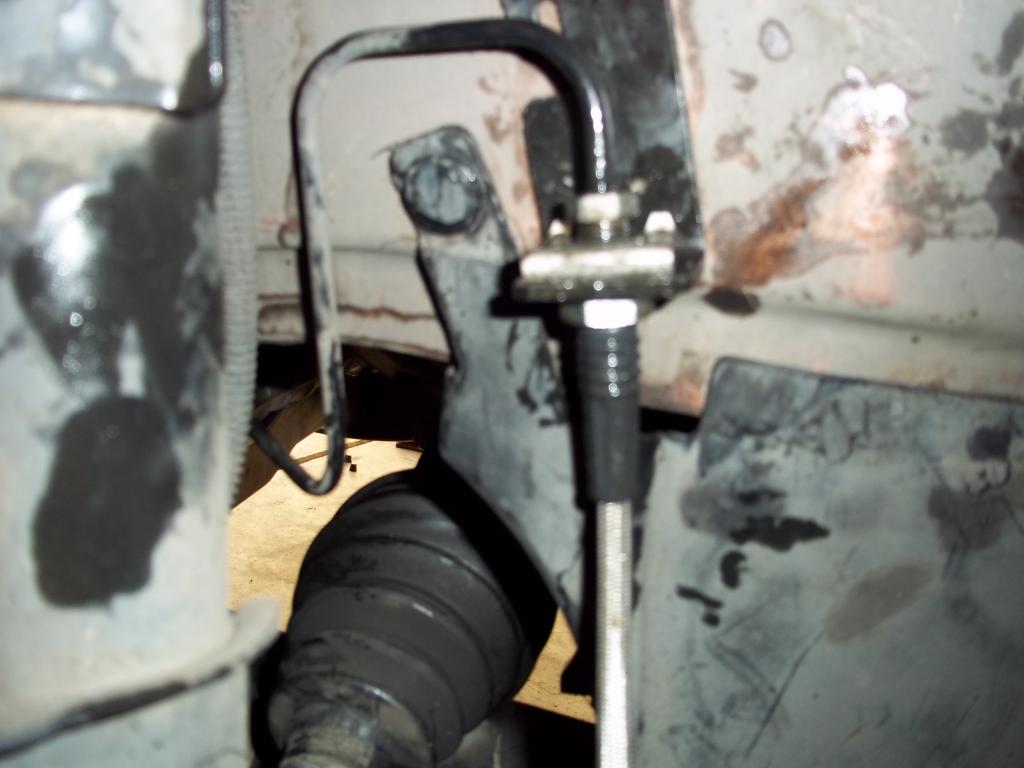
11. With the stock line removed, use the banjo bolt and new crush washers. I find it easier to start the hose in the caliper before putting it on to the hard line. Thread it in, but leave it loose for now so you can move the line around. Then place it back into the bracket and thread it into the hard metal line. Tighten the banjo bolt (30 lb. ft) and then tighten the fitting at the hard line and install the retaining clip. It should look like this when done.
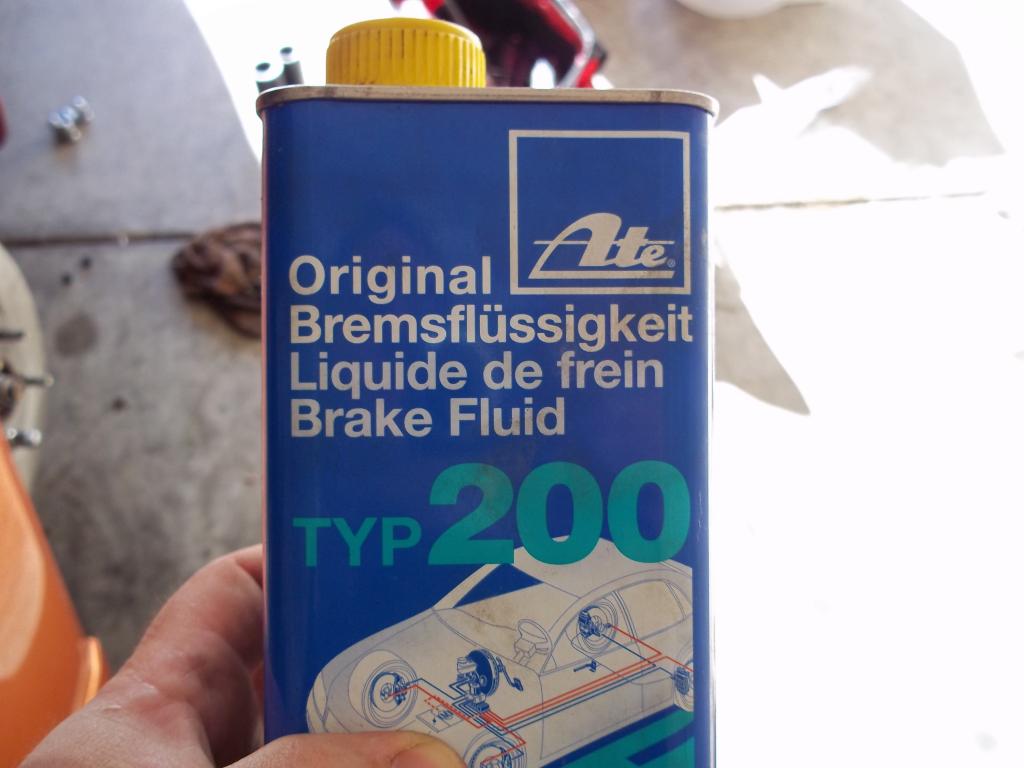
With everything tight, and after both sides are done, time to bleed the brakes. I usually crack the bleeder screws open and let them gravity bleed first. Then time to bleed the brakes. When bleeding them, bleed the inside bleeder first and then the outside. This is the fluid I use....it's a high temp dot 4 fluid. If you spend any time on a road course it is a good idea to upgrade from dot 3 to dot 4 to help keep the fluid from boiling and also getting rid of brake fade.
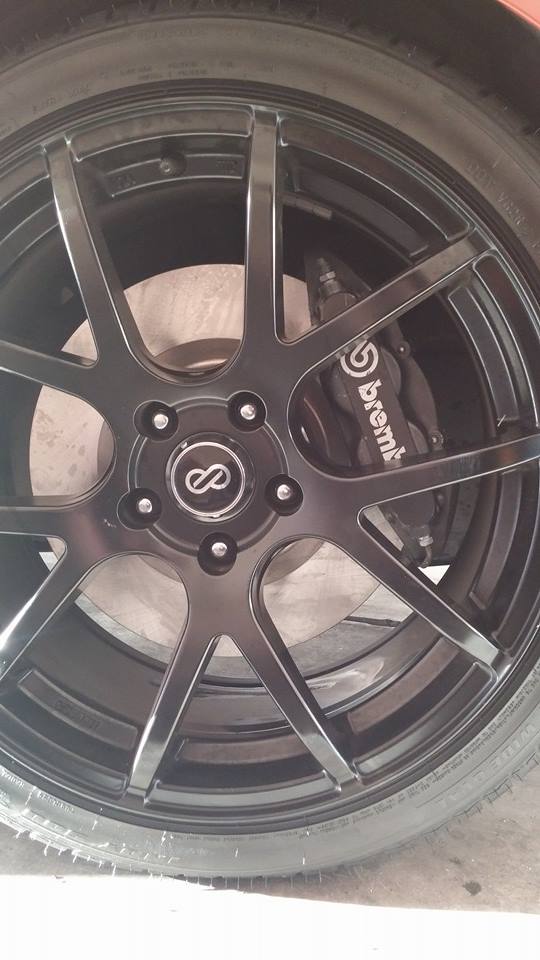
After the brakes are all bled, top the fluid off, put your wheels back on and enjoy the new stopping power!!
List of Parts needed
-Calipers
-Rotors
-Pads (running a different set of pads and rotors for track days)
-Brake lines (I decided to upgrade to braided steel lines all the way around)
-Shims (can be acquired from CED)
-Caliper mounting bolts (stock bolts will not work)
-Brake Fluid
Here is a picture of the parts about to go on.

First thing's first. Jack the car up and remove the front wheels.
Here is the stock rotor/caliper set up. first thing needed to do is to remove the caliper, pad bracket, rotor and axle nut.
1. Remove the 30mm axle nut from the axle (an impact gun makes this much easier)
if the axle is not wanting to move after removing the nut...thread the nut back on to the axle until it is flush with the axle (to save the threads on the axle) and give it a good smack with a hammer to free it up then remove the nut.

2. Next you need to remove the caliper and mounting bracket. You will need a 14mm and 15mm socket. There are two bolts holding the caliper on, then after the caliper is removed you can remove the 2 bolts holding the pad bracket.

3. After removing the caliper and pad bracket, you can slide the rotor off and should be left with just the hub.

4. Next you will want to unclip the abs connector and remove it from the bracket

5. After that remove the 3 15mm bolts from the back of the hub, and remove the hub and spacer from the car.

6. Now there is a spacer needed to go between the factory spacer and the steering knuckle. This is used to center the rotor in the middle of the caliper.

and installed

7. Install the rotor (I usually run a lug nut on to hold the rotor in place while mounting the caliper and stuff)

8. Use the new bolts and install and torque the caliper to the knuckle (tq spec. 96 lb. ft.) and make sure the rotor is centered in the caliper.


9. Next up , install the pads and pins. Pads will slide in from the top, then install the retaining pins from the inside out. I used at little hammer and punch to make sure they seated all the way down.


10. Next you will need to install the new brake line. I went with braided steel lines instead of O.E. lines. You will need to banjo bolt from the old caliper, and some crush washers. First take the 13mm fitting loose from the stock brake line, remove the lock tab that holds the flex tube from the bracket as pictured here.

11. With the stock line removed, use the banjo bolt and new crush washers. I find it easier to start the hose in the caliper before putting it on to the hard line. Thread it in, but leave it loose for now so you can move the line around. Then place it back into the bracket and thread it into the hard metal line. Tighten the banjo bolt (30 lb. ft) and then tighten the fitting at the hard line and install the retaining clip. It should look like this when done.


With everything tight, and after both sides are done, time to bleed the brakes. I usually crack the bleeder screws open and let them gravity bleed first. Then time to bleed the brakes. When bleeding them, bleed the inside bleeder first and then the outside. This is the fluid I use....it's a high temp dot 4 fluid. If you spend any time on a road course it is a good idea to upgrade from dot 3 to dot 4 to help keep the fluid from boiling and also getting rid of brake fade.

After the brakes are all bled, top the fluid off, put your wheels back on and enjoy the new stopping power!!


Thread Starter
Senior Member
Joined: 04-08-06
Posts: 2,395
Likes: 3
From: Charlotte, NC
Noticeable difference......i really want to see a diference at the track though
Last edited by Sunburst_SS; Sep 29, 2014 at 05:34 AM. Reason: Automerged Doublepost


Joined: 12-30-07
Posts: 14,079
Likes: 197
From: NEPA

you will need a 5mm spacer at the least to fit behind ss/sc wheels, if you use lnf wheels they fit without and issue, if you use the 2.4ss 17" wheels, you need a 3mm spacer.
both powell and CED sell the spacers you need.
both powell and CED sell the spacers you need.

Thread
Thread Starter
Forum
Replies
Last Post
ThoR294
Wanted - What to buy - All categories
4
Oct 4, 2015 08:44 PM