


Appearance: How To : Headlight Removal and HID Install (pics!!!)

 How To : Headlight Removal and HID Install (pics!!!)
As it says in the title this is a walk through on how to install HIDs in your Cobalt. Also how to remove headlight if you don't already know.
Items Needed
Painters Tape
10mm Socket
Ratchet w/ Extension
Drill W/Drill Bit
Zip Ties
Razor Blade
Flat Head Screwdriver
and of course HID Kit W/ 9007 Bulbs
1. Ok, so first start out by using your painters tape and mask off your bumper as close to the headlight as you can. (this will prevent scratching your bumper)
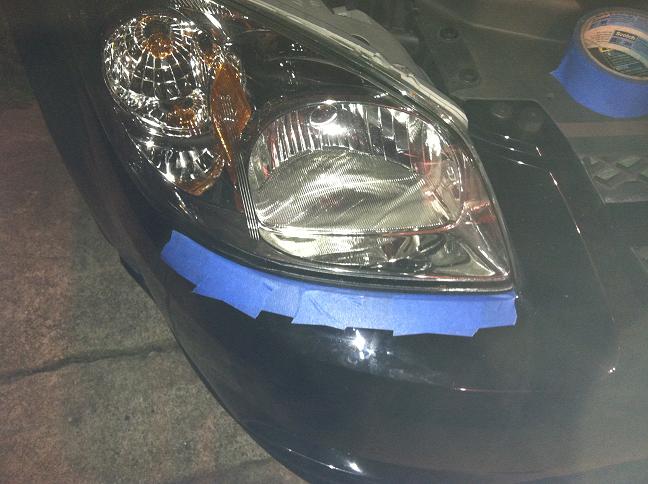
2. Next, remove the two silver bolts located on the headlight using your 10mm socket (RED) and using your flat head to remove the plastic clip (BLUE)
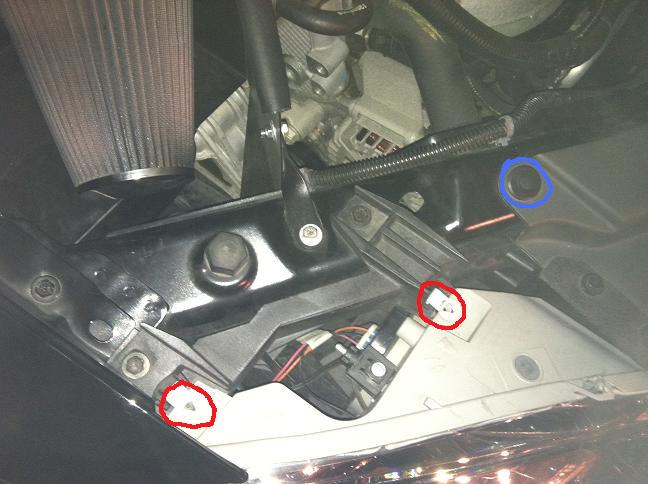
3. This step will require a little play (atleast for me it did), start with the side closest to your fender. Pull the headlight out slightly.
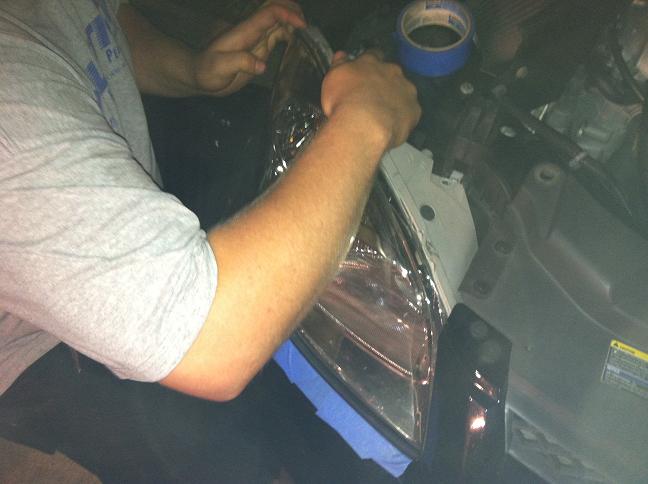
4. Lift up on the plastic piece where you removed the plastic clip from. Then the wiggling begins , you might have to push on the inner side of the headlight. Remove the next plastic clip if need.
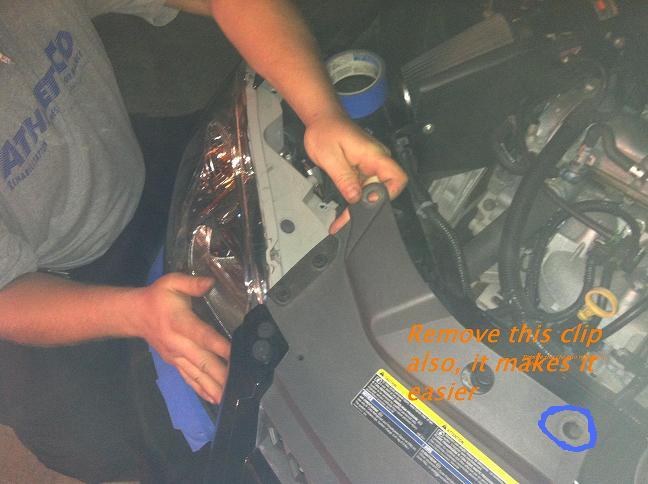
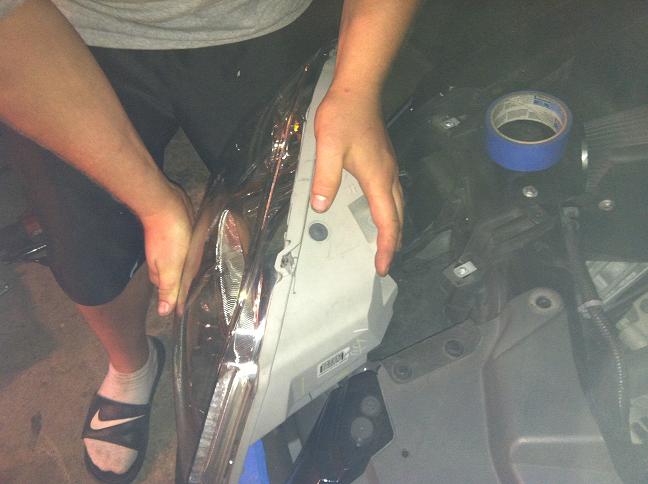
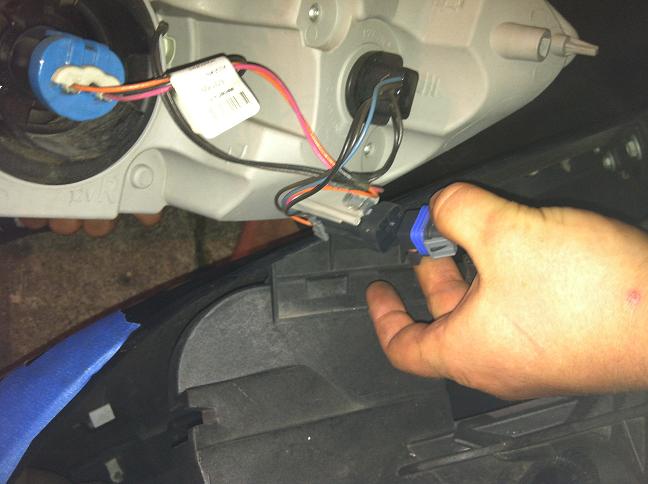
5. Remove the plug from the headlight and set headlight aside
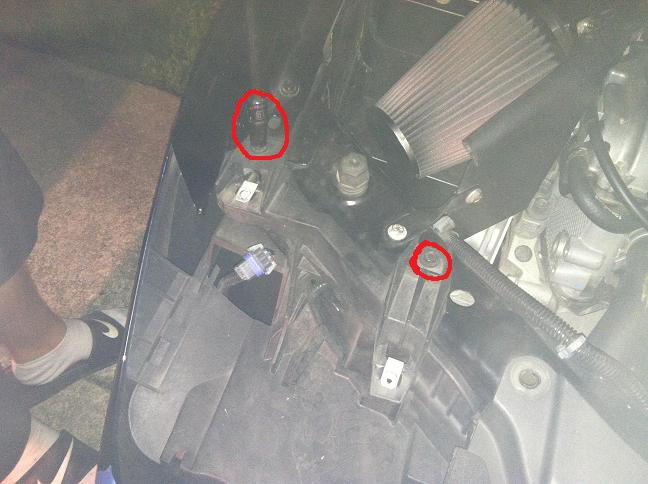
6. Remove the 2 bolts holding the headlight bracket on top (RED) , Then remove the two bolts on the bottom of the bracket (RED). When doing the drive side you will see the outside temp sensor just remove the plug on the back side.
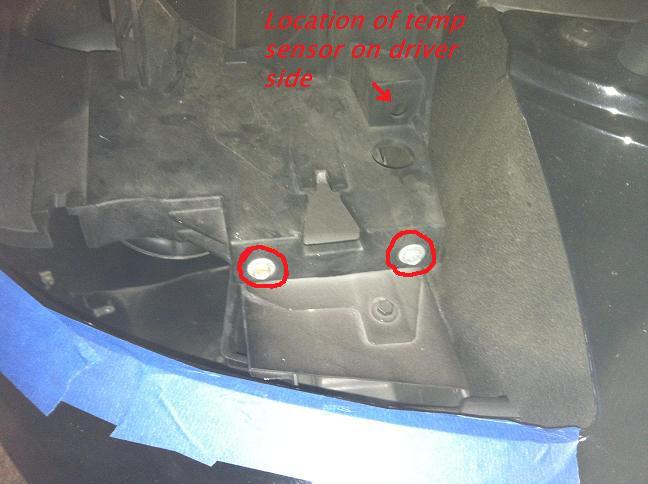
7. Then take your ballast from your HID kit and hold it to the underside of the bracket you just removed with the wires faced so they would be facing the inside of the car make 6 marks, 2 on each side and one on top and bottom.
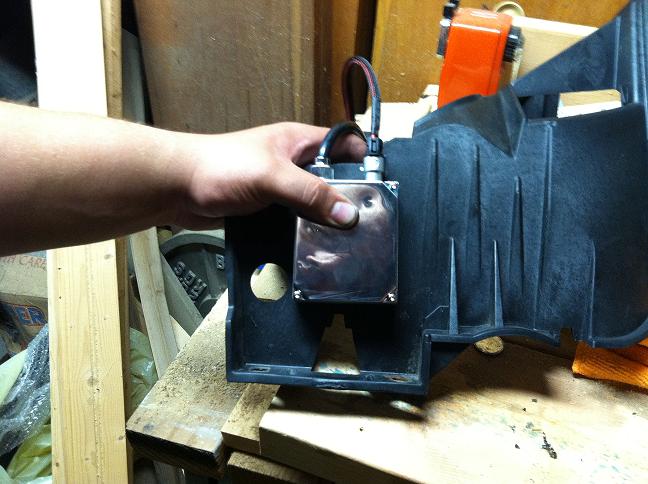
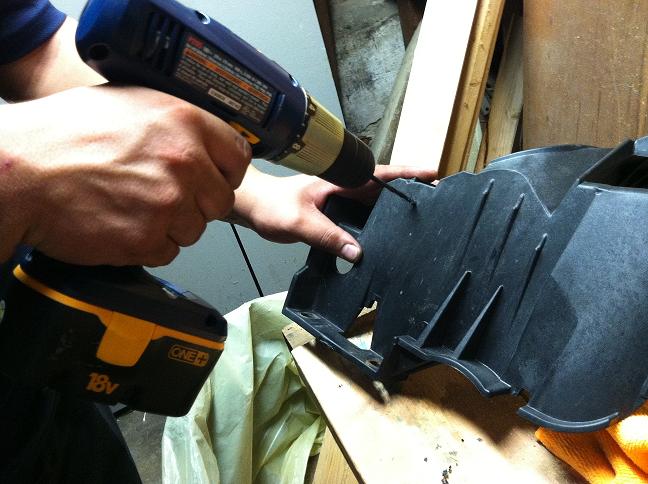
And drill the marks you made
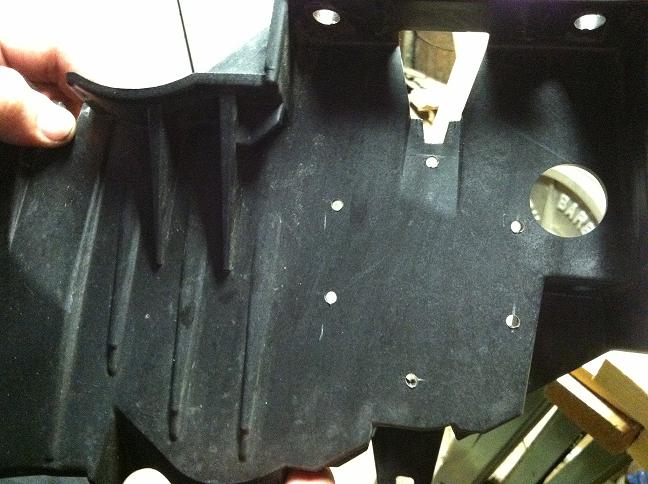
It should looks like this..
8. Next, zip tie your ballast to the headlight bracket and trim the excess
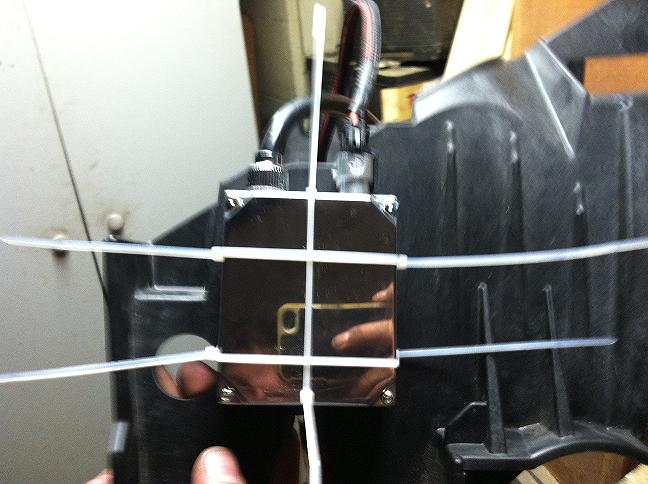
This is what the top of your bracket should look like
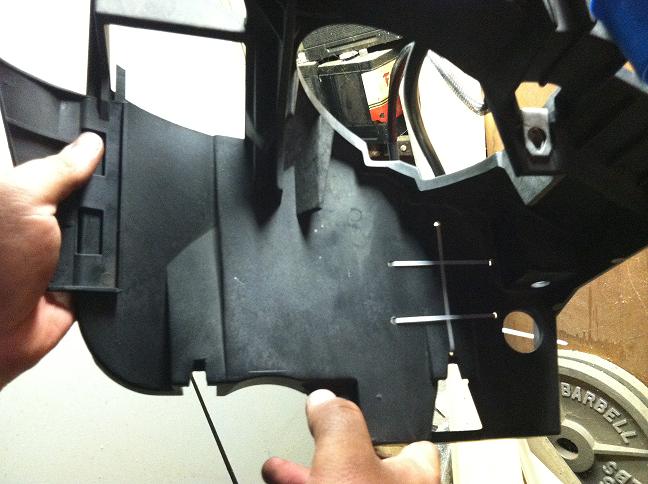
9. Pull the wires through the hole in the back and re-install the headlight bracket
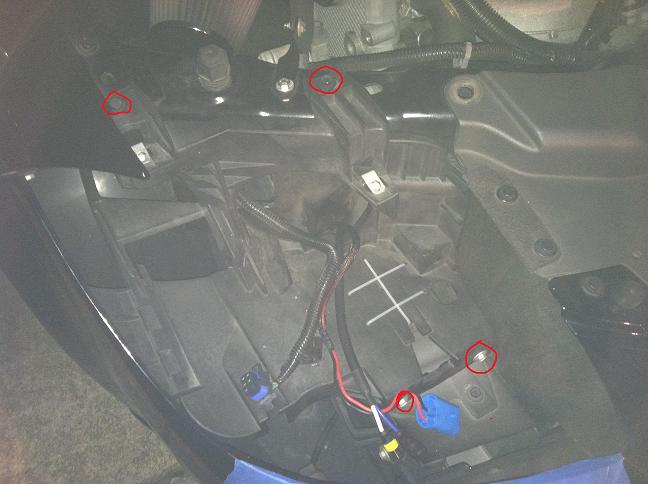
10. Install your HID bulb in your headlights just like you would if changing a burnt out bulb. Make you connections between the headlight and ballast. I have read about some people having to wire a ground but i did not everything was plug and play.
11. Follow instructions in reverse order to put head light back in. Tighten the 2 bolts to the headlight then the 2 plastic clips and your done
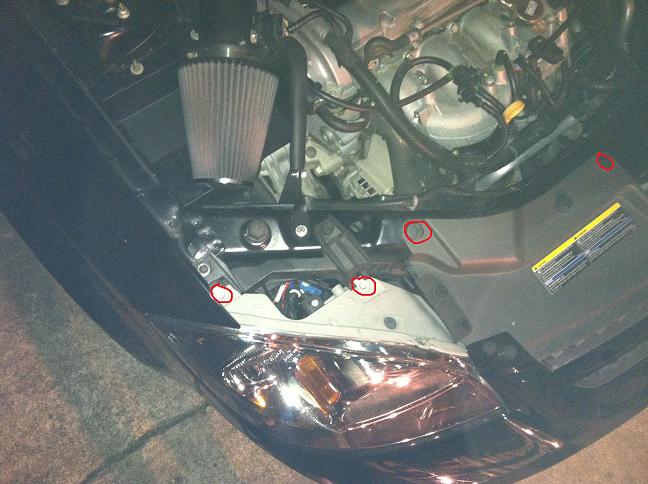
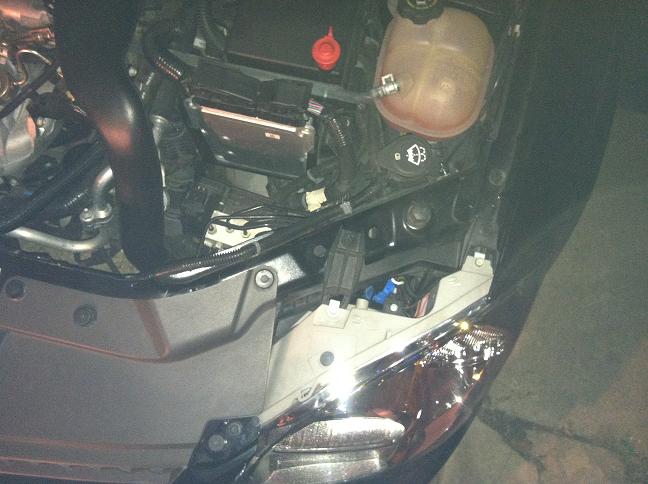
Driver side
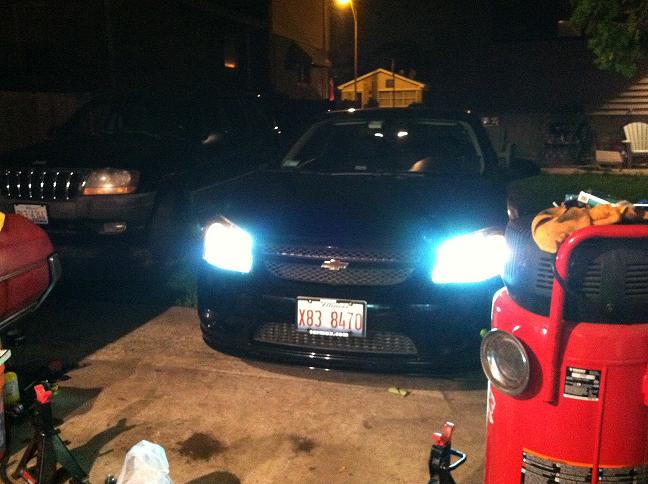
I decided to go with 6k HIDs
If your going to do fog lights too, do them at the same time because you have to remove the headlight and bracket all over again. I didnt do my fogs yet But will be doing them soon
I hope this helps
All done
Items Needed
Painters Tape
10mm Socket
Ratchet w/ Extension
Drill W/Drill Bit
Zip Ties
Razor Blade
Flat Head Screwdriver
and of course
HID Kit W/ 9007 Bulbs1. Ok, so first start out by using your painters tape and mask off your bumper as close to the headlight as you can. (this will prevent scratching your bumper)
2. Next, remove the two silver bolts located on the headlight using your 10mm socket (RED) and using your flat head to remove the plastic clip (BLUE)
3. This step will require a little play (atleast for me it did), start with the side closest to your fender. Pull the headlight out slightly.
4. Lift up on the plastic piece where you removed the plastic clip from. Then the wiggling begins
, you might have to push on the inner side of the headlight. Remove the next plastic clip if need.5. Remove the plug from the headlight and set headlight aside
6. Remove the 2 bolts holding the headlight bracket on top (RED) , Then remove the two bolts on the bottom of the bracket (RED). When doing the drive side you will see the outside temp sensor just remove the plug on the back side.
7. Then take your ballast from your HID kit and hold it to the underside of the bracket you just removed with the wires faced so they would be facing the inside of the car make 6 marks, 2 on each side and one on top and bottom.
And drill the marks you made
It should looks like this..
8. Next, zip tie your ballast to the headlight bracket and trim the excess
This is what the top of your bracket should look like
9. Pull the wires through the hole in the back and re-install the headlight bracket
10. Install your HID bulb in your headlights just like you would if changing a burnt out bulb. Make you connections between the headlight and ballast. I have read about some people having to wire a ground but i did not everything was plug and play.
11. Follow instructions in reverse order to put head light back in. Tighten the 2 bolts to the headlight then the 2 plastic clips and your done
Driver side
I decided to go with 6k HIDs
If your going to do fog lights too, do them at the same time because you have to remove the headlight and bracket all over again. I didnt do my fogs yet
But will be doing them soonI hope this helps
All done


Member
Joined: 05-01-13
Posts: 348
Likes: 3
From: O FALLON, IL


Retros r ez. U can get fogs while removing wheel wells and w/e the black plastic to bumper is called
Drunk now lol
Drunk now lol
Last edited by K-Train04RL; May 25, 2013 at 02:12 AM. Reason: Automerged Doublepost


Thread
Thread Starter
Forum
Replies
Last Post