
2.0 LSJ Engine: How to Install the ZZP Modular Pulley for your Cobalt SS/SC

Thread Starter
Senior Member
Joined: 06-30-05
Posts: 1,123
Likes: 1
From: Ottawa, Canada
How to Install the ZZP Modular Pulley for your Cobalt SS/SC
How to Install the ZZP Modular Pulley for your Cobalt SS/SC
By: Denny Medeiros-Cobaltss.net
You read the review, now let�s get right to the install (Approx: 1.5 Hours)
Tools needed:
�Needle nose pliers
�Wrench with extension
�15mm open wrench
�Pulley puller (ZZP GEN2 Pulley Puller)
�Allan keys
�Torx bits
�Flat screwdriver
�6mm Allan socket
�Lock Plier
�Permatex Blue (medium strength)
�Socket kit
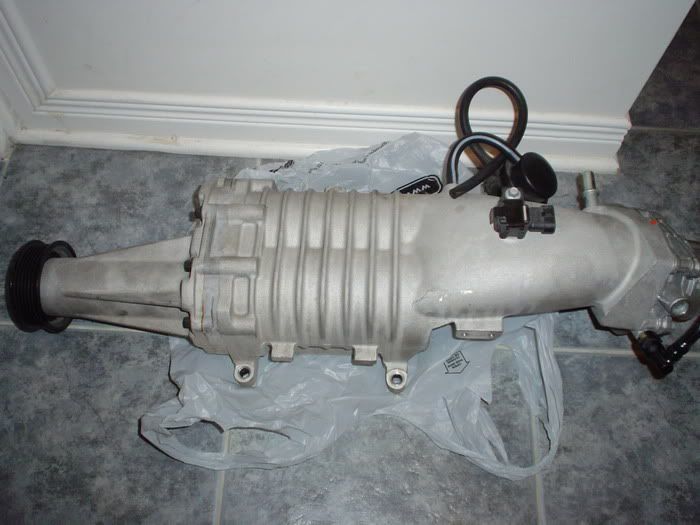
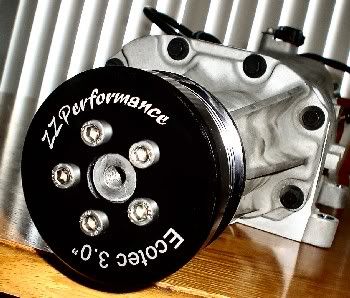
Here is a Picture of the ZZP Pulley:
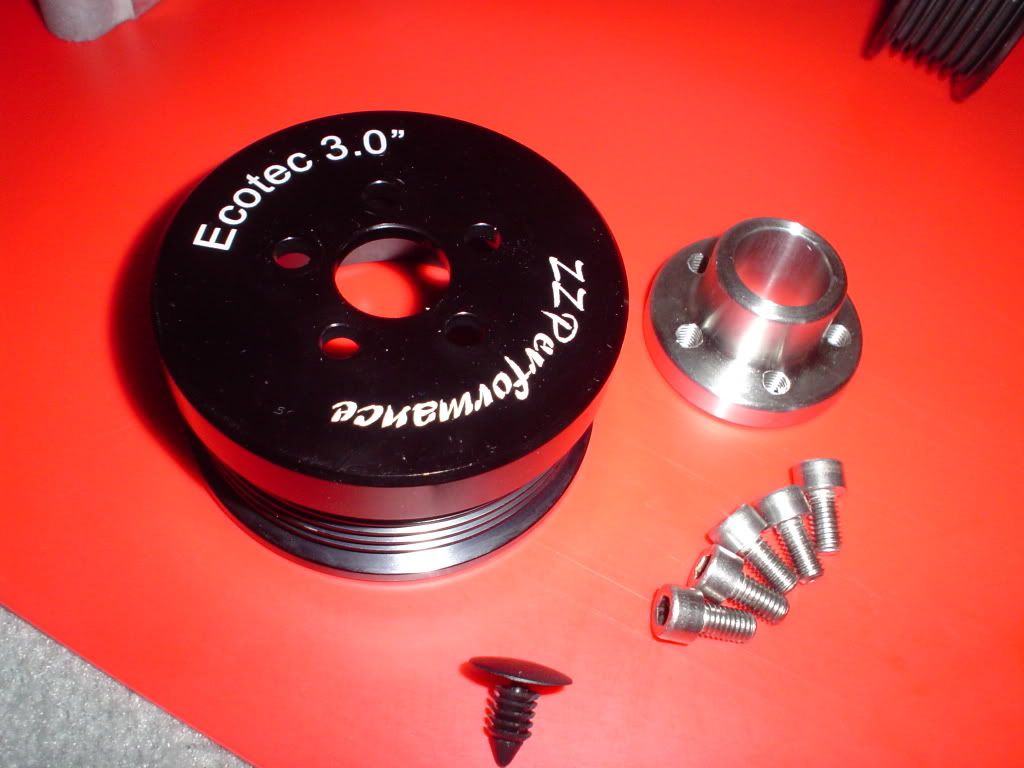
Trust me, this picture doesn�t do this pulley justice.

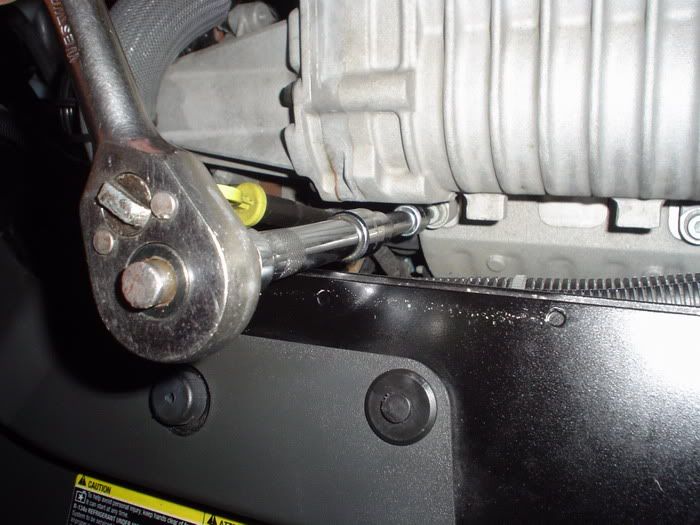
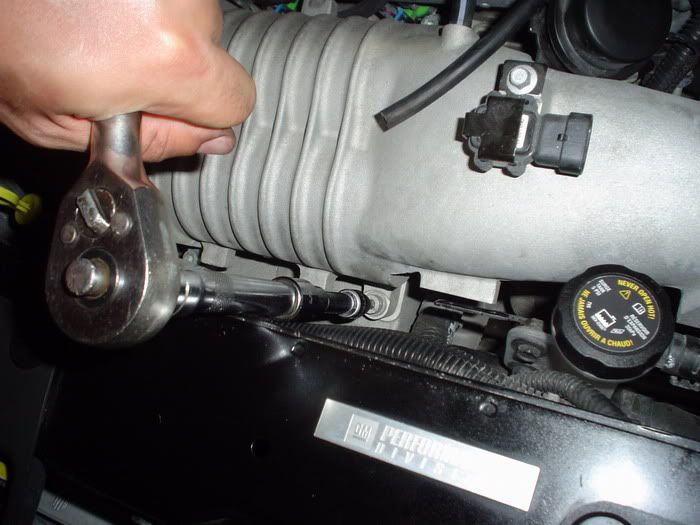
First thing, let�s loosen up the belt.
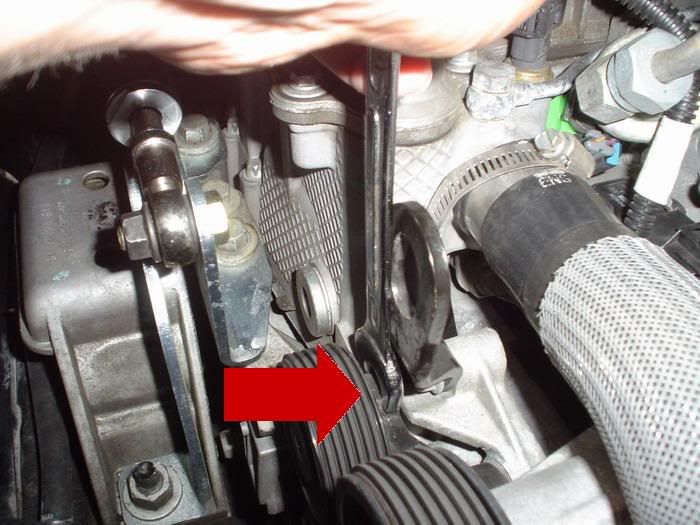
Use a 15MM open wrench, now push down and towards the firewall.
That wasn�t too bad, was it?!
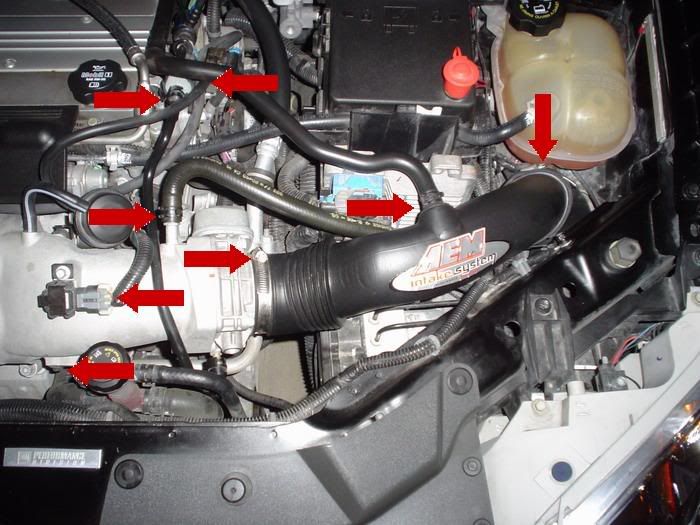
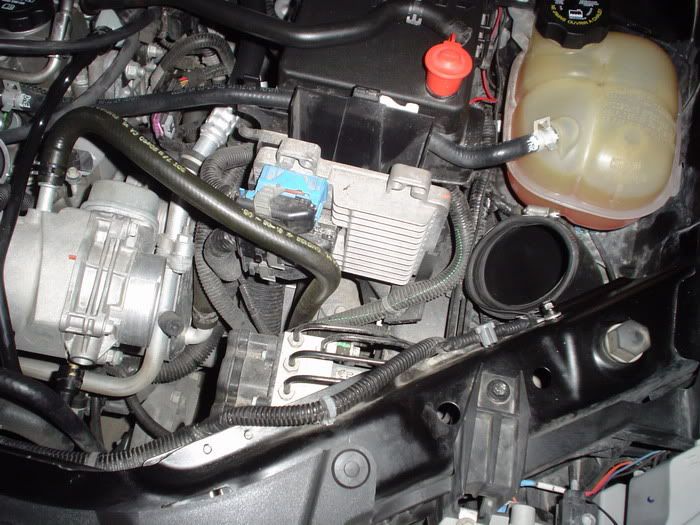
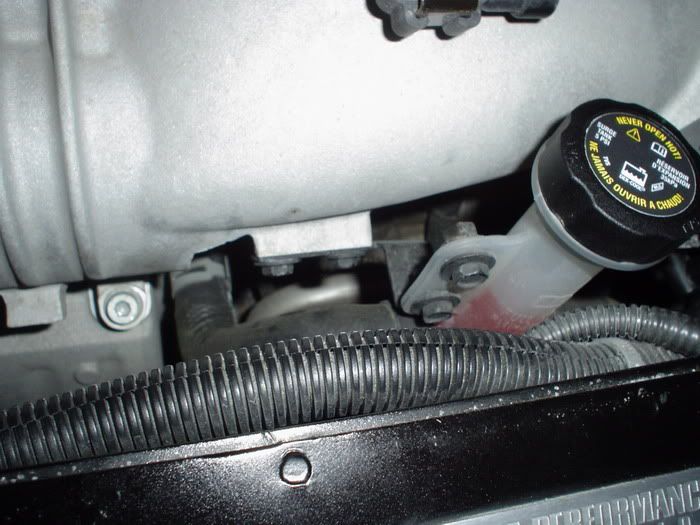
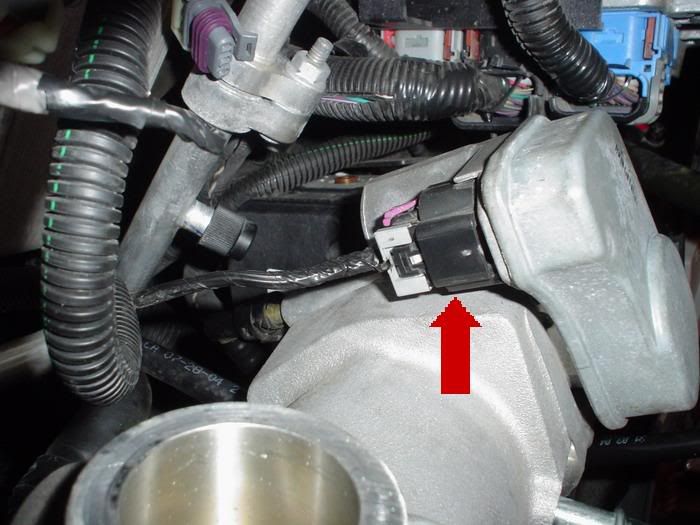
All the red arrows mean: connections to remove.
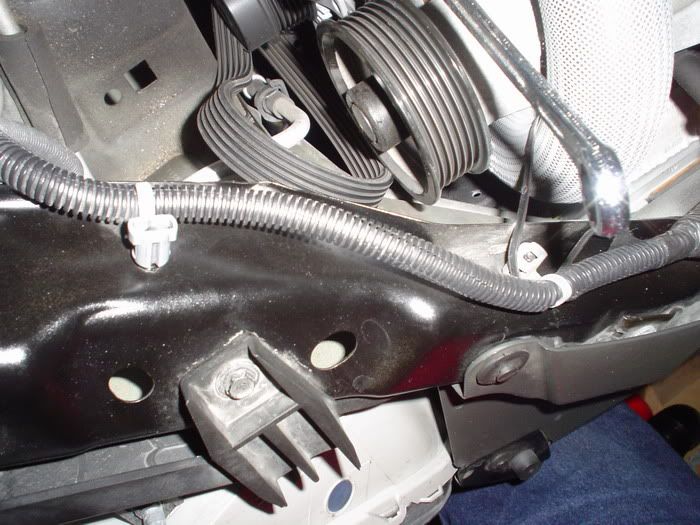
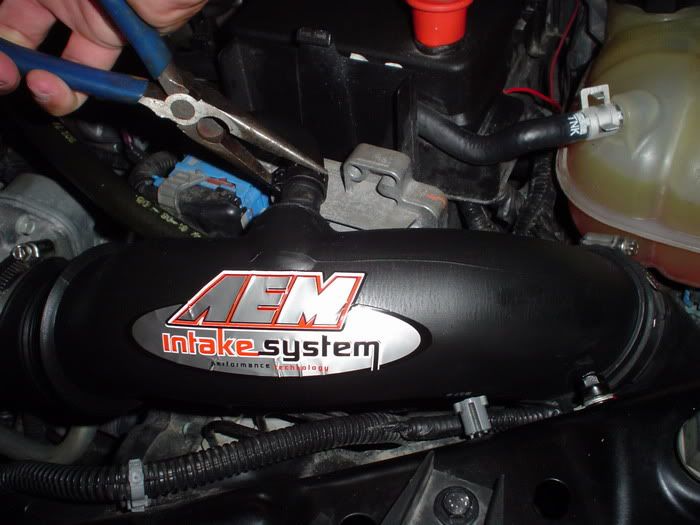
Remove this bracket on the OEM intake pipe.
Also remove this bracket on the OEM intake.
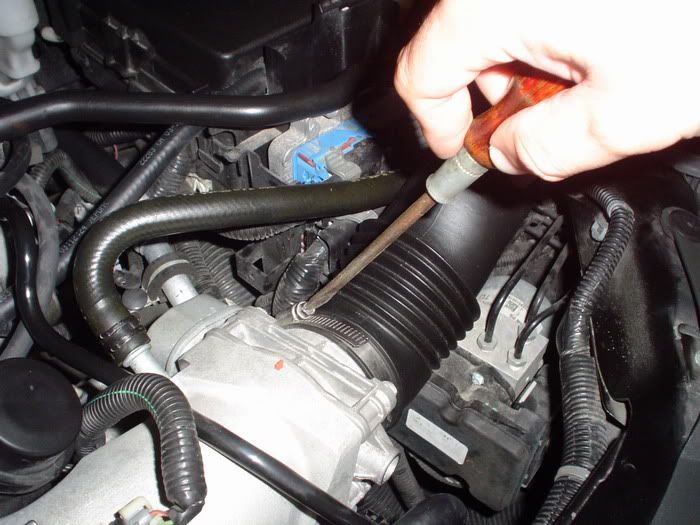
Take this hose out of the way.
WARNING: Make sure not to let anything fall in that intake hole.
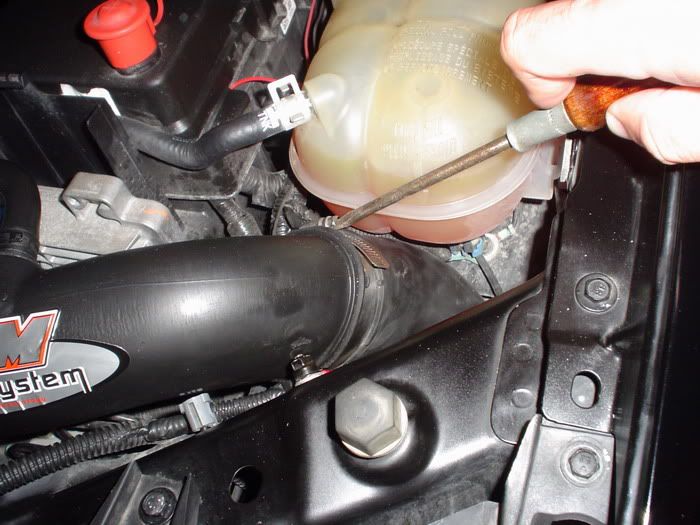
Take this hose out of the way.
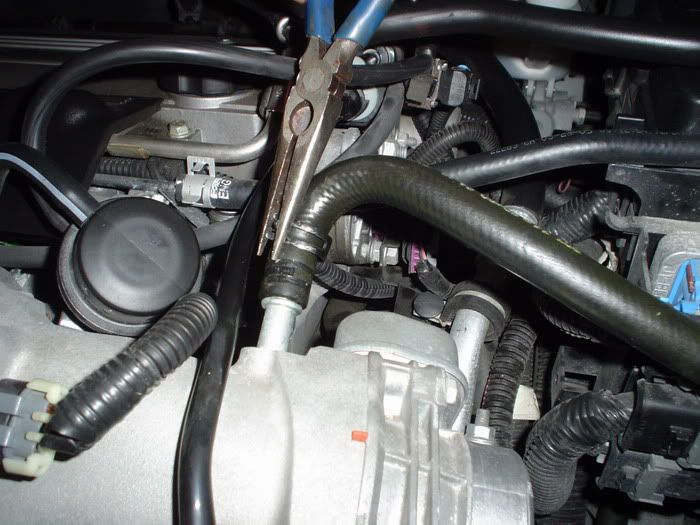
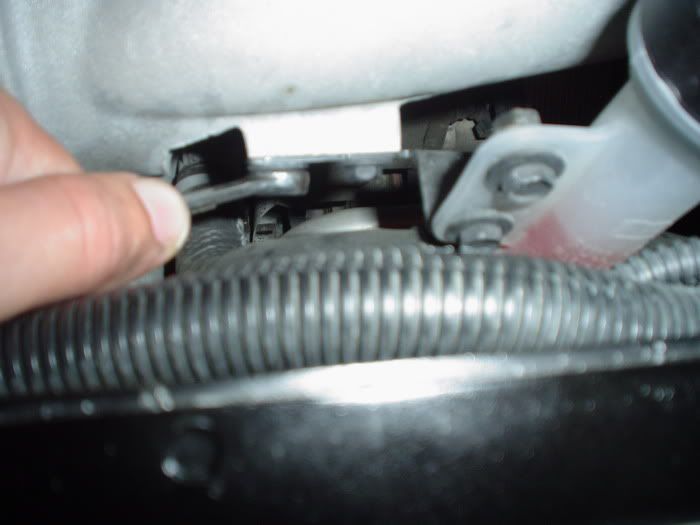
This hose is kind of special. Click that little clip then pull.
By: Denny Medeiros-Cobaltss.net
You read the review, now let�s get right to the install (Approx: 1.5 Hours)
Tools needed:
�Needle nose pliers
�Wrench with extension
�15mm open wrench
�Pulley puller (ZZP GEN2 Pulley Puller)
�Allan keys
�Torx bits
�Flat screwdriver
�6mm Allan socket
�Lock Plier
�Permatex Blue (medium strength)
�Socket kit
Here is a Picture of the ZZP Pulley:
Trust me, this picture doesn�t do this pulley justice.
First thing, let�s loosen up the belt.
Use a 15MM open wrench, now push down and towards the firewall.
That wasn�t too bad, was it?!
All the red arrows mean: connections to remove.
Remove this bracket on the OEM intake pipe.
Also remove this bracket on the OEM intake.
Take this hose out of the way.
WARNING: Make sure not to let anything fall in that intake hole.
Take this hose out of the way.
This hose is kind of special. Click that little clip then pull.
Thread Starter
Senior Member
Joined: 06-30-05
Posts: 1,123
Likes: 1
From: Ottawa, Canada
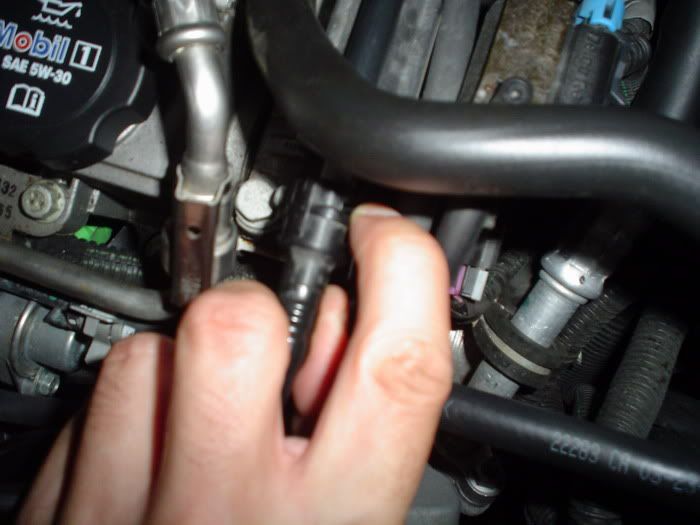
Just like that.

Remove this sensor on top of the Supercharger.

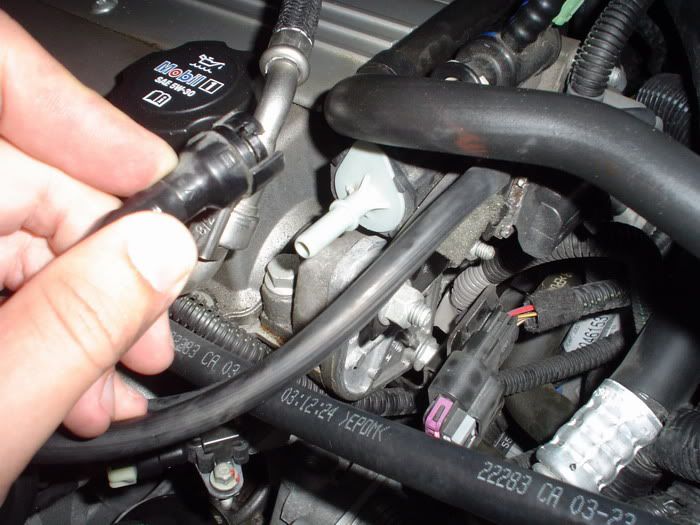
Take this hose out of the way.
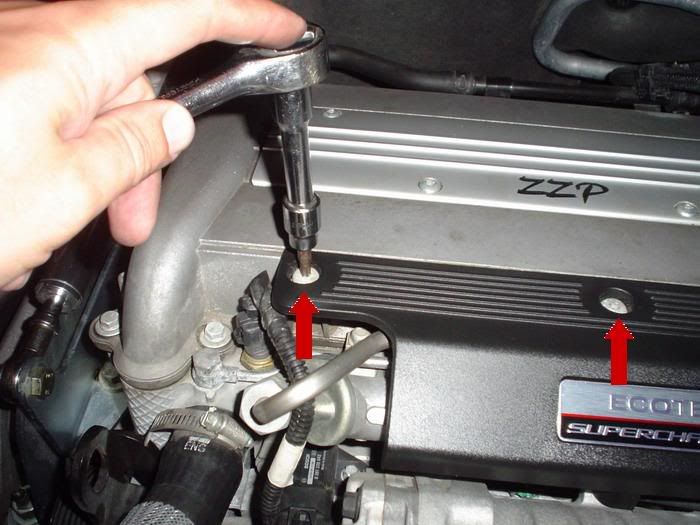
Remove the two screws holding the plastic engine cover.
Remove these two bolts holding the intercooler bottle to the supercharger.
Use a small open wrench for these two.
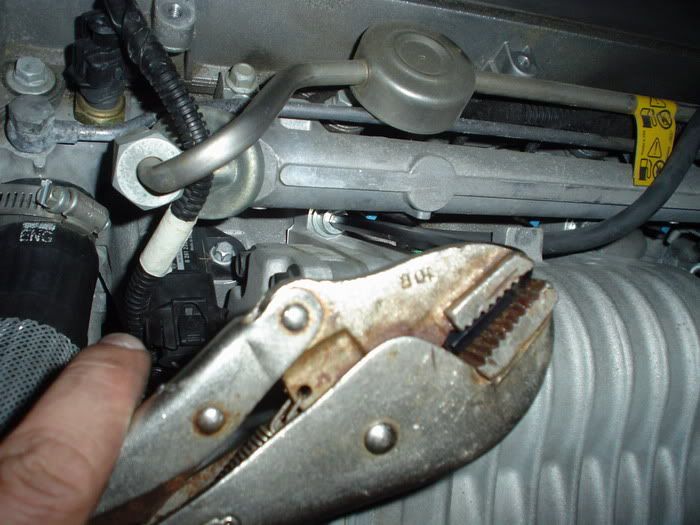
Remove the supercharger�s main bolts. The first one on the top left, I used an Allan key and my Lock Plier. It worked great this way, as I don�t have to remove the fuel rail
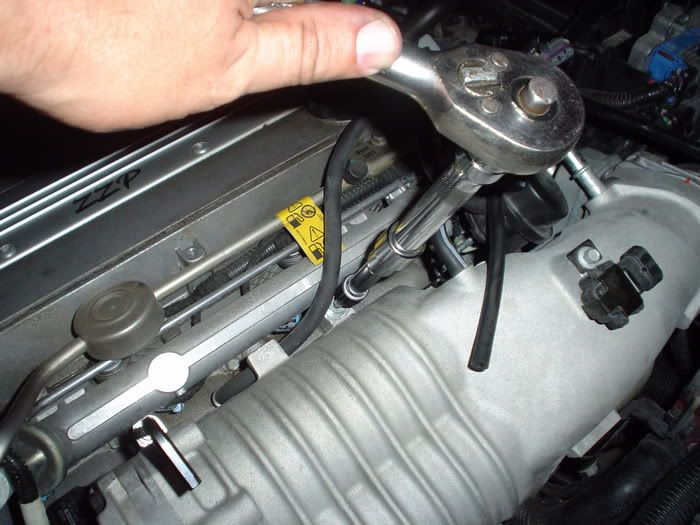
Second bolt, in the top right corner, I used an extension and Allan key in a socket.
Same here�
Same here�
And don�t forget to remove this sensor (This sensor was a bit of a Pain in the a**).
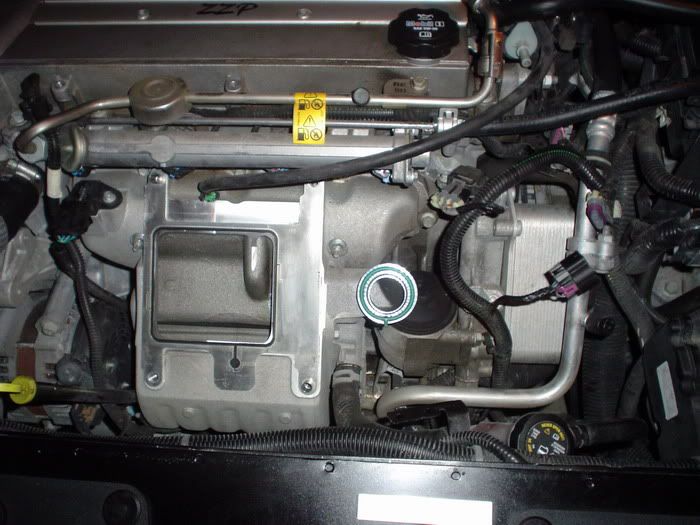
WARNING: Make sure not to let anything fall in that intake.
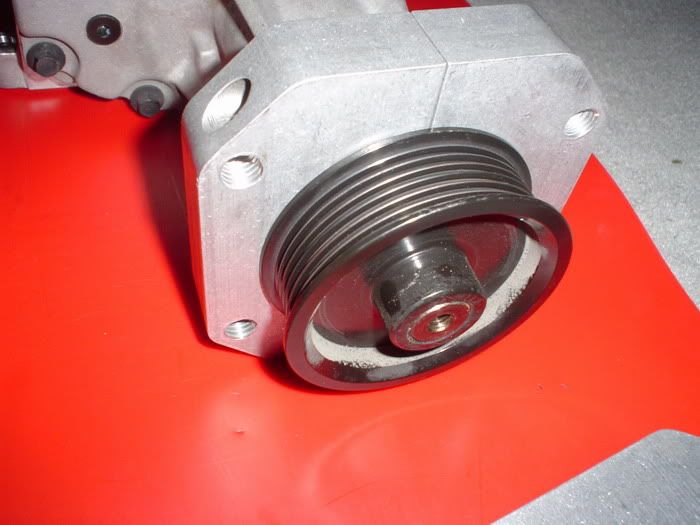
Nice and ready for Pulley removal. It�s time to roll up the sleeves.
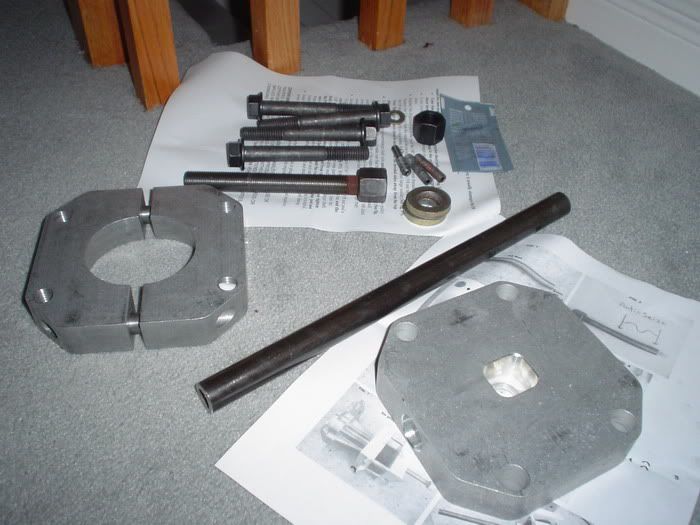
I used the ZZP Pulley Puller.
First thing, the back plate goes behind the pulley.
Thread Starter
Senior Member
Joined: 06-30-05
Posts: 1,123
Likes: 1
From: Ottawa, Canada
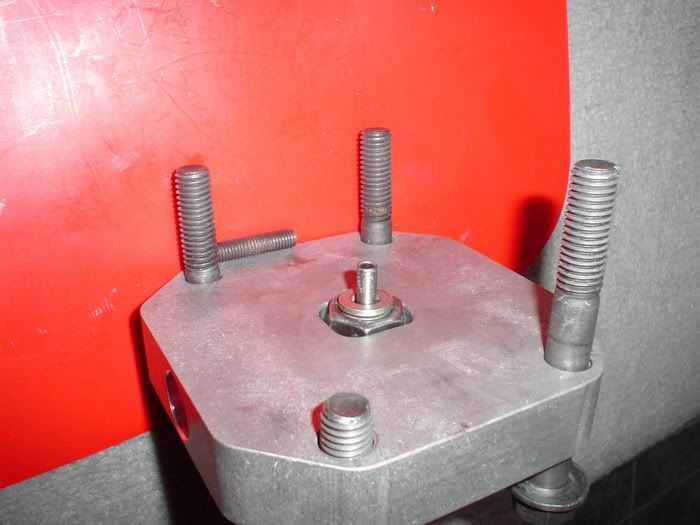
Put the four bolts in the front plate, with the nut in the middle. On the BIG bolt, you screw in the little 8mm guide (the one with no grooves on one side) and the washer.
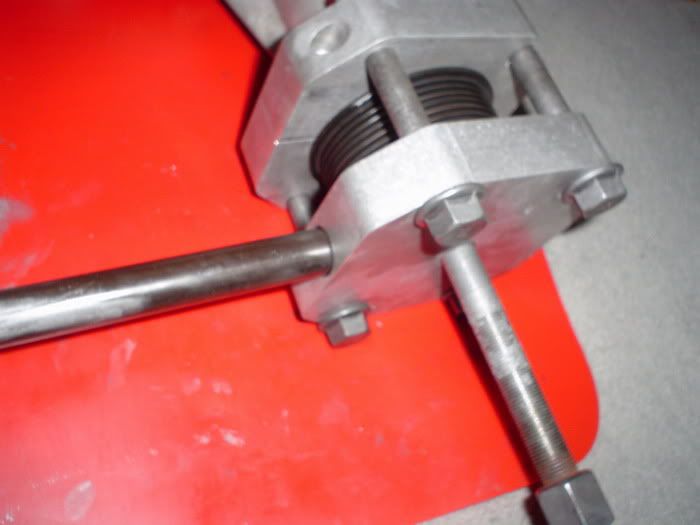
Make sure all four bolts are equal in length. The BIG bolt should be all lubed up with the supplied grease. Install the pole on the side of the front plate. Now hold the pole while you screw the BIG bolt clockwise. It is quite difficult to turn at the beginning; however, it gets easier every time the stock pulley moves.

For the install of the ZZP ring, make sure of its orientation first. Lube the supercharger shaft and the inside of the ZZP ring. Use the front plate only for this task. In order: big bolt (greased up), lock nut, big washer, front plate, big washer and 8mm stud screwed in the BIG bolt and the supercharger shaft. As you hold down the wrench and the pole that�s in the front plate, you must screw the lock nut counter clockwise.
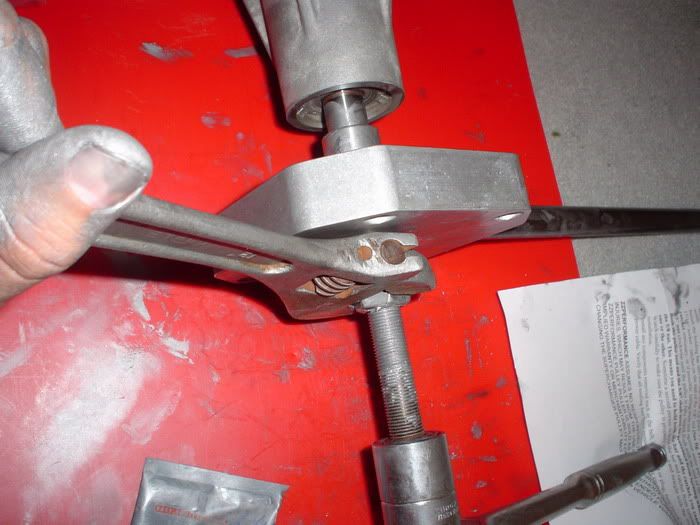
Turn�
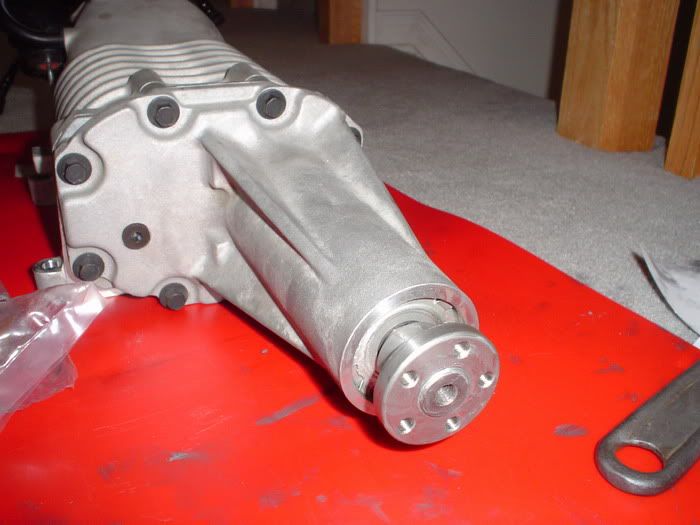
If you�ve been following these directives carefully, the pulley ring should now be installed.
Ensure that the bolts are tightened.
FINAL STEP: to re-install the supercharger back into the car, follow these directives backwards.
Please ensure to remove all the tools from the engine bay. Start the car, and make sure there�s no air leaks.
And that�s it! Happy Boosting!

The Stig
Joined: 05-11-05
Posts: 6,484
Likes: 1
From: New York
Good write up 
I actually removed my throttlebody when I did my swap. I may have done more work than needed.
The first time I started my car I heard a lot of vibration. The bolts that heald on the pulley ring had become lose even though I tightened them before reinstalling the supercharger. With the intense pulley it's important that the bolts are VERY tight. I also recommend using threadlock on them.
Thread Starter
Senior Member
Joined: 06-30-05
Posts: 1,123
Likes: 1
From: Ottawa, Canada
Originally Posted by MarcS
Good write up
I actually removed my throttlebody when I did my swap. I may have done more work than needed.
The first time I started my car I heard a lot of vibration. The bolts that heald on the pulley ring had become lose even though I tightened them before reinstalling the supercharger. With the intense pulley it's important that the bolts are VERY tight. I also recommend using threadlock on them.

Banned
Joined: 10-30-05
Posts: 7,752
Likes: 0
From: in a house
Originally Posted by denny
Ugh, I just completed doing this to a 2nd LSJ motor (Redline) which is somewhat identical. Just some things I might add to your otherwise well written info, careful with the Supercharger intake gasket. They're real sturdy little things, but they bend real easily. Also I copied the above photo just to warn everyone about that little innocent looking black plastic screw sitting on the side of your Pulley. It actually screws off and on. I made the mistake (the 2nd time I did the job infact!
 ) of trying to pry off the thing with pliers. Another pitfall I experienced is with the small thread-stock that's used inside the pulley puller's main bolt that bolts into the supercharger's snout. Go ahead and save yourself some future aggrivation and make sure you have some back-up thread-stock because when I attempted this install the first time, our thread snapped before we could press the pulley in as deep as it needed to be. Finally as stated in the write-up, tighten the supercharger pulley hub as tight as you possibly can. The pulley spins so fast that the screws can literally eat away at the pulley if not tightened down enough.
Last edited by denny; Jul 23, 2006 at 11:10 PM.
Thread Starter
Senior Member
Joined: 06-30-05
Posts: 1,123
Likes: 1
From: Ottawa, Canada
Originally Posted by TXRLU
Ugh, I just completed doing this to a 2nd LSJ motor (Redline) which is somewhat identical. Just some things I might add to your otherwise well written info, careful with the Supercharger intake gasket. They're real sturdy little things, but they bend real easily. Also I copied the above photo just to warn everyone about that little innocent looking black plastic screw sitting on the side of your Pulley. It actually screws off and on. I made the mistake (the 2nd time I did the job infact! ) of trying to pry off the thing with pliers. Another pitfall I experienced is with the small thread-stock that's used inside the pulley puller's main bolt that bolts into the supercharger's snout. Go ahead and save yourself some future aggrivation and make sure you have some back-up thread-stock because when I attempted this install the first time, our thread snapped before we could press the pulley in as deep as it needed to be. Finally as stated in the write-up, tighten the supercharger pulley hub as tight as you possibly can. The pulley spins so fast that the screws can literally eat away at the pulley if not tightened down enough.
) of trying to pry off the thing with pliers. Another pitfall I experienced is with the small thread-stock that's used inside the pulley puller's main bolt that bolts into the supercharger's snout. Go ahead and save yourself some future aggrivation and make sure you have some back-up thread-stock because when I attempted this install the first time, our thread snapped before we could press the pulley in as deep as it needed to be. Finally as stated in the write-up, tighten the supercharger pulley hub as tight as you possibly can. The pulley spins so fast that the screws can literally eat away at the pulley if not tightened down enough. . That little plastic screws on and off. I drilled a little hole in the middle and turned it out with a little flat screwdriver.


Junior Member
Joined: 02-06-06
Posts: 457
Likes: 0
From: Hamilton, ON, CA
Originally Posted by BallsoutBalt
Great write up! I plan on doing this tomorrow. Anyone have any ideas on where to get a Pulley puller like that?
good luck

Senior Member
Joined: 11-14-05
Posts: 997
Likes: 0
From: Dumont, NJ
I've done a few already as well, and I also have the zzp puller. I haven't checked yet but does the puller also take off the hub. Or would I have to get another puller for that. I'd like to have it around just incase.

Senior Member
Joined: 07-27-06
Posts: 603
Likes: 0
From: Georgia
Question here, i assume this write up is for a basicall stock SS/SC considering the fact that you are actually installing a 3.0 pulley.
Is it true that installing a 2.8 pulley on a Stage 2 equipped cobalt is simply loosening four bolts? Or do i have to do all the things listed here?
Is it true that installing a 2.8 pulley on a Stage 2 equipped cobalt is simply loosening four bolts? Or do i have to do all the things listed here?

Senior Member
Joined: 04-23-06
Posts: 5,165
Likes: 0
From: S. Jersey
Originally Posted by LandonElf
Question here, i assume this write up is for a basicall stock SS/SC considering the fact that you are actually installing a 3.0 pulley.
Is it true that installing a 2.8 pulley on a Stage 2 equipped cobalt is simply loosening four bolts? Or do i have to do all the things listed here?
Is it true that installing a 2.8 pulley on a Stage 2 equipped cobalt is simply loosening four bolts? Or do i have to do all the things listed here?
Senior Member
Joined: 07-27-06
Posts: 603
Likes: 0
From: Georgia
Originally Posted by DTM2188
For the 2.8" pulley you don't need to follow the steps above. Like you said, just take out the four bolts, swap the pulleys, and put the bolts back in.
Excellent. Thank you for such a quick reply. This is why this site has such great reputation.
Either way, this mod sounds like an easy mod to "undo" before having warranty work done


Senior Member
Joined: 11-22-06
Posts: 944
Likes: 0
From: Owings Mills, Maryland
when changing this pulley I heard that you do not need to changed naything eles such as sparkplugs injectors and such, is that true, or do I need to change all that when exchanging the pulley?
great write up by the way!!! =)
great write up by the way!!! =)

Senior Member
Joined: 05-03-06
Posts: 4,638
Likes: 0
From: new jersey
i have a 2.9" pulley from zzp. can i install that w/o putting in my #42 injectors? i'm concerned that i will run lean
great write-up by the way
great write-up by the way
Last edited by chevysalesman614; Feb 4, 2007 at 03:34 PM. Reason: Automerged Doublepost

Senior Member
Joined: 05-03-06
Posts: 4,638
Likes: 0
From: new jersey

New Member
Joined: 04-09-07
Posts: 185
Likes: 0
From: New Jersey
I just got stage 1 installed yesterday. Was thinking of getting a zzp 2.9 pully. Would I just need to unbolt the old and and bolt the 2.9 in, or would I have to follow the steps and take off the s/c and all that?

Senior Member
Joined: 02-25-06
Posts: 3,246
Likes: 0
From: Dacula, Georgia
i put on the Stage II hub instead of the ZZP however i used there pully system to do this...
couple notes from what i went through..
Belt is a complete bitch (there is a certain technique in-order for the wrench to not keep slipping off.. took a while to find the sweet spot)
installing the hub (items given to you through ZZP sucked on this one... BREAK BARS are a must for this, unless i just happen to get a tool system that was somewhat fucked up)

Senior Member
iTrader: (1)
Joined: 11-29-06
Posts: 4,105
Likes: 0
From: New Minas, Nova Scotia, Canada
I still don't understand what that plastic screw thing is for. Could someone show a pic of where it goes. I got one with my zzp modular system but it was broke when i recieved it. Thanks in advance