Detailing: Polishing 101 (How-To)
 09-04-2008, 08:14 PM
#101
Banned

Join Date: 06-23-05
Location: ky
Posts: 8,032
Likes: 0
Received 0 Likes
on
0 Posts
no
i do polishing on the side as well, here's a pic of my vc

this thing is so shiny it looks dirty in the next picture. the dark spots on the vc are actually the dirty ceiling from all the emery used on the buffing wheels

here's a better example.. a swing arm off the bike i sold back in may:
i do polishing on the side as well, here's a pic of my vc
this thing is so shiny it looks dirty in the next picture. the dark spots on the vc are actually the dirty ceiling from all the emery used on the buffing wheels
here's a better example.. a swing arm off the bike i sold back in may:

 11-10-2009, 12:27 PM
#104
Senior Member

Join Date: 10-20-08
Location: Norman, OK
Posts: 1,617
Likes: 0
Received 0 Likes
on
0 Posts
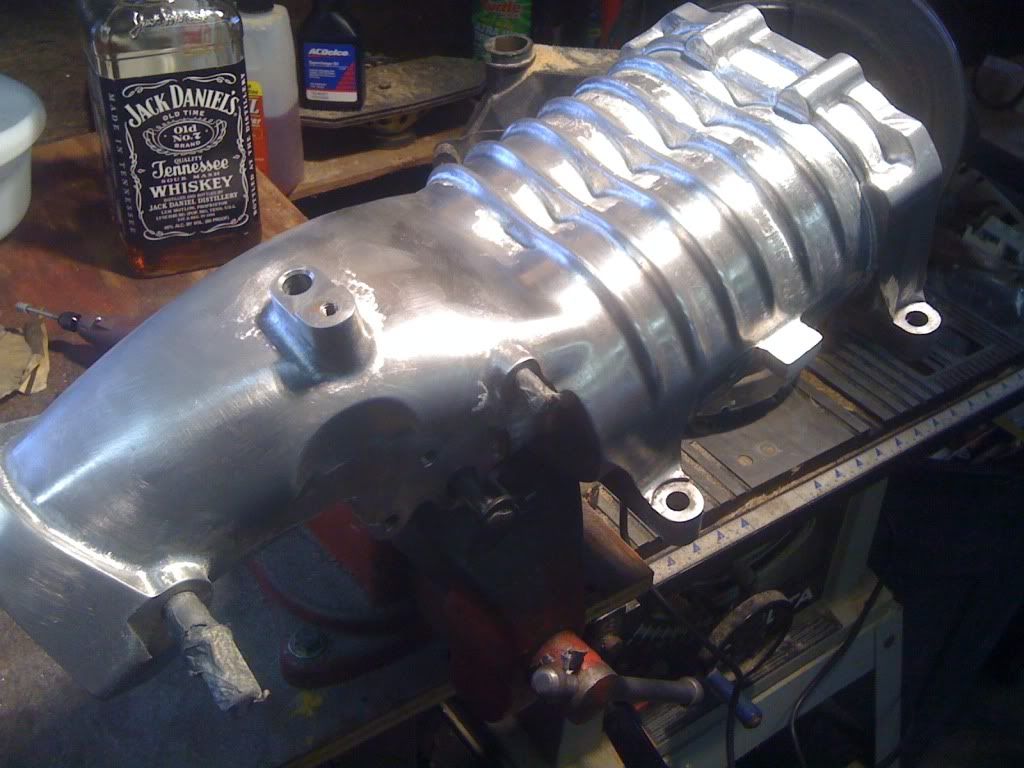
ok, i started polishing the outside of my supercharger today, and i want it to have a mirror finish across the whole thing. is it important to get out all those lil dimples, or will they go away w/ finer grit and polish? as of now its a mostly smooth surface on the parts ive done, but u can still see the anodize areas in dark, and i just wanted to make sure it was necessary to remove all of them.
ive heard u can use oven cleaner to remove the anodized material before sanding, does this help? will it damage the finish in the end result? as of now im using 180 grit and it feels like im getting nowhere...
any tips would be awesome!!
heres the throttle body end that ive been working on so far. still need more sanding?
11-10-2009, 07:30 PM
#105
Senior Member

ya i would sand some more. and a guy that has done alot of polishing, met him at a car show recommended to use wd40 or other spray lubricant instead of wetsanding, apparently it helps with the overall finish. not sure of any truth to this but it sounds plausable. i'll be testing it, when i redo my valve cover.
11-13-2009, 10:48 AM
#106
Banned
Join Date: 06-23-05
Location: ky
Posts: 8,032
Likes: 0
Received 0 Likes
on
0 Posts
can't see the pics here at work, i'll look at it when i get home and let you know what's up with it.
best thing i've found to smooth the supercharger is a 6" 3m bristle disk at about 60 grit.. think that's what i used. I've done a couple of blowers now, and still haven't touched mine lol... i may do that this winter cause hell it doesn't take any time at all. the TB is a pita though
best thing i've found to smooth the supercharger is a 6" 3m bristle disk at about 60 grit.. think that's what i used. I've done a couple of blowers now, and still haven't touched mine lol... i may do that this winter cause hell it doesn't take any time at all. the TB is a pita though
11-14-2009, 08:48 AM
#107
Senior Member
Thread Starter
ok, i started polishing the outside of my supercharger today, and i want it to have a mirror finish across the whole thing. is it important to get out all those lil dimples, or will they go away w/ finer grit and polish? as of now its a mostly smooth surface on the parts ive done, but u can still see the anodize areas in dark, and i just wanted to make sure it was necessary to remove all of them.
ive heard u can use oven cleaner to remove the anodized material before sanding, does this help? will it damage the finish in the end result? as of now im using 180 grit and it feels like im getting nowhere...
any tips would be awesome!!
heres the throttle body end that ive been working on so far. still need more sanding?
ive heard u can use oven cleaner to remove the anodized material before sanding, does this help? will it damage the finish in the end result? as of now im using 180 grit and it feels like im getting nowhere...
any tips would be awesome!!
heres the throttle body end that ive been working on so far. still need more sanding?
Yes you need to get out all the dimples, use a heavy grit like 60 or 80. The anodizing is a little tougher but using a heavy grit will cut thru it, I wouldn't use anything but what I recommended to polish with.
 02-24-2012, 01:04 PM
#110
Member
iTrader: (1)

Join Date: 11-18-10
Location: St Joseph, Michigan
Posts: 214
Likes: 0
Received 0 Likes
on
0 Posts
May be a stupid question, but important so I want to make sure.
Do you use anything as far as sealant to put the S/C back together? I know there wasnt any when I took it apart just want to make sure. Decided to finish it and not paint it after I got better dremel bits
Do you use anything as far as sealant to put the S/C back together? I know there wasnt any when I took it apart just want to make sure. Decided to finish it and not paint it after I got better dremel bits
02-24-2012, 01:13 PM
#111
Senior Member
iTrader: (1)

Join Date: 02-23-09
Location: Macedonia, OH
Posts: 887
Likes: 0
Received 0 Likes
on
0 Posts
5 hours..... you got a ways to go.
i spent 10 hours polishing my blower....... totally worth it!
OP engine bay looks awesome! i like how you polished the motor mount as well. it really pulls the polished item together.
i spent 10 hours polishing my blower....... totally worth it!
OP engine bay looks awesome! i like how you polished the motor mount as well. it really pulls the polished item together.
 02-24-2012, 01:30 PM
#113
Senior Member
iTrader: (1)
Join Date: 02-23-09
Location: Macedonia, OH
Posts: 887
Likes: 0
Received 0 Likes
on
0 Posts
either repolish it or get a really fine sand paper and some polish and that should work
after you get it back to where u want the shine, then wax the blower.
I waxed mine everytime i wash the car. dirt falls off the blower and i have one spot where i am starting to see some discoloration. ive had mine polished since feb. 2010
 02-24-2012, 01:56 PM
#115
Senior Member
iTrader: (1)
Join Date: 02-23-09
Location: Macedonia, OH
Posts: 887
Likes: 0
Received 0 Likes
on
0 Posts
lookin good!
unfortunately i only got the housing done, my Balt was my DD at the time and i was doing the clutch so i took the time to do the blower while my car was down/apart.
how are you going about doing it? like what steps/process are you taking?
unfortunately i only got the housing done, my Balt was my DD at the time and i was doing the clutch so i took the time to do the blower while my car was down/apart.
how are you going about doing it? like what steps/process are you taking?
02-24-2012, 02:35 PM
#116
Member
iTrader: (1)
Join Date: 11-18-10
Location: St Joseph, Michigan
Posts: 214
Likes: 0
Received 0 Likes
on
0 Posts
Spent like 5 hrs yesterday sanding getting no where really so this morning went to a specialty tool shop and bought some better dremel bits(better quality then what dremel makes), steel wool, and some different polish for later use.
The ones to the right are the ones Im going around all the tight spots with. dont remember what the softest - hardness is with the colors but white is hardest and pink softest.
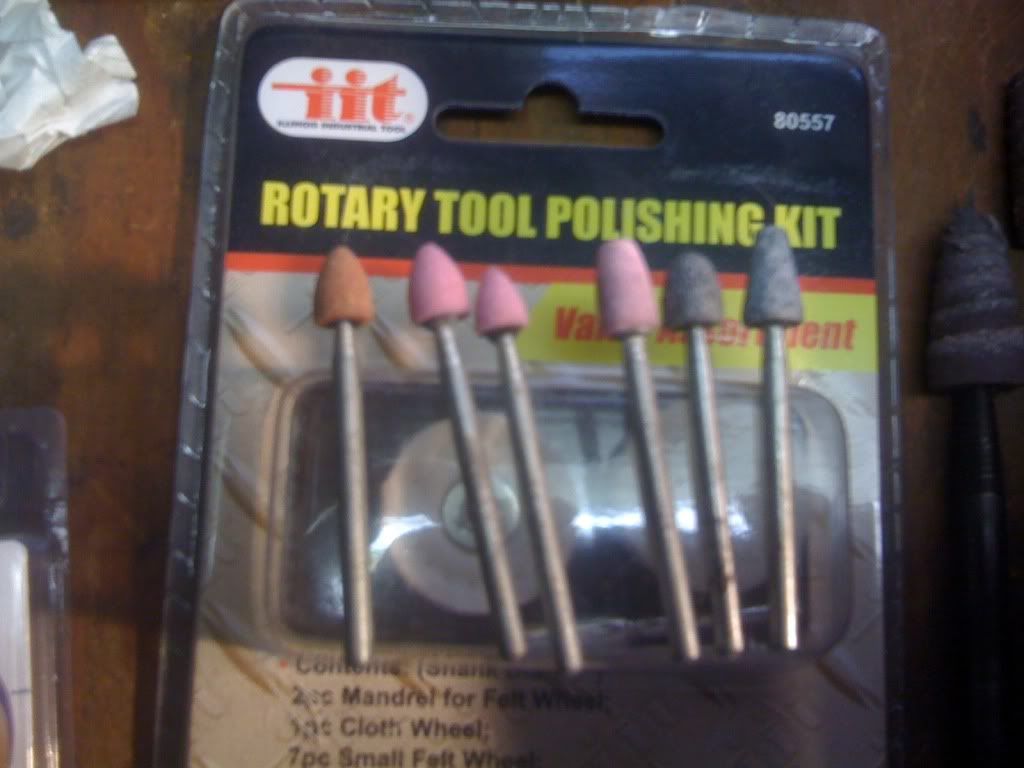
I already had it mostly sanded to 400 grit yesterday so Im going to try to use the 320 grit abrasive buffs( below the mouse pad) in the tight spots next. or the green bit for the drill.
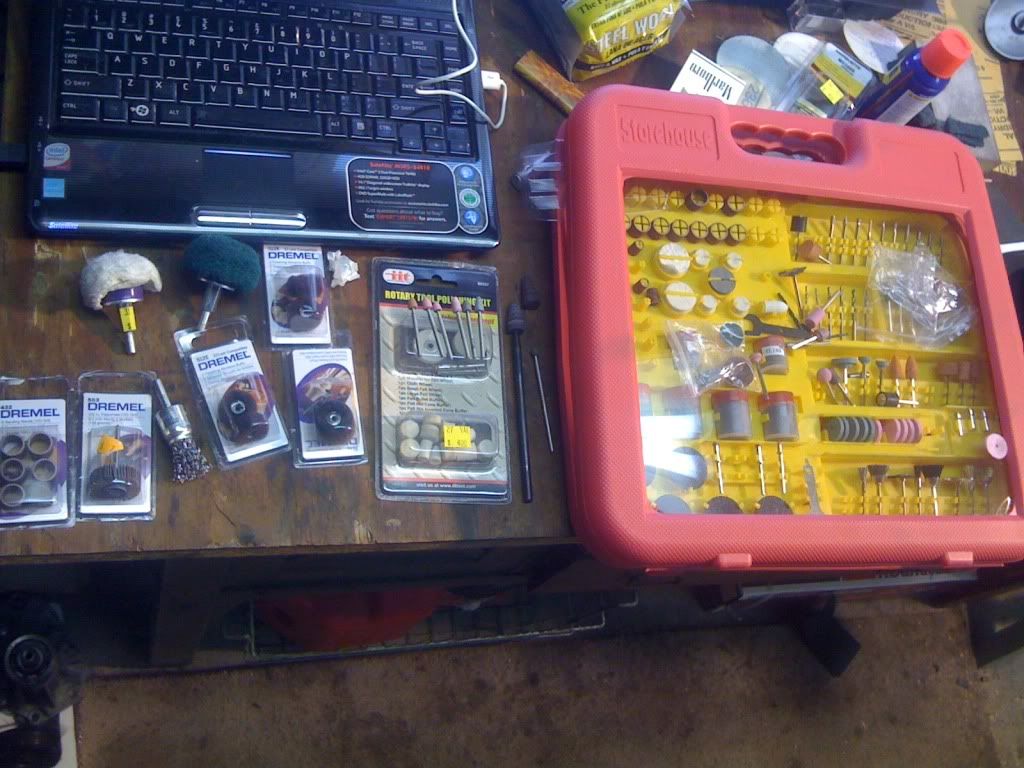
Sorry in advance I dont know how to resize pics after uploaded..
The ones to the right are the ones Im going around all the tight spots with. dont remember what the softest - hardness is with the colors but white is hardest and pink softest.
I already had it mostly sanded to 400 grit yesterday so Im going to try to use the 320 grit abrasive buffs( below the mouse pad) in the tight spots next. or the green bit for the drill.
Sorry in advance I dont know how to resize pics after uploaded..
02-24-2012, 03:16 PM
#117
Senior Member
iTrader: (1)
Join Date: 02-23-09
Location: Macedonia, OH
Posts: 887
Likes: 0
Received 0 Likes
on
0 Posts
lol its ok
i used a right angle air powered grinder to do mine. made sanding squares out of sand paper.
wish i had a dremel to get in the smaller areas a little better, such as the cooling ribs
Grits in order of use
80
120
240
360
420
600
800
1000
1200
1200 w/ this stuff called semi chrome
then waxed it
i used a right angle air powered grinder to do mine. made sanding squares out of sand paper.
wish i had a dremel to get in the smaller areas a little better, such as the cooling ribs
Grits in order of use
80
120
240
360
420
600
800
1000
1200
1200 w/ this stuff called semi chrome
then waxed it

 02-24-2012, 03:39 PM
#120
Member
iTrader: (1)
Join Date: 11-18-10
Location: St Joseph, Michigan
Posts: 214
Likes: 0
Received 0 Likes
on
0 Posts
Cheap but I already did my GF's valve cover and now putting it through hell with this S/C Didnt want to spend $80 on the real one cause I seen a few of those break within a month of so..
02-24-2012, 03:42 PM
#121
Senior Member
iTrader: (1)
Join Date: 02-23-09
Location: Macedonia, OH
Posts: 887
Likes: 0
Received 0 Likes
on
0 Posts
i lucked out, place where i used to work had the grinder and sand paper so i didn thave to buy any of it 
then my boss got mad at me because i would stay late and polish it........ likke why are you getting pissed? I already worked a 10hr shift today and the day before and the day before
then my boss got mad at me because i would stay late and polish it........ likke why are you getting pissed? I already worked a 10hr shift today and the day before and the day before


 03-16-2013, 06:26 PM
#125
New Member

Join Date: 09-18-11
Location: Warsaw, IN
Posts: 3
Likes: 0
Received 0 Likes
on
0 Posts
Starting
Started the long process of polishing the valve cover today 
My cobalt is my DD so i'm going to try to do most of the work while its on the car and take it off at the end to finish sanding and polish it.
I bought a Cordless Dremel 8220
(thing is bad ass! I'll report back on the battery life after I run it through a full charge.)
EDIT: The battery ran for 35minutes on a full charge. I was running at 15000RPM and using the 80grit flapwheel. I anticipate better life with other bits, i was putting a lot of load on it. It does charge in an hour tho.
I bought the 80 grit flap wheel, EZ lock Mandrel, Sanding Kit, and a variety of sandpaper (200, 400, 600, 800, 1000, 1500)
I dampen some rags and lay them over the engine bay to collect the dust.
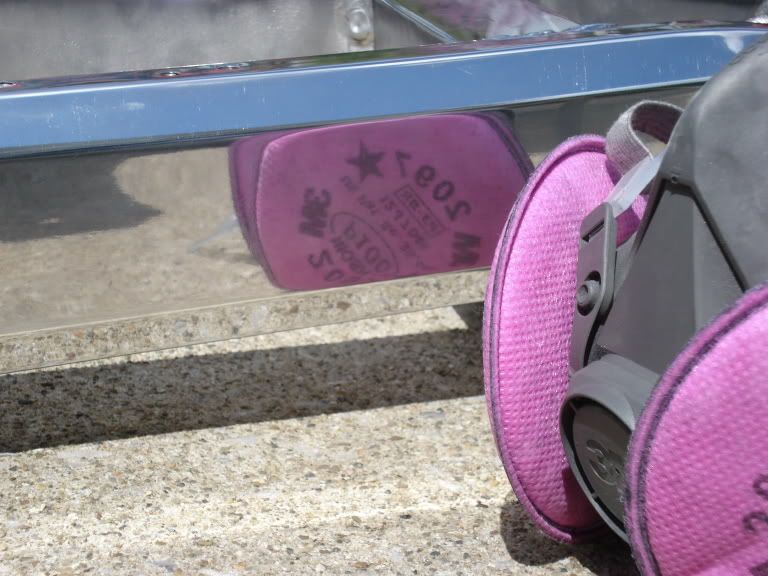
Safety glasses and a mask are essential as well.
I've started with the 80 grit flap wheel and its smoothing out pretty well.
My plan is to do:
80grit flapwheel (Dremel)
180, 280, 320grit abrasive buffs (Dremel)
400, 600Wet, 800wet,1000wet, 1500wet sand (hand)
Buff with Tipoli
Polish with White Rouge
Shine up with Liquid Polish.
Ill update with pictures as I go.
You can buy valve covers for $75 new so I figure if I mess it up its not that big of a deal. If all goes well Im going to do the supercharger next.
Any words of advice?
My cobalt is my DD so i'm going to try to do most of the work while its on the car and take it off at the end to finish sanding and polish it.
I bought a Cordless Dremel 8220
(thing is bad ass! I'll report back on the battery life after I run it through a full charge.)
EDIT: The battery ran for 35minutes on a full charge. I was running at 15000RPM and using the 80grit flapwheel. I anticipate better life with other bits, i was putting a lot of load on it. It does charge in an hour tho.
I bought the 80 grit flap wheel, EZ lock Mandrel, Sanding Kit, and a variety of sandpaper (200, 400, 600, 800, 1000, 1500)
I dampen some rags and lay them over the engine bay to collect the dust.
Safety glasses and a mask are essential as well.
I've started with the 80 grit flap wheel and its smoothing out pretty well.
My plan is to do:
80grit flapwheel (Dremel)
180, 280, 320grit abrasive buffs (Dremel)
400, 600Wet, 800wet,1000wet, 1500wet sand (hand)
Buff with Tipoli
Polish with White Rouge
Shine up with Liquid Polish.
Ill update with pictures as I go.
You can buy valve covers for $75 new so I figure if I mess it up its not that big of a deal. If all goes well Im going to do the supercharger next.
Any words of advice?
Last edited by Broqsten; 03-16-2013 at 07:48 PM.