
Interior: Rear Deck Makeover!


Thread Starter
New Member
Joined: 03-05-07
Posts: 56
Likes: 0
From: Ohio
Rear Deck Makeover!
This DIY is for those of you who dislike your rear deck.. the rear deck is that cloth covered thing in the back of your car�s cabin right below the rear window�
For those of us with a subwoofer(s) this thing is prone to rattles and vibrations causing offensive noise which can ruin the listening experience� this is why I did this�
WHAT YOU NEED:
Your hands
Socket set
Screwdriver set
Pliers
Sturdy sharp knife/ really good shears/scissors
Power drill
Drill bit set
Dermmel or a saw
(4) 10� x 8� x 1/8� plexiglass plates
1/4inch rubber foam gasket stripping (used on doors to help make an air tight seal)
Nuts, bolts, washers (kinda narrow shanks)
Wire strippers
Heat shrink tubing
Duct tape
Rubbing alcohol
Clean dry cloth
Roll of automotive/boat carpet ( got mine at walmart, forget price)
Roll of OUTDOOR CARPET TAPE (see pic at that step)
Good/cheap pair of scissors
Sharpie marker (color varies depending on carpet color)
~~ I may have forgotten some things, I don�t think I did but if I did, LET ME KNOW~~
sorry about the lack of pics and the quality, walmart 3day photo processing sucks...
Ok lets get started�
Start off by removing the 3 plastic child seat latch covers, you will need these holes later to maneuver the rear deck�
Now remove the covers over the headrests, then unbolt the headrests and remove the hardware�
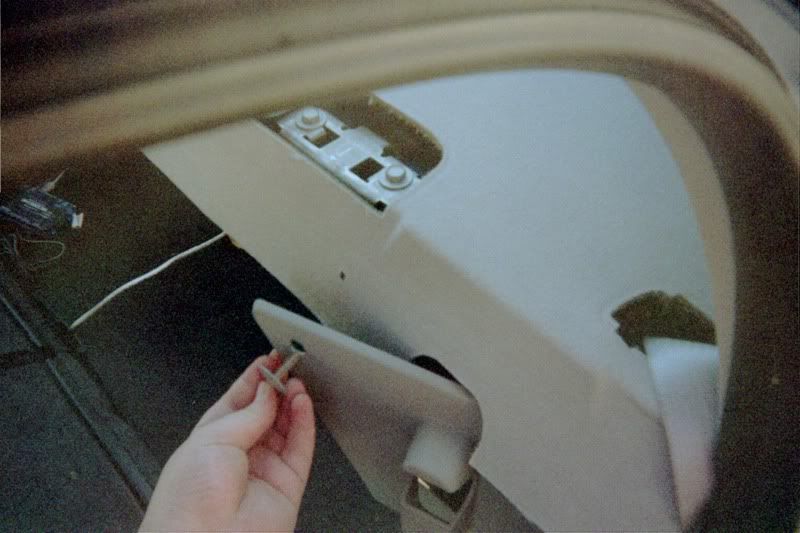
Remove the seatbelt guides from their places on the rear deck� you can�t take the seatbelts off or anything easy like that.. but we�ll get to that soon�
Now remove this�
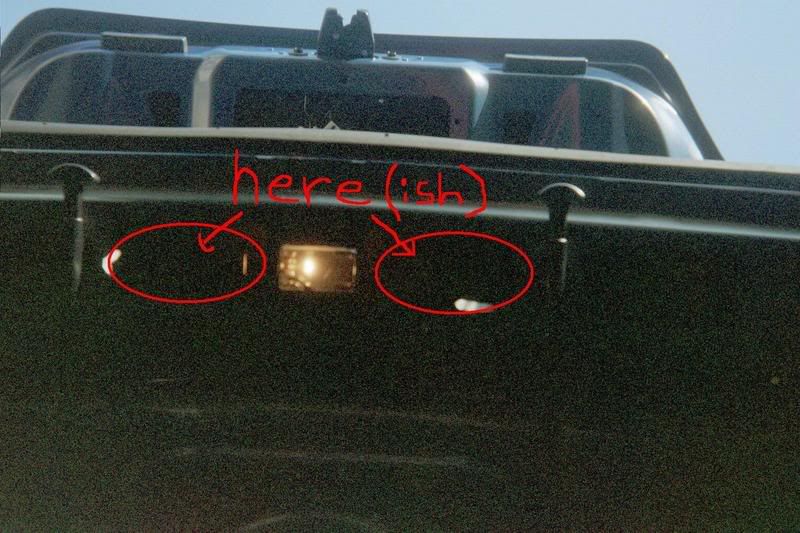
Now in the trunk right in the back under the opening there are 2 clip things that hold the rear of the deck �down� (lot of good it did >: \ )
You have to pry then back and up to �release� the deck
Here-ish
Now get back in your back seat and manipulate the deck up� its hooked under the 2 side panles so you need to push down on each side and manipulate it out, once you have it free everywhere but the very back you have to get �under� the deck and force the friction fit pins out of place� this should �free� the deck�
But its still �stuck� there by the seatbelts�. Here is where u take the knife� and cut slits in the DECK to get it free form the seatbelts� if you stand back and look at the deck you can decide which places will be best to cut it so that should you ever put the deck back in you wont notice the cuts as long as the seats are up�
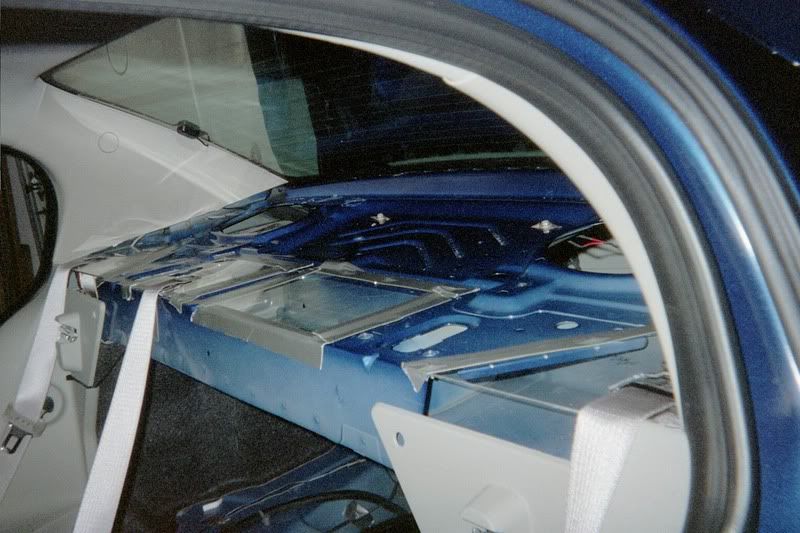
Now you rear deck is EXPOSED�
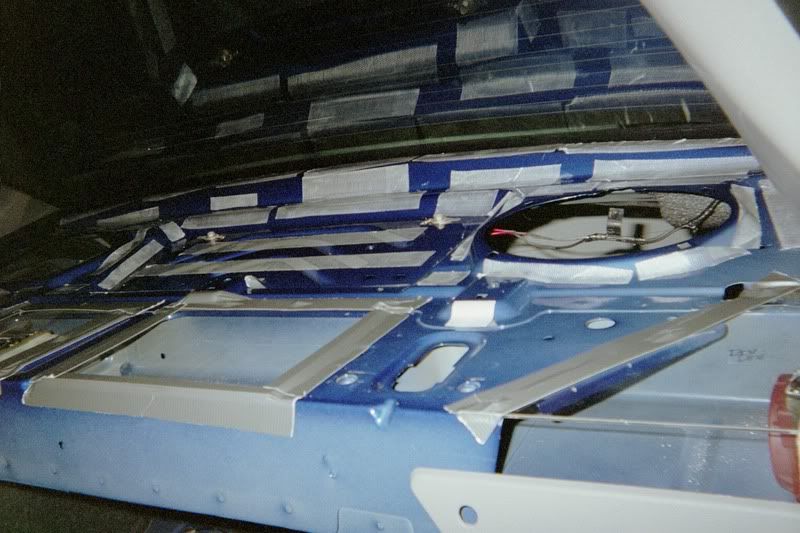
Now then� remove all the hardware from that rear deck� circled in purple and cyan (there is more on the passenger side (not shown in pic)
Remove the rear speakers�
Unbolt the ground wires pointed out in green, and move the wires outlined in yellow up into the sides under the side panels� except for the ground ends.. those need to be routed through the corners of the rear deck and down into the trunk area where you then you cut the metal ends off leaving about 3 inches of wire so you can reconnect the wires later� now take those metal ends and bend the metal so its all flat, place them back onto their spots and route the wire ends through the hole into the trunk area� bolt it down, reattach the wires, don�t worry about connecting the wires back to their original mates because they are all grounds so its no biggie�
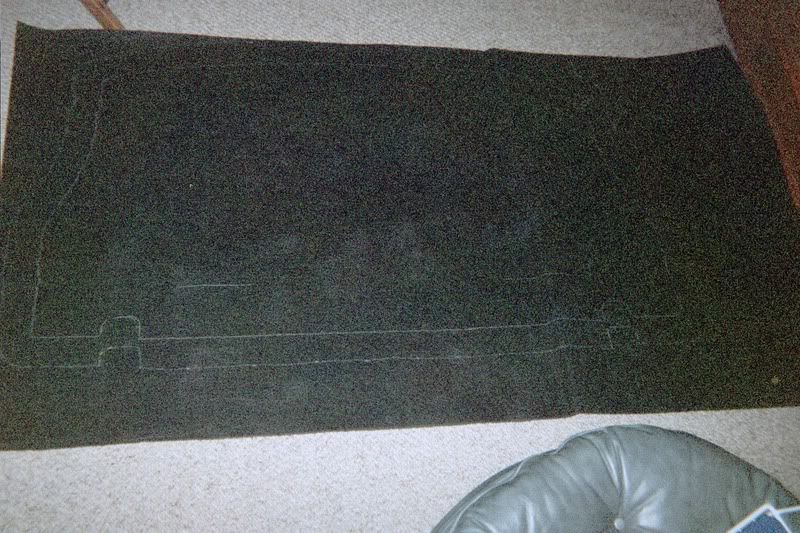
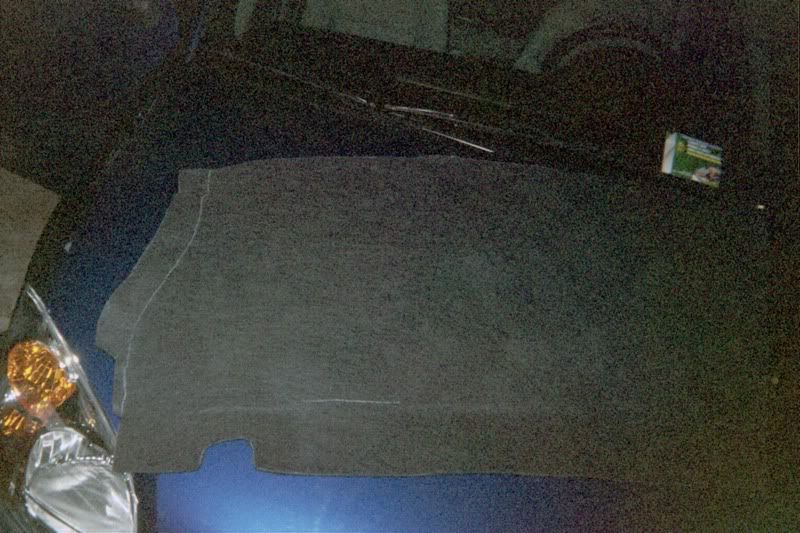
Now take your roll of carpet and your cloth covered rear deck� unroll the carpet and lay it out on the floor the stiff side facing up at you, now take the rear deck and lay it cloth side down on the carpet, take your sharpie and trace around the deck, be sure that you bring the back of the deck up so that the short part is on the carpet so you get a full trace� now take a 1-2 inch spacer of any sort and go around and mark places with that spacer so you have excess when you cut the carpet out� now cut the carpet out on the outer line that you made, you will trim this up to proper size later..
Make sure that you save the scrap for later�
Here is mine uncut�
Back to the rear deck�. You may notice that there are 4 big holes on the rear deck, 3 for the seatbelts and 1 for no reason� you will use the plexiglass to cover these, place the plexiglass over the hole and square up the 2 side openings then draw an outline about .5-1 inch offset from the actual opening, do the same for the middle openings but have as much excess on the sides as possible for best mounting�
Now cut the pieces out� here are mine�
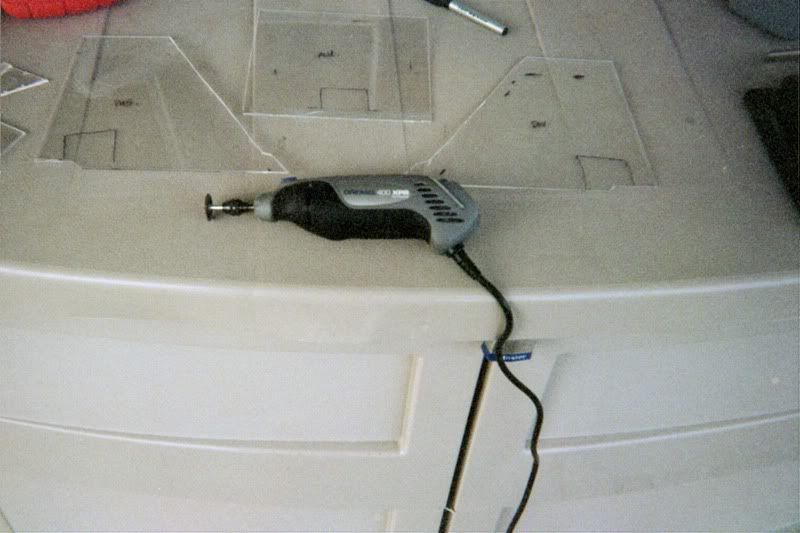
Notice the black lines still on those plates.. those are placed as markers where you will need to cut so that the seatbelt and cover that you unhooked earlier can be functional.. your going to need to place those plexiglass pieces over the cloth covered deck in order to get the proper shape to cut out so that the cover can fit in properly and securely, as well as cut a slit on the side of the plexiglass so you can slip the seatbelt itself into place within its cover plate�
Now drill intermittent holes on the sides of each piece, hole size determined my the diameter of your bolt, make sure that you place these holes in spots where you will be able to completely drill through the metal of the rear deck so you can properly bolt down your plate�
After drilling the holes, place the plexiglass over its respective opening and mark where the holes should be drilled in the deck� then drill the holes�
Now place the foam rubber gasket in strips between each hole opening on the plexiglass� I forgot to mention that the foam rubber stuff it to ensure that the plexiglass does not vibrate against the deck to cause unwanted noise... then bolt down the plates�
After bolting down the plates cover the edges with duct tape, this will make the edges more smooth when you apply the carpet�
Here is mine�
Ok now back to the carpet�
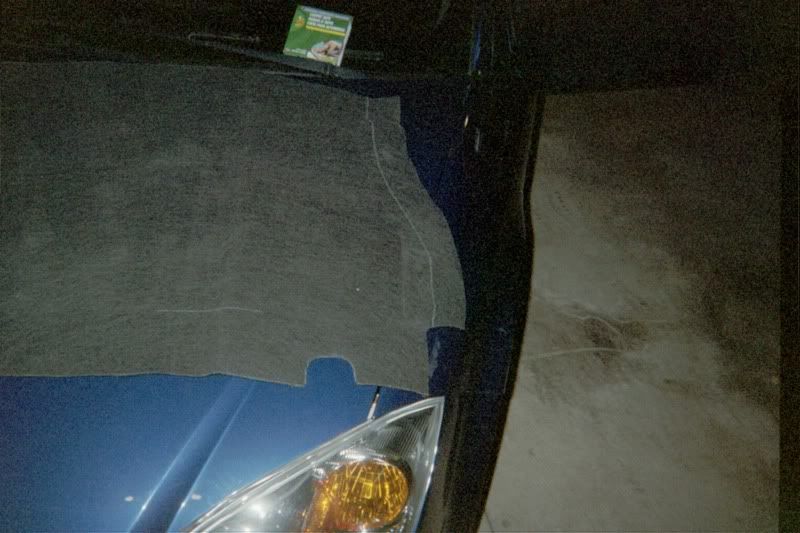
Take your cutout piece of carpet and get in your backseat, place the carpet down over the rear deck and determine where you need to trim it up to fit properly, you will find out that for the most part you will be trimming along the original trace until you get to the corner seatbelt areas�
Here is mine cutout to proper size and shape�
Now that you have your carpet to shape its time to prep the surface�
Take you rubbing alcohol and cloth, dampen the cloth with the rubbing alcohol and lightly clean off the rear deck of dirt, dust and oils, this is to ensure that the carpet tape can adhere to the deck properly�
After cleaning the surface, start placing the carpet tape in pieces�
Here is a crappy pic of the tape�
Here are 2 pics of where I placed the carpet tape, make sure that you place it on the contours of the metal, most places where there is a bend and such places�
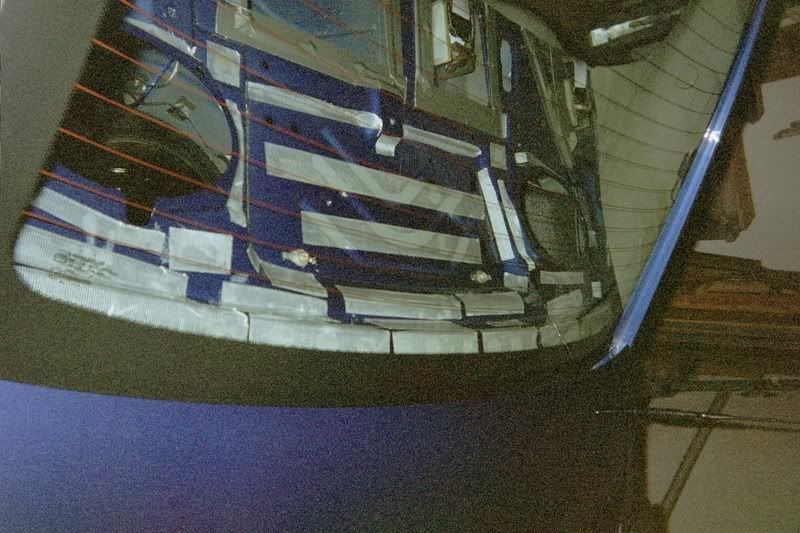
After placing all the tape, carefully place the carpet, put the carpet over your head and make sure that you start back at the base of the window and tuck it in, the slowly and carefully press the carpet into the contours of the deck to adhere it to the tape, with patience and caution this will look nice when finished�when you reach the seatbelt areas, you will need to cut slits to run the seatbelts through to the area it needs to be, as well as cut out where the guide cover sits in the plexiglass plate� you may need to trim the carpet once you get it all laid, mostly around the backseat latches when the seats are up� tape it on the bend so that it looks nice�
Here is mine�
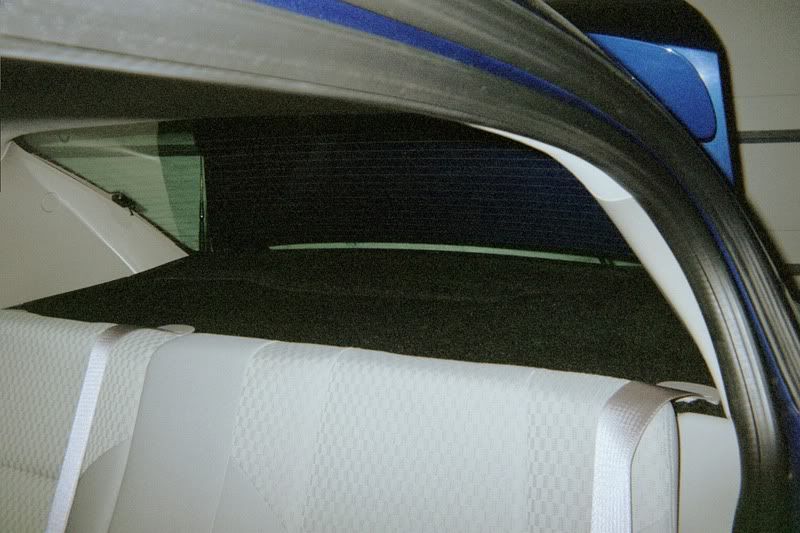
Here is where the excess carpet comes into play, cut strips think enough to fold/roll over and tuck in under the side panels with the rounded sides out, this will stay in place by friction, and look much nicer then if you don�t do it� = P
Now if your installing 6x9 speakers back in, take your knife and cut out where the speakers go in the carpet, as well at poke a big hole through where the screws/bolts for the speaker mounts go� and install your speakers�

For those of us with a subwoofer(s) this thing is prone to rattles and vibrations causing offensive noise which can ruin the listening experience� this is why I did this�
WHAT YOU NEED:
Your hands
Socket set
Screwdriver set
Pliers
Sturdy sharp knife/ really good shears/scissors
Power drill
Drill bit set
Dermmel or a saw
(4) 10� x 8� x 1/8� plexiglass plates
1/4inch rubber foam gasket stripping (used on doors to help make an air tight seal)
Nuts, bolts, washers (kinda narrow shanks)
Wire strippers
Heat shrink tubing
Duct tape
Rubbing alcohol
Clean dry cloth
Roll of automotive/boat carpet ( got mine at walmart, forget price)
Roll of OUTDOOR CARPET TAPE (see pic at that step)
Good/cheap pair of scissors
Sharpie marker (color varies depending on carpet color)
~~ I may have forgotten some things, I don�t think I did but if I did, LET ME KNOW~~
sorry about the lack of pics and the quality, walmart 3day photo processing sucks...
Ok lets get started�
Start off by removing the 3 plastic child seat latch covers, you will need these holes later to maneuver the rear deck�
Now remove the covers over the headrests, then unbolt the headrests and remove the hardware�
Remove the seatbelt guides from their places on the rear deck� you can�t take the seatbelts off or anything easy like that.. but we�ll get to that soon�
Now remove this�
Now in the trunk right in the back under the opening there are 2 clip things that hold the rear of the deck �down� (lot of good it did >: \ )
You have to pry then back and up to �release� the deck
Here-ish
Now get back in your back seat and manipulate the deck up� its hooked under the 2 side panles so you need to push down on each side and manipulate it out, once you have it free everywhere but the very back you have to get �under� the deck and force the friction fit pins out of place� this should �free� the deck�
But its still �stuck� there by the seatbelts�. Here is where u take the knife� and cut slits in the DECK to get it free form the seatbelts� if you stand back and look at the deck you can decide which places will be best to cut it so that should you ever put the deck back in you wont notice the cuts as long as the seats are up�
Now you rear deck is EXPOSED�
Now then� remove all the hardware from that rear deck� circled in purple and cyan (there is more on the passenger side (not shown in pic)
Remove the rear speakers�
Unbolt the ground wires pointed out in green, and move the wires outlined in yellow up into the sides under the side panels� except for the ground ends.. those need to be routed through the corners of the rear deck and down into the trunk area where you then you cut the metal ends off leaving about 3 inches of wire so you can reconnect the wires later� now take those metal ends and bend the metal so its all flat, place them back onto their spots and route the wire ends through the hole into the trunk area� bolt it down, reattach the wires, don�t worry about connecting the wires back to their original mates because they are all grounds so its no biggie�
Now take your roll of carpet and your cloth covered rear deck� unroll the carpet and lay it out on the floor the stiff side facing up at you, now take the rear deck and lay it cloth side down on the carpet, take your sharpie and trace around the deck, be sure that you bring the back of the deck up so that the short part is on the carpet so you get a full trace� now take a 1-2 inch spacer of any sort and go around and mark places with that spacer so you have excess when you cut the carpet out� now cut the carpet out on the outer line that you made, you will trim this up to proper size later..
Make sure that you save the scrap for later�
Here is mine uncut�
Back to the rear deck�. You may notice that there are 4 big holes on the rear deck, 3 for the seatbelts and 1 for no reason� you will use the plexiglass to cover these, place the plexiglass over the hole and square up the 2 side openings then draw an outline about .5-1 inch offset from the actual opening, do the same for the middle openings but have as much excess on the sides as possible for best mounting�
Now cut the pieces out� here are mine�
Notice the black lines still on those plates.. those are placed as markers where you will need to cut so that the seatbelt and cover that you unhooked earlier can be functional.. your going to need to place those plexiglass pieces over the cloth covered deck in order to get the proper shape to cut out so that the cover can fit in properly and securely, as well as cut a slit on the side of the plexiglass so you can slip the seatbelt itself into place within its cover plate�
Now drill intermittent holes on the sides of each piece, hole size determined my the diameter of your bolt, make sure that you place these holes in spots where you will be able to completely drill through the metal of the rear deck so you can properly bolt down your plate�
After drilling the holes, place the plexiglass over its respective opening and mark where the holes should be drilled in the deck� then drill the holes�
Now place the foam rubber gasket in strips between each hole opening on the plexiglass� I forgot to mention that the foam rubber stuff it to ensure that the plexiglass does not vibrate against the deck to cause unwanted noise... then bolt down the plates�
After bolting down the plates cover the edges with duct tape, this will make the edges more smooth when you apply the carpet�
Here is mine�
Ok now back to the carpet�
Take your cutout piece of carpet and get in your backseat, place the carpet down over the rear deck and determine where you need to trim it up to fit properly, you will find out that for the most part you will be trimming along the original trace until you get to the corner seatbelt areas�
Here is mine cutout to proper size and shape�
Now that you have your carpet to shape its time to prep the surface�
Take you rubbing alcohol and cloth, dampen the cloth with the rubbing alcohol and lightly clean off the rear deck of dirt, dust and oils, this is to ensure that the carpet tape can adhere to the deck properly�
After cleaning the surface, start placing the carpet tape in pieces�
Here is a crappy pic of the tape�
Here are 2 pics of where I placed the carpet tape, make sure that you place it on the contours of the metal, most places where there is a bend and such places�
After placing all the tape, carefully place the carpet, put the carpet over your head and make sure that you start back at the base of the window and tuck it in, the slowly and carefully press the carpet into the contours of the deck to adhere it to the tape, with patience and caution this will look nice when finished�when you reach the seatbelt areas, you will need to cut slits to run the seatbelts through to the area it needs to be, as well as cut out where the guide cover sits in the plexiglass plate� you may need to trim the carpet once you get it all laid, mostly around the backseat latches when the seats are up� tape it on the bend so that it looks nice�
Here is mine�
Here is where the excess carpet comes into play, cut strips think enough to fold/roll over and tuck in under the side panels with the rounded sides out, this will stay in place by friction, and look much nicer then if you don�t do it� = P
Now if your installing 6x9 speakers back in, take your knife and cut out where the speakers go in the carpet, as well at poke a big hole through where the screws/bolts for the speaker mounts go� and install your speakers�
Last edited by TommyP; May 23, 2012 at 01:32 PM.


Senior Member
Joined: 09-08-06
Posts: 3,511
Likes: 2
From: *
Nice how-to discription and pics! I want to remove mine so that I can dye it black...the light gray causes a window reflection when looking aft with the rear view mirror.
Side note: GM terminology -- rear window shelf. I always referred to it as "package shelf".
Side note: GM terminology -- rear window shelf. I always referred to it as "package shelf".


Banned
Joined: 10-11-06
Posts: 5,929
Likes: 0
From: in ur moms bed
you know to make it more long term you could us a pl or aka liquid nail... personaly indoor out door carpet glue would work better then all of those..
i suggest this because i install floor to make money while im in school
i suggest this because i install floor to make money while im in school

Banned
Joined: 04-16-06
Posts: 1,960
Likes: 0
From: Sterling, IL
when i say stupid, i mean: it screams pull me over because I cant see out of my windshield at night.
Last edited by TCarter; Apr 6, 2007 at 03:17 PM. Reason: Automerged Doublepost


Banned
Joined: 11-29-06
Posts: 2,665
Likes: 0
From: asdf
Looks good, I want to mount my speakers (or subs) like that when I get a system in my car.
Hes full of ****, look at his gallery.
Hes full of ****, look at his gallery.


Senior Member
Joined: 03-31-07
Posts: 724
Likes: 2
From: Edmonton, AB

Thread
Thread Starter
Forum
Replies
Last Post
DANRICKARD
Problems/Service/Maintenance
8
Oct 1, 2015 12:08 AM
Delta coupe
Pictures & Videos
1
Sep 30, 2015 08:11 AM