
Appearance: Underglow kit install w/pics

Thread Starter
Senior Member
Joined: 05-27-06
Posts: 2,921
Likes: 0
From: Sumter, SC
Underglow kit install w/pics
As with anything lay it out to make sure its all there. Also make sure you set up whatever kit you use to match the diagram in the install book. We did not have any problems as we made sure of this, but I can see it happening.
[IMG]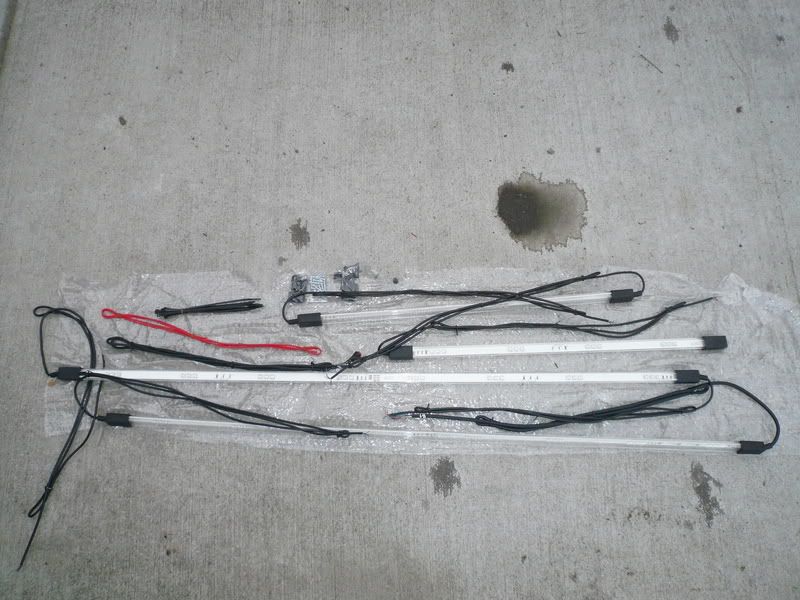 [/IMG]
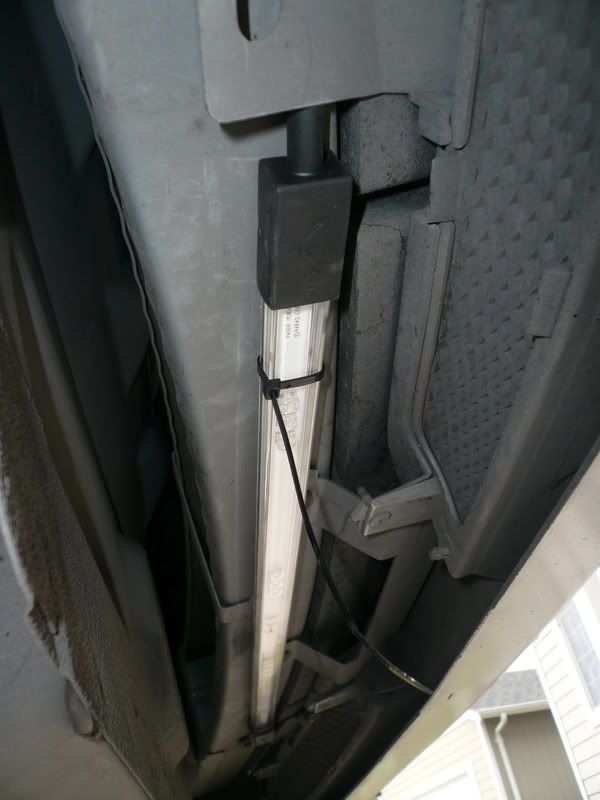
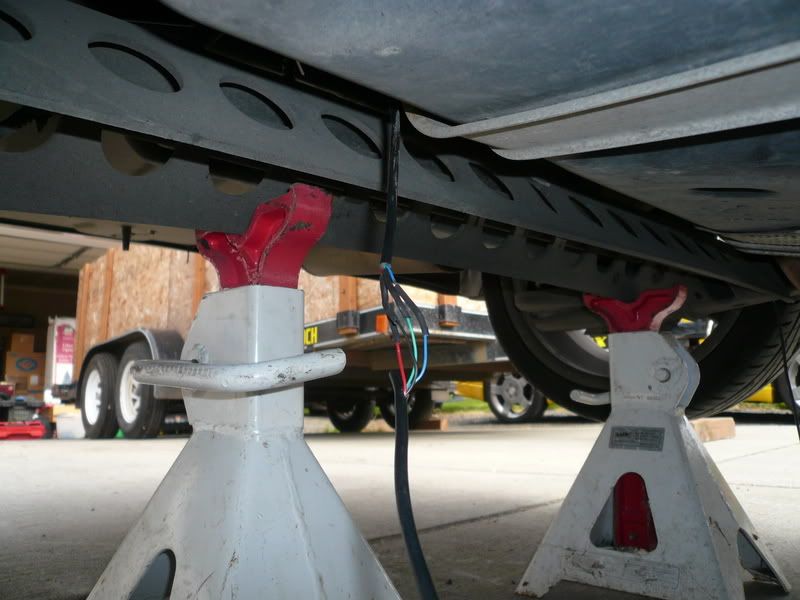
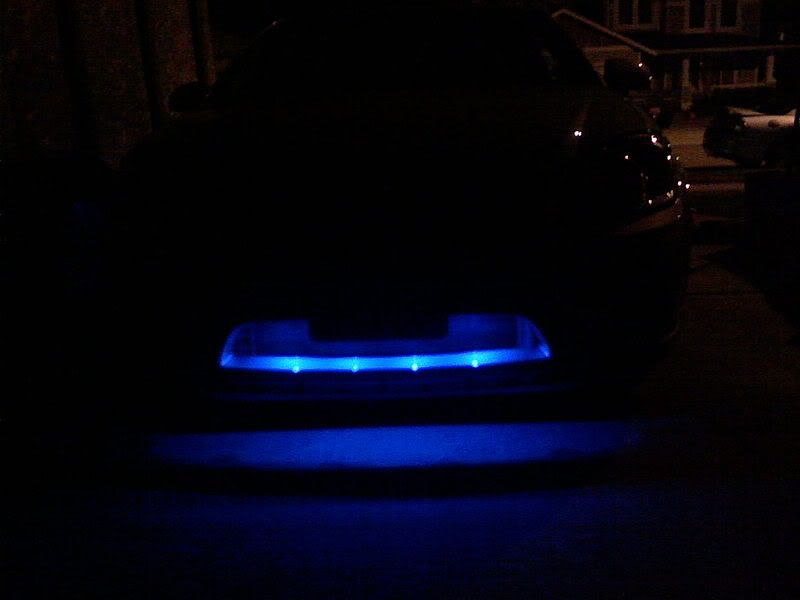
Once you have located where you want your lights to be mounted and centered....drill some pilot holes in the body, then with some self-tapping screws(included)...mount the plastic mounting brackets and slide the zip strips through and wrap them around the light strip. (eventually clipping off the long end of the zip strip)Do this all the way around the car. We did the back, then the front as we did not have a lift. Be careful not to mount a zip strip directly over the actual part of the light tube that has the lights.
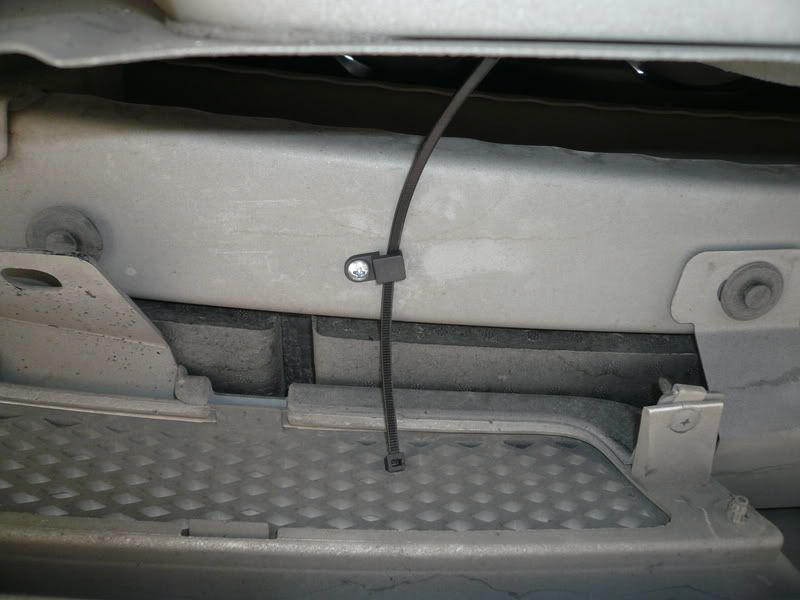
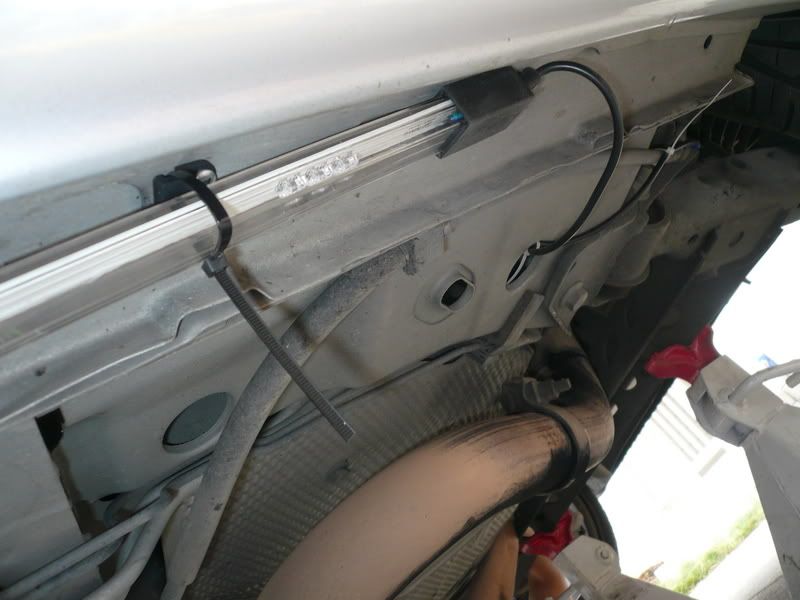
Now you're ready to run the wires through the body and frame (zip stripping your ass off and being careful not to create and pinch points or anywhere that you might bottom out.) The drivers side front did not have an easy way so I actually took the tire off, removing the front part of the plastic skirt....and using a metal clothes hanger, I ran the left side wires to the front over the skirt.
Connect the wires color for color and use the included heat shrink to secure the lines together. Safely wrap up and secure and extra length that you did not need to run or cut it shorter to fit if you like but I would not recommend that. Also try and leave a very small amount of slack in the line somewhere in case things need to just settle or get pulled slightly somehow.
Part two is all above and inside the car:
First thing is find a power source......this worked for me.

Find the rubber grommet and run both the right front cable from the lights(end of the chain) and the fuse line from the battery through the firewall.
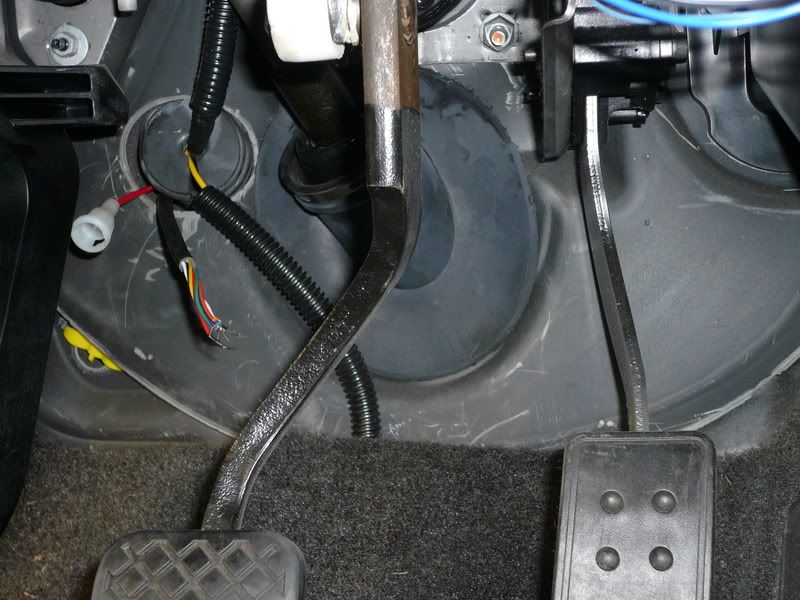
Now connect the cable for the indicator light and mode switch button to that line. Then attach(without the fuse in place) the power line in red and run this all to the center console for mounting.
Now use another power source(courtesy lights or alarm system)and connect the final cable. Just follow the install directions as it's pretty easy if you take your time and make sure you connect everything properly.
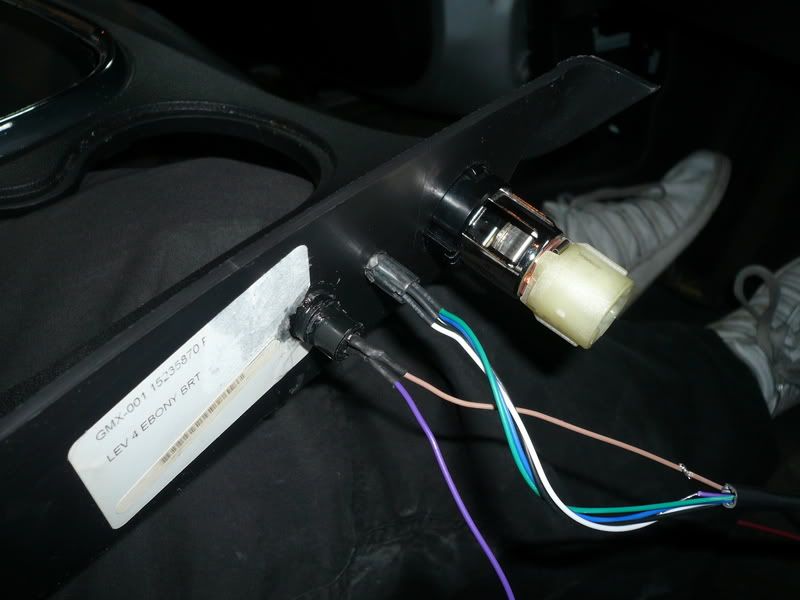
Once you've done this..drill your holes where you would like and mount your mode switch and indicator lights.
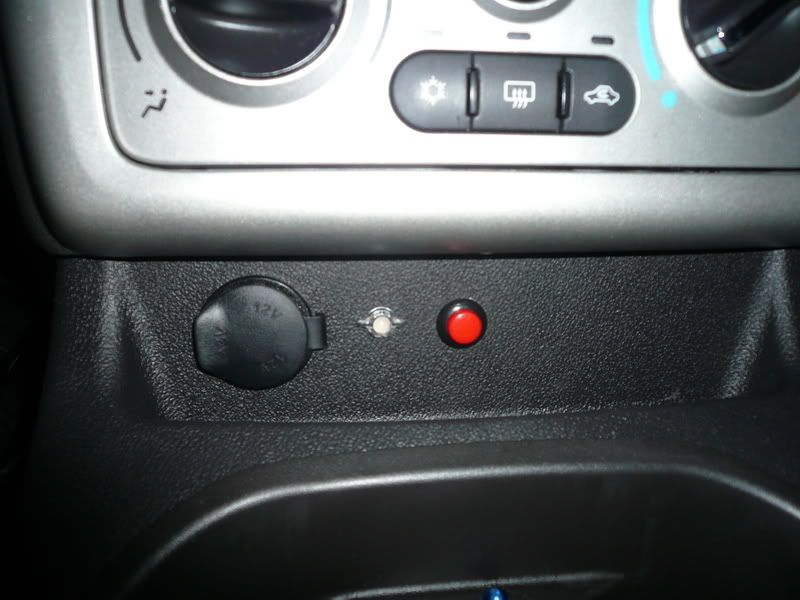
and voila:
fsickness(Bill) was the wiring expert on this job. Works great! Thanks man.
by the way: here is the link to the page for the product.
I bought the ULX210 model from Varad
By the way..this is the kit. The company is Varad and I got the ULX210 kit.
[IMG]
[/IMG]Once you have located where you want your lights to be mounted and centered....drill some pilot holes in the body, then with some self-tapping screws(included)...mount the plastic mounting brackets and slide the zip strips through and wrap them around the light strip. (eventually clipping off the long end of the zip strip)Do this all the way around the car. We did the back, then the front as we did not have a lift. Be careful not to mount a zip strip directly over the actual part of the light tube that has the lights.
Now you're ready to run the wires through the body and frame (zip stripping your ass off and being careful not to create and pinch points or anywhere that you might bottom out.) The drivers side front did not have an easy way so I actually took the tire off, removing the front part of the plastic skirt....and using a metal clothes hanger, I ran the left side wires to the front over the skirt.
Connect the wires color for color and use the included heat shrink to secure the lines together. Safely wrap up and secure and extra length that you did not need to run or cut it shorter to fit if you like but I would not recommend that. Also try and leave a very small amount of slack in the line somewhere in case things need to just settle or get pulled slightly somehow.
Part two is all above and inside the car:
First thing is find a power source......this worked for me.
Find the rubber grommet and run both the right front cable from the lights(end of the chain) and the fuse line from the battery through the firewall.
Now connect the cable for the indicator light and mode switch button to that line. Then attach(without the fuse in place) the power line in red and run this all to the center console for mounting.
Now use another power source(courtesy lights or alarm system)and connect the final cable. Just follow the install directions as it's pretty easy if you take your time and make sure you connect everything properly.
Once you've done this..drill your holes where you would like and mount your mode switch and indicator lights.
and voila:
fsickness(Bill) was the wiring expert on this job. Works great! Thanks man.
by the way: here is the link to the page for the product.
I bought the ULX210 model from Varad
By the way..this is the kit. The company is Varad and I got the ULX210 kit.
Last edited by TommyP; May 23, 2012 at 04:02 PM. Reason: Automerged Doublepost
Senior Member
Joined: 03-13-07
Posts: 7,520
Likes: 0
From: North Carolina
i have that same kit. i can't stand the button thing on it. can't seem to get my blue to work either, maybe i missed a wire somewhere? o well.. it looks great tho.
heres the only pic i can find right now...

heres the only pic i can find right now...

Senior Member
Joined: 03-17-07
Posts: 1,530
Likes: 0
From: Eastern, CT
great write up. honestly you got a cheap mounting system n/o. i just prefer one that doesnt reliy on zip ties. but im not trying to hate. just sayin from my personal experience. i've done bout 10 different cars. 4 kits on my own cars. very good write up and nice clean install on the switchs
Thread Starter
Senior Member
Joined: 05-27-06
Posts: 2,921
Likes: 0
From: Sumter, SC
Thanks guys....I was a tic worried about the zip strips too.....we over tightened two of the screws and it ruined two of the clamps, so there are fewer ones holding the long ones on......but I'll just check them periodically. The very little slack in the lines ran with zip strips securing that...I think I will be okay if one comes loose.
Thread Starter
Senior Member
Joined: 05-27-06
Posts: 2,921
Likes: 0
From: Sumter, SC
So...what I think I'll do is just pretend that the red mode switch button is my NO2! ha ha Might as well...it looks like it.  It's hard to tell....but the button and indicator light are not extremely visible as you're sitting in the car....I kinda wanted it that way.
It's hard to tell....but the button and indicator light are not extremely visible as you're sitting in the car....I kinda wanted it that way.
2 kit special
Nice work man. I'm diggin the blue...
But here's my set up. Sorry, no pics of actual install, just glow pics here folks. One red LED underglow kit and one yellow LED underglow kit. I think it worked out nicely. But you tell me...


Note: Soon to come, 4 pc. red LED interior underseat kit, red underdash neon kit, and trunk glow
But here's my set up. Sorry, no pics of actual install, just glow pics here folks. One red LED underglow kit and one yellow LED underglow kit. I think it worked out nicely. But you tell me...
Note: Soon to come, 4 pc. red LED interior underseat kit, red underdash neon kit, and trunk glow
Guest
Posts: n/a
Looks good. The kit I got goes all down my door sides. Front looks the same as yours. Its pretty badass driving with it on. All the girlies love it. ;D I actually put my switch in the back cup holder. So its not a sore sight anywhere important.
I put my switch by the 12v plug in front of the e-brake. Just a simple black round 12v rocker switch with a little red led on it. It looks clean... I'm gonna use another switch just like it for the interior glow. All exterior glow will be on one switch and all interior will be on another...


Thread
Thread Starter
Forum
Replies
Last Post
Jesse
Problems/Service/Maintenance
2
Sep 28, 2015 12:51 PM