
New Rotated Trans Mounts


well i can always put the stock one back on if i have any problems...
btw...who is john???
... three great companies, all coming together

btw...who is john???
... three great companies, all coming together
Last edited by EXsoccer1921; Apr 17, 2009 at 11:22 PM. Reason: Automerged Doublepost

Joined: 08-27-07
Posts: 21,561
Likes: 4
From: Jacksonville, FL
Yea I want to hear some clarification about this............
Last edited by Black SS/SC 06; Apr 17, 2009 at 11:46 PM. Reason: Automerged Doublepost
Senior Member
Joined: 03-15-08
Posts: 3,649
Likes: 0
From: Chicago...Land
as far as the mounts they are the **** i have them and the new ott axles and well the car ******* boogies in 1st gear on radials
 i'll have some track times tomorow morning for ya'll with both on the car
and yes the new axles made a HUGE difference car feels more solid when launching
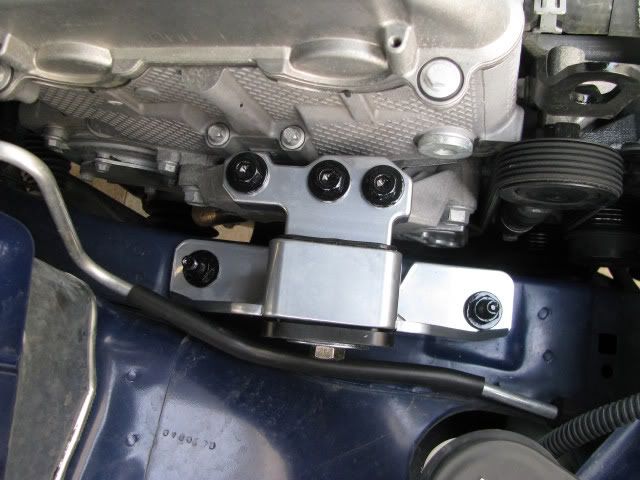
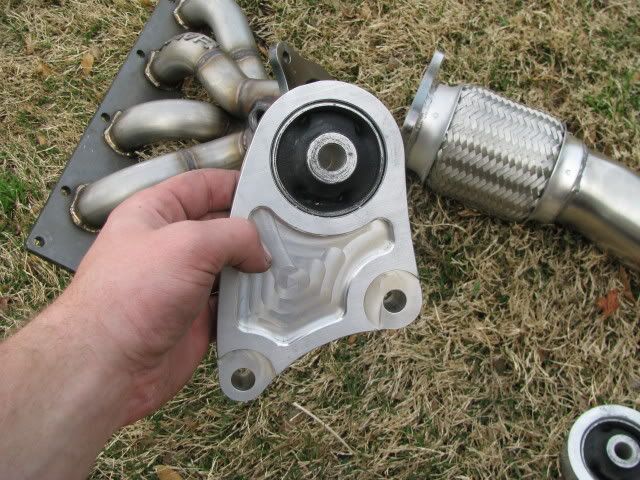
I do not reccomend these instructions for impatient people. This needs to be done very carefully as the THREE mounts will be loosened/uninstalled at one point. Yes i am aware these are prefered to be installed with the stock upper mount. well....i have the TTR upper and this is how i made it work. i have no incountered any problems on the road so far. thanks to recklessactn for the use of his "before install" pictures as i didn't think about taking any untill they were already on the car.
Use a 2x4 inbetween the jacks and engine.
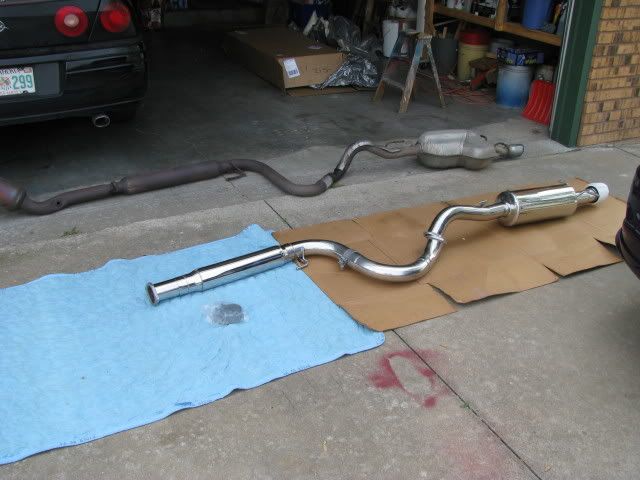
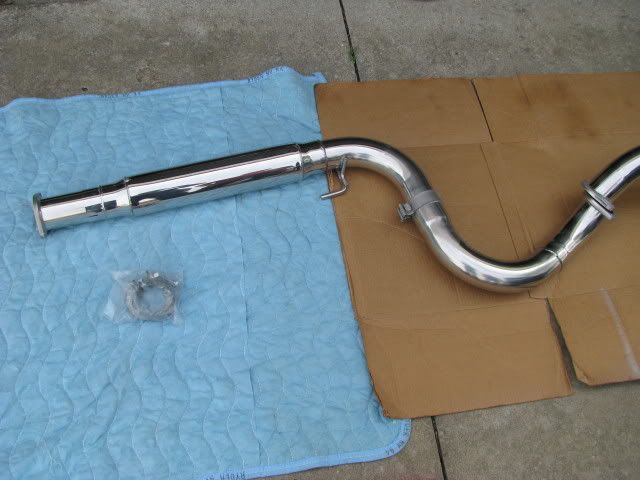
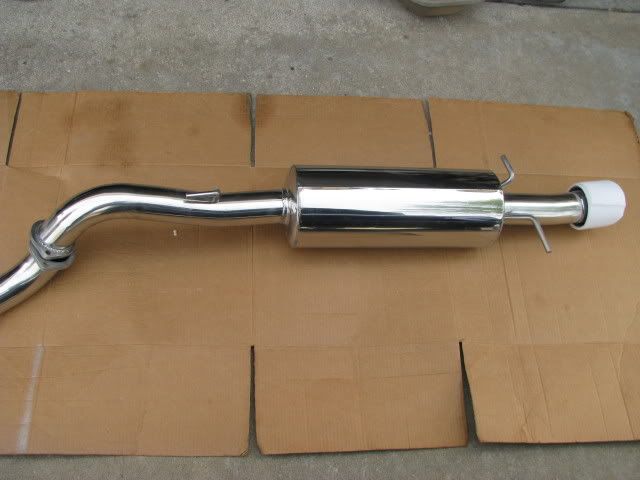
By the way, don't complain about not having a lift or anything, i did all this with the car just up on ramps. I also had the downpipe and catback removed so i could install the hahn exhaust, but having the downpipe removed gave me an ungodly amount of space to move around in, if you can remove the downpipe for this, i strongly reccomend it.
"tighten(ed) down" means....no play at all.
"rear trans bracket(18mm)"VVVV

"REAR THREE MOUNT TO SUBFRAME BOLTS(15mm)"VVVV

FRONT TRANS MOUNT BOLTS(18mm). LEFT=MOUNT TO SUBFRAME. MIDDLE&RIGHT=MOUNT TO TRANS

step1: Place hydrolic jack under trans.
step2: Place floor jack under oil pan(as close to pass. side as possible)
step3: Loosen the three bolts on the top of the passenger side upper engine mount BUT DO NOT TAKE THEM OUT!!!! LEAVE THEM THREADED!!!! ...just loosen them to allow a little movement(about .250")
step4: Remove front transmission mount via the three bolts
step5: Remove the WHOLE rear transmission mount assembly(mount, heatshield/bracket) via the three bolts on the bottom of the mount and the three bolts on the mount to trans bracket. LEAVE THE BOLT THAT GOES THROUGH THE MOUNT UNTIL IT IS ALL OFF THE CAR!!!! (it will all come out in one piece.....if it doesnt, you screwed up). once you can move it around, pull out the 02 electrical connections. its got a "christmastree type connection into the mount.
step6: Seperate the mount and bracket via the main bolt through the mount
step7: Reinstall bracket via the three bolts (WITHOUT THE MOUNT!!!) and tighten down.
step8: Install rear trans mount via the three mount to subframe bolts and tighten down.
step9: Install front trans mount via the two mount to trans bolts and leave loose. Install main bolt through the mount and start the thread it slightly, leave it loose as well.
AT THIS POINT, BOTH OTTP MOUNTS SHOULD BE ON THE CAR. FRONT SHOULD HAVE ALL THREE BOLTS LOSSELY IN. REAR SHOULD HAVE THE BRACKET ATTATCHED TO THE TRANS AND THE MOUNT ATTACHED TO THE FRAME, BOTH OF WHICH SHOULD BE TIGHTENED DOWN.step10: (Extra set of hands is useful here) Using the hydrolic jack under the transmission, start to jack it upwards untill the bolt that connects the rear trans mount to the bracket will go through(this is a fairly good amount in terms of engine movement)
AT THIS POINT, ALL BOLTS SHOULD BE ON THE CAR AND ALL THE WAY OR LOOSELY TIGHTENED
step11: Tighten the three bolts on the upper motor mount back down all the way and remove the jack from under the oil pan
step12: Tighten up ALL BOLTS on the front and rear trans mounts and remove the hydrolic jack SLOWLY, this is when everything will settle back down.
step13: Go for a LIGHT!!! (DO NOT HIT BOOST, DO NOT HIT MORE THAN 3K RPMS) drive around the block and pull back up the ramps. Yhis will allow the bolts/mounts to do any final movement
step14: Give everything a final tightening to trq specs
Use a 2x4 inbetween the jacks and engine.
By the way, don't complain about not having a lift or anything, i did all this with the car just up on ramps. I also had the downpipe and catback removed so i could install the hahn exhaust, but having the downpipe removed gave me an ungodly amount of space to move around in, if you can remove the downpipe for this, i strongly reccomend it.
"tighten(ed) down" means....no play at all.
"rear trans bracket(18mm)"VVVV
"REAR THREE MOUNT TO SUBFRAME BOLTS(15mm)"VVVV
FRONT TRANS MOUNT BOLTS(18mm). LEFT=MOUNT TO SUBFRAME. MIDDLE&RIGHT=MOUNT TO TRANS
step1: Place hydrolic jack under trans.
step2: Place floor jack under oil pan(as close to pass. side as possible)
step3: Loosen the three bolts on the top of the passenger side upper engine mount BUT DO NOT TAKE THEM OUT!!!! LEAVE THEM THREADED!!!! ...just loosen them to allow a little movement(about .250")
step4: Remove front transmission mount via the three bolts
step5: Remove the WHOLE rear transmission mount assembly(mount, heatshield/bracket) via the three bolts on the bottom of the mount and the three bolts on the mount to trans bracket. LEAVE THE BOLT THAT GOES THROUGH THE MOUNT UNTIL IT IS ALL OFF THE CAR!!!! (it will all come out in one piece.....if it doesnt, you screwed up). once you can move it around, pull out the 02 electrical connections. its got a "christmastree type connection into the mount.
step6: Seperate the mount and bracket via the main bolt through the mount
step7: Reinstall bracket via the three bolts (WITHOUT THE MOUNT!!!) and tighten down.
step8: Install rear trans mount via the three mount to subframe bolts and tighten down.
step9: Install front trans mount via the two mount to trans bolts and leave loose. Install main bolt through the mount and start the thread it slightly, leave it loose as well.
AT THIS POINT, BOTH OTTP MOUNTS SHOULD BE ON THE CAR. FRONT SHOULD HAVE ALL THREE BOLTS LOSSELY IN. REAR SHOULD HAVE THE BRACKET ATTATCHED TO THE TRANS AND THE MOUNT ATTACHED TO THE FRAME, BOTH OF WHICH SHOULD BE TIGHTENED DOWN.step10: (Extra set of hands is useful here) Using the hydrolic jack under the transmission, start to jack it upwards untill the bolt that connects the rear trans mount to the bracket will go through(this is a fairly good amount in terms of engine movement)
AT THIS POINT, ALL BOLTS SHOULD BE ON THE CAR AND ALL THE WAY OR LOOSELY TIGHTENED
step11: Tighten the three bolts on the upper motor mount back down all the way and remove the jack from under the oil pan
step12: Tighten up ALL BOLTS on the front and rear trans mounts and remove the hydrolic jack SLOWLY, this is when everything will settle back down.
step13: Go for a LIGHT!!! (DO NOT HIT BOOST, DO NOT HIT MORE THAN 3K RPMS) drive around the block and pull back up the ramps. Yhis will allow the bolts/mounts to do any final movement
step14: Give everything a final tightening to trq specs
Last edited by EXsoccer1921; Apr 19, 2009 at 12:52 AM.

Member
Joined: 10-01-08
Posts: 306
Likes: 1
From: Vegas, Baby!
Decent write up, wish it'd been around when I did mine, I had to trial and error it, lol.
Once I loosened everything back up, ricked it a few times, and torqued back down in sequence to proper specs, the vibes LITERALLY dropped in half. Barely more than stock now, still no wheelspin at street tire pressures, LOVE THESE!
All other mounts stock BTW...
Once I loosened everything back up, ricked it a few times, and torqued back down in sequence to proper specs, the vibes LITERALLY dropped in half. Barely more than stock now, still no wheelspin at street tire pressures, LOVE THESE!
All other mounts stock BTW...
yeah i'm pretty decent at seeing what is going to be needed and the order in which i'll need to do things. only took two calls to bryan too 
i'll try and take some pictures of them installed tomorrow
i'll try and take some pictures of them installed tomorrow
Last edited by EXsoccer1921; Apr 18, 2009 at 01:59 AM. Reason: Automerged Doublepost
Joined: 08-27-07
Posts: 21,561
Likes: 4
From: Jacksonville, FL
oooooor you could not. since its already in there hahahah. and yes i made two calls to bryan cause my dad was pissed and didn't believe what i was saying
but thatnks for lettin me steal your before pictures lol. i didn't even think about taking any untill they were already on the car
but thatnks for lettin me steal your before pictures lol. i didn't even think about taking any untill they were already on the car
Last edited by EXsoccer1921; Apr 19, 2009 at 12:51 AM. Reason: Automerged Doublepost
oooooor you could not. since its already in there hahahah. and yes i made two calls to bryan cause my dad was pissed and didn't believe what i was saying
but thatnks for lettin me steal your before pictures lol. i didn't even think about taking any untill they were already on the car
but thatnks for lettin me steal your before pictures lol. i didn't even think about taking any untill they were already on the car
https://www.cobaltss.net/forums/how-guide-43/install-powell-f35-stage2-mounts-166738/
theres the link to my "official" how to. along with installed pictures. and a couple pics of the hahn dp
well they're both in the how to section. so i'm sure people will check out both of them
but man do i love these. i don't hop any more. when i was driving back to the house when it was raining. i came off a stop sign, about 1,500-2,000rpms in first. went WOT and no hop at all. along with many other situations. i just can't wait to get these out to the track.
Last edited by EXsoccer1921; Apr 19, 2009 at 12:56 AM. Reason: Automerged Doublepost

Thread
Thread Starter
Forum
Replies
Last Post