2.0L LNF Performance Tech 260hp and 260 lb-ft of torque Turbocharged tuner version.

LDK build thread, version 2.0

Thread Tools
 
Search this Thread
 
Old 04-20-2017, 08:21 PM
  #1  
Junior Member
Thread Starter
 
08VRSS's Avatar
 
Join Date: 07-06-12
Location: Houston TX
Posts: 485
Received 7 Likes on 6 Posts
LDK build thread, version 2.0

Starting a new thread for my LDK build. Details are in my signature. Build will be done shortly and going into the car very soon. Here's some teasers.


Clearance too tight, honed to .0037-.004


I made this 5th injector kit.
Old 04-21-2017, 08:39 AM
  #2  
Senior Member
iTrader: (29)
 
royce777's Avatar
 
Join Date: 06-28-08
Location: Pittsburgh, PA
Posts: 9,444
Received 222 Likes on 182 Posts
beautiful man. did you ever get the issues resolved with your ARP hardware?
Old 04-21-2017, 10:16 AM
  #3  
Moderator
Platinum Member
Moderator
iTrader: (3)
 
Snail_SS's Avatar
 
Join Date: 04-18-14
Location: El Paso, TX
Posts: 16,465
Received 603 Likes on 561 Posts
Looks good man awesome build
Old 04-21-2017, 10:30 AM
  #4  
Senior Member
iTrader: (6)
 
cw383's Avatar
 
Join Date: 03-27-11
Location: butler,pa
Posts: 801
Received 27 Likes on 26 Posts
Did you happen to get a pic inside your throttle body opening, where the 5th injector sprays? Id like to see the bung on the other side?
Old 04-21-2017, 05:28 PM
  #5  
Senior Member
iTrader: (3)
 
63 Nova SS's Avatar
 
Join Date: 06-12-12
Location: Indiana
Posts: 5,485
Received 316 Likes on 296 Posts
Very nice! Love the name on the box of rods and Pistons.
Old 04-21-2017, 07:42 PM
  #6  
Junior Member
Thread Starter
 
08VRSS's Avatar
 
Join Date: 07-06-12
Location: Houston TX
Posts: 485
Received 7 Likes on 6 Posts
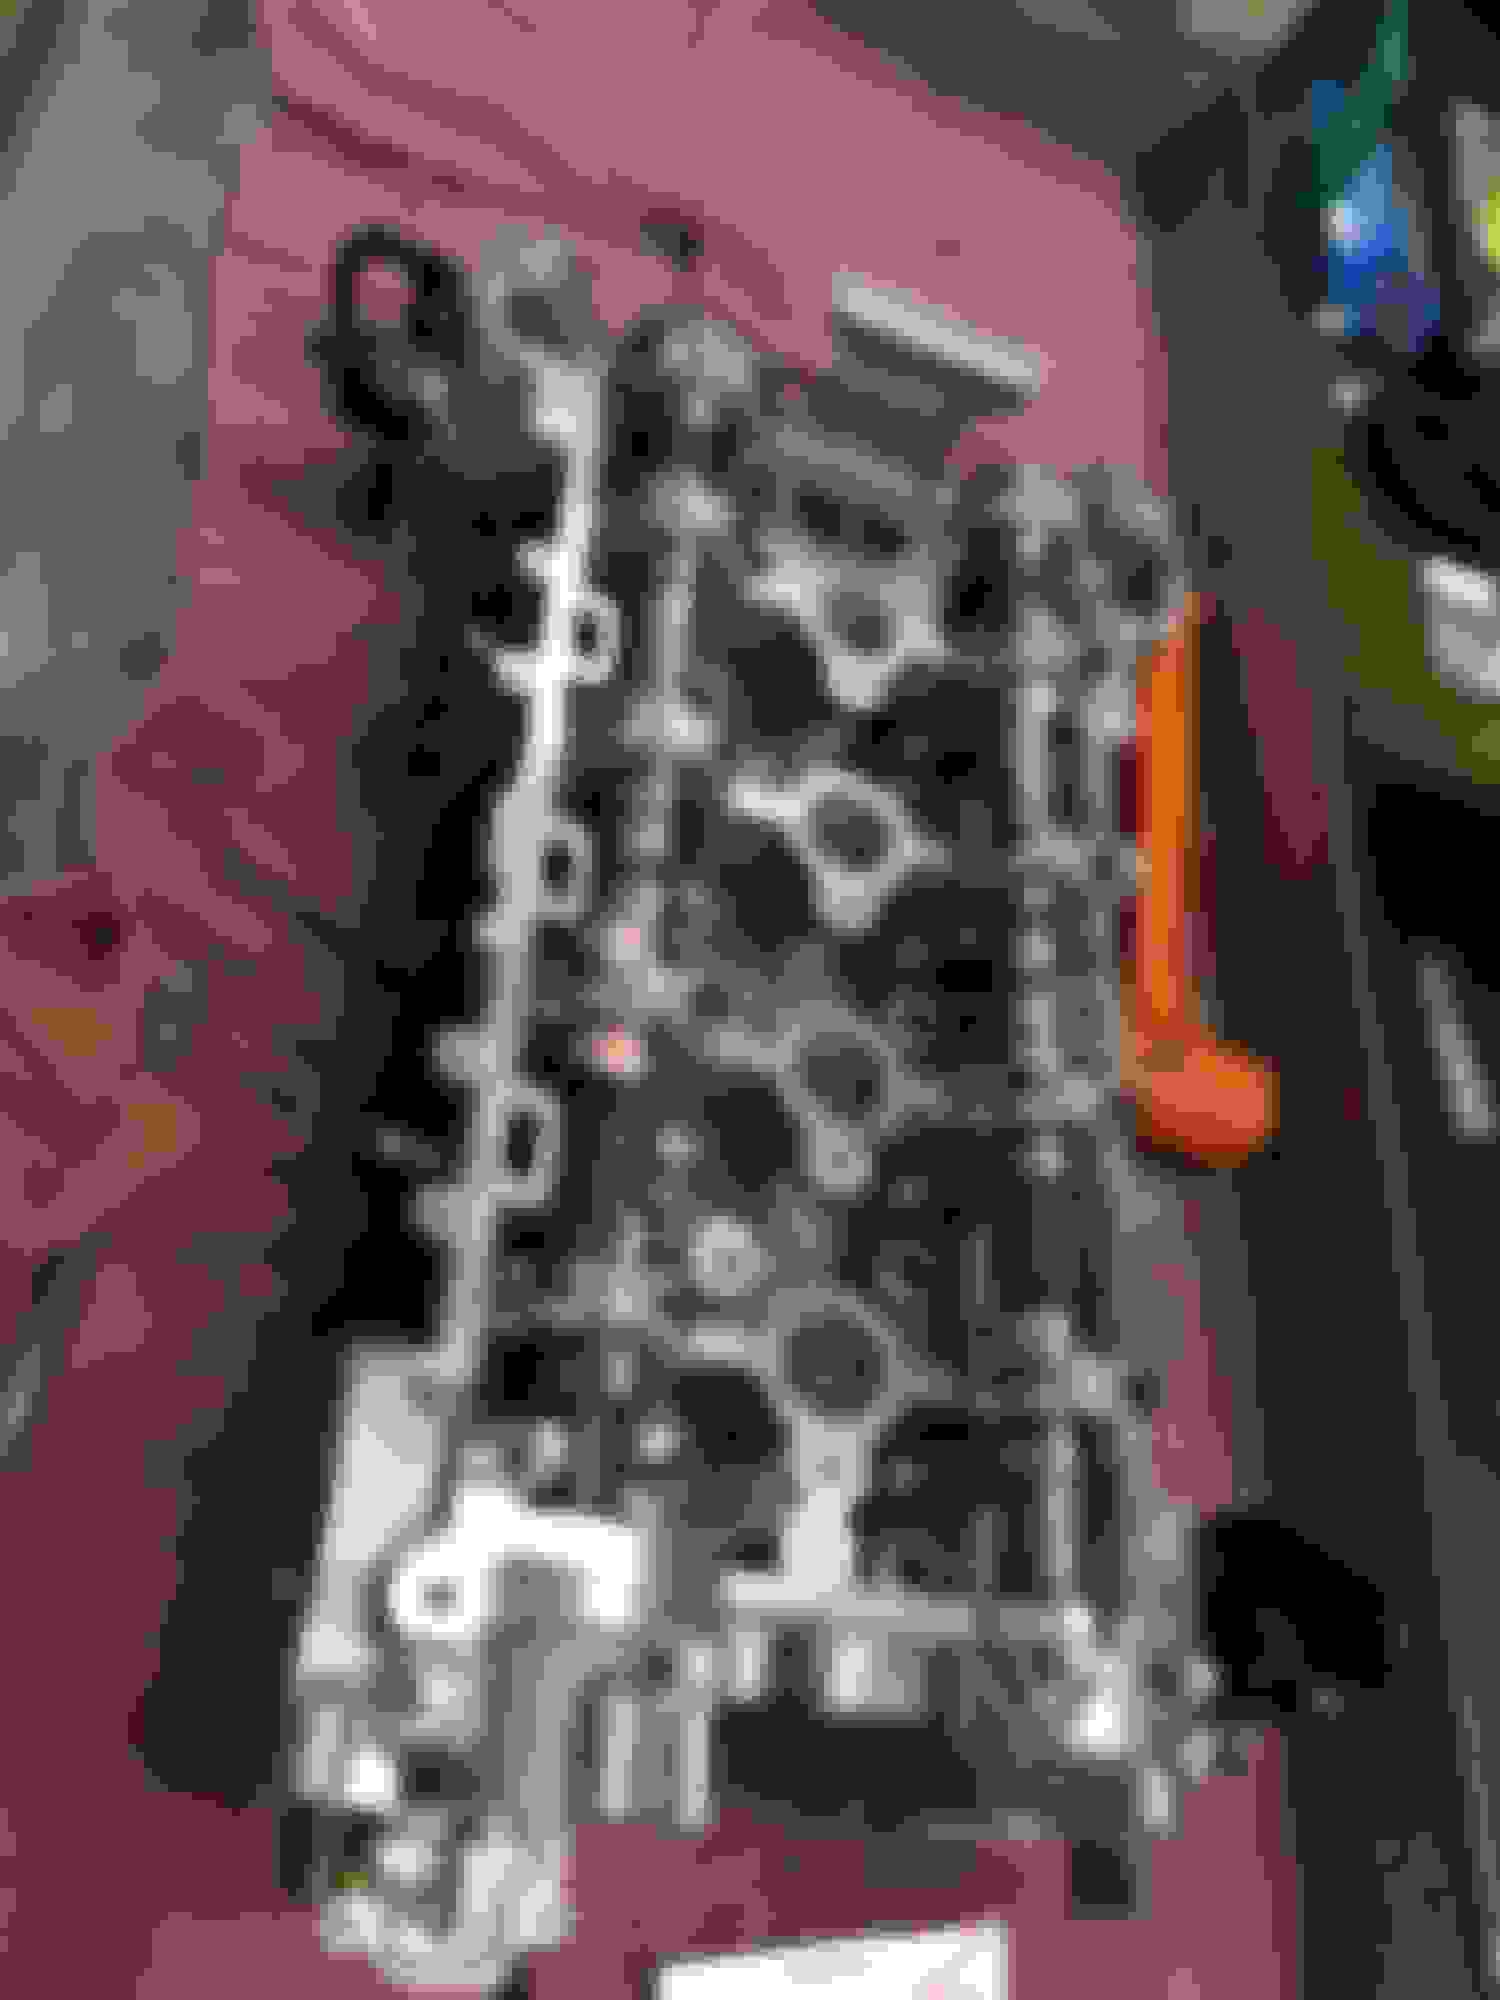
Thanks to Tom for the idea on the oil return line. It will also have heat shield wrap on all lines nere the hot side of the turbo.

The inside of the 5th injector is just flat and flush with the inside of the intake, any weld bleed through was just ground down and smoothed out with a deburring tool, nothing really to see. I liked this design of the injector holder because of the way its being held with the side tubes limiting the screw tightness so you can't over do it. It was overall pretty cheap as you can get the siemens 60# injector for cheap online, and can always go bigger. As for the injector controller, I had something laying around collecting dust that drives the injector just fine.

As of now, the engine is done, finished all the fittings and AN lines today, and will be in the car next weekend.

All dressed up and nowhere to go...... until next week lol


Last edited by 08VRSS; 04-22-2017 at 12:02 AM.
Old 04-25-2017, 11:36 AM
  #7  
Super Moderator
Platinum Member
iTrader: (2)
 
tomj77's Avatar
 
Join Date: 07-14-08
Location: canada
Posts: 12,015
Received 154 Likes on 131 Posts
Damn that return line is way straighter than mine, I'm gonna have to redo mine now lol. I also die grinded the return fitting that connects to turbo bigger and made it sloppeed into the fitting for better oil flow, and made the fitting going into block a little more open as well.
Old 04-25-2017, 12:14 PM
  #8  
Senior Member
iTrader: (4)
 
colodude18's Avatar
 
Join Date: 01-12-10
Location: Greater Denver Area, Colorado
Posts: 2,692
Received 171 Likes on 142 Posts
Originally Posted by 08VRSS
Nice build!
But do yourself a big favor and extend that turbo oil feed line so you can run it along the "cold" side of the turbo. It's a good idea. Ask me how I know....
Old 04-25-2017, 01:55 PM
  #9  
Super Moderator
Platinum Member
iTrader: (2)
 
tomj77's Avatar
 
Join Date: 07-14-08
Location: canada
Posts: 12,015
Received 154 Likes on 131 Posts
Originally Posted by colodude18
Nice build!
But do yourself a big favor and extend that turbo oil feed line so you can run it along the "cold" side of the turbo. It's a good idea. Ask me how I know....
Run it how? All the way around the motor? Nothing heat wrap on exhaust pipes and oil line can't fix.
Old 04-25-2017, 04:37 PM
  #10  
Senior Member
iTrader: (4)
 
colodude18's Avatar
 
Join Date: 01-12-10
Location: Greater Denver Area, Colorado
Posts: 2,692
Received 171 Likes on 142 Posts
Originally Posted by tomj77
Run it how? All the way around the motor? Nothing heat wrap on exhaust pipes and oil line can't fix.
True, and granted, I'm probably going a bit overboard with AND rerouting the oil and coolant lines, AND heat wrapping them AND heat wrapping the exhaust pipes and turbo and down pipe but once you write off an engine due to a cooked 30 dollar oil feed line you get a little nervous

ANyway, this is what I was talking about (not my picture)

Old 04-25-2017, 04:50 PM
  #11  
Senior Member
iTrader: (2)
 
Omiotek's Avatar
 
Join Date: 07-04-10
Location: Carol Stream, IL
Posts: 3,282
Received 66 Likes on 54 Posts
Originally Posted by tomj77
Run it how? All the way around the motor? Nothing heat wrap on exhaust pipes and oil line can't fix.
Heat wrap is a band aid. Under extreme conditions it will eventually fail. Heat wrap is only ment to provide a little extra protection. You really wanna route it properly
Old 04-25-2017, 05:07 PM
  #12  
Senior Member
iTrader: (4)
 
colodude18's Avatar
 
Join Date: 01-12-10
Location: Greater Denver Area, Colorado
Posts: 2,692
Received 171 Likes on 142 Posts
https://www.designengineering.com//c...ve-lr-technolo

Old 04-25-2017, 07:03 PM
  #13  
Super Moderator
Platinum Member
iTrader: (2)
 
tomj77's Avatar
 
Join Date: 07-14-08
Location: canada
Posts: 12,015
Received 154 Likes on 131 Posts
Only problem is the ldk doesn't have that oil galley port, just the original oil feed one, so no choice. I'm making mine long enough to not touch anything and when I say heat wrap I mean 3 layers of wrap. Wrap that is good for 2000f
Old 04-25-2017, 07:08 PM
  #14  
Super Moderator
Platinum Member
iTrader: (2)
 
tomj77's Avatar
 
Join Date: 07-14-08
Location: canada
Posts: 12,015
Received 154 Likes on 131 Posts
I'm gonna take the line off every year and replace, not much work and not much cost for peace of mind
Old 04-25-2017, 07:12 PM
  #15  
Moderator
Platinum Member
Moderator
iTrader: (3)
 
Snail_SS's Avatar
 
Join Date: 04-18-14
Location: El Paso, TX
Posts: 16,465
Received 603 Likes on 561 Posts
That's probably a good idea if you can't re route the line^
Old 04-25-2017, 07:22 PM
  #16  
Moderator
Platinum Member
Moderator
iTrader: (1)
 
Slowbalt2000's Avatar
 
Join Date: 05-15-11
Location: Livonia, MI
Posts: 27,413
Received 584 Likes on 519 Posts
Drill the block

The picture Adrian posted is mine, but i have a gen2 LE5. Never had any problems with the line in that spot.
Old 04-25-2017, 07:45 PM
  #17  
Super Moderator
Platinum Member
iTrader: (2)
 
tomj77's Avatar
 
Join Date: 07-14-08
Location: canada
Posts: 12,015
Received 154 Likes on 131 Posts
I actually have a good idea on how to do it like that using the factory oil feed, use a 90 degree fitting, go under the water pipe and up and around compressor housing. will work. just hope I ordered enough hose lol
Old 04-25-2017, 08:21 PM
  #18  
Junior Member
Thread Starter
 
08VRSS's Avatar
 
Join Date: 07-06-12
Location: Houston TX
Posts: 485
Received 7 Likes on 6 Posts
I ordered my oil line from agp a little longer than I needed (18") to make sure I had clearance and I have reflective insulated heat wrap tubing good to 2600deg, it's all good


ive been throwing around the idea of doing my own T51R mod to the s257 for fun, most likely will do in the next few weeks as I need a spare compressor cover. If you don't know what a t51r mod is, all sound baby ;D


Last edited by 08VRSS; 04-25-2017 at 08:32 PM.
Old 04-25-2017, 10:45 PM
  #19  
Super Moderator
Platinum Member
iTrader: (2)
 
tomj77's Avatar
 
Join Date: 07-14-08
Location: canada
Posts: 12,015
Received 154 Likes on 131 Posts
damn that sounds good
Old 04-28-2017, 01:00 PM
  #20  
Junior Member
Thread Starter
 
08VRSS's Avatar
 
Join Date: 07-06-12
Location: Houston TX
Posts: 485
Received 7 Likes on 6 Posts


After two forklifts and lots of swear words and cuts later it's finally out and now I'm working on the lpfp and feed line side of things today along with dressing the new engine up, mounting the ky stage 4+, and getting it ready to go back in.
Old 04-28-2017, 01:51 PM
  #21  
Super Moderator
Platinum Member
iTrader: (2)
 
tomj77's Avatar
 
Join Date: 07-14-08
Location: canada
Posts: 12,015
Received 154 Likes on 131 Posts
Damn those valves are gross dude
Old 04-28-2017, 02:09 PM
  #22  
Senior Member
iTrader: (4)
 
colodude18's Avatar
 
Join Date: 01-12-10
Location: Greater Denver Area, Colorado
Posts: 2,692
Received 171 Likes on 142 Posts
Originally Posted by tomj77
Damn those valves are gross dude
Yeah no kidding.
Please tell me you are installing a Powell oil separator and not that Mishimoto catch can in the pictures...

Last edited by colodude18; 04-28-2017 at 04:55 PM.
Old 04-28-2017, 04:18 PM
  #23  
Senior Member
iTrader: (3)
 
advise's Avatar
 
Join Date: 04-25-07
Location: Bohemia, New York, Long Island
Posts: 2,390
Received 18 Likes on 16 Posts
Originally Posted by tomj77
Damn those valves are gross dude
BMW's are even worse
Old 04-28-2017, 06:36 PM
  #24  
Senior Member
iTrader: (3)
 
T-Man's Avatar
 
Join Date: 12-07-09
Location: The Desert
Posts: 1,461
Received 89 Likes on 76 Posts
Originally Posted by 08VRSS

ive been throwing around the idea of doing my own T51R mod to the s257 for fun, most likely will do in the next few weeks as I need a spare compressor cover. If you don't know what a t51r mod is, all sound baby ;D
It's a sweet mod and something I've contemplated doing myself. I contacted the company and it's not a bad deal at all.

Definitely feeds the inner ricer
Old 04-29-2017, 12:43 AM
  #25  
Junior Member
Thread Starter
 
08VRSS's Avatar
 
Join Date: 07-06-12
Location: Houston TX
Posts: 485
Received 7 Likes on 6 Posts
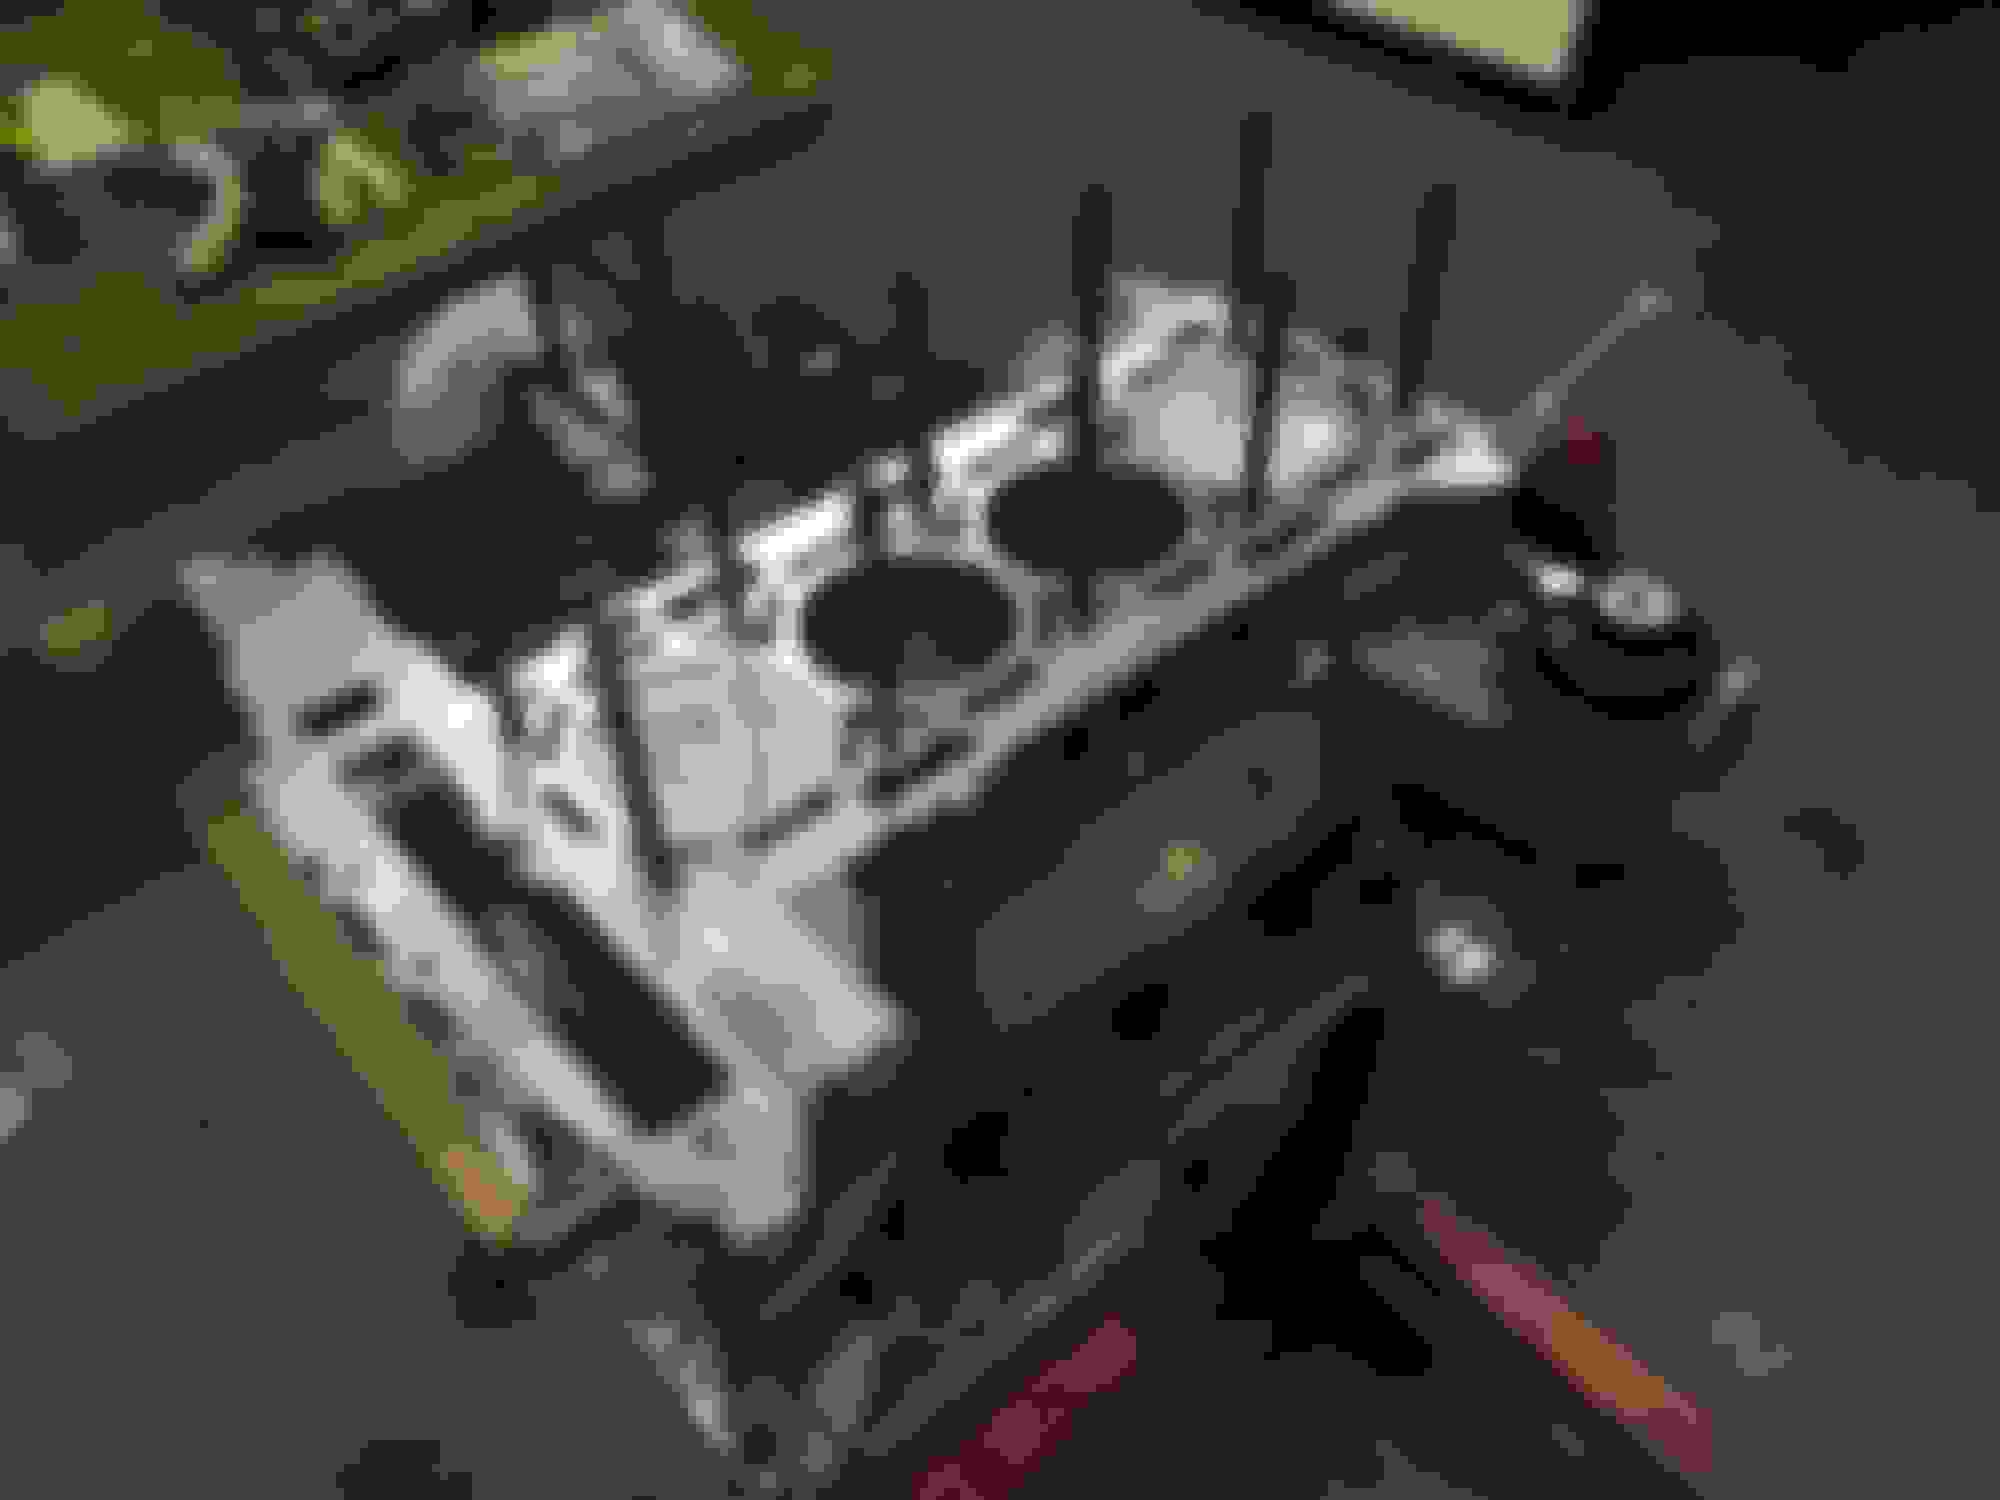
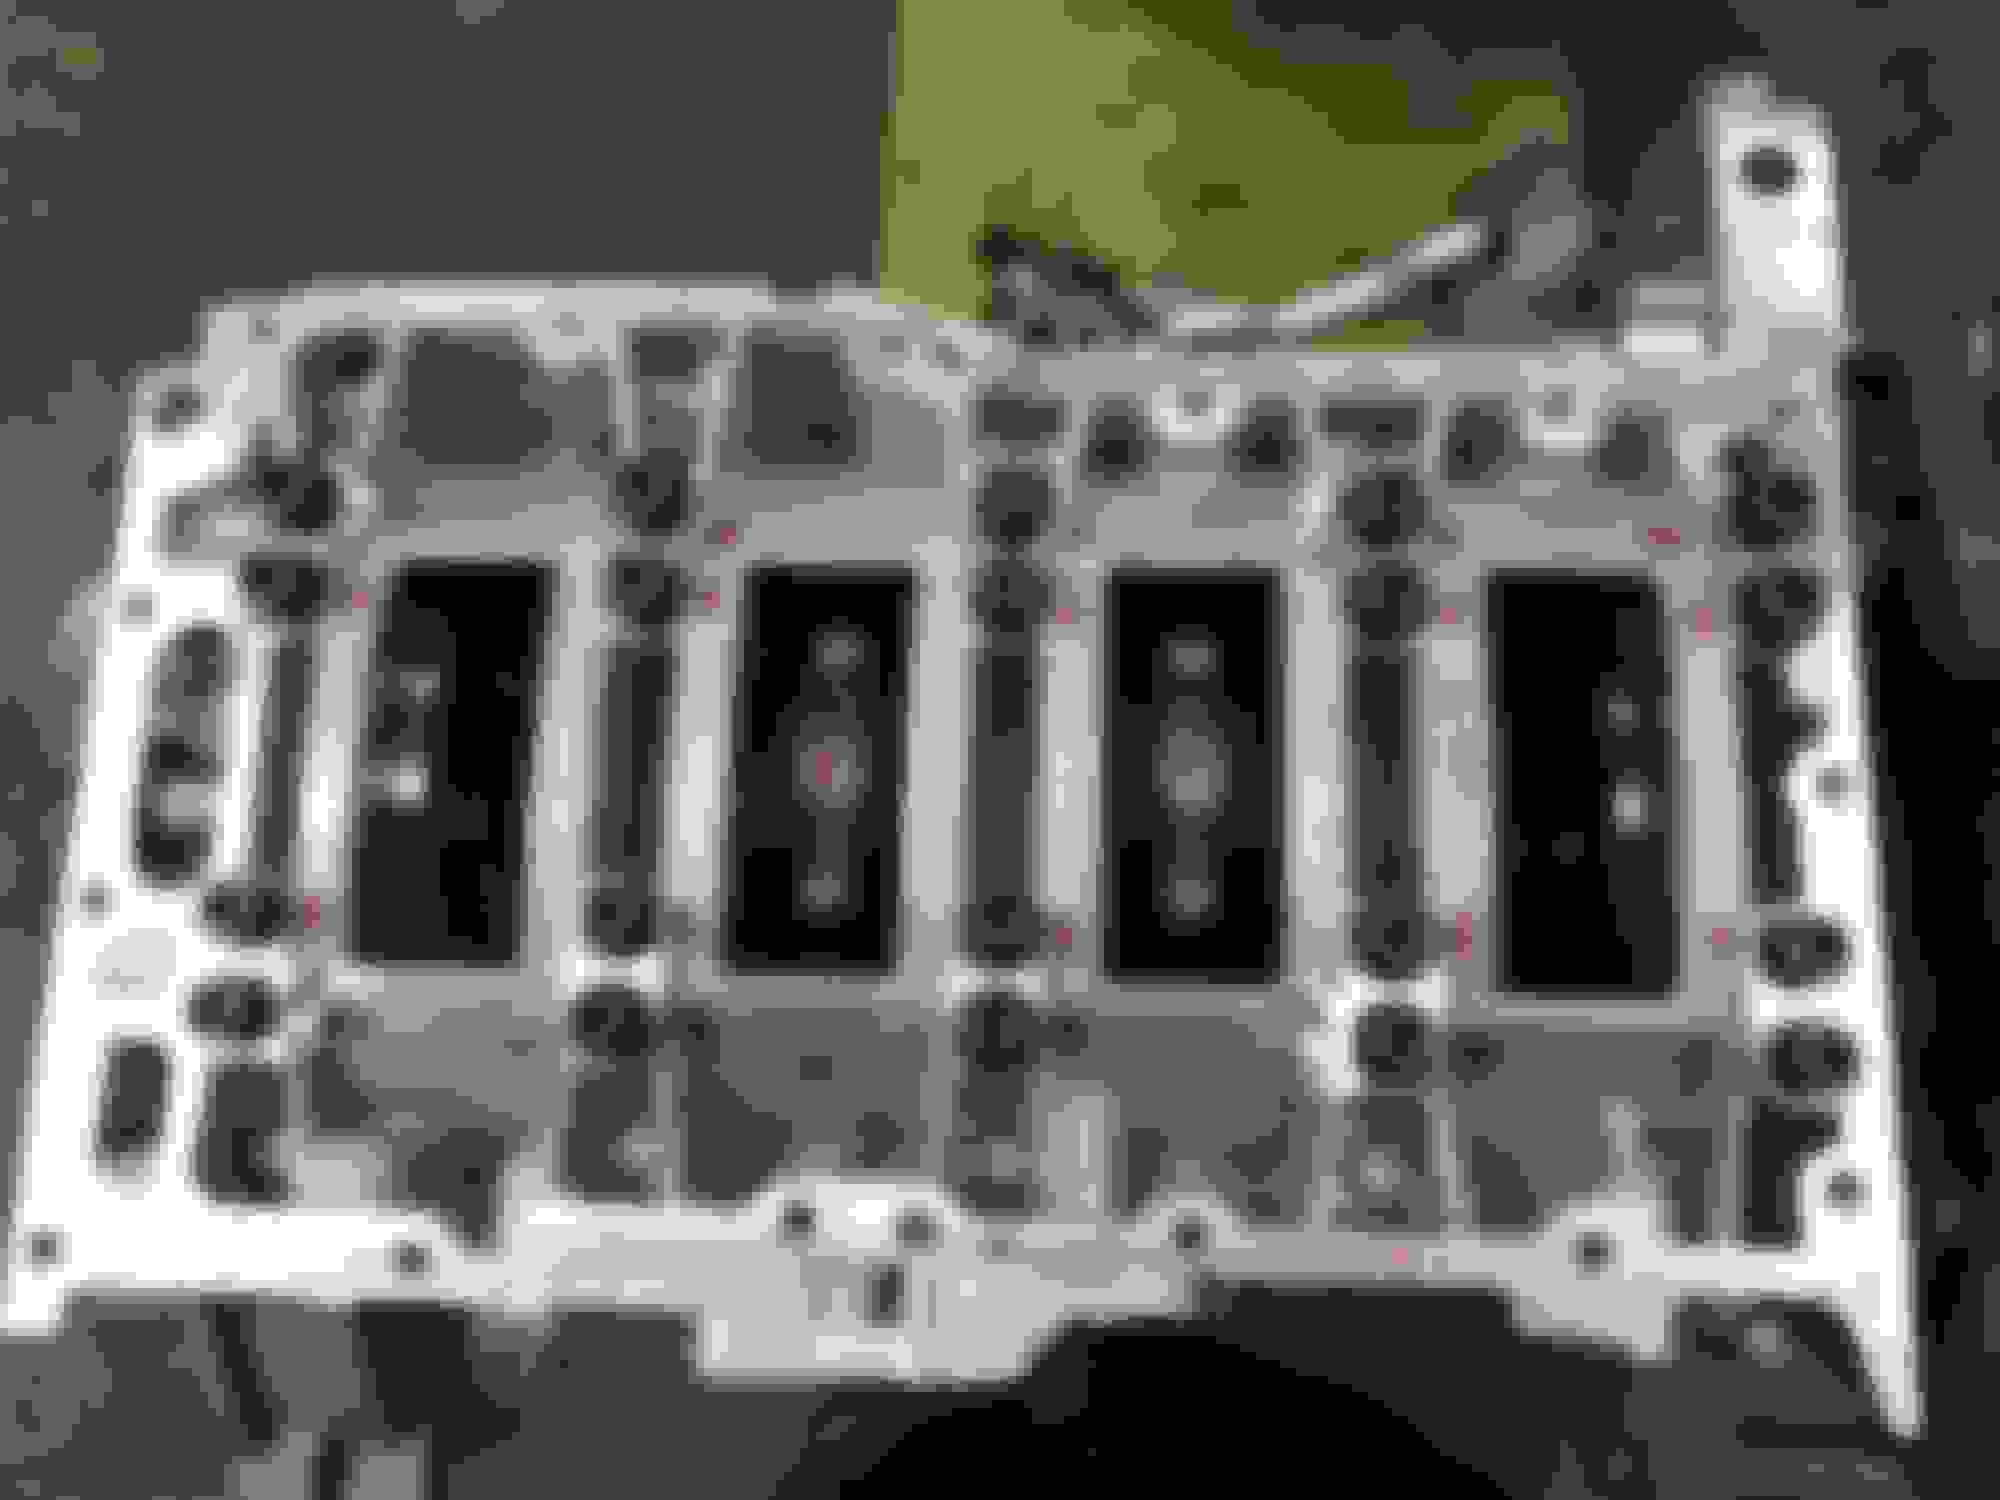
Those valves are the result of 147,000 miles and not cleaned once, stock pcv system. Gotta love DI.


The aem e85 fuel pump is a pain in the rear, lots of modification of the fuel pump canister is required as the pump is slightly longer than the stock one and the pump plug needs the pins reversed, but got it done. LDK is all dressed and ready to be bolted to the trans.

It's all the little stuff like cleaning the engine bay re looming wiring that's taking it much longer than anticipated, I'm getting burned out but trying to push forward. Still have to fab up the down pipe and turbo intake once it's all in too.

Last edited by 08VRSS; 04-29-2017 at 01:19 AM.


Quick Reply: LDK build thread, version 2.0


All times are GMT -4. The time now is 03:17 AM.