
CAI Installation (Injen, with pics)


Thread Starter
Member
Joined: 09-26-09
Posts: 397
Likes: 0
From: South Jersey
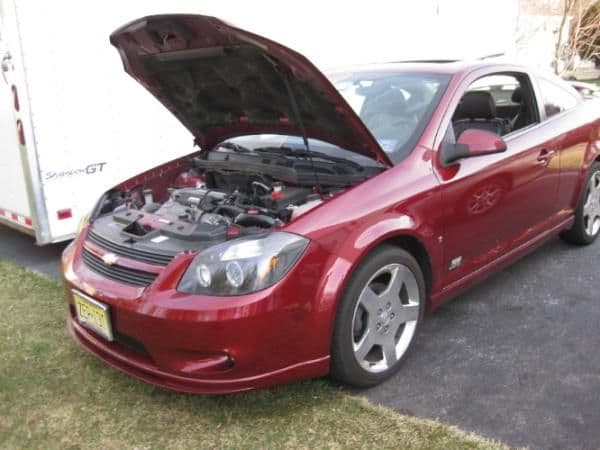
Hey all, put it on a while back never got up to posting pics until now. There is probably an installation thread somewhere, but here is a more recent one.
TOOLS NEEDED:
Jack
2 Jack Stands (I do not recommend using a Jack as a Jack Stand)
Dont remember what size the bolts are, but be sure to have several kinds of wrenches and the like available.
Screwdriver
Patience, Time (<--the hardest to get)
STEP 1: (if someone can do this without removing the front number, PROPS)
Break the lugs, jack up the car with trusty jack, remove tires, then remove EXTREMELY annoying bolts holding together the front number.


STEP 2:
Time to remove the stock air intake. Very easy, loosen clamps and remove stock air intake. I recommend you save the stock air intake for installation when you trade/sell the car.


STEP 3:
Open your shiny new intake, be sure to put on the rubber at the end of your M62, but do not tighten clamps yet. Place rubber protection around small cutout hole leading outward (pic not shown) so that the CAI does not get cut due to possible rubbing. Wiggle the oddly bent and most likely aluminum air flow into place, but do not tighten clamps or screws until it fits nice and neat. Once all is in place, tighten clamps and screws, apply your fancy filter.


STEP 4:
Put back on the bumper and tighten all the screws tight. Be sure that your filter (driver side fender) has no chance or very little chance of getting wet - this is bad news. Make sure all of the screws for the black plastic on that side are in and secure. Then WA-LA! Easy as that. Enjoy the nice whine.
Any questions please ask, but overall a simple installation.
SIDENOTE: Yes, that is a 2000 Camaro Z28 in the background, best time 12.87 1/2 mile. And in the trailer next to it, is a 9 second Mustang GT, old school fbody with the 5.0l engine inside, about 90% of the car is custom made (gutted, etc etc) **Wah wahh where's the pics?? ** I'll get the mustang pics up soon, the car was getting worked on so I could not take any good pics.
TOOLS NEEDED:
Jack
2 Jack Stands (I do not recommend using a Jack as a Jack Stand)
Dont remember what size the bolts are, but be sure to have several kinds of wrenches and the like available.
Screwdriver
Patience, Time (<--the hardest to get)
STEP 1: (if someone can do this without removing the front number, PROPS)
Break the lugs, jack up the car with trusty jack, remove tires, then remove EXTREMELY annoying bolts holding together the front number.
STEP 2:
Time to remove the stock air intake. Very easy, loosen clamps and remove stock air intake. I recommend you save the stock air intake for installation when you trade/sell the car.
STEP 3:
Open your shiny new intake, be sure to put on the rubber at the end of your M62, but do not tighten clamps yet. Place rubber protection around small cutout hole leading outward (pic not shown) so that the CAI does not get cut due to possible rubbing. Wiggle the oddly bent and most likely aluminum air flow into place, but do not tighten clamps or screws until it fits nice and neat. Once all is in place, tighten clamps and screws, apply your fancy filter.
STEP 4:
Put back on the bumper and tighten all the screws tight. Be sure that your filter (driver side fender) has no chance or very little chance of getting wet - this is bad news. Make sure all of the screws for the black plastic on that side are in and secure. Then WA-LA! Easy as that. Enjoy the nice whine.
Any questions please ask, but overall a simple installation.
SIDENOTE: Yes, that is a 2000 Camaro Z28 in the background, best time 12.87 1/2 mile. And in the trailer next to it, is a 9 second Mustang GT, old school fbody with the 5.0l engine inside, about 90% of the car is custom made (gutted, etc etc) **Wah wahh where's the pics?? ** I'll get the mustang pics up soon, the car was getting worked on so I could not take any good pics.

I just did my Hahn CAI a few hours ago on my SS/TC

did an OTTP intake on an LSJ but we had the bumper off cause we did a heat exchanger at the same time so iv never done an LSJ with the bumper on yet, but i know it can be done. driver side is more of a pain though since you got the windshield washer fluid and horn
did an OTTP intake on an LSJ but we had the bumper off cause we did a heat exchanger at the same time so iv never done an LSJ with the bumper on yet, but i know it can be done. driver side is more of a pain though since you got the windshield washer fluid and horn


i know that opening does suck. if you put the filter in there, then slide the tube down the hole and into the filter and angle the worm clamp for the filter right im sure it wont be stupidly difficult. But whatever way gets it done ya know
You made that soooo much harder than it needed to be lol
Step 1.-Remove drivers side headlight(2 10mm bolts, can't miss em)
Step 2.-Remove headlight bracket (4 10mm bolts, 2 on top, 2 on bottom)
Step 3.-Install intake thru nice little hole there lol
No jack required and only a 10mm socket
Step 1.-Remove drivers side headlight(2 10mm bolts, can't miss em)
Step 2.-Remove headlight bracket (4 10mm bolts, 2 on top, 2 on bottom)
Step 3.-Install intake thru nice little hole there lol
No jack required and only a 10mm socket

nice directions and pics. ive changed my intake on and off like 4 times but never taken off the bumper or jackin up the car to do it, except for the very first time that i installed it along with the H/X.
Thread Starter
Member
Joined: 09-26-09
Posts: 397
Likes: 0
From: South Jersey
Lol thanks all, and yeah I actually never thought to take the headlight out.......
Once the bumper is off, its cake. But next time I go to change the filter or something ill be sure to to the easier of the steps, haha.
**Oh, and I will definitely get pics of the camaro and fbody soon... they are in the process of moving and I should have them up in a few weeks after they get settled in, ill be sure to post on here with the new thread link showing the pics. Mustang is BEAST.
Last edited by M00senSS; May 20, 2010 at 01:58 PM. Reason: Automerged Doublepost


Thread
Thread Starter
Forum
Replies
Last Post