
Interior: How To: Install a Double-DIN Aftermarket Headunit in your 05-06 Cobalt SS


Thread Starter
New Member
Joined: 02-06-11
Posts: 79
Likes: 0
From: Palmdale, CA
This is my experience installing the P3300BT pioneer headunit in my car. I was a nub at it, but I'll be damned if I was paying for a professional installation and you shouldn't either (you will do a better job than they do, you care more about your car). It took me 12 hours, countless calls to sonicselectronix tech support (which was amazingly helpful, they know their stuff and will do their research if necessary) and a sacrificial goat or two. But it was worth it. I am now a mobile rave, with music videos bumping dubstep everywhere I go. So, let's get started.
Step 1: Shopping List
Needed:
Head unit - Pioneer AVH-P3300BT
Harness - Scosche GM13SR
Mounting Kit - Scosche GM1599B
Antenna Adapter - Scosche MDA1B/MDA1
Steering Wheel Adapter - Axxess ASWC
Firstly, living in southern California, I ordered from sonicselectronix (which is based in Valencia, allowing me to drive and physically pick up the merchandise. I highly recommend them for reasons you will soon see). I bought the Pioneer AVH-P3300BT because I wanted an SD card input, and I wanted to play AVI music videos while I drive. They suggested scosche parts listed above to help with the install (you will need all of these). The harness retained chimes which is really for the 07+ models, so I really should have gotten the cheaper Metra harness, but the blue box also sends an A-OK signal to the car so your car doesn't freak out and think your headunit got stolen. I do not know if Metra does this, but other people have used the metra harness with no problem so go with that one. It's much cheaper. Hell, the blue box may not even be necessary, but I went the uber legit route. This guide still applies, so read on.
Step 2: Soldering and Prep Work (9 hours appx, 4 of them calls and research)
Don't expect to do this quickly. With this guide it should be easier for you, but my trial and error took forever. I do things legit. Don't even think of using twist caps or silicone, unless you hate your car. You have subs, your car vibrates. Nothing less than solder and heat shrink will give you a timeless, solid connection. If you're not willing to do it right, just take it to a shop.
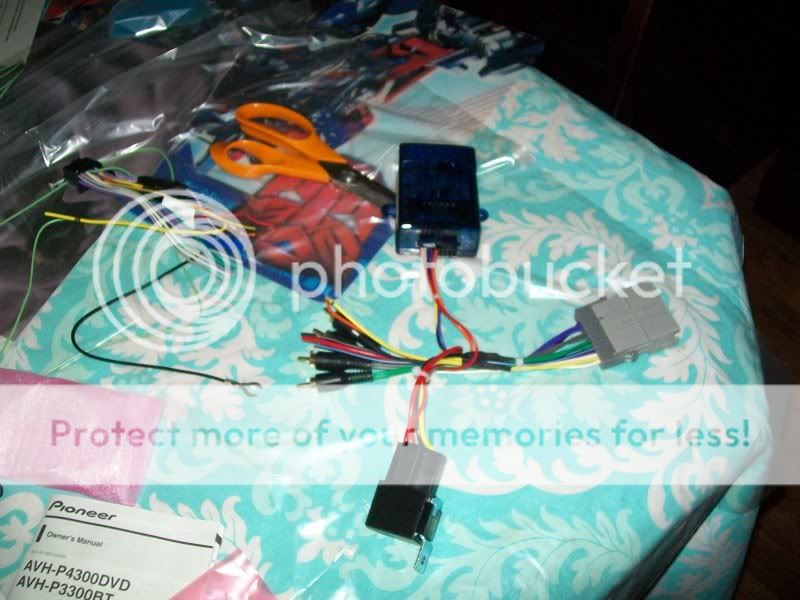
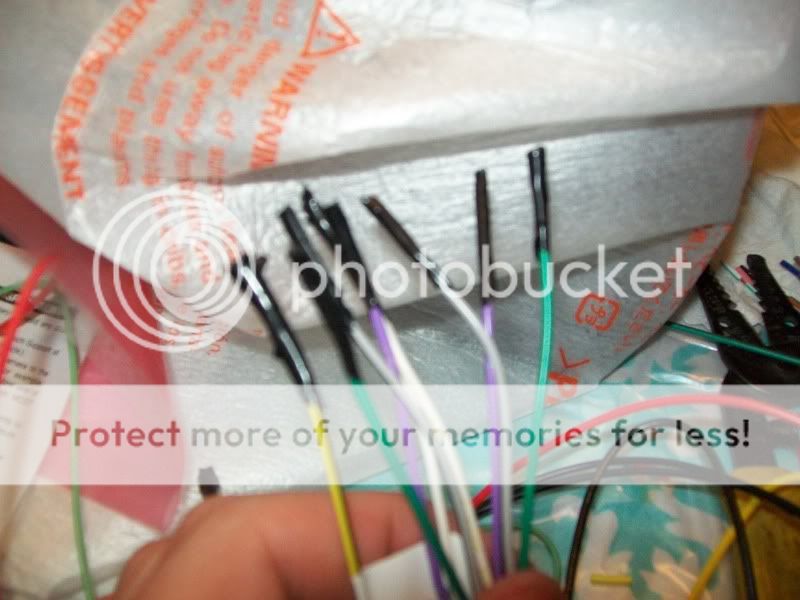
Here is a picture of the harness they send, they have pieces for the 05-06 as well as the 07+. The 05-06 piece is taken and assembled to the blue box module as shown.
Now, I did not do my system entirely legal. WARNING AGAIN. I DID NOT WIRE MY SYSTEM LEGALLY. The harness has a green wire that you are supposed to wire to the parking brake, so it senses when you are in park and only plays DVDs when in park. I wired a switch so it plays DVDs whenever the hell I tell it to, because I am its master. The switch is easily hideable if you get pulled over. You don't have to use it illegally, but I don't recommend splicing your parking brake wire either. It's up to you.
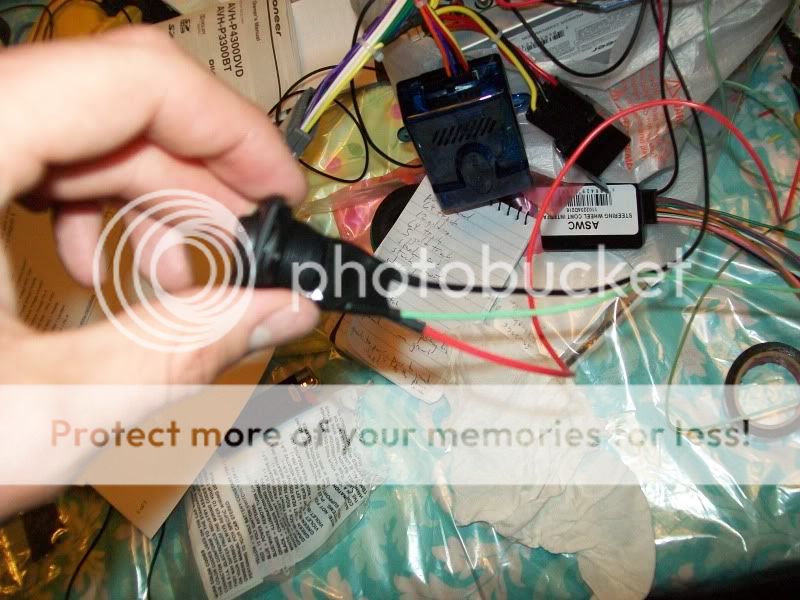
Here's the switch. Three-pronged. I soldered the power to ground, the ground to power, and the load to the parking brake wire out of the harness, ultimately. Finding this didn't work, I switched around the load and power (so, I switched the parking brake wire and the ground) and it worked. You have to remember you're tricking the car into thinking your parking brake is on, thus this switch isn't wired traditionally. I recommend testing before soldering the switch to the wires you have prepared for it. But I get ahead of myself; right now, we have the switch with ample wire ready to go. Solder, heat shrink over each individual wire, and then a big piece of heat shrink for the whole thing.
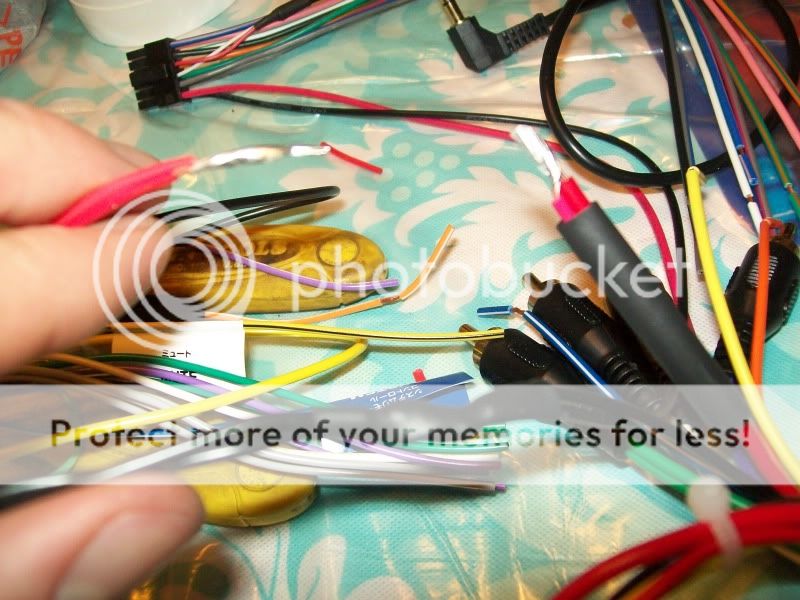
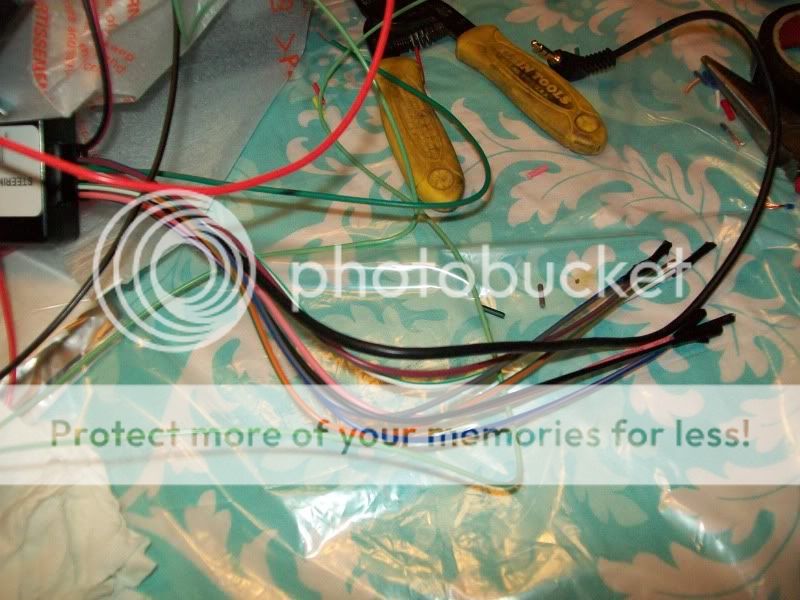
You'll notice I twist together a total of FOUR red and black wires when I solder the red from the scosche harness, and the red from the aftermarket pioneer radio harness. The extra red and black wires will be for the switch and the steering wheel controls adapter (which I did not finish installing but I will explain the install anyways), hence why I explained so much about that switch earlier. Also notice I solder the reds and blacks together before soldering all four together - more solid. Use flux EVERY time so the solder sticks; I've forgotten the flux before and it breaks the connection. Trust me.
With the reds and blacks all connected. Easy peasy. Drink a beer now, for morale. It's about to get tedious.
Here is the steering wheel adapter. See how I use electrical tape to close off all unused connections? DO THIS. The chevy cobalt-specific instructions for the adapter use only two wires off the harness, all other wires are unused. Download the specific instructions off the website; they are very weird but follow them. Trust me. It requires soldering INSIDE your car, though, which is why I never got around to doing it.
Here again, we have the antenna adapter. Moving right along.
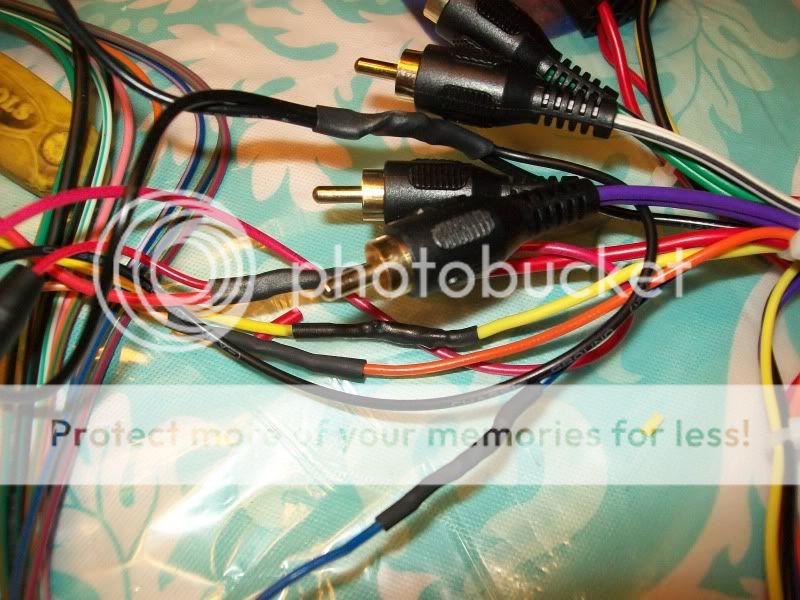
Notice I chopped the RCA adapters off. With the 05-06 this is necessary. Probably for the 07+ too but don't quote me; the RAs are used only if you have a Bose system and we do not. Even if you CAN use the RCAs, chopping them off and soldering is still more legit, so do it. You will need to peel the two wires going into the RCA apart, and this is a LOT of tedious soldering and heatshrinking. Yes, I made a word up there.
You guys are lucky, I had to find this out the hard way. When I installed my headunit the first time, the sound did not work. Awful feeling, trust me. But anyways, after calling and so forth, I found that the blue/white amp power wire in the harness goes to the wrong wire in the car. SO, you need to carefully take the pin out of the harness and relocate it so it connects with the PINK wire coming out of your car. If this is too hard, you can solder it to the pink wire, but the harness swap is more legit.Just be careful, the pin is easy to break (I did not break it, but I was warned of this).
Part 3: The Install (A few hours, give or take)
Now it's time to put that bad boy in. Take your covers off, there are other threads for these so I will not explain them.
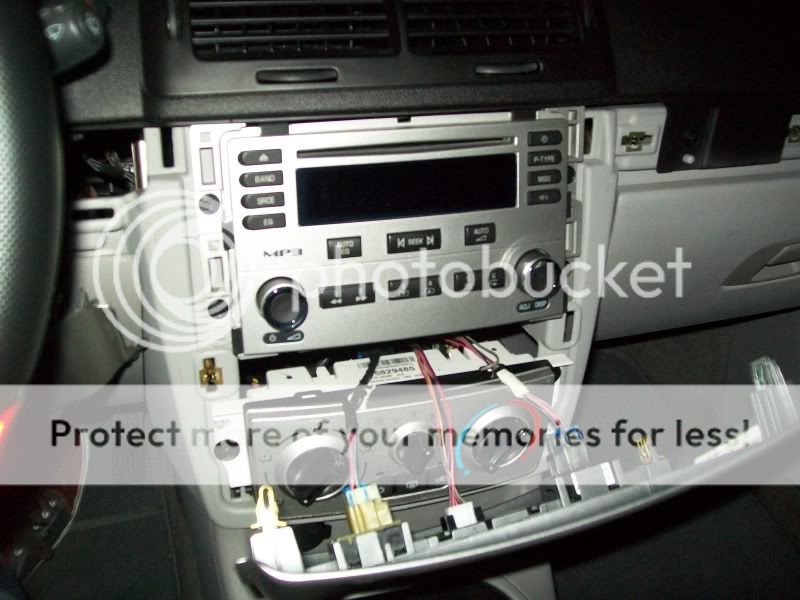
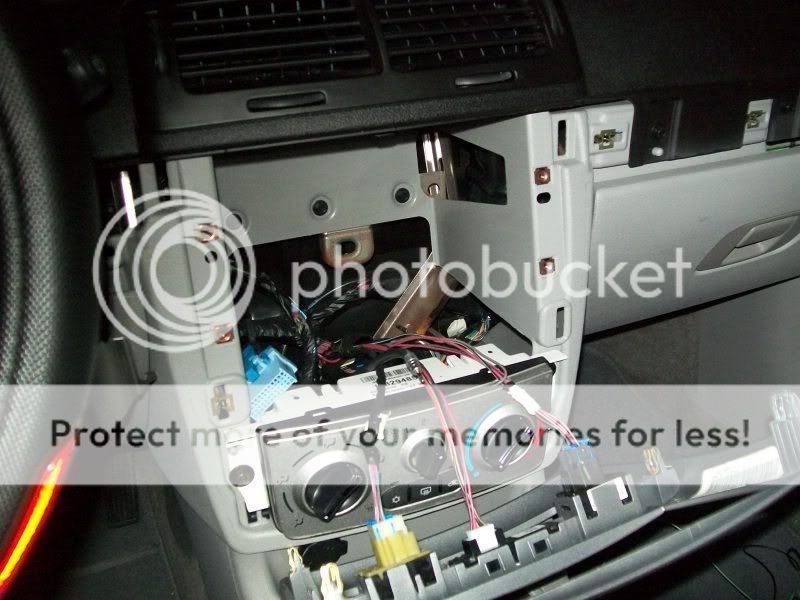
It is out. Let's do this.
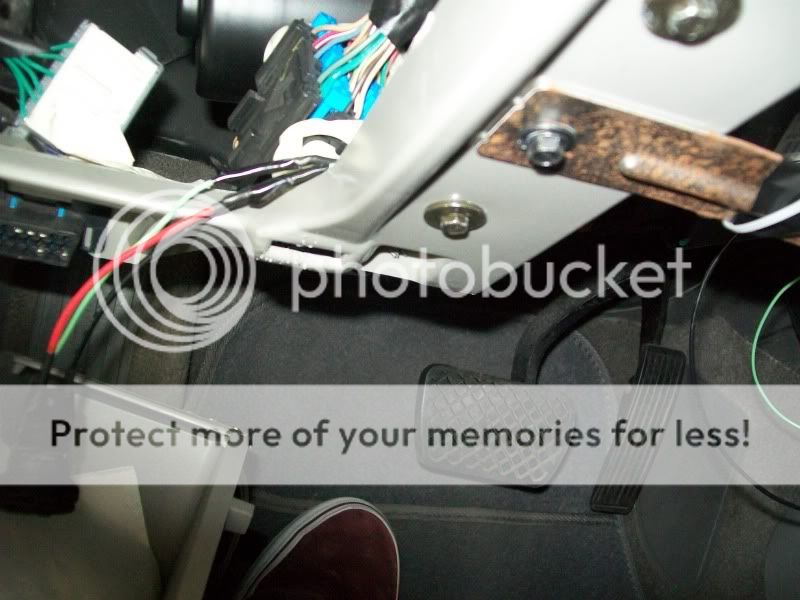
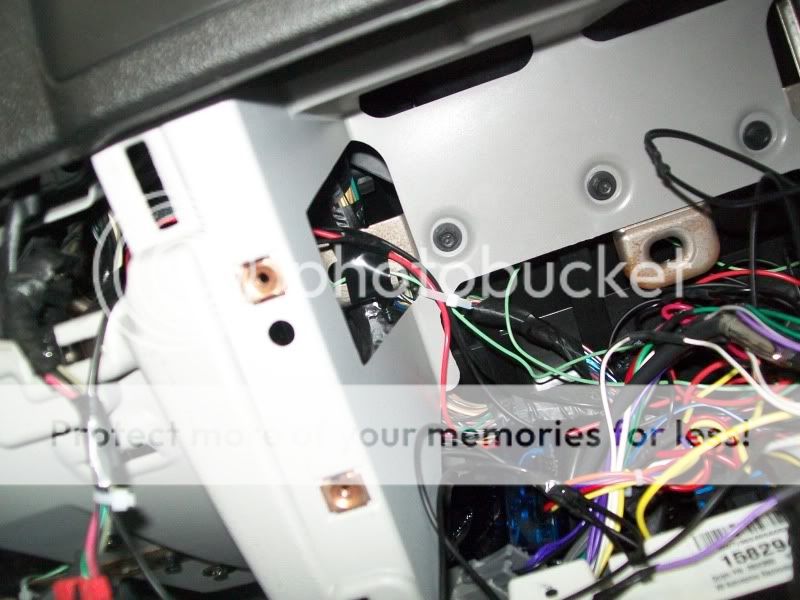
The switch got threaded through to the ashtray where the trunk button is hidden. I did not want to drill any holes, and I also like being able to hide the switch if pulled over. Up to you. Notice on the right in the picture, you can see electrical tape and zip ties? I made sure the wire ran along the metal bar under the steering wheel and STAYED AGAINST THAT BAR. If your wires get tangled in the steering column you will be very unhappy. Not a huge danger but we do things legit here, so use zip ties and tape. Also, though you may not believe me, because it is secured so well the switch never falls out of the ashtray when closed. And I didn't even give it a lot of room to hang in the ashtray in the first place. As for looks, close the damn ashtray. You just switch it off and on when you start the car to enable video. It NEEDS to be able to switch off and on, they want the parking brake to be applied, released, and applied so they know you didn't simply ground the parking brake sensor wire from the radio. Pioneer is smart, but so are we.
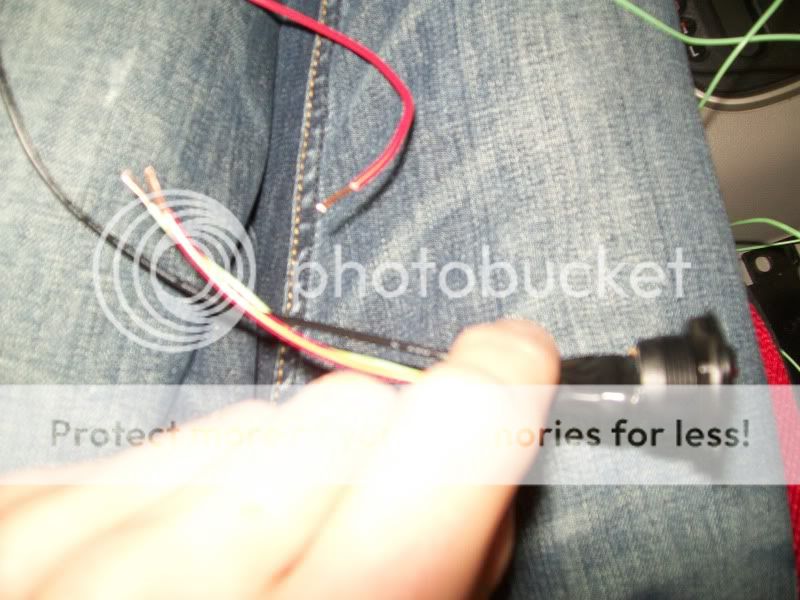
This is me switching the wire around because it didn't succeed the first time. I recommend testing before soldering the switch in. Also make sure you have enough wire to run to the ashtray, or wherever you want to mount it.
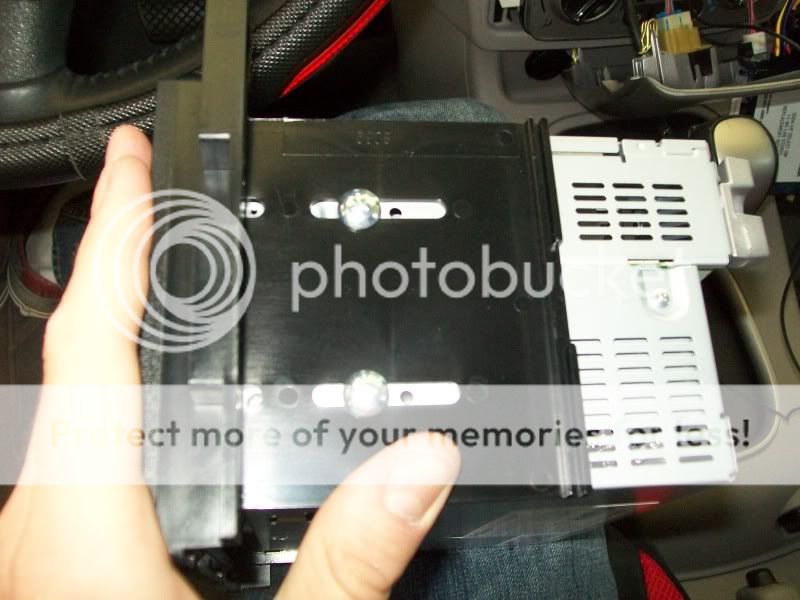
Here we go, bolting the mounting kit to the radio. I hate mounting this radio on the cobalt, and you will soon see why. But don't worry, I'll walk ya through it.
Here is the wire running from the steering wheel area to the radio ... area. Also notice I ziptied/taped the microphone for my bluetooth behind the DIC buttons (it works very well, by the way). But wait, Derke, you may say. There's this piece of plastic behind my radio, and I can't seem to fit my radio in it! Well, I would reply, take a dremel tool and cut the damn thing out. You've come this far, no piece of plastic is your master. And yes, I felt very bad cutting into my car. There's a metal bar behind the plastic I also had to cut, but I ended up only cutting the left side and bending it back (the right side has a bolt that is accessible; the left side kind of does, but it's a pain so I cut the thing out).
Out.
And in.
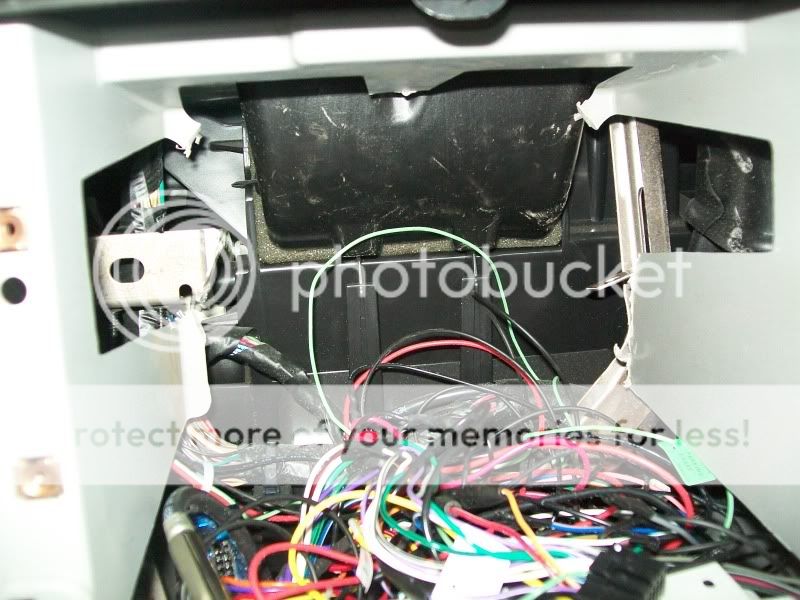
Now, when I fist put the radio in, it fell through. There's no support on the bottom! It's supposed to be supported from the back and the front. The problem is, the front is a snap on that easily comes off, and the back I just dremeled out (did I need to dremel the metal? I couldn't fit it in with the metal there, so I will say yes. This mounting kit hates us). What to do? We are broke at this point.
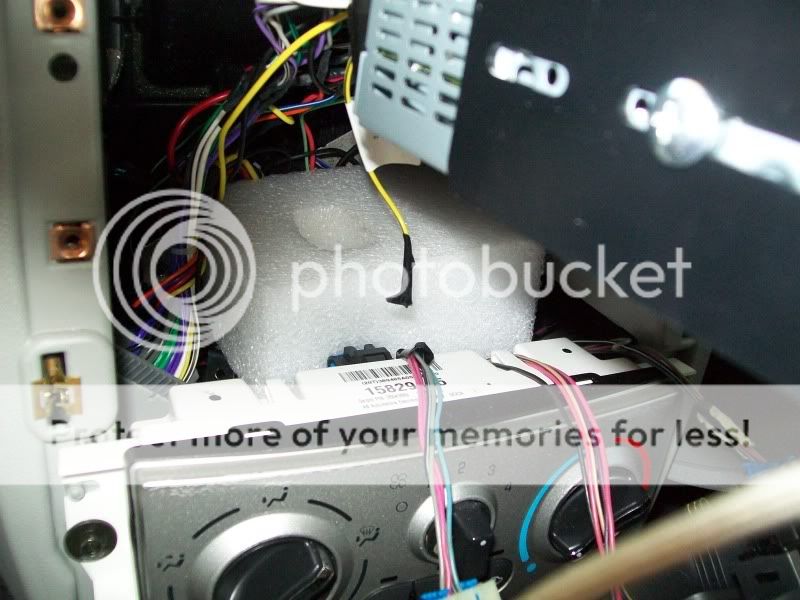
Well now. Styrofoam to the rescue! I put some in the back too, because it's not very snug back there.
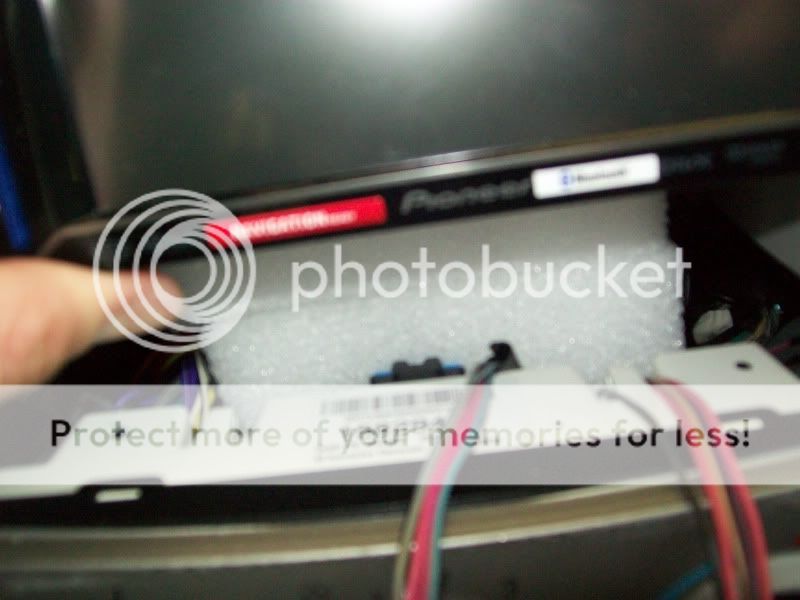
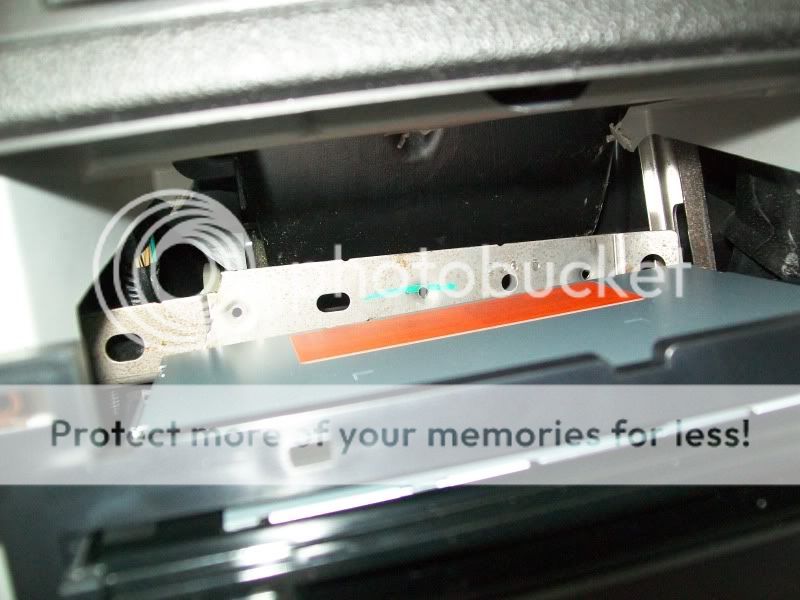
Put it in carefully..
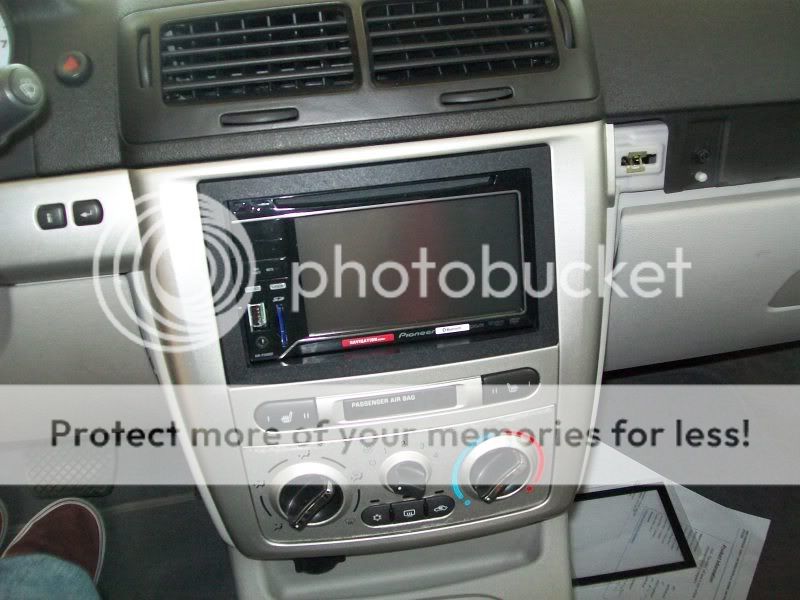
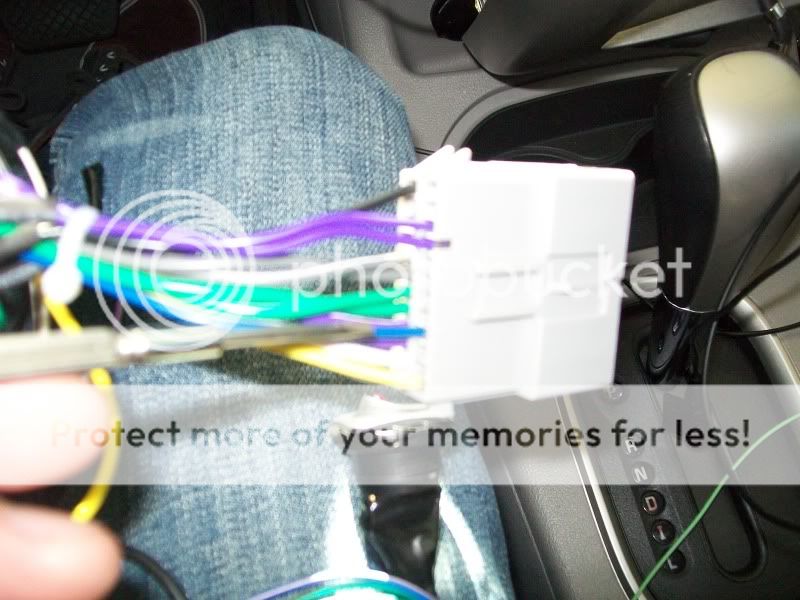
And victory is ours. Plug the harness, antenna adapter, and in my case microphone adapter in the back, and you're in business.
Hope this educates someone. It was hell for me, and hard to find good information on how to do everything. So maybe this makes it easier on you do-it-yourselfers.
Step 1: Shopping List
Needed:
Head unit - Pioneer AVH-P3300BT
Harness - Scosche GM13SR
Mounting Kit - Scosche GM1599B
Antenna Adapter - Scosche MDA1B/MDA1
Steering Wheel Adapter - Axxess ASWC
Firstly, living in southern California, I ordered from sonicselectronix (which is based in Valencia, allowing me to drive and physically pick up the merchandise. I highly recommend them for reasons you will soon see). I bought the Pioneer AVH-P3300BT because I wanted an SD card input, and I wanted to play AVI music videos while I drive. They suggested scosche parts listed above to help with the install (you will need all of these). The harness retained chimes which is really for the 07+ models, so I really should have gotten the cheaper Metra harness, but the blue box also sends an A-OK signal to the car so your car doesn't freak out and think your headunit got stolen. I do not know if Metra does this, but other people have used the metra harness with no problem so go with that one. It's much cheaper. Hell, the blue box may not even be necessary, but I went the uber legit route. This guide still applies, so read on.
Step 2: Soldering and Prep Work (9 hours appx, 4 of them calls and research)
Don't expect to do this quickly. With this guide it should be easier for you, but my trial and error took forever. I do things legit. Don't even think of using twist caps or silicone, unless you hate your car. You have subs, your car vibrates. Nothing less than solder and heat shrink will give you a timeless, solid connection. If you're not willing to do it right, just take it to a shop.
Here is a picture of the harness they send, they have pieces for the 05-06 as well as the 07+. The 05-06 piece is taken and assembled to the blue box module as shown.
Now, I did not do my system entirely legal. WARNING AGAIN. I DID NOT WIRE MY SYSTEM LEGALLY. The harness has a green wire that you are supposed to wire to the parking brake, so it senses when you are in park and only plays DVDs when in park. I wired a switch so it plays DVDs whenever the hell I tell it to, because I am its master. The switch is easily hideable if you get pulled over. You don't have to use it illegally, but I don't recommend splicing your parking brake wire either. It's up to you.
Here's the switch. Three-pronged. I soldered the power to ground, the ground to power, and the load to the parking brake wire out of the harness, ultimately. Finding this didn't work, I switched around the load and power (so, I switched the parking brake wire and the ground) and it worked. You have to remember you're tricking the car into thinking your parking brake is on, thus this switch isn't wired traditionally. I recommend testing before soldering the switch to the wires you have prepared for it. But I get ahead of myself; right now, we have the switch with ample wire ready to go. Solder, heat shrink over each individual wire, and then a big piece of heat shrink for the whole thing.
You'll notice I twist together a total of FOUR red and black wires when I solder the red from the scosche harness, and the red from the aftermarket pioneer radio harness. The extra red and black wires will be for the switch and the steering wheel controls adapter (which I did not finish installing but I will explain the install anyways), hence why I explained so much about that switch earlier. Also notice I solder the reds and blacks together before soldering all four together - more solid. Use flux EVERY time so the solder sticks; I've forgotten the flux before and it breaks the connection. Trust me.
With the reds and blacks all connected. Easy peasy. Drink a beer now, for morale. It's about to get tedious.
Here is the steering wheel adapter. See how I use electrical tape to close off all unused connections? DO THIS. The chevy cobalt-specific instructions for the adapter use only two wires off the harness, all other wires are unused. Download the specific instructions off the website; they are very weird but follow them. Trust me. It requires soldering INSIDE your car, though, which is why I never got around to doing it.
Here again, we have the antenna adapter. Moving right along.
Notice I chopped the RCA adapters off. With the 05-06 this is necessary. Probably for the 07+ too but don't quote me; the RAs are used only if you have a Bose system and we do not. Even if you CAN use the RCAs, chopping them off and soldering is still more legit, so do it. You will need to peel the two wires going into the RCA apart, and this is a LOT of tedious soldering and heatshrinking. Yes, I made a word up there.
You guys are lucky, I had to find this out the hard way. When I installed my headunit the first time, the sound did not work. Awful feeling, trust me. But anyways, after calling and so forth, I found that the blue/white amp power wire in the harness goes to the wrong wire in the car. SO, you need to carefully take the pin out of the harness and relocate it so it connects with the PINK wire coming out of your car. If this is too hard, you can solder it to the pink wire, but the harness swap is more legit.Just be careful, the pin is easy to break (I did not break it, but I was warned of this).
Part 3: The Install (A few hours, give or take)
Now it's time to put that bad boy in. Take your covers off, there are other threads for these so I will not explain them.
It is out. Let's do this.
The switch got threaded through to the ashtray where the trunk button is hidden. I did not want to drill any holes, and I also like being able to hide the switch if pulled over. Up to you. Notice on the right in the picture, you can see electrical tape and zip ties? I made sure the wire ran along the metal bar under the steering wheel and STAYED AGAINST THAT BAR. If your wires get tangled in the steering column you will be very unhappy. Not a huge danger but we do things legit here, so use zip ties and tape. Also, though you may not believe me, because it is secured so well the switch never falls out of the ashtray when closed. And I didn't even give it a lot of room to hang in the ashtray in the first place. As for looks, close the damn ashtray. You just switch it off and on when you start the car to enable video. It NEEDS to be able to switch off and on, they want the parking brake to be applied, released, and applied so they know you didn't simply ground the parking brake sensor wire from the radio. Pioneer is smart, but so are we.
This is me switching the wire around because it didn't succeed the first time. I recommend testing before soldering the switch in. Also make sure you have enough wire to run to the ashtray, or wherever you want to mount it.
Here we go, bolting the mounting kit to the radio. I hate mounting this radio on the cobalt, and you will soon see why. But don't worry, I'll walk ya through it.
Here is the wire running from the steering wheel area to the radio ... area. Also notice I ziptied/taped the microphone for my bluetooth behind the DIC buttons (it works very well, by the way). But wait, Derke, you may say. There's this piece of plastic behind my radio, and I can't seem to fit my radio in it! Well, I would reply, take a dremel tool and cut the damn thing out. You've come this far, no piece of plastic is your master. And yes, I felt very bad cutting into my car. There's a metal bar behind the plastic I also had to cut, but I ended up only cutting the left side and bending it back (the right side has a bolt that is accessible; the left side kind of does, but it's a pain so I cut the thing out).
Out.
And in.
Now, when I fist put the radio in, it fell through. There's no support on the bottom! It's supposed to be supported from the back and the front. The problem is, the front is a snap on that easily comes off, and the back I just dremeled out (did I need to dremel the metal? I couldn't fit it in with the metal there, so I will say yes. This mounting kit hates us). What to do? We are broke at this point.
Well now. Styrofoam to the rescue! I put some in the back too, because it's not very snug back there.
Put it in carefully..
And victory is ours. Plug the harness, antenna adapter, and in my case microphone adapter in the back, and you're in business.
Hope this educates someone. It was hell for me, and hard to find good information on how to do everything. So maybe this makes it easier on you do-it-yourselfers.
Last edited by TommyP; Oct 6, 2012 at 09:21 AM.


Member
Joined: 03-13-09
Posts: 272
Likes: 0
From: Missouri
I know this from experience, but when you just put electrical tape over unused wires, that MAY not be enough cushion.
Last stereo I put in, I did the same thing thinking that will keep the other wires from grounding out, but they still jumped through the tape to the metal all the time.I had to end up putting twist caps over all the wires and taping the CRAP out of them.
Last stereo I put in, I did the same thing thinking that will keep the other wires from grounding out, but they still jumped through the tape to the metal all the time.I had to end up putting twist caps over all the wires and taping the CRAP out of them.
Thread Starter
New Member
Joined: 02-06-11
Posts: 79
Likes: 0
From: Palmdale, CA
I know this from experience, but when you just put electrical tape over unused wires, that MAY not be enough cushion.
Last stereo I put in, I did the same thing thinking that will keep the other wires from grounding out, but they still jumped through the tape to the metal all the time.I had to end up putting twist caps over all the wires and taping the CRAP out of them.
Last stereo I put in, I did the same thing thinking that will keep the other wires from grounding out, but they still jumped through the tape to the metal all the time.I had to end up putting twist caps over all the wires and taping the CRAP out of them.
For the electrical tape issue, I have had no problems yet. However! Sometimes my switch takes a while before it recognizes it as "in park" and allows DVDs to be played, other times its instant. It can't be a short because once DVD mode is on it STAYS on, every time. I'm thinking the cold weather or somesuch.. I don't know. It always turns on within a few minutes so I don't even trip on it. Sometimes it even turns on without flipping the switch off and on.. but like I said, can't be a short because.. any tips on this would be appreciated.
________________________________
I also need to find a different mounting kit, or jury-rig the existing one I have. It sucks. It doesn't hold the head unit in with any strength at all, so supporting it with styrofoam in the back just makes it pop out the front (until I used a bit of locktite..). Mounting kits are so cheap that I'm not too worried. When I fix my setup I'll update the guide.
I also installed a sub and amp in my car since then, but it was so easy I don't even think it deserves a write-up. Hook up to the battery, hook up to the headunit, hide the wires. Done. ^^ Dubstep kicks ass in that car.

New Member
Joined: 10-22-11
Posts: 29
Likes: 0
From: Denver
I have a 09 TC and I'm putting in a pioneer double din made it through everything thanks to your write up except the optimal spot to connect my power wire as in which wire. Color /fuse panel etc maybe I missed it if you can help

thats weird that you had to cut out that plastic piece and the metal....ive done two pioneer double din installs in G5s and neither one needed to have anything cut out.
Avic Z2 and a avic D3 are the decks i installed.
ar you talking about the accessory wire? I tapped into the sunroof spot for mine. has the RAP and is an accessory wire.
Avic Z2 and a avic D3 are the decks i installed.
ar you talking about the accessory wire? I tapped into the sunroof spot for mine. has the RAP and is an accessory wire.
Last edited by kingg5; Jan 9, 2012 at 02:16 AM. Reason: Automerged Doublepost
Thread Starter
New Member
Joined: 02-06-11
Posts: 79
Likes: 0
From: Palmdale, CA
I never touched the fuse panel. The power for the headunit should come from the red wire from the scosche harness being soldered to the red wire from your headunit. If you're talking about the amp turn-on wire (the one that turns your amp on) you need to either solder or move the pins in the car's stock harness to make the pink wire from the car match with the blue/white wire in the harness. The '09 wire harness is different than the 05-06 though, but the colors should be the same. The amp-on wire problem is the most common problem when installing an aftermarket headunit in these cars, you are not alone!
Thread Starter
New Member
Joined: 02-06-11
Posts: 79
Likes: 0
From: Palmdale, CA
thats weird that you had to cut out that plastic piece and the metal....ive done two pioneer double din installs in G5s and neither one needed to have anything cut out.
Avic Z2 and a avic D3 are the decks i installed.
ar you talking about the accessory wire? I tapped into the sunroof spot for mine. has the RAP and is an accessory wire.
Avic Z2 and a avic D3 are the decks i installed.
ar you talking about the accessory wire? I tapped into the sunroof spot for mine. has the RAP and is an accessory wire.
the dash is 10000% identical...its not to shallow, i think some people are just to lazy to do cable management behind the deck to make it sit right.
it depends on the radio. some are deeper then others and some have the plug higher or lower making it fit or not. BUT the op put his radio too far back for one and the metal bar can be un bolted instead of cut as well
New Member
Joined: 10-22-11
Posts: 29
Likes: 0
From: Denver
I never touched the fuse panel. The power for the headunit should come from the red wire from the scosche harness being soldered to the red wire from your headunit. If you're talking about the amp turn-on wire (the one that turns your amp on) you need to either solder or move the pins in the car's stock harness to make the pink wire from the car match with the blue/white wire in the harness. The '09 wire harness is different than the 05-06 though, but the colors should be the same. The amp-on wire problem is the most common problem when installing an aftermarket headunit in these cars, you are not alone!
Last edited by 5280SSedan; Jan 9, 2012 at 06:45 AM. Reason: Auto correct sucks
Thread Starter
New Member
Joined: 02-06-11
Posts: 79
Likes: 0
From: Palmdale, CA
And yes, the harness placement was directly on the metal piece. I couldn't leave it in.
As for the ebay special, with no harness.. look at where the red wire comes out for the stock harness. That's the wire you wanna tap into. I'm ASSUMING the color of the power wire coming out of the car will be red, since this is universal, but an easy way to check would be to use a voltmeter. Constant power at 12v (I believe)? It's the radio. It will NOT be the pink wire, since that is for the amp-on wire (the blue-white wire on the harness matches the pink in your car). I don't remember if the car has a red wire coming out of it.. but if it does, I guarantee that's the power wire. Check with the voltmeter to be safe.
Also.. this red wire coming from your radio IS the power wire for the radio, right? Not a speaker wire or something special?
aftermarket red is power specificlly acc. cobalts us gm lan data to turn on the stock amp. theres no wire at all of any color in the harness that will give u that acc. you either need the expensive harness that has a computer to decode the data and relay to give the acc from the constant OR run a seperate wire bypassing the stock radio wires to something else like the fusebox

New Member
Joined: 12-28-11
Posts: 5
Likes: 0
From: Knoxville, TN
I have to ask this, I have not seen it mentioned anywhere! There are 3 ground wires I need to hook up. One on the aftermarket chime retention, one on my brake bypass, and one on my HU. Do I splice them all together and ground one total wire, or do I need to ground each one individually?
Thread Starter
New Member
Joined: 02-06-11
Posts: 79
Likes: 0
From: Palmdale, CA
I have to ask this, I have not seen it mentioned anywhere! There are 3 ground wires I need to hook up. One on the aftermarket chime retention, one on my brake bypass, and one on my HU. Do I splice them all together and ground one total wire, or do I need to ground each one individually?
u almost were right ther derke yes ground is ground but your electrical circuit is only as good as the weakest link. so if u have a **** ground then ur gonna have a **** circuit. this is where alot of people get ground loop from.... bad or poor ground and differences between one electronic devices ground resistance and another electronic device ground resistance
so to answer the question generally hooking them all together will suffice for a good ground
so to answer the question generally hooking them all together will suffice for a good ground
Thread Starter
New Member
Joined: 02-06-11
Posts: 79
Likes: 0
From: Palmdale, CA
u almost were right ther derke yes ground is ground but your electrical circuit is only as good as the weakest link. so if u have a **** ground then ur gonna have a **** circuit. this is where alot of people get ground loop from.... bad or poor ground and differences between one electronic devices ground resistance and another electronic device ground resistance
so to answer the question generally hooking them all together will suffice for a good ground
so to answer the question generally hooking them all together will suffice for a good ground

New Member
Joined: 01-13-12
Posts: 1
Likes: 0
From: Honda
Hello Derke, The main concern I've had with your post, which really confused me is that I was seeing you had the 4 door. Why did you choose the 4 door for your project, Are you going to be selling it later on for a 2 door, to go pick up bitches?
Thread Starter
New Member
Joined: 02-06-11
Posts: 79
Likes: 0
From: Palmdale, CA
Actually 4 doors = more ******, fact.