
Interior: How To: Make a Dual Gauge Cluster Bezel

Thread Starter
Member
Joined: 12-02-09
Posts: 296
Likes: 0
From: Toronto
How To: Make a Dual Gauge Cluster Bezel
Okay here is a quick how-to based on my recent experience building a dual gauge cluster bezel.
What you need:
- Instrument Cluster Bezel
- Donor gauge pod OR plastic pipe (see step 2)
- 5 minute epoxy
- 2 part epoxy flexible plastic bumper filler
- plastic paint (most people use satin black)
- rotary tool
- sanding drum for rotary tool
- cut off wheel for rotary tool
- 220 grit sandpaper
- 600 grit sandpaper
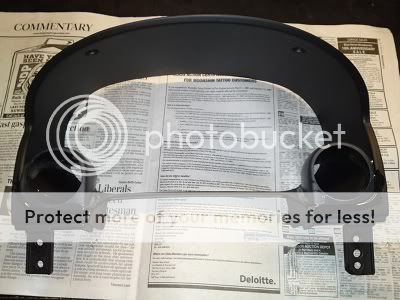
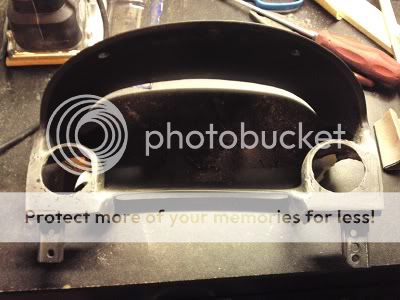
1. Get a bezel
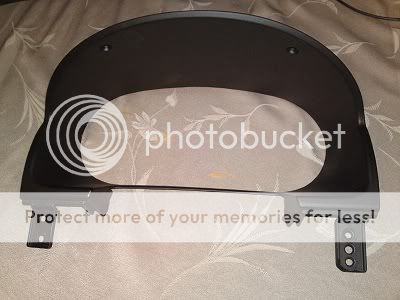
2. Figure out how you want to mount the gauges. There are mainly two choices, cut up a gauge pod to fit the bezel, OR use plastic pipe. Most people go the pipe route but I had the pillar sitting around and I think the curve at the back uncovers a lot of the speedo and tach. I have not tried the pipe route so I don't really know what to use but I heard that you can find 2 1/16 inch ABS pipe or PVC conduit at Home Depot or Lowes. However I suggest a trip to the store with a gauge to answer that question.

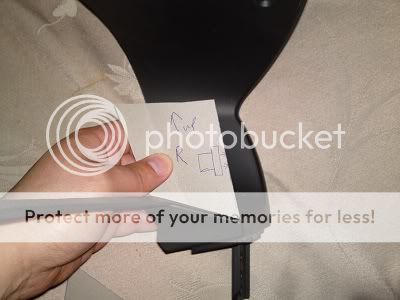
3. Figure out what angle you want to set the gauges to. I made a template to help. If I had to do it again I would angle the gauges inward (towards the driver) a bit more to cut down on glare.
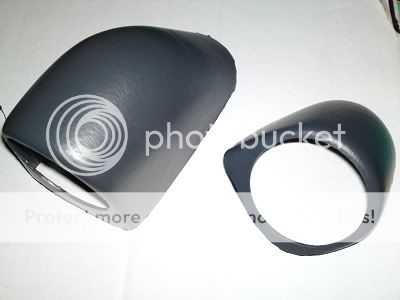
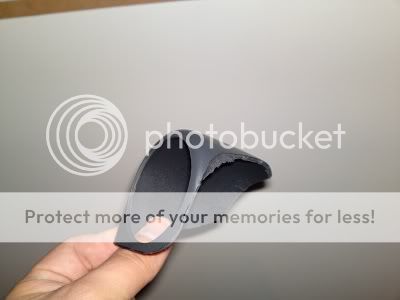
4. Cut your pods out of your donor gauge pod or pipe to fit the contours of the bezel. Test fit repeatedly! Check the angle against what you want.
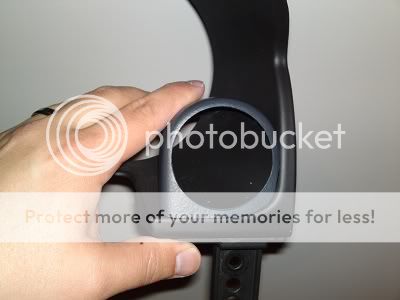
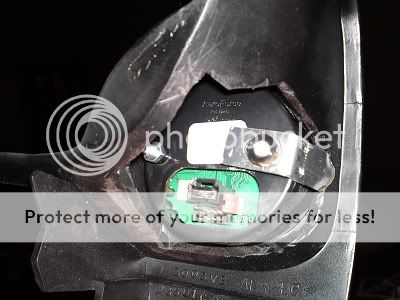
5. Once you are happy with the dry fit of the pieces, you are ready to glue them together. To join the two pieces to the bezel I scuffed the area around the mating surfaces up real good then liberally used 5 minute epoxy to hold them in place. Don't skimp on the epoxy here, you can add a lot of strength in the places that will be hidden from view later. It is also a good idea to clean the surfaces you are joining to get rid of grease etc.. I used just soap and water but you could use something more agressive as well.
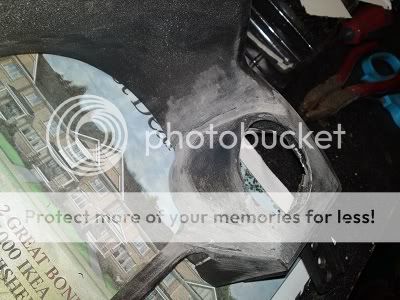
6. Once the epoxy glue had set up I scuffed up the areas where I wanted to blend the pieces together. Then I used 2 part epoxy flexible bumper filler to build up the area and create the blending between the two pieces. Wait until it is hardened. The pods I cut out of my donor A pillar gauge pod were not symetrical so i had to make some relief cuts and use a heat gun to roughly shape the back of the left side pod to match the curve of the right side. You can avoid this by using pipes or a donor gauge pod which is symetrical.
7. At this point your bezel should be strong enough to be considered one piece. Now you can cut out the areas needed for the gauges to fit. I used a cutoff disk on a rotary tool cutting in from the outside. Test fit the gauges and make sure they sit flush and even to each other. Adjust as necessary. Aeroforce gauges are pretty shallow and will mount easily but if you are using anything else you will probably have to cut down the mounting studs. It should be obvious how much you will need to trim. Keep in mind any wires or tubes that will be plugged into the back of your gauge and allow room for them.

8. Use the sanding method of your choice to roughly shape the blended areas. I used a palm sander for the flat front area and a rotary tool with a fine sanding drum to quickly remove large amounts of material from the inside curves. Then I used my finger and a strip of 220 sandpaper to get the finer finish and feather the filler to the piece. You may have to fill in voids or pits in the filler material so don't be surprised if you need to do a couple coats or spot fix ups.
9. If you are really good you can get away with just the bumper filler to get the final blending. I could not so I also used Spot/Glazing putty and more sanding to get to a smooth finish. Use some 600 grit sandpaper once it looks like the blending is done just to smooth it out some more.
10. The bezel comes textured but likely you have made your blended areas and the "pods" smooth by now. Do a quick sand with 220 grit sandpaper to knock down the rest of the bezel texture. If you are so inclined you could go so far as to also use glazing putty to make a super smooth surface.
11. Now you are ready to paint! Spray a test coat and look for any more pits in the blended areas that you missed, it's easier to see with paint. Repeat step 9 until perfect then paint another coat to check that everything is good. Once everything looks good continue painting the rest of the coats.
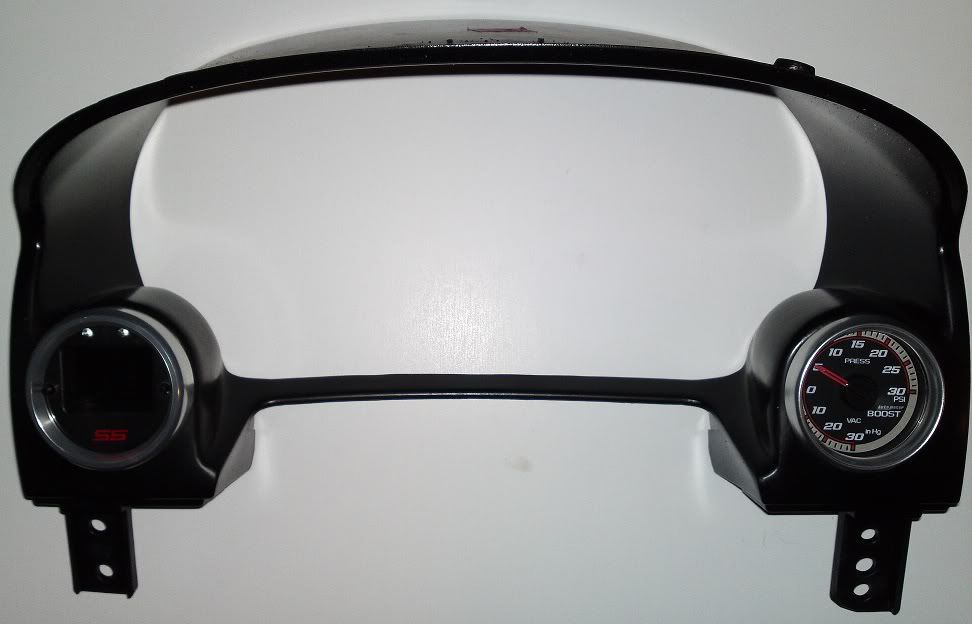
12. Mount your gauges, install your new dual gauge cluster bezel and enjoy!
What you need:
- Instrument Cluster Bezel
- Donor gauge pod OR plastic pipe (see step 2)
- 5 minute epoxy
- 2 part epoxy flexible plastic bumper filler
- plastic paint (most people use satin black)
- rotary tool
- sanding drum for rotary tool
- cut off wheel for rotary tool
- 220 grit sandpaper
- 600 grit sandpaper
1. Get a bezel
2. Figure out how you want to mount the gauges. There are mainly two choices, cut up a gauge pod to fit the bezel, OR use plastic pipe. Most people go the pipe route but I had the pillar sitting around and I think the curve at the back uncovers a lot of the speedo and tach. I have not tried the pipe route so I don't really know what to use but I heard that you can find 2 1/16 inch ABS pipe or PVC conduit at Home Depot or Lowes. However I suggest a trip to the store with a gauge to answer that question.
3. Figure out what angle you want to set the gauges to. I made a template to help. If I had to do it again I would angle the gauges inward (towards the driver) a bit more to cut down on glare.
4. Cut your pods out of your donor gauge pod or pipe to fit the contours of the bezel. Test fit repeatedly! Check the angle against what you want.
5. Once you are happy with the dry fit of the pieces, you are ready to glue them together. To join the two pieces to the bezel I scuffed the area around the mating surfaces up real good then liberally used 5 minute epoxy to hold them in place. Don't skimp on the epoxy here, you can add a lot of strength in the places that will be hidden from view later. It is also a good idea to clean the surfaces you are joining to get rid of grease etc.. I used just soap and water but you could use something more agressive as well.
6. Once the epoxy glue had set up I scuffed up the areas where I wanted to blend the pieces together. Then I used 2 part epoxy flexible bumper filler to build up the area and create the blending between the two pieces. Wait until it is hardened. The pods I cut out of my donor A pillar gauge pod were not symetrical so i had to make some relief cuts and use a heat gun to roughly shape the back of the left side pod to match the curve of the right side. You can avoid this by using pipes or a donor gauge pod which is symetrical.
7. At this point your bezel should be strong enough to be considered one piece. Now you can cut out the areas needed for the gauges to fit. I used a cutoff disk on a rotary tool cutting in from the outside. Test fit the gauges and make sure they sit flush and even to each other. Adjust as necessary. Aeroforce gauges are pretty shallow and will mount easily but if you are using anything else you will probably have to cut down the mounting studs. It should be obvious how much you will need to trim. Keep in mind any wires or tubes that will be plugged into the back of your gauge and allow room for them.
8. Use the sanding method of your choice to roughly shape the blended areas. I used a palm sander for the flat front area and a rotary tool with a fine sanding drum to quickly remove large amounts of material from the inside curves. Then I used my finger and a strip of 220 sandpaper to get the finer finish and feather the filler to the piece. You may have to fill in voids or pits in the filler material so don't be surprised if you need to do a couple coats or spot fix ups.
9. If you are really good you can get away with just the bumper filler to get the final blending. I could not so I also used Spot/Glazing putty and more sanding to get to a smooth finish. Use some 600 grit sandpaper once it looks like the blending is done just to smooth it out some more.
10. The bezel comes textured but likely you have made your blended areas and the "pods" smooth by now. Do a quick sand with 220 grit sandpaper to knock down the rest of the bezel texture. If you are so inclined you could go so far as to also use glazing putty to make a super smooth surface.
11. Now you are ready to paint! Spray a test coat and look for any more pits in the blended areas that you missed, it's easier to see with paint. Repeat step 9 until perfect then paint another coat to check that everything is good. Once everything looks good continue painting the rest of the coats.
12. Mount your gauges, install your new dual gauge cluster bezel and enjoy!
Last edited by Miko; Jun 28, 2011 at 10:13 PM.


New Member
Joined: 06-15-10
Posts: 165
Likes: 0
From: Edmonton, Canada
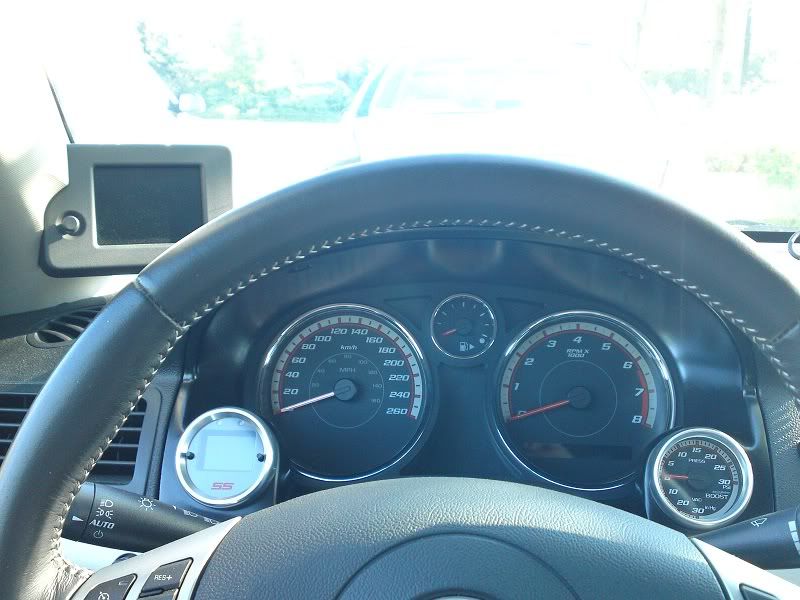
Would love to see pictures of how this looks mounted inside the car, because this might be an idea for me tonight lol. Got an extra 3pod pillar sitting in the basement from my old SRT4, and i got a better looking one already on the wifes neon lol


interesting take on the pods. they do have pvc that is the same size as the stock boost gauge. im not sure what size it is but i had scrap piping left over from my basement and had some that fit and used it on mine when i redid mine
also where would you recommend getting the filler? an auto parts store? because i used just epoxy on mine so far and have it pretty smooth but there are some little dips and holes that i didnt feel like sanding out
also where would you recommend getting the filler? an auto parts store? because i used just epoxy on mine so far and have it pretty smooth but there are some little dips and holes that i didnt feel like sanding out
Thread Starter
Member
Joined: 12-02-09
Posts: 296
Likes: 0
From: Toronto
interesting take on the pods. they do have pvc that is the same size as the stock boost gauge. im not sure what size it is but i had scrap piping left over from my basement and had some that fit and used it on mine when i redid mine
also where would you recommend getting the filler? an auto parts store? because i used just epoxy on mine so far and have it pretty smooth but there are some little dips and holes that i didnt feel like sanding out
also where would you recommend getting the filler? an auto parts store? because i used just epoxy on mine so far and have it pretty smooth but there are some little dips and holes that i didnt feel like sanding out
I got the filler from an auto parts store, it was good ole' B**** brand. I found that for filling in the the small dips regular body glazing putty worked well.
I liked using the pillar pod as a source for the pod portion because it curved in at the back and helped to un-hide the gauges. Probably same amount of work as using pipe.
I got the filler from an auto parts store, it was good ole' B**** brand. I found that for filling in the the small dips regular body glazing putty worked well.
I got the filler from an auto parts store, it was good ole' B**** brand. I found that for filling in the the small dips regular body glazing putty worked well.

Thread Starter
Member
Joined: 12-02-09
Posts: 296
Likes: 0
From: Toronto
Yeah, I used mostly epoxy filler, the putty was just for a few spots to fill in minor imperfections. Been baking in my car during the day for a couple weeks now and so far so good.


Thread Starter
Member
Joined: 12-02-09
Posts: 296
Likes: 0
From: Toronto
Sorry, i'm not really sure what size pipe it is that you need. There are lots of different pipes, pipes for plumbing, built-in vacuum pipes, electrical conduit to name a few. The stock gauge is the same size as the standard aftermarket gauges so if you can find a size that works on one it will work on the others.


