
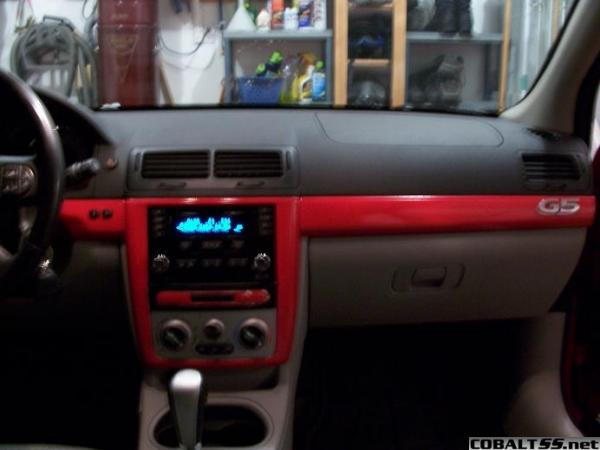
Interior: How To: Paint your dash


Thread Starter
Senior Member
Joined: 11-15-05
Posts: 2,693
Likes: 0
From: Newton Highlands, Massachusetts
How To: Paint your dash
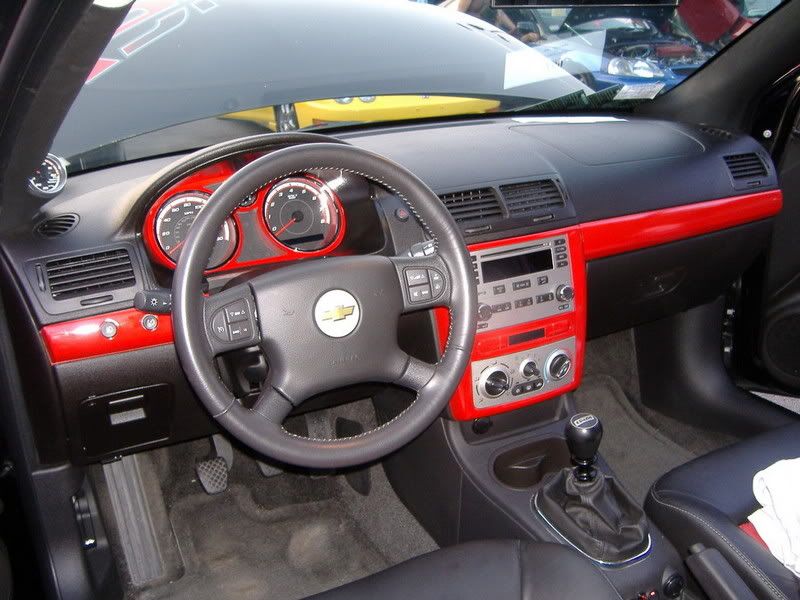
Here's how I painted my dash pieces, sorry I didn't take pictures during the process but it's not really essential for this how-to. These are just my reccommendations for the process, based on what I did.
Your results will be dependent upon your prep work, patience, and the area in which you are painting. I used a home-made spray booth with heat and ventilation that was made of plastic painters drop coverings and is close to dust-free.
You will need:
1.) Rustoleum (or other) Plastic Primer.
2.) DupliColor Cherry Red (or other color) Enamel. **Please see below.
3.) DupliColor Clear Enamel. **Please see below.
4.) DupliColor Prep Wipes (or mild soap and water or tack cloth).
5.) 300-400 grit sand paper.
6.) 600-800 grit sand paper.
Optional:
7.) 1000 grit sand paper.
8.) Fine cut rubbing compound or your favorite polish.
9.) Car wax.
Instructions:
1.) Scuff the pieces you want to paint with a grey 3M scuff pad or 300-400 grit sand paper.
2.) Use a DupliColor Prep Wipe to wipe off all the dust and junk that the scuffing creates.
3.) Spray one light coat of plastic primer, let dry 10 minutes.
4.) Spray one slightly heavier coat of plastic primer, filling in the light spots from the last coat, let dry 15-20 minutes.
5.) Sand with 600-800 grit if needed.
6.) Use a DupliColor Prep Wipe to wipe off all the dust and junk that the sanding creates.
7.) Spray one very light coat of color, let dry 10 minutes.
8.) Repeat Step #7 three more times.
9.) Spray one medium coat of color being careful not to let it create runs, let dry 30 minutes.
10.) Spray one light coat of clear, let dry 10 minutes.
11.) Repeat step #10 two more times.
12.) Spray one medium coat of clear, let dry 6-8 hours before re-installing.
Optional:
Requires 24-48 hours dry time, depending on environment.
13.) Wet sand with 1000 grit paper.
14.) Buff with fine cut rubbing compound or your favorite polish until the surface becomes perfectly smooth.
15.) Wax.
**Please note, if you are using enamel paint, you will need enamel clear. If you are using lacquer paint, you will need lacquer clear. DO NOT MIX ENAMEL AND LACQUER PAINT. If you mix lacquer and enamel, the paint thins out, just as if you applied thinner directly to your piece.
End result:
Last edited by GSoccer24; Nov 6, 2006 at 08:58 AM.

Senior Member
Joined: 01-15-06
Posts: 2,382
Likes: 2
From: Rockwood, MI
how did you do the arm rests or does the ss come like that they are neutral in my ls and i want to get some black door panels (might just paint them) and paint the arms orange to match the car.

Thread Starter
Senior Member
Joined: 11-15-05
Posts: 2,693
Likes: 0
From: Newton Highlands, Massachusetts
SS S/C comes with colored inserts on the seats and doors. Black, yellow, red, and blue are available. You would have to buy my seats if you wanted them like that, LOL.
Thread Starter
Senior Member
Joined: 11-15-05
Posts: 2,693
Likes: 0
From: Newton Highlands, Massachusetts
Originally Posted by chevyguy1990
should have had pics of every step you did, then it would be an excellent HOW-TO.
sorry for the lack of pics, but it's pretty easy stuff. if it were something that involved swapping engine parts or something, i would have taken the time to take some pics.
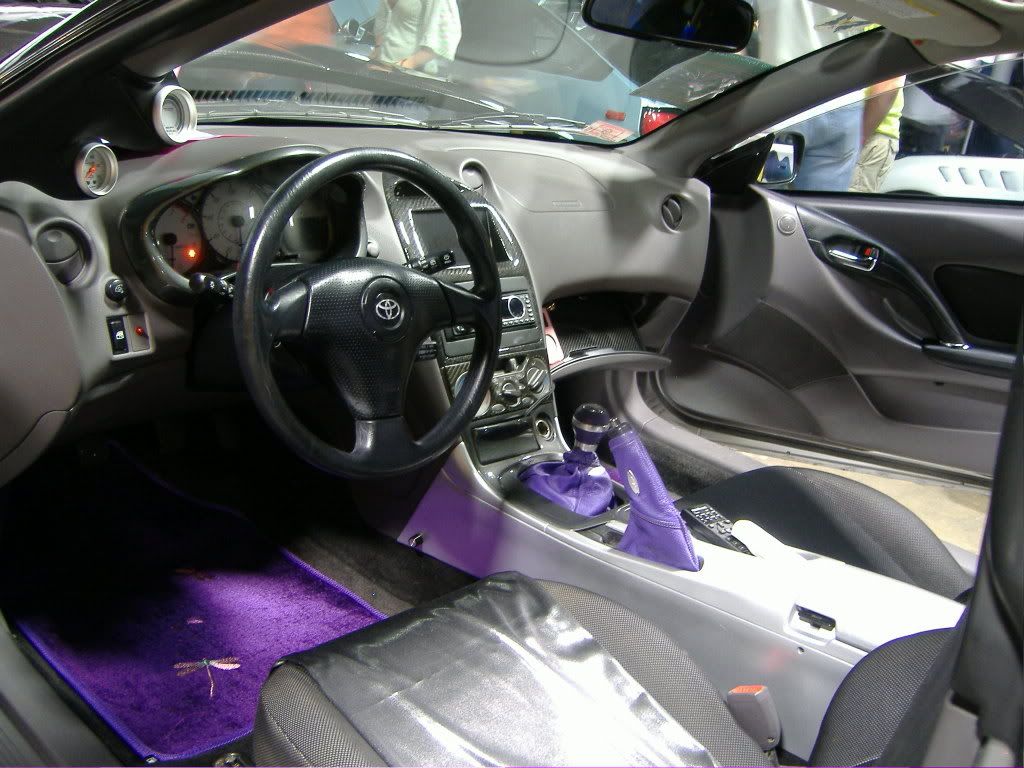
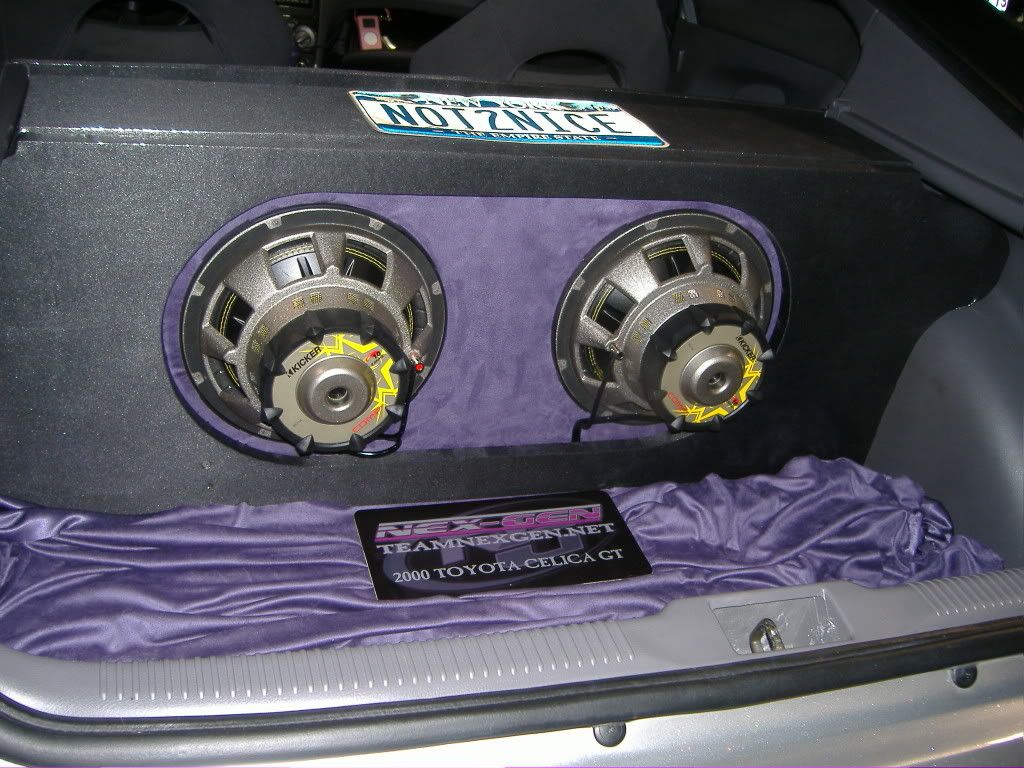
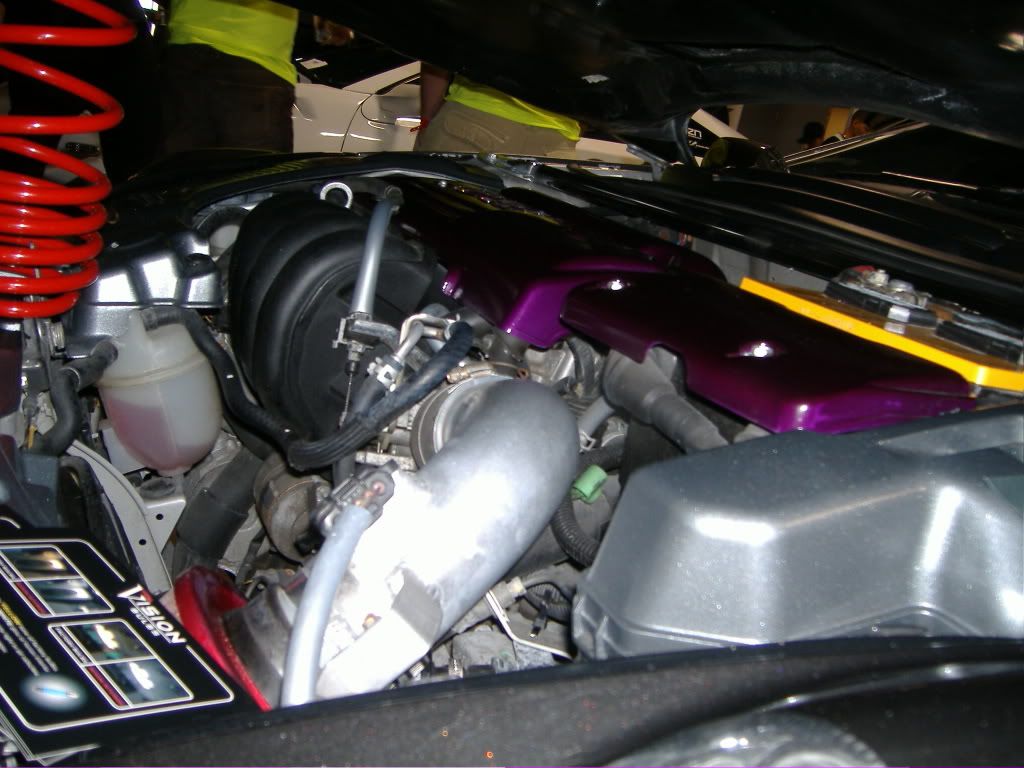
i'll try to remember to get some pics next time i do something. this time around was rushed because i had my car to do and my girl's to do as well for Hot Import Nights Boston. her's was worse because we had to sand off the fake leather texture first, then use high build primer and sand that, then paint and sand and paint and clear and sand and clear and buff. i also painted her engine bay plastics, installed a new system in her car, and reupholstered what was there.
here's pics of her stuff, did the gauge shroud, shift surround, and euro head unit surround in gunmetal metallic, and center console to match the exterior platinum silver
Senior Member
Joined: 07-15-06
Posts: 3,765
Likes: 0
From: Pocomoke City, MD
Originally Posted by biniecki
how did you do the arm rests or does the ss come like that they are neutral in my ls and i want to get some black door panels (might just paint them) and paint the arms orange to match the car.

Senior Member
Joined: 01-08-06
Posts: 590
Likes: 0
From: Ottawa, Canada
Alright i painted my dash trim about a week ago and just never got around to posting the pic....did mine green using Krylon fusion...and krylon clear coat...im painting the glove bax and the dash piece under the steering wheel black soon enough to make it look much better...doesnt look very shiny in this picture because of the lighting..anyway giving u an idea what green looks like...i am pleased with it..


Senior Member
Joined: 04-11-06
Posts: 677
Likes: 0
From: Sarasota, FL
damn...all yalls came out so nice mine came out so bad but i was impatient at first which screwed it up... i need to find time to sand it back down totally... although i found a trim package on crateenginedepot.com in red for $188 i dnno if itd be worth it


Senior Member
Joined: 07-15-06
Posts: 3,765
Likes: 0
From: Pocomoke City, MD
my buddy used the gell top coat that goes on body kits to make the fiber glass on body kits smoth. that gell top coat is easily sandable. thats how he did his top part of the dash
i think the gell top coat is called epoxy. but i cant remember
i think the gell top coat is called epoxy. but i cant remember
Last edited by xCobalt05x; Feb 9, 2007 at 12:46 PM. Reason: Automerged Doublepost

Senior Member
Joined: 06-06-06
Posts: 2,889
Likes: 0
From: Redding, Nor-Cal.


