


Interior: How To: Paint your dash



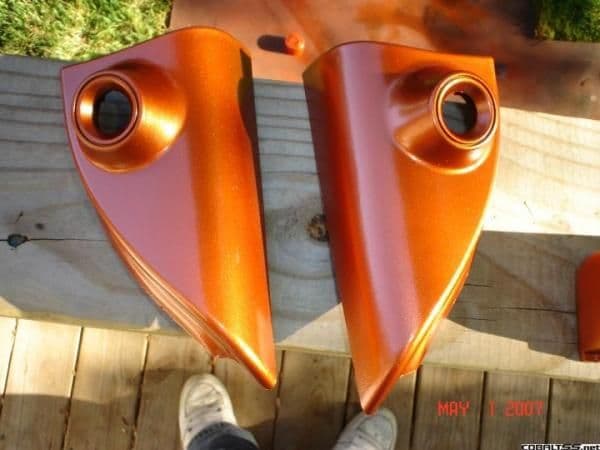
I pianted it, haven't gotten around to taking out the dash and doing that... but it will get done... and i'l still working on the gray panels in the back, i kind of got lazy and stoped and i also took a trip to nevada, so i got slowed down... for more pics look in my pictures...
Here's the whole thing... from the back seat
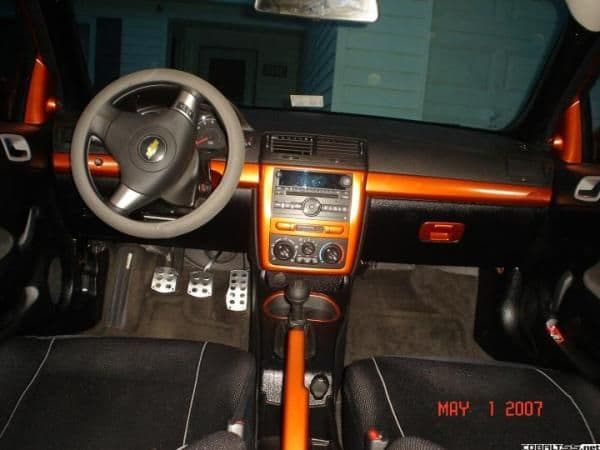
Here's the whole thing... from the back seat
Last edited by blu3_v1p3r; May 1, 2007 at 08:01 PM.

its pretty resistant... hasn't chipped yet, plus i clear coated the **** out of it, but i'm only doing this untill i fugure out if i want to just go and buy the black panels.
Also anyone know how to get the steering wheel trim of on the 07s?
Also anyone know how to get the steering wheel trim of on the 07s?




Senior Member
Joined: 02-20-07
Posts: 1,004
Likes: 1
From: Stratford TX
ok i have a few qustions! is this a good idea for someone that doesn't know how to paint? and where is the best place to pick all this stuff up? and one more qustions! i have already pulled of my panals and i can't seem to get the buttons off how do you get those off? i can unhook them but how do you get the whole button out? and do you leave the clamps on there when you paint do you paint the back side as well?

Senior Member
Joined: 09-09-05
Posts: 1,601
Likes: 0
From: Grayslake, IL
ok i have a few qustions! is this a good idea for someone that doesn't know how to paint? and where is the best place to pick all this stuff up? and one more qustions! i have already pulled of my panals and i can't seem to get the buttons off how do you get those off? i can unhook them but how do you get the whole button out? and do you leave the clamps on there when you paint do you paint the back side as well?
Senior Member
Joined: 02-20-07
Posts: 1,004
Likes: 1
From: Stratford TX
can you get all this at walmart? o yeah and how do you not paint the ss symbol? and if you have to remove it and the but it back on how do you do that?
how did you get your ss bage off? and i kind of like the bafe there so how would i but it back on?
Here's how I painted my dash pieces, sorry I didn't take pictures during the process but it's not really essential for this how-to. These are just my reccommendations for the process, based on what I did.
Your results will be dependent upon your prep work, patience, and the area in which you are painting. I used a home-made spray booth with heat and ventilation that was made of plastic painters drop coverings and is close to dust-free.
You will need:
1.) Rustoleum (or other) Plastic Primer.
2.) DupliColor Cherry Red (or other color) Enamel. **Please see below.
3.) DupliColor Clear Enamel. **Please see below.
4.) DupliColor Prep Wipes (or mild soap and water or tack cloth).
5.) 300-400 grit sand paper.
6.) 600-800 grit sand paper.
Optional:
7.) 1000 grit sand paper.
8.) Fine cut rubbing compound or your favorite polish.
9.) Car wax.
Instructions:
1.) Scuff the pieces you want to paint with a grey 3M scuff pad or 300-400 grit sand paper.
2.) Use a DupliColor Prep Wipe to wipe off all the dust and junk that the scuffing creates.
3.) Spray one light coat of plastic primer, let dry 10 minutes.
4.) Spray one slightly heavier coat of plastic primer, filling in the light spots from the last coat, let dry 15-20 minutes.
5.) Sand with 600-800 grit if needed.
6.) Use a DupliColor Prep Wipe to wipe off all the dust and junk that the sanding creates.
7.) Spray one very light coat of color, let dry 10 minutes.
8.) Repeat Step #7 three more times.
9.) Spray one medium coat of color being careful not to let it create runs, let dry 30 minutes.
10.) Spray one light coat of clear, let dry 10 minutes.
11.) Repeat step #10 two more times.
12.) Spray one medium coat of clear, let dry 6-8 hours before re-installing.
Optional:
Requires 24-48 hours dry time, depending on environment.
13.) Wet sand with 1000 grit paper.
14.) Buff with fine cut rubbing compound or your favorite polish until the surface becomes perfectly smooth.
15.) Wax.
**Please note, if you are using enamel paint, you will need enamel clear. If you are using lacquer paint, you will need lacquer clear. DO NOT MIX ENAMEL AND LACQUER PAINT. If you mix lacquer and enamel, the paint thins out, just as if you applied thinner directly to your piece.
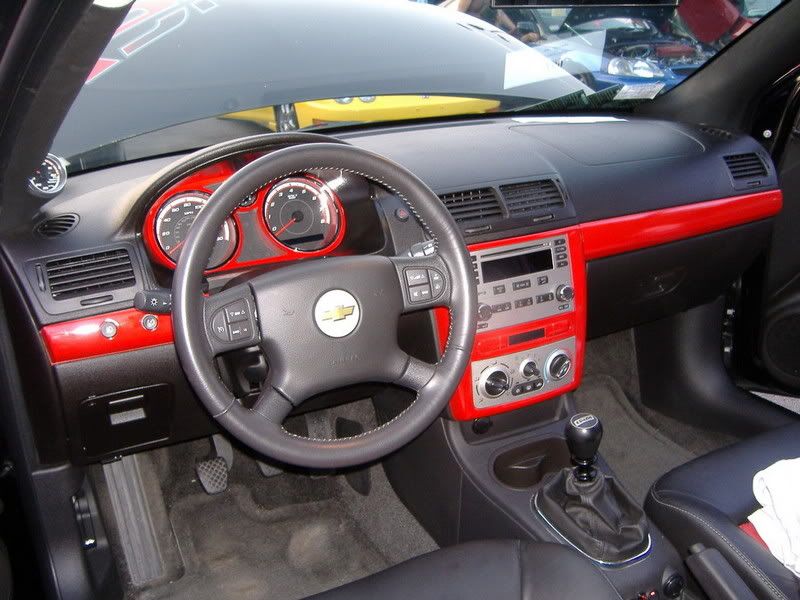
End result:
Your results will be dependent upon your prep work, patience, and the area in which you are painting. I used a home-made spray booth with heat and ventilation that was made of plastic painters drop coverings and is close to dust-free.
You will need:
1.) Rustoleum (or other) Plastic Primer.
2.) DupliColor Cherry Red (or other color) Enamel. **Please see below.
3.) DupliColor Clear Enamel. **Please see below.
4.) DupliColor Prep Wipes (or mild soap and water or tack cloth).
5.) 300-400 grit sand paper.
6.) 600-800 grit sand paper.
Optional:
7.) 1000 grit sand paper.
8.) Fine cut rubbing compound or your favorite polish.
9.) Car wax.
Instructions:
1.) Scuff the pieces you want to paint with a grey 3M scuff pad or 300-400 grit sand paper.
2.) Use a DupliColor Prep Wipe to wipe off all the dust and junk that the scuffing creates.
3.) Spray one light coat of plastic primer, let dry 10 minutes.
4.) Spray one slightly heavier coat of plastic primer, filling in the light spots from the last coat, let dry 15-20 minutes.
5.) Sand with 600-800 grit if needed.
6.) Use a DupliColor Prep Wipe to wipe off all the dust and junk that the sanding creates.
7.) Spray one very light coat of color, let dry 10 minutes.
8.) Repeat Step #7 three more times.
9.) Spray one medium coat of color being careful not to let it create runs, let dry 30 minutes.
10.) Spray one light coat of clear, let dry 10 minutes.
11.) Repeat step #10 two more times.
12.) Spray one medium coat of clear, let dry 6-8 hours before re-installing.
Optional:
Requires 24-48 hours dry time, depending on environment.
13.) Wet sand with 1000 grit paper.
14.) Buff with fine cut rubbing compound or your favorite polish until the surface becomes perfectly smooth.
15.) Wax.
**Please note, if you are using enamel paint, you will need enamel clear. If you are using lacquer paint, you will need lacquer clear. DO NOT MIX ENAMEL AND LACQUER PAINT. If you mix lacquer and enamel, the paint thins out, just as if you applied thinner directly to your piece.
End result:
how did you get your ss bage off? and i kind of like the bafe there so how would i but it back on?
Last edited by craigk_c19; May 28, 2007 at 06:50 PM. Reason: Automerged Doublepost

Senior Member
Joined: 02-20-07
Posts: 1,004
Likes: 1
From: Stratford TX

Senior Member
Joined: 05-05-07
Posts: 10,822
Likes: 0
From: Mechanicsburg, Pa


Senior Member
Joined: 05-22-07
Posts: 1,001
Likes: 0
From: Northern Virginia
When i had my 05 cobalt ls i took the trim off to change the stereo and i took a flat screwdriver and pried it off.. it seems like it's going to break but it'll be good. and you'll hear a pop but don't worry bout that.. now that is on the LS.. i haven't takin the trim off on my SS/SC yet so i can't verify it'll be the same process in taking it off.

Senior Member
Joined: 08-22-06
Posts: 1,601
Likes: 0
From: New Jersey
Yea i know where the clips are i have the red replacement ones so i was looking at their clips to see where the ones in the dash are. I have tried pulling strait out and using a screwdriver and the damn things wont budge!

Senior Member
Joined: 05-10-07
Posts: 5,890
Likes: 1
From: West Babylon, NY
Find the clip and compress it with a screwdriver. It will come off.
As a side note... anyone know how to make the clips more snug again? you think just spreading them open a little would work? I have a little play in my trim and want it all to fit snug again
As a side note... anyone know how to make the clips more snug again? you think just spreading them open a little would work? I have a little play in my trim and want it all to fit snug again
ya your trim is all nice an virgin bu once you start pulling it on and off a few times it becomes loose like a *****... i havent tried fixing it because im not done with it but im sure spreading them open would help
Senior Member
Joined: 05-10-07
Posts: 5,890
Likes: 1
From: West Babylon, NY
