
Electrical: Clockspring Replacement


Clockspring Replacement
What is a clockspring?
The clockspring or "srs spring" is the device that makes it so your steering wheel can turn while still giving power to the airbag as well as the steering wheel controls. It looks like a ribbon wire from a computer inside of a doughnut like device.
Background
I had a problem where my "service air bag" message and light would come on and off randomly. It seemed to happen only when I would get off of the freeway and onto the local roads. I thought it was something speed related but could never track down the problem. I then found my Belt Tension Sensor was stressed and the wires were broken, so I ordered a new passenger seat belt assembly. This did not solve the problem.
Fast forward to MONTHS later and I started to notice that the message would only occur if the steering wheel was not held straight (i.e. exiting the freeway and starting to make turns). I decided that 90 bucks for a new clockspring would be better than the 50-100 dollar fee for diagnosis at the stealership.
Testing the clockspring
You can test the clockspring for continuity. Make sure everything is disconnected! Here is a video of how to test:
Tools
-Small screwdriver or punch
-Philips screwdriver
-Steering wheel puller (optional, I didn't use one but it would have been nice)
-New steering wheel nut (I also didn't use one but should have)
-Socket and drive (supposed to be a 19mm but mine turned out to be a 20 or 21mm, I can't remember)
-Torque Wrench
Beers Requried: Minimum of 2.
Installation/Replacement
1. Disable air bag
First you need to disable the SRS system so you don't go smacking yourself in the face with an airbag. I hear that is not exactly fun... I assume NO RESPONSIBILITY if you are stupid and end up hurting yourself.
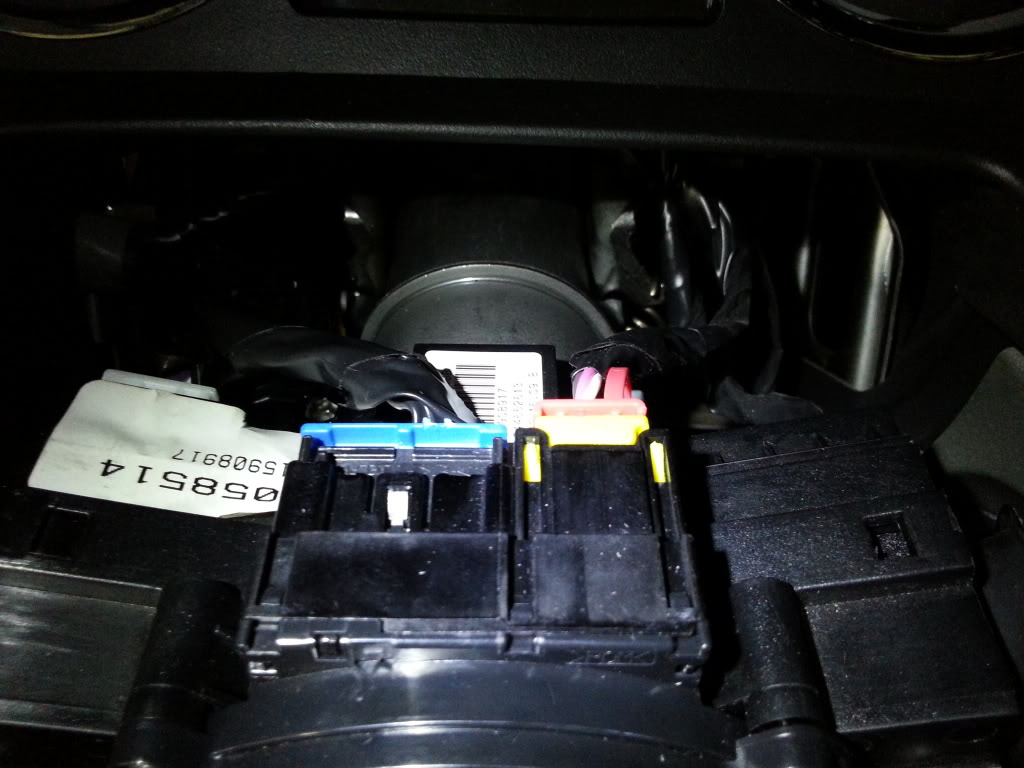
Start by removing the negative battery cable and then the airbag fuse from the interior fuse panel. Wait at least 2 minutes for the system to run out of reserve power.
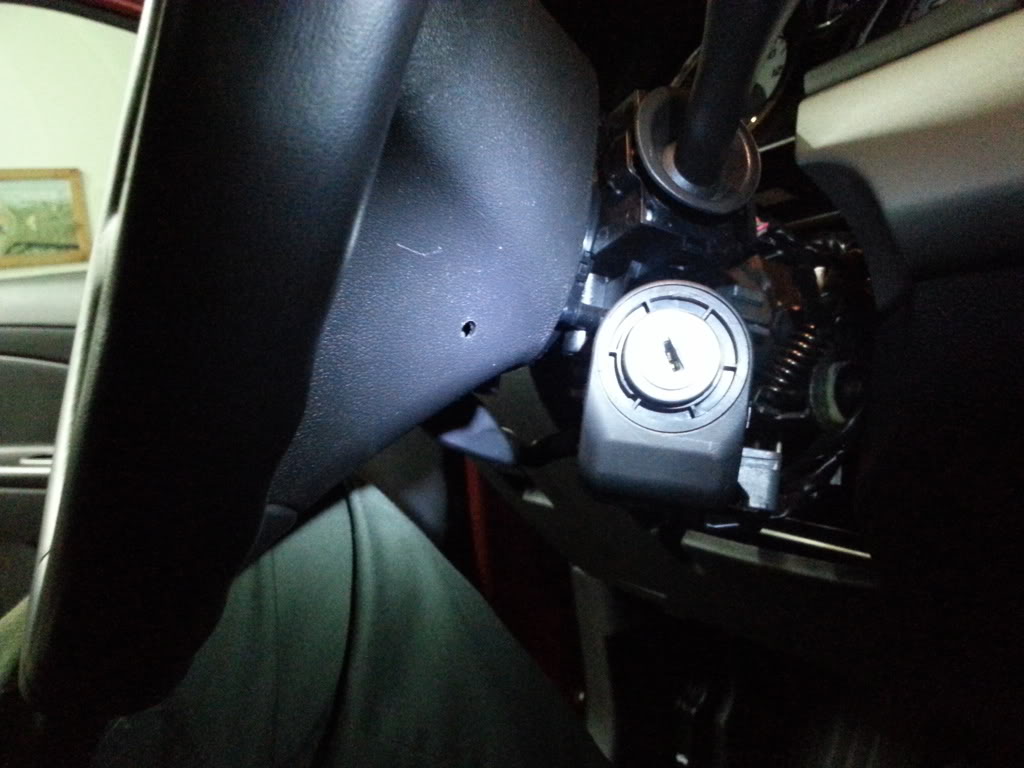
Remove air bag
Use a small punch or screw driver to press into a small hole on either side of the steering wheel. This disengages a spring on each side that holds the airbag in place. Make sure to do both sides.
See hole here:
Then physically lift out the airbag and remove the small clips. Try to ground yourself before doing so in the event you had any static electricity built up. It only takes half a volt to set these things off. The clips are kind of annoying at first but you will figure it out. Set the airbag on the ground with the chevy symbol facing upwards so that if any static were to set it off it would try to fly into the ground.
Remove steering wheel
Using your thighs to hold the wheel steady, use a socket and wrench to loosen the steering wheel nut. Don't take it off until the steering wheel is loose or else you'll smack yourself in the face with it when it comes flying off. Then grab either side of the wheel and pull on each side alternating and wiggling. It will come off eventually trust me. I thought mine was stuck. If you can get a steering wheel puller that uses 2 very small grab points, do that.
My steering wheel had an index notch so that you could only put it back on straight. If yours does not, mark it on the column shaft so that you get it back on straight.
Remove column cover
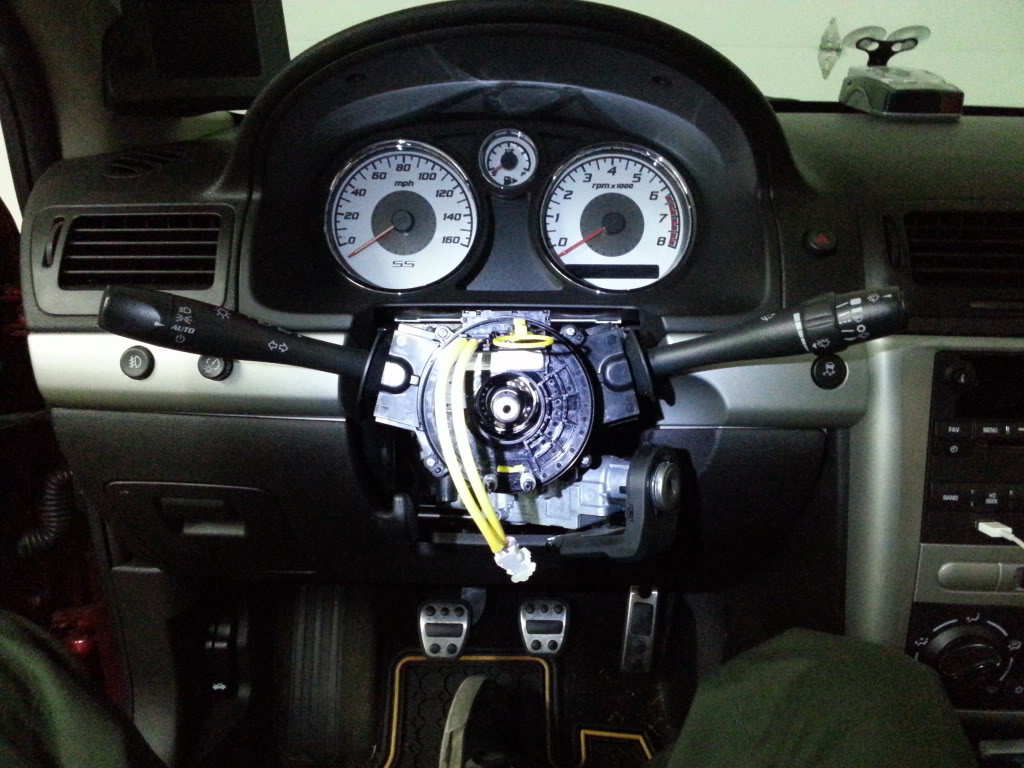
I did this earlier but you can do it whenever really. 3 screws on the bottom of the column and the bottom and top half separate. This gives you access to the back of the clock spring.
Your steering column should now look like this minus the yellow pull tab (from the new one)
Remove clock spring
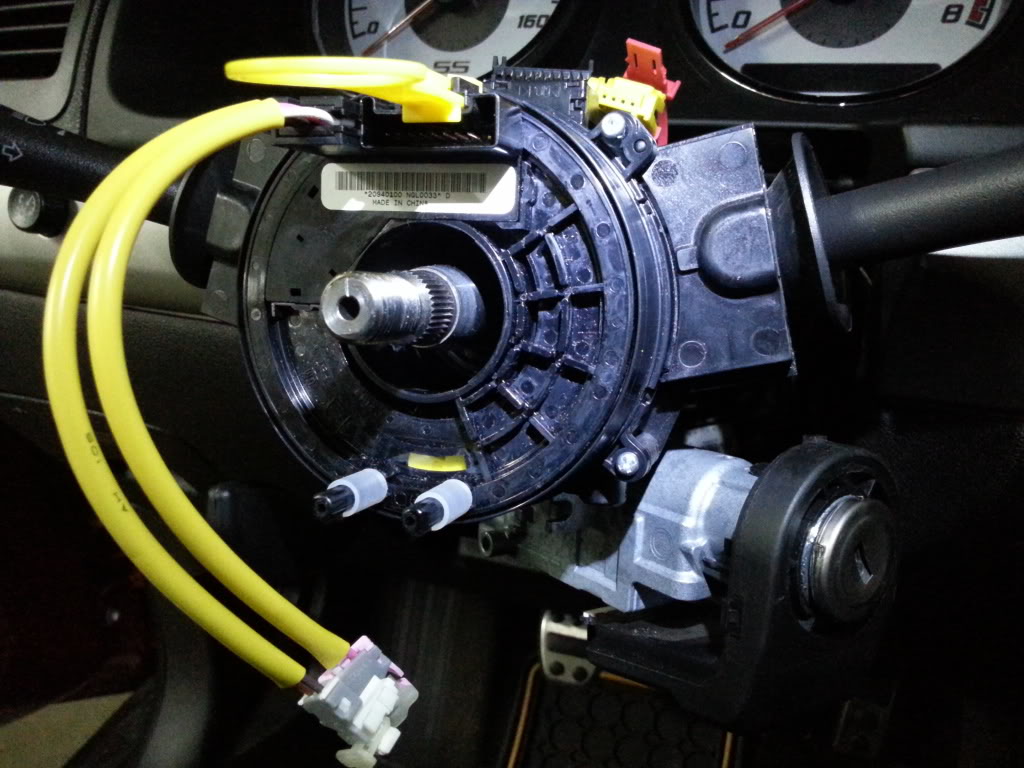
You will first need to undue the blue plugs. They are tough but there is a small pry lever inside that is part of the clock spring (black color plastic) lift up on that with a small flat blade screwdriver and it'll pop out. You need to remove the plugs from the front AND the back.
Here are those plugs:
Then use a philips screwdriver to remove the 4 screws holding the clockspring to the rest of the column. You can see them here:
There is also might be (depending on model) black plastic clips that keep the unit on the column. Depress those to get it out.
Then pop out the old unit!
Prep new unit
Take your new spring and undue the clip that holds it in place for shipping purposes. It should be prepped correctly already but rarely do I trust mass production facilities in mexico...
Spin the unit all the way to one end (GENTLY NOW) and then spin it the other way, counting the number of rotations. Divide by two and then spin it the other way that number, so that the spring is exactly half way from either end point. Failure to do this right would make your normal steering activity damage the wires inside if you turned too far one direction. Place the holding tab back in place.
Reinstallation
Reverse of the previous steps for the most part. Align the steering wheel correctly, install a new steering wheel nut and torque to 31 ft lbs.
Hope that helps. Feel free to add anything or ask any questions.
The clockspring or "srs spring" is the device that makes it so your steering wheel can turn while still giving power to the airbag as well as the steering wheel controls. It looks like a ribbon wire from a computer inside of a doughnut like device.
Background
I had a problem where my "service air bag" message and light would come on and off randomly. It seemed to happen only when I would get off of the freeway and onto the local roads. I thought it was something speed related but could never track down the problem. I then found my Belt Tension Sensor was stressed and the wires were broken, so I ordered a new passenger seat belt assembly. This did not solve the problem.
Fast forward to MONTHS later and I started to notice that the message would only occur if the steering wheel was not held straight (i.e. exiting the freeway and starting to make turns). I decided that 90 bucks for a new clockspring would be better than the 50-100 dollar fee for diagnosis at the stealership.
Testing the clockspring
You can test the clockspring for continuity. Make sure everything is disconnected! Here is a video of how to test:
Tools
-Small screwdriver or punch
-Philips screwdriver
-Steering wheel puller (optional, I didn't use one but it would have been nice)
-New steering wheel nut (I also didn't use one but should have)
-Socket and drive (supposed to be a 19mm but mine turned out to be a 20 or 21mm, I can't remember)
-Torque Wrench
Beers Requried: Minimum of 2.
Installation/Replacement
1. Disable air bag
First you need to disable the SRS system so you don't go smacking yourself in the face with an airbag. I hear that is not exactly fun... I assume NO RESPONSIBILITY if you are stupid and end up hurting yourself.
Start by removing the negative battery cable and then the airbag fuse from the interior fuse panel. Wait at least 2 minutes for the system to run out of reserve power.
Remove air bag
Use a small punch or screw driver to press into a small hole on either side of the steering wheel. This disengages a spring on each side that holds the airbag in place. Make sure to do both sides.
See hole here:

Then physically lift out the airbag and remove the small clips. Try to ground yourself before doing so in the event you had any static electricity built up. It only takes half a volt to set these things off. The clips are kind of annoying at first but you will figure it out. Set the airbag on the ground with the chevy symbol facing upwards so that if any static were to set it off it would try to fly into the ground.
Remove steering wheel
Using your thighs to hold the wheel steady, use a socket and wrench to loosen the steering wheel nut. Don't take it off until the steering wheel is loose or else you'll smack yourself in the face with it when it comes flying off. Then grab either side of the wheel and pull on each side alternating and wiggling. It will come off eventually trust me. I thought mine was stuck. If you can get a steering wheel puller that uses 2 very small grab points, do that.
My steering wheel had an index notch so that you could only put it back on straight. If yours does not, mark it on the column shaft so that you get it back on straight.
Remove column cover
I did this earlier but you can do it whenever really. 3 screws on the bottom of the column and the bottom and top half separate. This gives you access to the back of the clock spring.
Your steering column should now look like this minus the yellow pull tab (from the new one)

Remove clock spring
You will first need to undue the blue plugs. They are tough but there is a small pry lever inside that is part of the clock spring (black color plastic) lift up on that with a small flat blade screwdriver and it'll pop out. You need to remove the plugs from the front AND the back.
Here are those plugs:

Then use a philips screwdriver to remove the 4 screws holding the clockspring to the rest of the column. You can see them here:

There is also might be (depending on model) black plastic clips that keep the unit on the column. Depress those to get it out.
Then pop out the old unit!
Prep new unit
Take your new spring and undue the clip that holds it in place for shipping purposes. It should be prepped correctly already but rarely do I trust mass production facilities in mexico...
Spin the unit all the way to one end (GENTLY NOW) and then spin it the other way, counting the number of rotations. Divide by two and then spin it the other way that number, so that the spring is exactly half way from either end point. Failure to do this right would make your normal steering activity damage the wires inside if you turned too far one direction. Place the holding tab back in place.
Reinstallation
Reverse of the previous steps for the most part. Align the steering wheel correctly, install a new steering wheel nut and torque to 31 ft lbs.
Hope that helps. Feel free to add anything or ask any questions.

Thread
Thread Starter
Forum
Replies
Last Post
agentirons
Electronics, Audio, and Video
2
Oct 16, 2015 02:11 AM
DANRICKARD
Problems/Service/Maintenance
8
Oct 1, 2015 12:08 AM
importkiller
Problems/Service/Maintenance
11
Sep 30, 2015 07:18 PM