
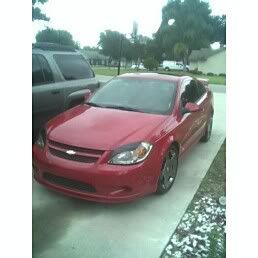
Appearance: How-To: Paint Eyelids on Front Lights.

Thread Starter
Senior Member
Joined: 03-09-06
Posts: 6,431
Likes: 0
From: Orlando, FL
How-To: Paint Eyelids on Front Lights.
I will show you how to paint some custom your one of a kind eyelids to make your car look meaner or droopy?
1. What you will need: Blue painters tape (1" prefered), razor, color paint of your choice (I used Krylon Fusion for Plastic "Red"), Dupli-Color Clear Acrylic, 3/8" drive ratchet, 2" extension (easier), 10mm socket, flat blade screwdriver, news paper, and Mt. Dew for energy or Jose for the agrivation.

2. Mess around with the tape and find a way that you like, or well your girlfriend likes. Make your pretty close on both sides.


3. Locate and remove all six body pins that hold the grill on with flat blade screwdriver.

4. Remove the 2 bolts on each light assembly that hold it to the bracket.

5. I found it easier to prop the grill assembly on the hood latch.

6. Remove each light carefully making sure not to scratch the paint or scuff the lights.

7. Mask of the areas you do not want to paint and start going away.

8. After paint has dried and acrylic has dried then apply a few coats of wax and some polish then remove the paint and newsprint.

9. Re-install light fixtures and reverse all un-install steps.


I hope this helps some of you that are some DIYers and want to save some money and not spend over $100 for vinyl eyelids. Leave some comments on what you think, it's my frist DIY thread, I also did one with OrngBalt on how to paint your bowtie.
1. What you will need: Blue painters tape (1" prefered), razor, color paint of your choice (I used Krylon Fusion for Plastic "Red"), Dupli-Color Clear Acrylic, 3/8" drive ratchet, 2" extension (easier), 10mm socket, flat blade screwdriver, news paper, and Mt. Dew for energy or Jose for the agrivation.
2. Mess around with the tape and find a way that you like, or well your girlfriend likes. Make your pretty close on both sides.
3. Locate and remove all six body pins that hold the grill on with flat blade screwdriver.
4. Remove the 2 bolts on each light assembly that hold it to the bracket.
5. I found it easier to prop the grill assembly on the hood latch.
6. Remove each light carefully making sure not to scratch the paint or scuff the lights.
7. Mask of the areas you do not want to paint and start going away.
8. After paint has dried and acrylic has dried then apply a few coats of wax and some polish then remove the paint and newsprint.
9. Re-install light fixtures and reverse all un-install steps.
I hope this helps some of you that are some DIYers and want to save some money and not spend over $100 for vinyl eyelids. Leave some comments on what you think, it's my frist DIY thread, I also did one with OrngBalt on how to paint your bowtie.
Last edited by TommyP; Oct 3, 2012 at 10:37 AM.
nice how-to...one question thought...were do you the fushion paint from....i've never seen it at autozone or adavance auto parts...have to order it? b/c i wanted to bacl out my tails, and eye-lid my fronts...but i dont know where to get tranlucent paint form
Original Hayden Fanatic
Platinum Member
Joined: 05-06-06
Posts: 33,169
Likes: 1
From: Dayton, O HI O
the Fusion paint you can get at Walmart, Kmart, Meijer, even autozone... its just Krylon's paint that bonds to plastic. As for blacking out your tail-lights that requires night shade, its easiest to find it online.
Thread Starter
Senior Member
Joined: 03-09-06
Posts: 6,431
Likes: 0
From: Orlando, FL
Thread Starter
Senior Member
Joined: 03-09-06
Posts: 6,431
Likes: 0
From: Orlando, FL
Also I like your avy....

Senior Member
Joined: 05-11-07
Posts: 3,936
Likes: 0
From: Cincinnati


Member
Joined: 04-09-07
Posts: 243
Likes: 0
From: Gainesville

Senior Member
Joined: 08-14-07
Posts: 9,012
Likes: 0
From: alabama
question. my parts dept where i worked when i ordered touch up paint for dings and what not gave me a spray can instead. i have no use for it. would that kinda paint work on this? and would the silver really look good? or should i do black?
Thread Starter
Senior Member
Joined: 03-09-06
Posts: 6,431
Likes: 0
From: Orlando, FL
Originally Posted by disposable_her0
nice write up...but i need to match my car...i have a blue one..not sure what the paint code is
@ Everyone - If you like it and it helped you out don't forget the friendly +Rep, I will return the favor.
Thread Starter
Senior Member
Joined: 03-09-06
Posts: 6,431
Likes: 0
From: Orlando, FL
Senior Member
Joined: 03-10-08
Posts: 1,243
Likes: 0
From: FL
I have the same paint I bought it at ace hardware but I saw it it home depot too

Senior Member
Joined: 08-27-08
Posts: 1,413
Likes: 1
From: Beiseker AB Canada
Thanks for the sweet write up, thinking I may do something like this.
One question: Once you have shot your colour, should you clear coat just the eyelid or clear coat the whole light?
I would imagine that there would be a bit of a line where the eyelid ends, a coat or 2 of clear would smooth it out and keep the inevitable rock hits from chipping away at the edges.
But will clear coat live on headlights? I am worried that it will haze / yellow / peel off.

Thread
Thread Starter
Forum
Replies
Last Post
2.0 LSJ Engine: aem wideband,zzp front mount exhanger,stock exchanger
n20saturn
Parts
7
Sep 30, 2015 12:26 AM