
2.0 LSJ Engine: How To: Push down the Tensioner if you stripped the nub


Thread Starter
Senior Member
iTrader: (3)
Joined: 04-13-08
Posts: 4,029
Likes: 0
From: Pennsburg, PA
How To: Push down the Tensioner if you stripped the nub
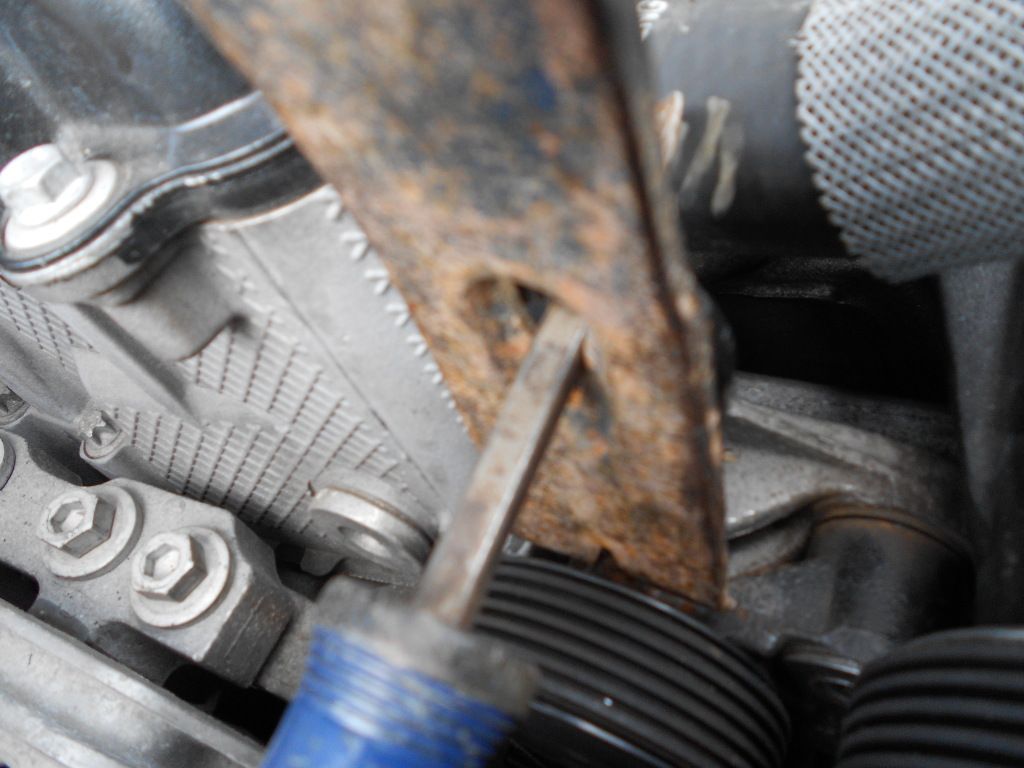
I know many people gotta be havin the same problem. I stripped my nub a while back and trying to do work on the car with that damn nub stripped was not fun when trying to push the tensioner down. Many people say to use a pry bar but do not give specifics where or how to. So here it is.
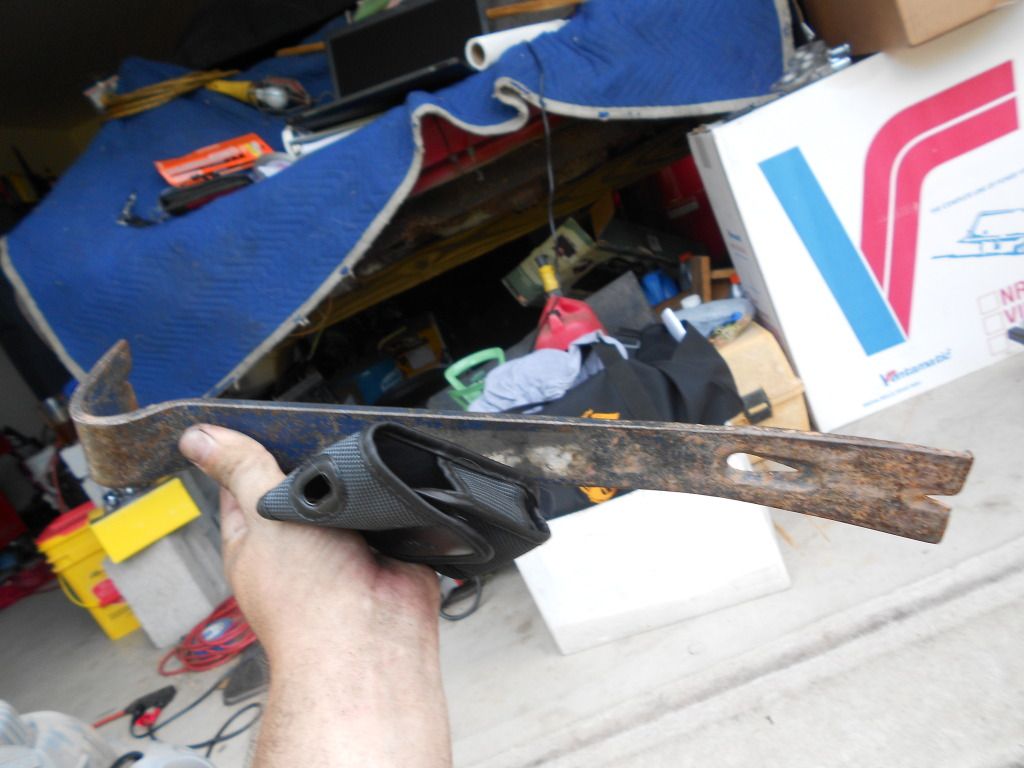
Tools needed: Pry bar, and a screw driver, as seen

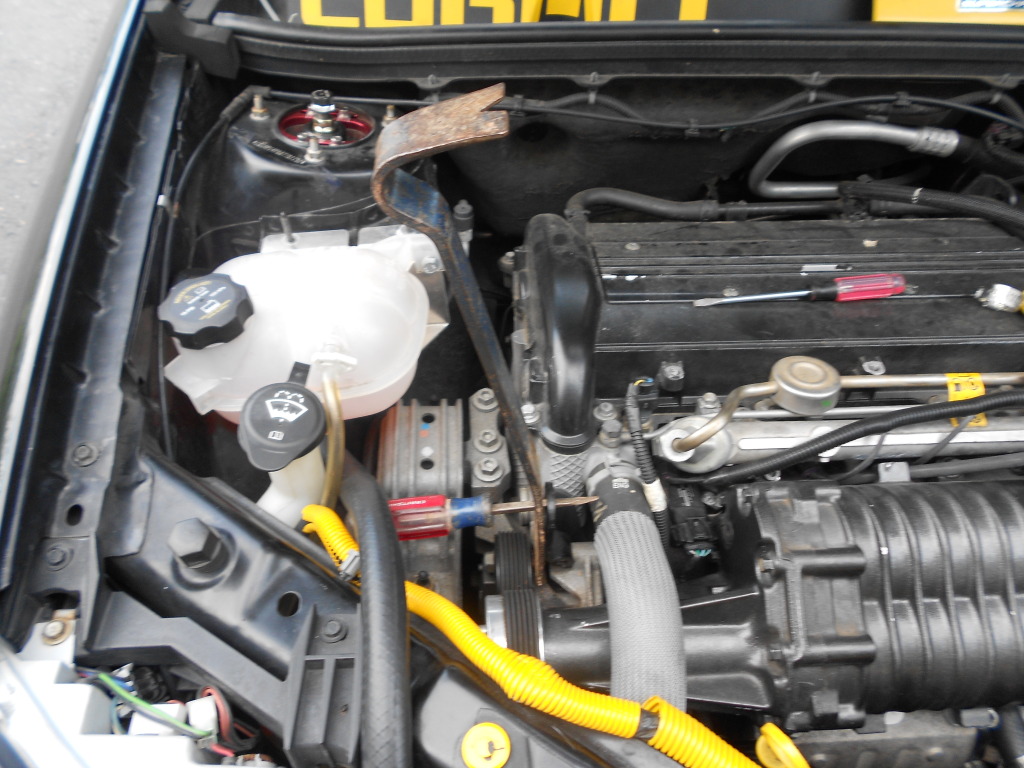
put the bottom of the pry bar on the top of the tensioner where the nub is, then stick the screwdriver through the hole in the pry bar and angled down through the engine hoist mount and simply push the screwdriver down.
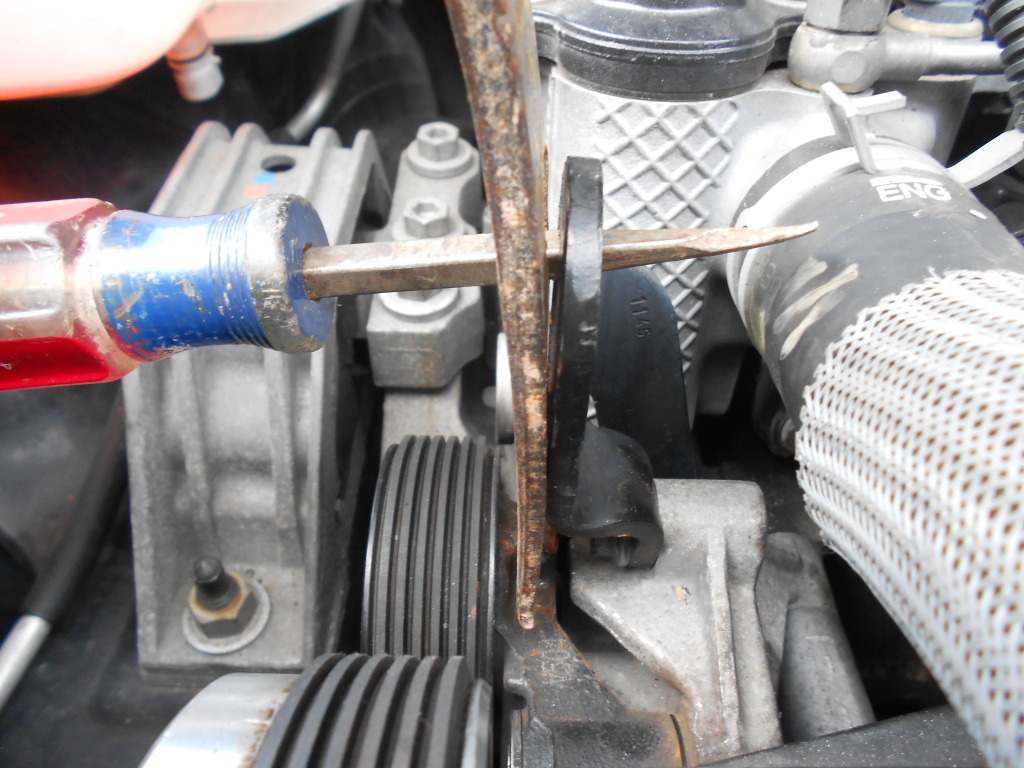
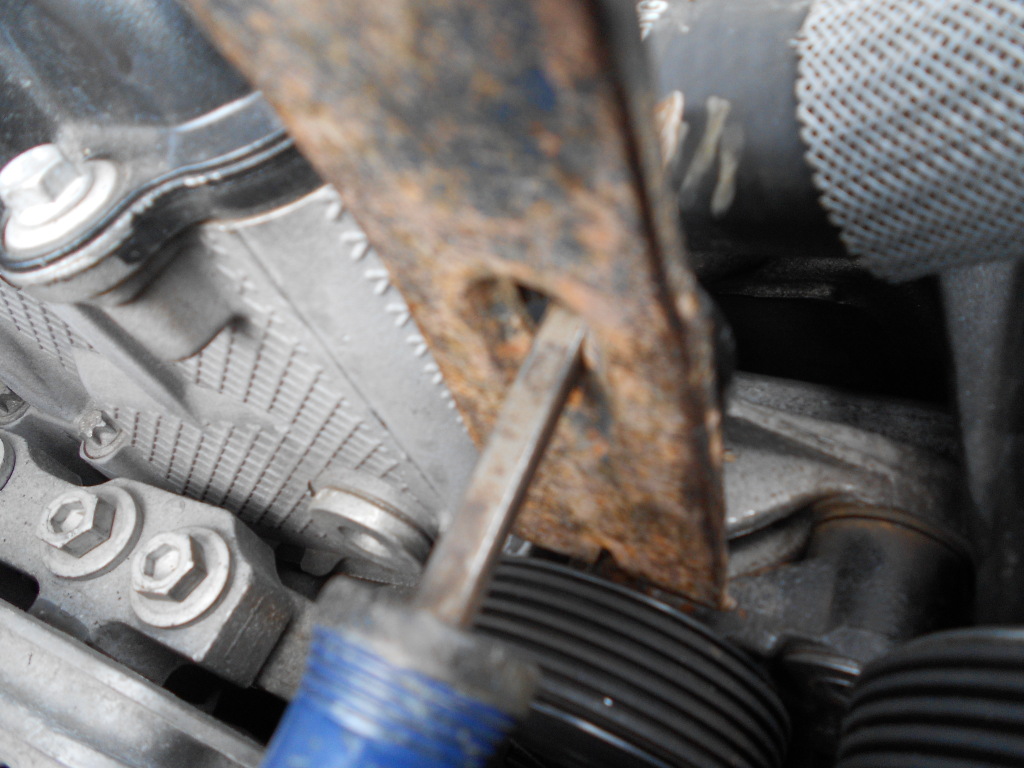
And presto! tensioner is depressed!.
I hope this helped everyone!
Tools needed: Pry bar, and a screw driver, as seen
put the bottom of the pry bar on the top of the tensioner where the nub is, then stick the screwdriver through the hole in the pry bar and angled down through the engine hoist mount and simply push the screwdriver down.
And presto! tensioner is depressed!.
I hope this helped everyone!

Senior Member
Joined: 08-04-06
Posts: 862
Likes: 3
From: Canada
I know many people gotta be havin the same problem. I stripped my nub a while back and trying to do work on the car with that damn nub stripped was not fun when trying to push the tensioner down. Many people say to use a pry bar but do not give specifics where or how to. So here it is.
Tools needed: Pry bar, and a screw driver, as seen
put the bottom of the pry bar on the top of the tensioner where the nub is, then stick the screwdriver through the hole in the pry bar and angled down through the engine hoist mount and simply push the screwdriver down.

And presto! tensioner is depressed!.

I hope this helped everyone!
Tools needed: Pry bar, and a screw driver, as seen
put the bottom of the pry bar on the top of the tensioner where the nub is, then stick the screwdriver through the hole in the pry bar and angled down through the engine hoist mount and simply push the screwdriver down.
And presto! tensioner is depressed!.
I hope this helped everyone!
DUDE! HELP? ARE YOU KIDDING, THIS IS AWESOME! The hardest part of ANYTHING with this car so far has been the belt. My hands were bleeding like crazy last time, blood everywhere, serious, stupid ******* nub!!!
Anyway, I was worried about the friggen belt, I want to do the spacer for the intake, now, I can totally do it easy!
Thanks bro, thanks thanks thanks!
PS: Do your engine mount dude! It will make a huge difference in the car, from shifting to the feeling of accelerating, first mod I did was the mount and the poly bushings! Very easy to do, just support the engine with a jack from below, but not on the oil pan.

Thread Starter
Senior Member
iTrader: (3)
Joined: 04-13-08
Posts: 4,029
Likes: 0
From: Pennsburg, PA
Awesome guys! glad to know I was able to help some people out already. and I do have the poly trans mounts, so far I haven't needed anything else, i got coils as well so when i get my $$ back up then I might look into a nice motor mount ...after i get the powell racing tow hooks.

New Member
Joined: 08-09-12
Posts: 25
Likes: 0
From: marion,ohio
thanks I used this method today and it worked great. in your pic of the whole engine you have a coolant tank on the passenger side. is this a factory location. I am helping my nephew out on his 05 ss sc and we can't figure out where the overflow from the intercooler system should go. any info on this would help alot. thanks.
Thread Starter
Senior Member
iTrader: (3)
Joined: 04-13-08
Posts: 4,029
Likes: 0
From: Pennsburg, PA
thanks I used this method today and it worked great. in your pic of the whole engine you have a coolant tank on the passenger side. is this a factory location. I am helping my nephew out on his 05 ss sc and we can't figure out where the overflow from the intercooler system should go. any info on this would help alot. thanks.
New Member
Joined: 08-09-12
Posts: 25
Likes: 0
From: marion,ohio
thanks for getting back to me. we didn't know for sure where the intercooler overflow port hooked up to. I thought it would return to overflow coolant tank. I have read that you just run a hose toward the ground and let it go to waste. so we still don't know for sure what is correct. trying to get it running soon so for now we will just put a hose toward the ground on it for now. thanks.
Thread Starter
Senior Member
iTrader: (3)
Joined: 04-13-08
Posts: 4,029
Likes: 0
From: Pennsburg, PA
if you have the stock setup then it will run up to the fill cap and then out the other side and back down into your system. The top of the fill neck by the cap there will be another hook up for a line that is just a short stub line that goes nowhere. Everything else should go somewhere.
New Member
Joined: 08-09-12
Posts: 25
Likes: 0
From: marion,ohio
thanks. the short nub is what I thought was for overflow. I need to look at that closer. is this a sealed loop with no overflow. this is a repacement engine that some shop removed old engine and then gave up. I am helping my nephew out getting it together. so many thing missing and I wasn't around to see it when it was taken apart to know where things went. thanks to everyone here that has helped us out we finally got it running but needs some tweeks.
Thread Starter
Senior Member
iTrader: (3)
Joined: 04-13-08
Posts: 4,029
Likes: 0
From: Pennsburg, PA
yea it is a short nub that basically acts as an overflow. The cap is rated at a specific pressure, i think like 15psi or something so it also lets the air escape up that big fill neck. if the system would go beyond that pressure then that short nub would in fact become the overflow and would shoot down, that filler neck should have a bracket that fastens to the front of the supercharger as well. tho the bolts tend to break pretty often.
o yea, to answer your question, yes it is a closed loop, the overflow becomes that short nub if system is over pressurized which is regulated by the cap.
o yea, to answer your question, yes it is a closed loop, the overflow becomes that short nub if system is over pressurized which is regulated by the cap.
Thread Starter
Senior Member
iTrader: (3)
Joined: 04-13-08
Posts: 4,029
Likes: 0
From: Pennsburg, PA
btw, make sure the coolant pump is running, they tend to fail frequently. you can hear it operating just at the turn of a key w/o starting the engine. if a new one is needed to cycle the coolant then see overthetopperformance.com (OTTP), they have the cheapest direct replacement bosch coolant pump that i've found.


 . Regardless, This is much easier than pressing down on the tensioner with the butt end of a breaker bar!


Thread
Thread Starter
Forum
Replies
Last Post