
"LEJ" Hybrid Build/2011 Build Thread


What/how does these not fit in the LSJ head?

Thread Starter
Senior Member
iTrader: (2)
Joined: 02-26-09
Posts: 1,036
Likes: 1
From: Ontario, Canada
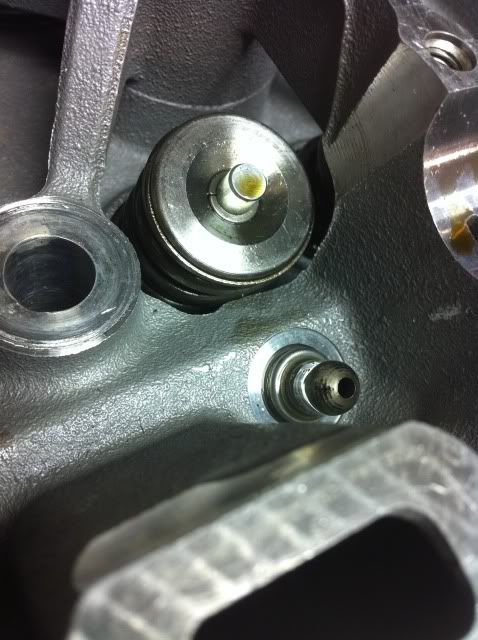
If you look closely, the spring is contacting the head casting directly infront of the lash adjuster. That was the only spring I installed, but by placing the other springs in the head it would seem that some have clearance and some don't. The ones that do have clearance however are too close for comfort IMO to the head, if you take into acount spring deformation when compressed.
This is the Supertech 78lb kit that I have, to clearify.
Like I said, I have never heard of this issue before, but I have heard enough people have had issues with Supertech springs here in LSJ's. I'm not sure specifically what issues, but maybe this is part of the problem.
I might post this in LSJ Tech and see what some of the other guys have to say.

Thread Starter
Senior Member
iTrader: (2)
Joined: 02-26-09
Posts: 1,036
Likes: 1
From: Ontario, Canada
Thread Starter
Senior Member
iTrader: (2)
Joined: 02-26-09
Posts: 1,036
Likes: 1
From: Ontario, Canada
Some updates:
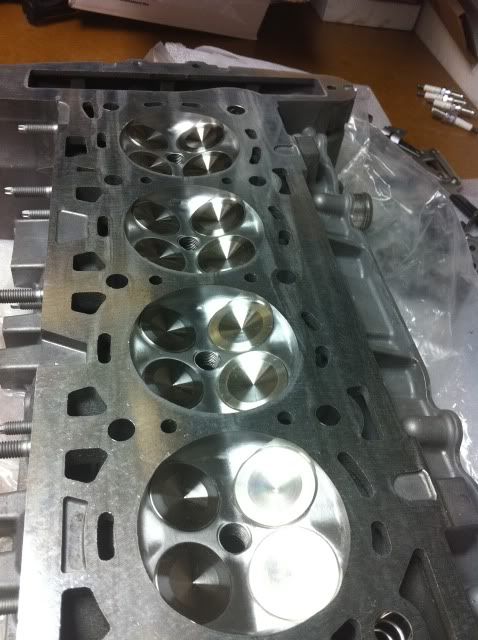
Clearanced my head for the valve springs and cleaned it out again.
New Ford Racing 42lb "Blue Demon" fuel injectors shipped out yesterday.
Pulled the oil cooler sleeve out of my oil filter housing, so now I can block the holes off.
Bad news:
Cylinder head dowels are a 5-7 day wait from GM, ordered yesterday, so wont be in till next week.
Fucked up all my valve seals pulling them back out of the head....so I have to order a new set from GM.
Other than that...nothing to report.
Don't worry tho, SOMEDAY day this engine will run....hahaha

Thread Starter
Senior Member
iTrader: (2)
Joined: 02-26-09
Posts: 1,036
Likes: 1
From: Ontario, Canada
Not to bad, we trapped it then left the tap in, put a pair of vice grips on the tap and then heated the sleeve and used a long pry bar against the vice grips and it poped right out.
There is an o-ring in there that holds it in, the pry bar probably would of worked without heating it.
There is an o-ring in there that holds it in, the pry bar probably would of worked without heating it.
Thread Starter
Senior Member
iTrader: (2)
Joined: 02-26-09
Posts: 1,036
Likes: 1
From: Ontario, Canada
Ya, we were gonna use a slide hammer but my buddy forgot to grab it from work so we improvised.
We tried to hit the vise grips with a hammer but they weren't solid enough to transfer to force to the sleave.
I know it sounds kinda haywire...but it worked like a dream, hardly any pressure with the pry bar and it poped out.
ZZP welded a nut to the end of the sleave, then threaded in a slide hammer and poped it out....I didn't really feel like welding a nut on so I did it my way.
Thread Starter
Senior Member
iTrader: (2)
Joined: 02-26-09
Posts: 1,036
Likes: 1
From: Ontario, Canada
More progress:
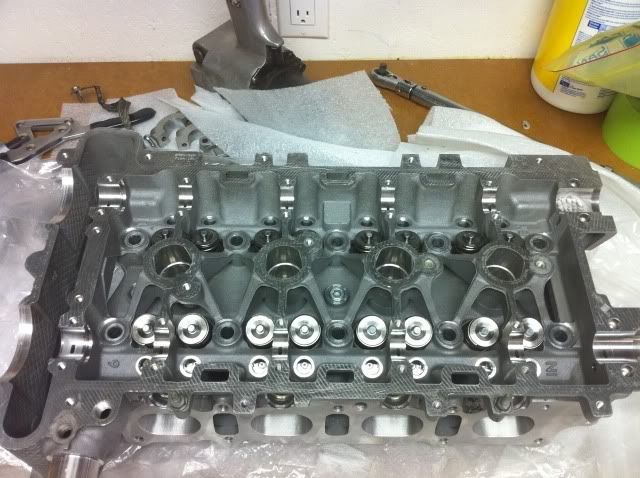
Cylinder head FINALLY assembled
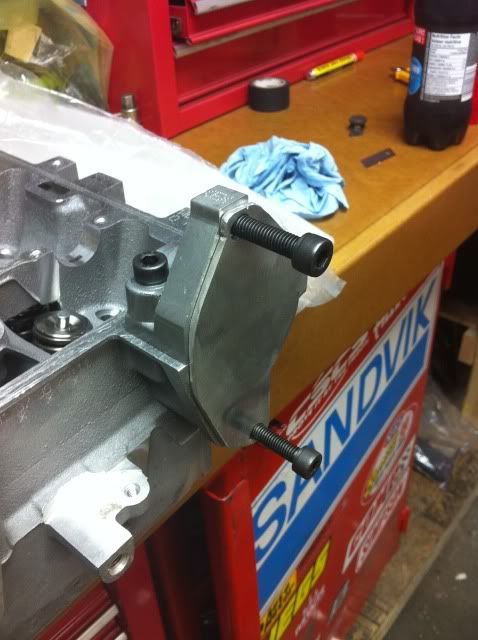
Made my block off plate for where the CPS sensor would normally go
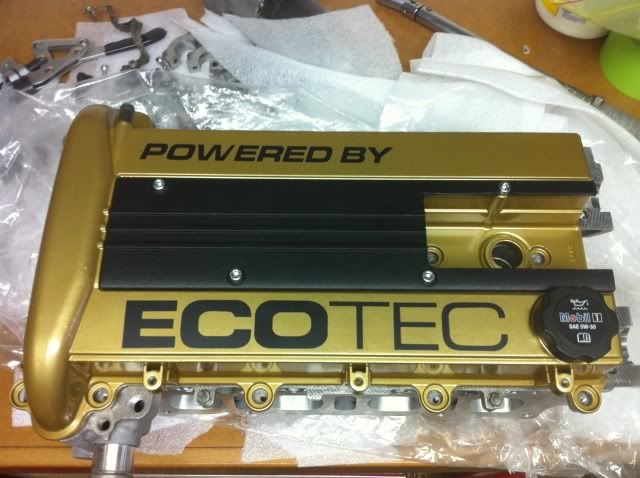
Addition to my valve cover
Mock up to see the finished product

Cylinder head FINALLY assembled
Made my block off plate for where the CPS sensor would normally go
Addition to my valve cover
Mock up to see the finished product

Thread Starter
Senior Member
iTrader: (2)
Joined: 02-26-09
Posts: 1,036
Likes: 1
From: Ontario, Canada
Looked to plain without something on there, plus its a bit of a homage to the GM Ecotec race cars.
If I get bored of it its just a sticker so it will peal off, if it doesn't get really hot and burn off first, that is...lol
If I get bored of it its just a sticker so it will peal off, if it doesn't get really hot and burn off first, that is...lol
Thread Starter
Senior Member
iTrader: (2)
Joined: 02-26-09
Posts: 1,036
Likes: 1
From: Ontario, Canada
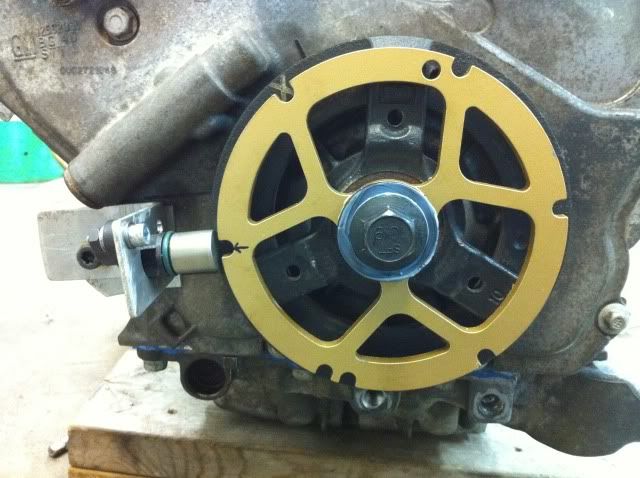
Also, better pic of my block off plate I forgot to post.
It isn't perfect I know, but I made this in 20 mins with a hacksaw and a 5" flapper disk on a grinder, and it shows..lol
Will hardly be able to see it anyways.

It isn't perfect I know, but I made this in 20 mins with a hacksaw and a 5" flapper disk on a grinder, and it shows..lol
Will hardly be able to see it anyways.
Thread Starter
Senior Member
iTrader: (2)
Joined: 02-26-09
Posts: 1,036
Likes: 1
From: Ontario, Canada
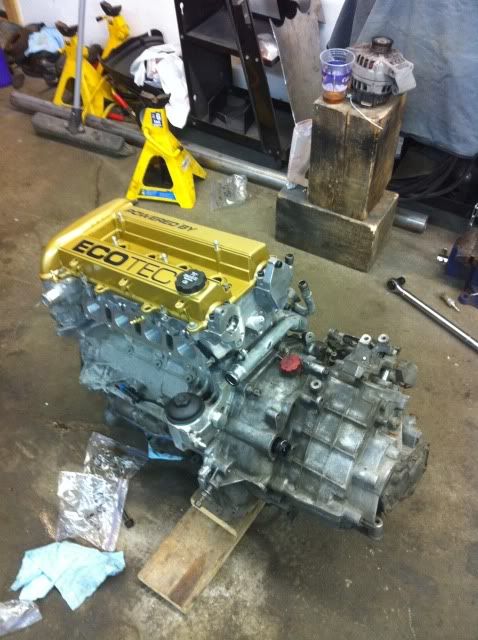
Motor is together, and assembled with trans....putting it back in the car this week...hopefully fire it up next weekend.
My solution to the oil cooler, tapped and plugged the big hole with a #10 BSP and a bonded seal and tapped the small hole 1/4 NPT to #4 JIC for my oil pressure.
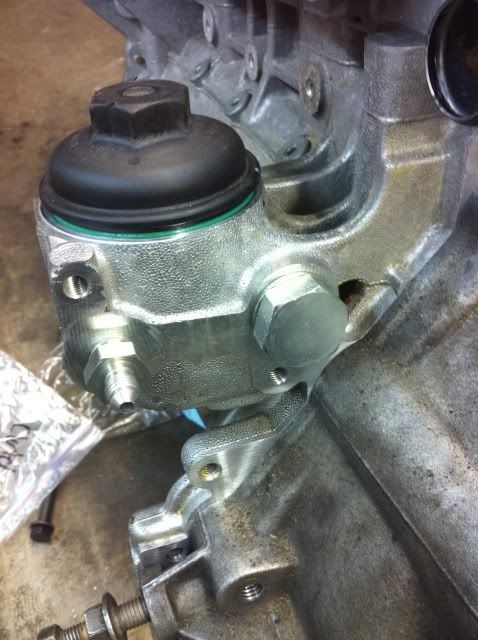
My solution to the oil cooler, tapped and plugged the big hole with a #10 BSP and a bonded seal and tapped the small hole 1/4 NPT to #4 JIC for my oil pressure.

Thread Starter
Senior Member
iTrader: (2)
Joined: 02-26-09
Posts: 1,036
Likes: 1
From: Ontario, Canada
Got the motor in last night....
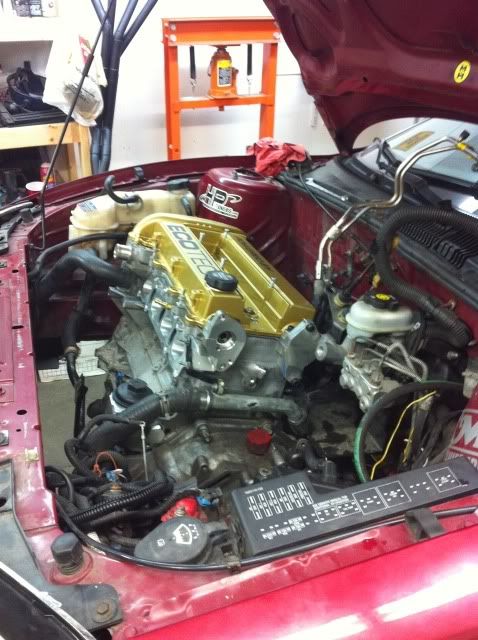
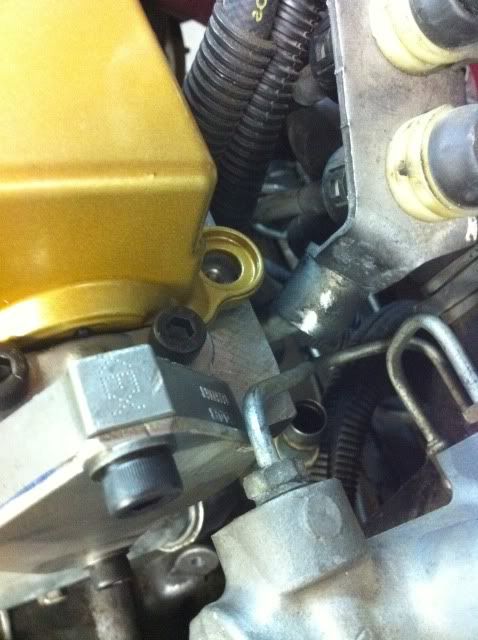
Then ran into another snag (The LSJ head doesn't clear the Master, its touching the brake lines, not sure how I'm gonna fix this yet).
That where I left it for the night.
Then ran into another snag (The LSJ head doesn't clear the Master, its touching the brake lines, not sure how I'm gonna fix this yet).
That where I left it for the night.
How the hell are you going to do that? You cant make a bend that sharp in brake line, it will just kink. And you shouldnt make a bend that close to a connection either. Just grind 1/2 an inch off the head where its close.
it isent hard to do man all you have to do is cut it in the long strait section loosen it up at the master cylnder move the line out of the way and then add a longer piece in and bend it to clear and reattach
You dont quite see it. That plate for the cam pos sensor blockoff looks to be about a quarter inch from the face of the nut on the fitting on the MC. Which would mean newt would need to get a less than 1/4" radius bend in a 1/4" (or 3/16) piece of tubing and that is not physically possible.
